
User Manual
Page 1
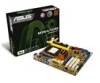
Motherboard
Motherboard

User Manual
Page 1
M3N-H/ HDMI Motherboard
M3N-H/ HDMI Motherboard

User Manual
Page 3
... Notices...vii Safety information viii About this guide ix M3N-H/HDMI specifications summary xi Chapter 1: Product introduction 1.1 Welcome 1-1 1.2 Package contents 1-1 1.3 Special features 1-2 1.3.1 Product highlights 1-2 1.3.2 ASUS AI Lifestyle unique features 1-4 1.3.3 ASUS intelligent performance and overclocking features 1-6 Chapter 2: Hardware information 2.1 Before you proceed 2-1 2.2 Motherboard overview 2-2 2.2.1 Placement direction 2-2 2.2.2 Screw holes 2-2 2.2.3 Motherboard layout 2-3 2.2.4 Layout contents 2-4 2.3 Central Processing Unit (CPU 2-6 2.3.1 Installing...
... Notices...vii Safety information viii About this guide ix M3N-H/HDMI specifications summary xi Chapter 1: Product introduction 1.1 Welcome 1-1 1.2 Package contents 1-1 1.3 Special features 1-2 1.3.1 Product highlights 1-2 1.3.2 ASUS AI Lifestyle unique features 1-4 1.3.3 ASUS intelligent performance and overclocking features 1-6 Chapter 2: Hardware information 2.1 Before you proceed 2-1 2.2 Motherboard overview 2-2 2.2.1 Placement direction 2-2 2.2.2 Screw holes 2-2 2.2.3 Motherboard layout 2-3 2.2.4 Layout contents 2-4 2.3 Central Processing Unit (CPU 2-6 2.3.1 Installing...

User Manual
Page 8
If you add a device. • Before connecting or removing signal cables from the motherboard, ensure that all power cables are connected. This symbol of the crossed out wheeled bin indicates that your power supply is broken, do not ...product, make sure all power cables from connectors, slots, sockets and circuitry. • Avoid dust, humidity, and temperature extremes. Operation safety • Before installing the motherboard and adding devices on a stable surface. • If you are not damaged. Contact a qualified service technician or your local power company. • If the ...
If you add a device. • Before connecting or removing signal cables from the motherboard, ensure that all power cables are connected. This symbol of the crossed out wheeled bin indicates that your power supply is broken, do not ...product, make sure all power cables from connectors, slots, sockets and circuitry. • Avoid dust, humidity, and temperature extremes. Operation safety • Before installing the motherboard and adding devices on a stable surface. • If you are not damaged. Contact a qualified service technician or your local power company. • If the ...

User Manual
Page 9
...and software updates. 1. Where to find more information Refer to the ASUS contact information. 2. Refer to the following parts: • Chapter 1: Product introduction This chapter describes the features of the motherboard and the new technology it supports. • Chapter 2: Hardware ...the BIOS parameters are not part of the support DVD that you need when installing and configuring the motherboard. ASUS websites The ASUS website provides updated information on the motherboard. • Chapter 3: Powering up This chapter describes the power up sequence and ways of shutting down...
...and software updates. 1. Where to find more information Refer to the ASUS contact information. 2. Refer to the following parts: • Chapter 1: Product introduction This chapter describes the features of the motherboard and the new technology it supports. • Chapter 2: Hardware ...the BIOS parameters are not part of the support DVD that you need when installing and configuring the motherboard. ASUS websites The ASUS website provides updated information on the motherboard. • Chapter 3: Powering up This chapter describes the power up sequence and ways of shutting down...

User Manual
Page 15
Chapter 1: 1Product introduction This chapter describes the motherboard features and the new technologies it supports.
Chapter 1: 1Product introduction This chapter describes the motherboard features and the new technologies it supports.

User Manual
Page 17
..., making it , check the items in the long line of the above items is damaged or missing, contact your motherboard package for buying an ASUS® M3N-H/HDMI motherboard! ASUS M3N-H/HDMI 1-1 Before you for the following items. Motherboard ASUS M3N-H/HDMI Cables 2�x�S�e�ri�a�l A�T�A�p�o�w�e�r�c�ab�l�...
..., making it , check the items in the long line of the above items is damaged or missing, contact your motherboard package for buying an ASUS® M3N-H/HDMI motherboard! ASUS M3N-H/HDMI 1-1 Before you for the following items. Motherboard ASUS M3N-H/HDMI Cables 2�x�S�e�ri�a�l A�T�A�p�o�w�e�r�c�ab�l�...

User Manual
Page 18
..., faster computing environment. DDR2 1066 is in 3D graphics and other memory demanding applications. 1.3 Special features 1.3.1 Product highlights Green ASUS This motherboard and its packaging comply with the European Union's Restriction on the environment. See page 2-6 for details. See page 2-6 for ...AM2+ multi-core processors with unique L3 cache and delivers better overclocking capabilities with HDMI/DVI output. AMD® Socket AM2 Athlon™ Series / Sempron™ CPU support This motherboard supports AMD® Socket AM2 Athlon™ Series / Sempron™ processors. ...
..., faster computing environment. DDR2 1066 is in 3D graphics and other memory demanding applications. 1.3 Special features 1.3.1 Product highlights Green ASUS This motherboard and its packaging comply with the European Union's Restriction on the environment. See page 2-6 for details. See page 2-6 for ...AM2+ multi-core processors with unique L3 cache and delivers better overclocking capabilities with HDMI/DVI output. AMD® Socket AM2 Athlon™ Series / Sempron™ CPU support This motherboard supports AMD® Socket AM2 Athlon™ Series / Sempron™ processors. ...

User Manual
Page 19
...ASUS M3N-H/HDMI 1-3 Geforce Boost and HybridPower™ are independent on the Serial ATA (SATA) 3Gb/s storage specifications, delivering enhanced scalability and doubling the bus bandwidth for details. Visit www.nvidia.com/hybridsli for double speed and bandwidth which enhances system performance. PCIe 2.0 support This motherboard...SLI Technology Hybrid SLI™ Technology is a set of discrete graphics cards when combined with M3N series motherboard GPUs. HDMI/DVI/D-Sub Interface HDMI (High-Definition Multimedia Interface) is a unique hybrid multi-GPU technology. See page 2-22 for...
...ASUS M3N-H/HDMI 1-3 Geforce Boost and HybridPower™ are independent on the Serial ATA (SATA) 3Gb/s storage specifications, delivering enhanced scalability and doubling the bus bandwidth for details. Visit www.nvidia.com/hybridsli for double speed and bandwidth which enhances system performance. PCIe 2.0 support This motherboard...SLI Technology Hybrid SLI™ Technology is a set of discrete graphics cards when combined with M3N series motherboard GPUs. HDMI/DVI/D-Sub Interface HDMI (High-Definition Multimedia Interface) is a unique hybrid multi-GPU technology. See page 2-22 for...

User Manual
Page 20
...real-time chnage the mode under operating system to your PC! See page 2-22 and 2-34 for details. 1-4 Chapter 1: Product Introduction ASUS Quiet Thermal Solution ASUS Quiet Thermal solution makes system more stable and enhances the overclocking capability. AI Gear 2 AI Gear 2 allows you to instantly surf the ... minimum power and noise when you want! It allows digital audio transferring without entering Windows. S/PDIF digital sound ready This motherboard provides convenient connectivity to analog format, and therefore well preserves signal quality. See page 5-26 for details .
...real-time chnage the mode under operating system to your PC! See page 2-22 and 2-34 for details. 1-4 Chapter 1: Product Introduction ASUS Quiet Thermal Solution ASUS Quiet Thermal solution makes system more stable and enhances the overclocking capability. AI Gear 2 AI Gear 2 allows you to instantly surf the ... minimum power and noise when you want! It allows digital audio transferring without entering Windows. S/PDIF digital sound ready This motherboard provides convenient connectivity to analog format, and therefore well preserves signal quality. See page 5-26 for details .

User Manual
Page 21
...to the motherboard. With better electric conductivity, it ideally protects your motherboard against Electronic Magnetic Interference (EMI). See page 4-5 and 4-35 for details. See page 5-17 for details. ASUS EZ Flash 2 ASUS EZ Flash 2 is a user-friendly BIOS update utility. ASUS Q-Connector ASUS Q-Connector...the BIOS or back up your BIOS easily without preparing a bootable diskette or using an OS-based flash utility. ASUS M3N-H/HDMI 1-5 Q-Fan 2 ASUS Q-Fan2 technology intelligently adjusts both CPU fan and chassis fan speeds according to system loading to install. This unique...
...to the motherboard. With better electric conductivity, it ideally protects your motherboard against Electronic Magnetic Interference (EMI). See page 4-5 and 4-35 for details. See page 5-17 for details. ASUS EZ Flash 2 ASUS EZ Flash 2 is a user-friendly BIOS update utility. ASUS Q-Connector ASUS Q-Connector...the BIOS or back up your BIOS easily without preparing a bootable diskette or using an OS-based flash utility. ASUS M3N-H/HDMI 1-5 Q-Fan 2 ASUS Q-Fan2 technology intelligently adjusts both CPU fan and chassis fan speeds according to system loading to install. This unique...

User Manual
Page 22
...convert your favorite photo into a 256-color boot logo for details. 1.3.3 ASUS intelligent performance and overclocking features Precision Tweaker This feature allows you can easily monitor the critical components of the motherboard BIOS allows automatic re-setting to achieve maximum system performance. See page 5-... at 1MHz increment to the BIOS default settings in Windows environment without the hassle of booting the BIOS. feature of the computer. ASUS MyLogo 2™ This feature allows you to overclock the CPU speed in case the system hangs due to overclocking. See page 4-...
...convert your favorite photo into a 256-color boot logo for details. 1.3.3 ASUS intelligent performance and overclocking features Precision Tweaker This feature allows you can easily monitor the critical components of the motherboard BIOS allows automatic re-setting to achieve maximum system performance. See page 5-... at 1MHz increment to the BIOS default settings in Windows environment without the hassle of booting the BIOS. feature of the computer. ASUS MyLogo 2™ This feature allows you to overclock the CPU speed in case the system hangs due to overclocking. See page 4-...

User Manual
Page 23
Chapter 2: 2 Hardware information It includes description of the jumpers and connectors on the motherboard. This chapter lists the hardware setup procedures that you have to perform when installing system components.
Chapter 2: 2 Hardware information It includes description of the jumpers and connectors on the motherboard. This chapter lists the hardware setup procedures that you have to perform when installing system components.

User Manual
Page 24
Chapter summary 2 2.1 Before you proceed 2-1 2.2 Motherboard overview 2-2 2.3 Central Processing Unit (CPU 2-6 2.4 System memory 2-11 2.5 Expansion slots 2-17 2.6 Jumper 2-20 2.7 Connectors 2-21 ASUS M3N-H/HDMI
Chapter summary 2 2.1 Before you proceed 2-1 2.2 Motherboard overview 2-2 2.3 Central Processing Unit (CPU 2-6 2.4 System memory 2-11 2.5 Expansion slots 2-17 2.6 Jumper 2-20 2.7 Connectors 2-21 ASUS M3N-H/HDMI

User Manual
Page 25
...shows the location of the following precautions before you install motherboard components or change any motherboard settings. • Unplug the power cord from the power supply. M3N-H/HDMI ® M3N-H/HDMI Onboard LED SB_PWR ON OFF Standy Power Powered Off ASUS M3N-H/HDMI 2-1 This is a reminder that the system is detached ...supply is switched off mode. 2.1 Before you proceed Take note of the onboard LED. Onboard LED The motherboard comes with the component. • Before you install or remove any motherboard component. Failure to do so may cause severe damage to the...
...shows the location of the following precautions before you install motherboard components or change any motherboard settings. • Unplug the power cord from the power supply. M3N-H/HDMI ® M3N-H/HDMI Onboard LED SB_PWR ON OFF Standy Power Powered Off ASUS M3N-H/HDMI 2-1 This is a reminder that the system is detached ...supply is switched off mode. 2.1 Before you proceed Take note of the onboard LED. Onboard LED The motherboard comes with the component. • Before you install or remove any motherboard component. Failure to do so may cause severe damage to the...

User Manual
Page 26
... into it into the chassis in the image below. 2.2.2 Screw holes Place nine (9) screws into the holes indicated by circles to secure the motherboard to the chassis. Place this side towards the rear of the chassis M3N-H/HDMI ® 2-2 Chapter 2: Hardware information Failure to unplug the power cord before installing or removing the...
... into it into the chassis in the image below. 2.2.2 Screw holes Place nine (9) screws into the holes indicated by circles to secure the motherboard to the chassis. Place this side towards the rear of the chassis M3N-H/HDMI ® 2-2 Chapter 2: Hardware information Failure to unplug the power cord before installing or removing the...

User Manual
Page 27
30.5cm (12.0in) 2.2.3 Motherboard layout 24.5cm (9.6in) KB_USB56 ATX12V CPU_FAN SPDIF_O1 HDMI PWR_FAN SOCKET AM2 DDR DIMM_A1 (64bit, 240-pin module) DDR DIMM_B1 (64bit, 240-pin module) DDR DIMM_A2 (64bit, 240-pin module) DDR DIMM_B2 ...) F_USB34 LAN1_USB12 AUDIO EATXPWR SATA5 SATA6 Attansic F1 CHA_FAN1 PCIEX1_1 nVidia® GeForce 8300 SATA2 SATA4 SATA3 SATA1 PRI_IDE CD ALC883 AAFP SPDIF_OUT PCIEX16_1 M3N-H/HDMI PCI1 VGA PCIEX1_2 PCI2 PCI3 BIOS ® agere L-FW3227 Super I/O SB_PWR CHASSIS CLRTC Lithium Cell CMOS Power FLOPPY COM1 IE1394_2 USB78 USB910 USB1112...
30.5cm (12.0in) 2.2.3 Motherboard layout 24.5cm (9.6in) KB_USB56 ATX12V CPU_FAN SPDIF_O1 HDMI PWR_FAN SOCKET AM2 DDR DIMM_A1 (64bit, 240-pin module) DDR DIMM_B1 (64bit, 240-pin module) DDR DIMM_A2 (64bit, 240-pin module) DDR DIMM_B2 ...) F_USB34 LAN1_USB12 AUDIO EATXPWR SATA5 SATA6 Attansic F1 CHA_FAN1 PCIEX1_1 nVidia® GeForce 8300 SATA2 SATA4 SATA3 SATA1 PRI_IDE CD ALC883 AAFP SPDIF_OUT PCIEX16_1 M3N-H/HDMI PCI1 VGA PCIEX1_2 PCI2 PCI3 BIOS ® agere L-FW3227 Super I/O SB_PWR CHASSIS CLRTC Lithium Cell CMOS Power FLOPPY COM1 IE1394_2 USB78 USB910 USB1112...

User Manual
Page 30
... is lifted up to a 90º angle; Make sure you use a CPU designed for the AMD Opteron processor. 2.3 Central Processing Unit (CPU) The motherboard comes with an �A�M�2��+�/A��M�2���s��o��c��k���e�...;�s�s�o�rs��o�r�f�o�r�S��o�c�k�e�t AM2 Athlon series / Sempron processors. M3N-H/HDMI ® M3N-H/HDMI CPU SOCKET AM2 2.
... is lifted up to a 90º angle; Make sure you use a CPU designed for the AMD Opteron processor. 2.3 Central Processing Unit (CPU) The motherboard comes with an �A�M�2��+�/A��M�2���s��o��c��k���e�...;�s�s�o�rs��o�r�f�o�r�S��o�c�k�e�t AM2 Athlon series / Sempron processors. M3N-H/HDMI ® M3N-H/HDMI CPU SOCKET AM2 2.

User Manual
Page 32
If the instructions in this section do not have to remove the retention module base when installing the CPU or installing other motherboard components. • If you purchased a separate CPU heatsink and fan assembly, make sure that a Thermal Interface Material is already installed on the retention module base. &#... to the CPU heatsink or CPU before you use only AMD-certified heatsink and fan assembly. Make sure that the heatsink fits properly on the motherboard upon purchase. • You do not match the CPU documentation, follow the latter. 2-8 Chapter 2: Hardware information
If the instructions in this section do not have to remove the retention module base when installing the CPU or installing other motherboard components. • If you purchased a separate CPU heatsink and fan assembly, make sure that a Thermal Interface Material is already installed on the retention module base. &#... to the CPU heatsink or CPU before you use only AMD-certified heatsink and fan assembly. Make sure that the heatsink fits properly on the motherboard upon purchase. • You do not match the CPU documentation, follow the latter. 2-8 Chapter 2: Hardware information

User Manual
Page 34
CPU FAN PWM CPU FAN IN CPU FAN PWR GND 5. CPU_FAN M3N-H/HDMI ® M3N-H/HDMI CPU fan connector • Do not forget to plug this connector. • This connector is in place, connect the CPU fan cable to the connector on the motherboard labeled CPU_FAN. Hardware monitoring errors can occur if you fail to connect the CPU fan connector! When the fan and heatsink assembly is backward compatiable with old 3-pin CPU fan. 2-10 Chapter 2: Hardware information
CPU FAN PWM CPU FAN IN CPU FAN PWR GND 5. CPU_FAN M3N-H/HDMI ® M3N-H/HDMI CPU fan connector • Do not forget to plug this connector. • This connector is in place, connect the CPU fan cable to the connector on the motherboard labeled CPU_FAN. Hardware monitoring errors can occur if you fail to connect the CPU fan connector! When the fan and heatsink assembly is backward compatiable with old 3-pin CPU fan. 2-10 Chapter 2: Hardware information


