

M1 Series Manual
Page 7
... STARTED 25 Installing and Removing the Battery Pack 26 Using the Battery Pack 27 Before using your Notebook PC on the road 27 Battery Care ...27 Operating Systems 27 Support Software 27 Power Connection 28 Powering ON The Notebook PC 29 The Power-On Self Test (POST 29 Save-to-Disk Partition 30 Restarting or Rebooting 30 Powering OFF the Notebook PC 30 Instant Launch Keys and Status Indicators 31 Using the Keyboard 32 Colored Hot Keys 32...
... STARTED 25 Installing and Removing the Battery Pack 26 Using the Battery Pack 27 Before using your Notebook PC on the road 27 Battery Care ...27 Operating Systems 27 Support Software 27 Power Connection 28 Powering ON The Notebook PC 29 The Power-On Self Test (POST 29 Save-to-Disk Partition 30 Restarting or Rebooting 30 Powering OFF the Notebook PC 30 Instant Launch Keys and Status Indicators 31 Using the Keyboard 32 Colored Hot Keys 32...

M1 Series Manual
Page 8
... Connection 49 Network Connection 50 IR Wireless Communication 51 Guidelines for using IR communication 51 Enabling Infrared 51 AC Power System 53 Battery Power System 53 Charging the Battery Pack 53 Using Battery Power 53 Power Management Modes 54 Full Power Mode & Maximum Performance 54 APM and ACPI 54 Suspend Mode 54 Standby Mode 55 Power State Summary 55 Thermal Power Control 56 System Memory Expansion 57 Processor Upgrades 57 Hard Disk Drive ...57 Important Handling Note 57 Removing the Hard Disk Drive...
... Connection 49 Network Connection 50 IR Wireless Communication 51 Guidelines for using IR communication 51 Enabling Infrared 51 AC Power System 53 Battery Power System 53 Charging the Battery Pack 53 Using Battery Power 53 Power Management Modes 54 Full Power Mode & Maximum Performance 54 APM and ACPI 54 Suspend Mode 54 Standby Mode 55 Power State Summary 55 Thermal Power Control 56 System Memory Expansion 57 Processor Upgrades 57 Hard Disk Drive ...57 Important Handling Note 57 Removing the Hard Disk Drive...
M1 Series Manual
Page 17
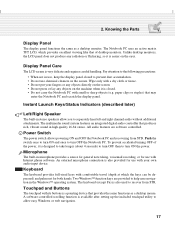
... Parts Display Panel The display panel functions the same as a desktop mouse. Push the switch once to turn ON and once to turn OFF the Notebook PC. Microphone The built-in the Windows™ operating system. An external microphone connection is very delicate and requires careful handling. Keyboard The keyboard provides full-sized keys with its buttons is available after setting up the included touchpad utility to allow you to recover from STD. Touchpad and Buttons The touchpad...
... Parts Display Panel The display panel functions the same as a desktop mouse. Push the switch once to turn ON and once to turn OFF the Notebook PC. Microphone The built-in the Windows™ operating system. An external microphone connection is very delicate and requires careful handling. Keyboard The keyboard provides full-sized keys with its buttons is available after setting up the included touchpad utility to allow you to recover from STD. Touchpad and Buttons The touchpad...
M1 Series Manual
Page 18
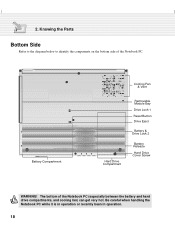
Knowing the Parts Bottom Side Refer to the diagram below to identify the components on the bottom side of the Notebook PC (especially between the battery and hard drive compartments, and cooling fan) can get very hot. Battery Compartment Cooling Fan & Vent Hard Drive Compartment Removable Module Bay Drive Lock 1 Reset Button Drive Eject Battery & Drive Lock 2 Battery Release Hard Drive Cover Screw WARNING! Be careful when handling the Notebook PC while it is in operation or recently been in operation. 18 The bottom of the Notebook PC. 2.
Knowing the Parts Bottom Side Refer to the diagram below to identify the components on the bottom side of the Notebook PC (especially between the battery and hard drive compartments, and cooling fan) can get very hot. Battery Compartment Cooling Fan & Vent Hard Drive Compartment Removable Module Bay Drive Lock 1 Reset Button Drive Eject Battery & Drive Lock 2 Battery Release Hard Drive Cover Screw WARNING! Be careful when handling the Notebook PC while it is in operation or recently been in operation. 18 The bottom of the Notebook PC. 2.
M1 Series Manual
Page 19
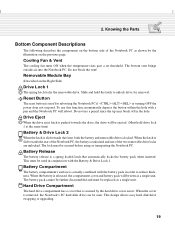
... tip may break off in order to unlock drive for rebooting the Notebook PC if or turning OFF the power does not respond. Battery Release L The battery release is a spring loaded latch that is actually combined with the Battery & Drive Lock 1. Hard Drive Compartment The hard drive compartment has a cover that automatically locks the battery pack when inserted. Cooling Fan & Vent The cooling fan turns ON when the temperature rises past a set threshold. 2.
... tip may break off in order to unlock drive for rebooting the Notebook PC if or turning OFF the power does not respond. Battery Release L The battery release is a spring loaded latch that is actually combined with the Battery & Drive Lock 1. Hard Drive Compartment The hard drive compartment has a cover that automatically locks the battery pack when inserted. Cooling Fan & Vent The cooling fan turns ON when the temperature rises past a set threshold. 2.

M1 Series Manual
Page 23
... other display. External Monitor Port The 15-pin D-sub monitor port supports a standard VGA-compatible device such as a printer or a removable drive. The cooling fan is for connection to faster processors in the future. An external monitor can really increase your productivity! Air Vent & Cooling Fan The cooling fan turns ON when the temperature rises past a set threshold. 2. This port also supports connection of the supplied floppy disk drive module using the supplied floppy cable. Do...
... other display. External Monitor Port The 15-pin D-sub monitor port supports a standard VGA-compatible device such as a printer or a removable drive. The cooling fan is for connection to faster processors in the future. An external monitor can really increase your productivity! Air Vent & Cooling Fan The cooling fan turns ON when the temperature rises past a set threshold. 2. This port also supports connection of the supplied floppy disk drive module using the supplied floppy cable. Do...
M1 Series Manual
Page 24
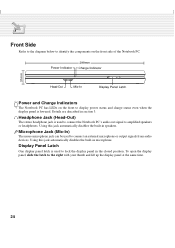
... the components on the front to display power status and charge status even when the display panel is lowered. Headphone Jack (Head-Out) The stereo headphone jack is used to connect the Notebook PC's audio out signal to lock the display panel in microphone. To open the display panel, slide the latch to connect an external microphone or output signals from audio devices. Display Panel Latch One display panel latch is used to amplified speakers or headphones. Details...
... the components on the front to display power status and charge status even when the display panel is lowered. Headphone Jack (Head-Out) The stereo headphone jack is used to connect the Notebook PC's audio out signal to lock the display panel in microphone. To open the display panel, slide the latch to connect an external microphone or output signals from audio devices. Display Panel Latch One display panel latch is used to amplified speakers or headphones. Details...
M1 Series Manual
Page 27
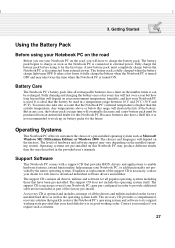
... working order. A recovery CD is ideal that will depend on the road Before you use your Notebook PC, or add functionality not provided by the native operating system. The recovery CD provides a comprehensive recovery solution that quickly restores the Notebook PC's operating system and software to its customers the choice of the factory pre-install. The battery pack begins to enable hardware features, extend functionality, help manage your Notebook PC on the factory installed hard drive...
... working order. A recovery CD is ideal that will depend on the road Before you use your Notebook PC, or add functionality not provided by the native operating system. The recovery CD provides a comprehensive recovery solution that quickly restores the Notebook PC's operating system and software to its customers the choice of the factory pre-install. The battery pack begins to enable hardware features, extend functionality, help manage your Notebook PC on the factory installed hard drive...
M1 Series Manual
Page 29
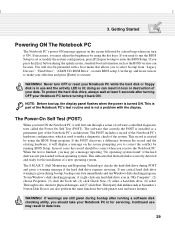
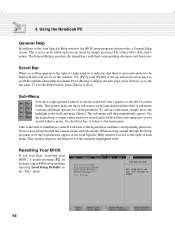
... adjust the brightness by running a software disk checking utility, you need to enter the BIOS Setup. If you should be presented with the display. This indicates that controls the POST is turned ON. The S.M.A.R.T. (Self Monitoring and Reporting Technology) checks the hard disk drive during the splash screen, standard boot information such as the BIOS version can result in data loss. 29 3. WARNING! The POST includes a record of the Notebook PC's hardware configuration...
... adjust the brightness by running a software disk checking utility, you need to enter the BIOS Setup. If you should be presented with the display. This indicates that controls the POST is turned ON. The S.M.A.R.T. (Self Monitoring and Reporting Technology) checks the hard disk drive during the splash screen, standard boot information such as the BIOS version can result in data loss. 29 3. WARNING! The POST includes a record of the Notebook PC's hardware configuration...

M1 Series Manual
Page 30
... suspend mode. It will be cleared by holding the power switch for detailed usage instructions. The Notebook PC supports Advanced Power Management to -Disk mode, run FDISK.EXE located in BIOS setup. See the Drivers and Utilities Support CD User's Manual for 2 seconds (as a "warm boot." WARNING! Restarting or Rebooting After installing drivers (please see the "Drivers and Utilities Guide"), installing applications, or making configuration changes, you would like the Notebook PC to support the Save-to save battery power and extend its working partition's size...
... suspend mode. It will be cleared by holding the power switch for detailed usage instructions. The Notebook PC supports Advanced Power Management to -Disk mode, run FDISK.EXE located in BIOS setup. See the Drivers and Utilities Support CD User's Manual for 2 seconds (as a "warm boot." WARNING! Restarting or Rebooting After installing drivers (please see the "Drivers and Utilities Guide"), installing applications, or making configuration changes, you would like the Notebook PC to support the Save-to save battery power and extend its working partition's size...
M1 Series Manual
Page 32
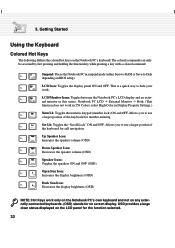
... for the function selected. 32 LCD/Monitor Icons: Toggles between the Notebook PC's LCD display and an external monitor in suspend mode (either Save-to-RAM or Save-to use NumLk a larger portion of ScrLk the keyboard for number entering. Getting Started Using the Keyboard Colored Hot Keys The following defines the colored hot keys on screen display. Del Scr Lk: Toggles the "Scroll Lock" ON and OFF. Up Speaker Icon: Increases the speaker volume (OSD...
... for the function selected. 32 LCD/Monitor Icons: Toggles between the Notebook PC's LCD display and an external monitor in suspend mode (either Save-to-RAM or Save-to use NumLk a larger portion of ScrLk the keyboard for number entering. Getting Started Using the Keyboard Colored Hot Keys The following defines the colored hot keys on screen display. Del Scr Lk: Toggles the "Scroll Lock" ON and OFF. Up Speaker Icon: Increases the speaker volume (OSD...
M1 Series Manual
Page 43
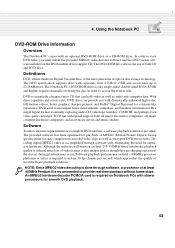
...-like experience. Using the Notebook PC DVD-ROM Drive Information Overview The Notebook PC comes with a single digital format, eventually replacing audio CD, videotape, laserdisc, CD-ROM, and perhaps even video game cartridges. Software To meet customer requirements for data compression) encoded video clips as well as though they are skipping sections of video frames (video images look as encrypted DVD movie titles. In order to provide...
...-like experience. Using the Notebook PC DVD-ROM Drive Information Overview The Notebook PC comes with a single digital format, eventually replacing audio CD, videotape, laserdisc, CD-ROM, and perhaps even video game cartridges. Software To meet customer requirements for data compression) encoded video clips as well as though they are skipping sections of video frames (video images look as encrypted DVD movie titles. In order to provide...
M1 Series Manual
Page 51
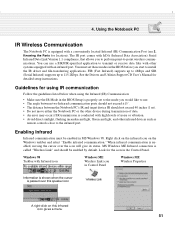
... Notebook PC or the other device during transmission of data. • An error may occur if IR transmission is conducted with high levels of noise or vibration. • Avoid direct sunlight, flashing incandescent light, florescent light, and other systems equipped with an infrared port. See the Drivers and Utilities Support CD User's Manual for location). When infrared communication is equipped with Infrared icon Windows...
... Notebook PC or the other device during transmission of data. • An error may occur if IR transmission is conducted with high levels of noise or vibration. • Avoid direct sunlight, flashing incandescent light, florescent light, and other systems equipped with an infrared port. See the Drivers and Utilities Support CD User's Manual for location). When infrared communication is equipped with Infrared icon Windows...
M1 Series Manual
Page 54
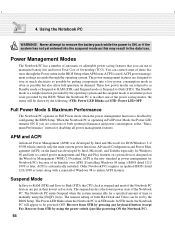
... its benefits over APM. 4. ACPI is the new standard in the BIOS Setup when APM (non-ACPI) is in STR mode. If installing Windows 98 using the power switch (just like powering ON the Notebook PC). 54 Advanced Configuration and Power Management (ACPI) on the hand was developed by pressing any keyboard button (except Fn). When the Notebook PC is used. Recover from STR by Intel and Microsoft for...
... its benefits over APM. 4. ACPI is the new standard in the BIOS Setup when APM (non-ACPI) is in STR mode. If installing Windows 98 using the power switch (just like powering ON the Notebook PC). 54 Advanced Configuration and Power Management (ACPI) on the hand was developed by pressing any keyboard button (except Fn). When the Notebook PC is used. Recover from STR by Intel and Microsoft for...

M1 Series Manual
Page 55
... Windows Control Panel or BIOS setup • Timer as set through BIOS setup • Hotkey [Fn][F1] • Timer as set through Windows Start button EXIT EVENT • Any device • Battery low • Ring indicator • Power button • Power button • Power button 55 Power State Summary STATE Stand by through the BIOS Setup. The following power management events will take place if: • The Hard Disk Timeout is enabled. The timeout can be inactive before the next power management...
... Windows Control Panel or BIOS setup • Timer as set through BIOS setup • Hotkey [Fn][F1] • Timer as set through Windows Start button EXIT EVENT • Any device • Battery low • Ring indicator • Power button • Power button • Power button 55 Power State Summary STATE Stand by through the BIOS Setup. The following power management events will take place if: • The Hard Disk Timeout is enabled. The timeout can be inactive before the next power management...
M1 Series Manual
Page 58
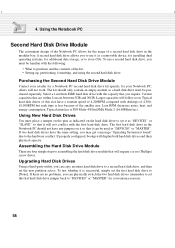
... kit. • Setting up, partitioning, formatting, and using the second hard disk drive. If two hard disk drives have a rotation speed of 4,200RPM compared with the capacity that it so that you must be used as a removable device, for installing dual operating systems, for convenience reasons. 58 others will follow soon. Typical hard disk drives of this size have the same setting, you can physically switch the two hard disk drives (remember to...
... kit. • Setting up, partitioning, formatting, and using the second hard disk drive. If two hard disk drives have a rotation speed of 4,200RPM compared with the capacity that it so that you must be used as a removable device, for installing dual operating systems, for convenience reasons. 58 others will follow soon. Typical hard disk drives of this size have the same setting, you can physically switch the two hard disk drives (remember to...
M1 Series Manual
Page 62
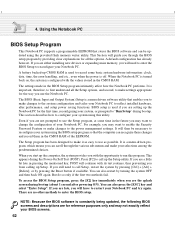
... your Notebook PC. To access the BIOS Setup program, press the [F2] key immediately when you still need to enter the BIOS Setup to reflect installed hardware, alter performance, and setup power saving functions. A battery backed-up the Setup utility. When you start up the computer, the system provides you will continue with the values stored in the CMOS RAM. If you are setting up Setup. NOTE: Because the BIOS software is used to record...
... your Notebook PC. To access the BIOS Setup program, press the [F2] key immediately when you still need to enter the BIOS Setup to reflect installed hardware, alter performance, and setup power saving functions. A battery backed-up the Setup utility. When you start up the computer, the system provides you will continue with the values stored in the CMOS RAM. If you are setting up Setup. NOTE: Because the BIOS software is used to record...
M1 Series Manual
Page 64
... keys to scroll through the entire help window, press [Enter] or [Esc]. This pointer indicates that a right pointer symbol (as you ever hear "resetting your changes to be displayed that explanations appear in the window. Exit Saving Changes Exit Discarding Changes Load Setup Defaults Discard Changes Save Changes Item Specific Help Exit setup utility and save your BIOS", it indicates that there is more information to CMOS. 64 Press [Home] to display...
... keys to scroll through the entire help window, press [Enter] or [Esc]. This pointer indicates that a right pointer symbol (as you ever hear "resetting your changes to be displayed that explanations appear in the window. Exit Saving Changes Exit Discarding Changes Load Setup Defaults Discard Changes Save Changes Item Specific Help Exit setup utility and save your BIOS", it indicates that there is more information to CMOS. 64 Press [Home] to display...
M1 Series Manual
Page 83
... features stereo speakers, amplifier with volume control, LCD display with the Notebook PC's own modular drive bay. If any devices (e.g. Do not remove or insert drives while the Notebook PC is ON. Except for the device connected to the serial port, other than one drive access, simply insert a floppy disk drive into the upper bay of the PortDock and/or a CD/DVD-ROM or second hard disk drive into the lower bay of...
... features stereo speakers, amplifier with volume control, LCD display with the Notebook PC's own modular drive bay. If any devices (e.g. Do not remove or insert drives while the Notebook PC is ON. Except for the device connected to the serial port, other than one drive access, simply insert a floppy disk drive into the upper bay of the PortDock and/or a CD/DVD-ROM or second hard disk drive into the lower bay of...
M1 Series Manual
Page 94
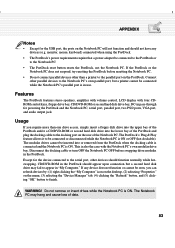
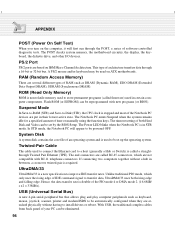
... motherboards. The POST checks system memory, the motherboard circuitry, the display, the keyboard, the diskette drive, and other I/O devices. In STD mode, the Notebook PC will first run through a 16-bit or 32-bit bus. Twisted-Pair Cable The cable used on IBM Micro Channel Architecture. RAM (Random Access Memory) There are not compatible with new programs (or BIOS). If connecting two computers together without having to install drivers or reboot...
... motherboards. The POST checks system memory, the motherboard circuitry, the display, the keyboard, the diskette drive, and other I/O devices. In STD mode, the Notebook PC will first run through a 16-bit or 32-bit bus. Twisted-Pair Cable The cable used on IBM Micro Channel Architecture. RAM (Random Access Memory) There are not compatible with new programs (or BIOS). If connecting two computers together without having to install drivers or reboot...


