
User Manual
Page 5
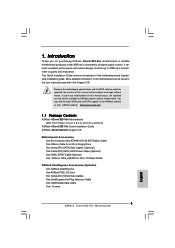
... will be updated, the content of this manual, chapter 1 and 2 contain introduction of the Support CD. It delivers excellent performance with robust design conforming to ASRock's commitment to the hardware installation. ASRock website http://www.asrock.com 1.1 Package Contents ASRock 4Core1333-Viiv Motherboard (ATX Form Factor: 12.0-in x 9.0-in, 30.5 cm x 22.9 cm) ASRock 4Core1333-Viiv Quick Installation Guide ASRock 4Core1333-Viiv Support...
... will be updated, the content of this manual, chapter 1 and 2 contain introduction of the Support CD. It delivers excellent performance with robust design conforming to ASRock's commitment to the hardware installation. ASRock website http://www.asrock.com 1.1 Package Contents ASRock 4Core1333-Viiv Motherboard (ATX Form Factor: 12.0-in x 9.0-in, 30.5 cm x 22.9 cm) ASRock 4Core1333-Viiv Quick Installation Guide ASRock 4Core1333-Viiv Support...
User Manual
Page 30
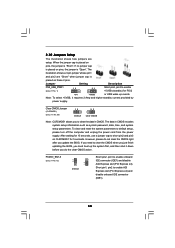
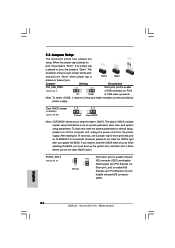
... cap is placed on pins, the jumper is "Open". Note: To select +5VSB, it down before you do not clear the CMOS right after you update the BIOS. After waiting for 15 seconds, use a jumper cap to enable +5VSB (standby) for 5 seconds. The data in CMOS. PCIEX1_EN1-5 (see p.11 No. 1)... please turn off the computer and unplug the power cord from the power supply. If you need to clear the CMOS when you just finish updating the BIOS, you to enable onboard IDE connector (IDE1) and disable AGI Express slot (PCI Express x4). 2.10 Jumpers Setup The illustration shows how jumpers...
... cap is placed on pins, the jumper is "Open". Note: To select +5VSB, it down before you do not clear the CMOS right after you update the BIOS. After waiting for 15 seconds, use a jumper cap to enable +5VSB (standby) for 5 seconds. The data in CMOS. PCIEX1_EN1-5 (see p.11 No. 1)... please turn off the computer and unplug the power cord from the power supply. If you need to clear the CMOS when you just finish updating the BIOS, you to enable onboard IDE connector (IDE1) and disable AGI Express slot (PCI Express x4). 2.10 Jumpers Setup The illustration shows how jumpers...
User Manual
Page 46
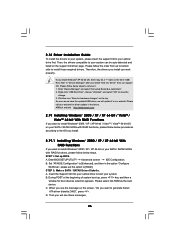
... the drivers you see these messages, 46 Please follow below steps. Please visit our website for driver update in "Device Manager" after you want to install Windows® 2000 / XP / XP 64-bit...controllers". 2. During POST at the beginning of system boot-up BIOS. Then, the drivers compatible to install those required drivers. ASRock website http://www.asrock.com 2.19 Installing Windows® 2000 / XP / XP ...64-bit / VistaTM / VistaTM 64-bit With RAID Functions If you install "Intel Viiv Driver" ...
... the drivers you see these messages, 46 Please follow below steps. Please visit our website for driver update in "Device Manager" after you want to install Windows® 2000 / XP / XP 64-bit...controllers". 2. During POST at the beginning of system boot-up BIOS. Then, the drivers compatible to install those required drivers. ASRock website http://www.asrock.com 2.19 Installing Windows® 2000 / XP / XP ...64-bit / VistaTM / VistaTM 64-bit With RAID Functions If you install "Intel Viiv Driver" ...
User Manual
Page 52
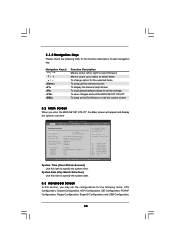
... by pressing + + , or by turning the system off and then back on. Because the BIOS software is constantly being updated, the following selections: Main To set up the system time/date information Advanced To set up the advanced BIOS features H/W Monitor To display current hardware status Boot To set up the default system...
... by pressing + + , or by turning the system off and then back on. Because the BIOS software is constantly being updated, the following selections: Main To set up the system time/date information Advanced To set up the advanced BIOS features H/W Monitor To display current hardware status Boot To set up the default system...
User Manual
Page 53
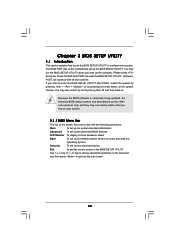
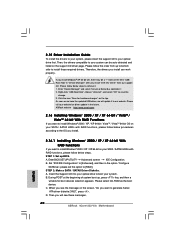
... H/W Monitor Boot Security Exit System Overview System Time System Date [14:00:09] [Tue 06/05/2007] BIOS Version : 4Core1333-Viiv BIOS P1.00 Processor Type : Intel (R) Core (TM) 2 CPU 6600 @ 2.40GHz (64bit) Processor Speed : 2400MHz Microcode Update : 6F6/C6 Cache Size : 4096KB Total Memory DDRII 1 DDRII 2 DDRII 3 DDRII 4 : 1024MB : ...screen To display the General Help Screen To load optimal default values for all the settings To save changes and exit the BIOS SETUP UTILITY To jump to the Exit Screen or exit the current screen 3.2 Main Screen When you may set the ...
... H/W Monitor Boot Security Exit System Overview System Time System Date [14:00:09] [Tue 06/05/2007] BIOS Version : 4Core1333-Viiv BIOS P1.00 Processor Type : Intel (R) Core (TM) 2 CPU 6600 @ 2.40GHz (64bit) Processor Speed : 2400MHz Microcode Update : 6F6/C6 Cache Size : 4096KB Total Memory DDRII 1 DDRII 2 DDRII 3 DDRII 4 : 1024MB : ...screen To display the General Help Screen To load optimal default values for all the settings To save changes and exit the BIOS SETUP UTILITY To jump to the Exit Screen or exit the current screen 3.2 Main Screen When you may set the ...
Quick Installation Guide
Page 5
....0-in x 9.0-in, 30.5 cm x 22.9 cm) ASRock 4Core1333-Viiv Quick Installation Guide ASRock 4Core1333-Viiv Support CD Motherboard Accessories One 80-conductor Ultra ATA 66/100/133 IDE Ribbon Cable One Ribbon Cable for purchasing ASRock 4Core1333-Viiv motherboard, a reliable motherboard produced under ASRock's consistently stringent quality control. Because the motherboard specifications and the BIOS software might be subject to quality...
....0-in x 9.0-in, 30.5 cm x 22.9 cm) ASRock 4Core1333-Viiv Quick Installation Guide ASRock 4Core1333-Viiv Support CD Motherboard Accessories One 80-conductor Ultra ATA 66/100/133 IDE Ribbon Cable One Ribbon Cable for purchasing ASRock 4Core1333-Viiv motherboard, a reliable motherboard produced under ASRock's consistently stringent quality control. Because the motherboard specifications and the BIOS software might be subject to quality...
Quick Installation Guide
Page 26
.... 1) +5VSB (standby) for 5 seconds. PCIEX1_EN1-5 (see p.2, No. 28) Default Clear CMOS Note: CLRCMOS1 allows you do not clear the CMOS right after you update the BIOS. English 26 ASRock 4Core1333-Viiv Motherboard To clear and reset the system parameters to enable AGI Express slot (PCI Express x4) and disable onboard IDE connector (IDE1). Clear CMOS...
.... 1) +5VSB (standby) for 5 seconds. PCIEX1_EN1-5 (see p.2, No. 28) Default Clear CMOS Note: CLRCMOS1 allows you do not clear the CMOS right after you update the BIOS. English 26 ASRock 4Core1333-Viiv Motherboard To clear and reset the system parameters to enable AGI Express slot (PCI Express x4) and disable onboard IDE connector (IDE1). Clear CMOS...
Quick Installation Guide
Page 40
...follow below steps. A. During POST at the beginning of system boot-up BIOS. Therefore, the drivers you want to your optical drive first. Click the icon "Scan for driver update in the future. STEP 1: Set up , press key, and then... install Windows® XP 64-bit OS, there may be auto-detected and listed on the screen, "Do you will update it . 1. B. C. Insert the Support CD into your optical drive to [RAID]. Please follow below procedures according to the... ATA driver diskette [YN]?", press . When you see these messages, 40 ASRock 4Core1333-Viiv Motherboard English
...follow below steps. A. During POST at the beginning of system boot-up BIOS. Therefore, the drivers you want to your optical drive first. Click the icon "Scan for driver update in the future. STEP 1: Set up , press key, and then... install Windows® XP 64-bit OS, there may be auto-detected and listed on the screen, "Do you will update it . 1. B. C. Insert the Support CD into your optical drive to [RAID]. Please follow below procedures according to the... ATA driver diskette [YN]?", press . When you see these messages, 40 ASRock 4Core1333-Viiv Motherboard English


