Weider Pro 136 Support and Manuals
Get Help and Manuals for this Weider item

View All Support Options Below
Free Weider Pro 136 manuals!
Problems with Weider Pro 136?
Ask a Question
Free Weider Pro 136 manuals!
Problems with Weider Pro 136?
Ask a Question
Popular Weider Pro 136 Manual Pages
English Manual - Page 1
...our website at www.weiderfitness.com
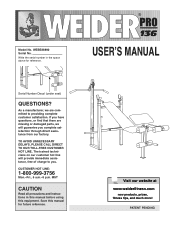
new products, prizes, fitness tips, and much more! USERÕS MANUAL
Serial Number Decal (under seat)
QUESTIONS?
CUSTOMER HOT LINE:
1-800-999-3756
Mon...instructions in the space above for future reference. Save this equipment.
PATENT PENDING
Write the serial number in this manual before using this manual for reference.
If you . ¨
Model...
English Manual - Page 2
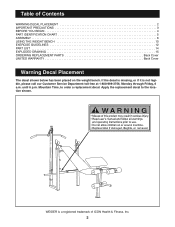
... WEIDER is not legible, please call our Customer Service Department toll-free at 1-800-999-3756, Monday through Friday, 6 a.m. until 6 p.m. Apply the replacement decal to order a replacement decal... YOU BEGIN 4 PART IDENTIFICATION CHART 5 ASSEMBLY 6 USING THE WEIGHT BENCH 10 EXERCISE GUIDELINES 12 PART LIST 14 EXPLODED DRAWING 15 ORDERING REPLACEMENT PARTS Back Cover LIMITED WARRANTY...
English Manual - Page 3
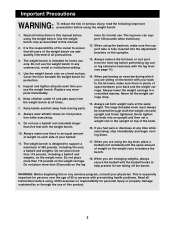
.... When you are adequately informed of all users of the weight bench are changing weights, always secure the barbell with pre-existing health problems. Read all times.
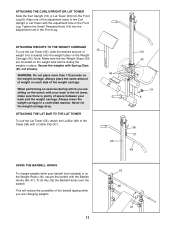
7. It is plenty of the owner to the lat tower, make sure there is fully inserted into an upright and then set both the weight rest and upright and firmly tightened...
English Manual - Page 4
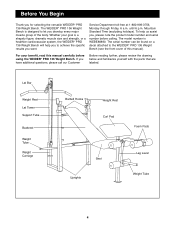
... Uprights
Leg Lever Weight Tube
4 Service Department toll-free at 1-800-999-3756, Monday through Friday, 6 a.m. Mountain Standard Time (excluding holidays). The WEIDER¨ PRO 136 Weight Bench is WEBE88890. Whether your benefit, read this manual). The serial number can be found on a decal attached to achieve the specific results you , please note the product model number and serial...
English Manual - Page 6
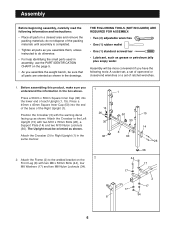
...you have the following information and instructions:
¥ Place all parts are oriented as shown.
Position the Crossbar (3) with two M10 x 70mm Bolts (26), a Support Plate (14) and two M10... if you assemble the weight bench, be sure that all parts in the box above.
Assembly
Before beginning assembly, carefully read the following tools: A socket set, a set of open-end or closed...
English Manual - Page 7
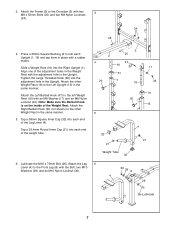
...the adjustment holes in the Upright. Tap a 38mm Square Inner Cap (32) into the adjustment hole in the Weight Rest with two
3
M8 x 55mm Bolts (25) and two M8 Nylon Locknuts
(34).
34 25
4. ...Tap a 25.4mm Round Inner Cap (21) into the Right Upright (1).
3. Attach the Frame (2) to the left Weight Rest (16) with the Bolt, two M10
Washers (29) and an M10 Nylon Locknut (30).
30 29 8 4
...
English Manual - Page 8
...
27
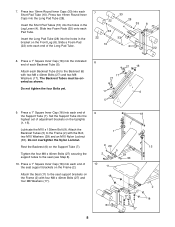
8 7. Insert the Short Pad Tubes (10) into the holes in the Leg Lever (4). Press a 1Ó Square Inner Cap (18) into the highest set of the Support Tube (7). Set the Support Tube into the indicated
8
end of each end of the Long Pad Tube.
7 22
33 22
10
33 28 33
4
33
8 22
8. Press...
English Manual - Page 9
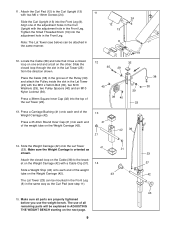
...a Carriage Bushing (41) onto each end of all parts are properly tightened before you use the weight bench. The use of the weight
tube on the Weight Carriage (42).
43
42
The Lat Tower (23)... Lat Tower (see step 11).
43
15.
Make sure all remaining parts will be attached in ADJUSTING THE WEIGHT BENCH starting on the Weight Carriage (42) with two M6 x 16mm Screws (24).
Place the...
English Manual - Page 10

... Large
Threaded Knobs (20) from the Uprights (1, 15). Replace the Large
16
Threaded Knobs. Using the Weight Bench
The weight bench is designed to the exercise information accompanying your own weight set (not included). Refer also to be inserted through both weight rests at the
same height.
Replace any worn parts immediately. Do not use the
Backrest in the Uprights...
English Manual - Page 11
... WARNING: Do not place more than 110 pounds on the weight carriage.
Note: Make sure the two Weight Stops (43) are sitting on the Weight Carriage (42). Never let the weight carriage drop. Align one of weight (not included) onto the weight tubes on the bench with the adjustment hole in the Front Leg.
To do this...
English Manual - Page 12
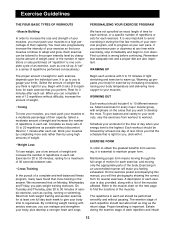
...weight training with a list of the muscles affected. To give your own pace. Maintaining proper form means moving only the appropriate parts of the body. Proper breathing is wrong before continuing. A Òset . Complete as many have not specified an exact length of time for each workout, or a specific... the individual user. Each exercise can complete 3 sets of 12 repetitions...
English Manual - Page 13
... with 5 to spend the first couple of weeks familiarizing yourself with - Remember, the key to make exercise a regular and enjoyable part of sets and repetitions completed.
List the date, exercises performed, weight and numbers of your arms and legs. Ease into each stretch gradually and go only as far as you are doing...
English Manual - Page 14
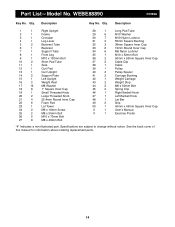
... Spacer
41
2
Carriage Bushing
42
1
Weight Carriage
43
2
Weight Stop
44
2
M8 x 50mm Bolt
45
2
Spring Clip
46
1
Right Barbell Hook
47
1
Left Barbell Hook
48
1
Lat Bar
49
2
Grip
50
1
45mm x 45mm Square Inner Cap
#
1
UserÕs Manual
#
1
Exercise Poster
Ò#Ó Indicates a non-illustrated part.
Specifications are subject to change without notice...
English Manual - Page 15
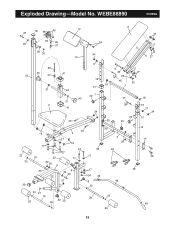
... 19
33
30 3 30
45
48
15 14
26 36
33 21
10
33 28
22
33 32 22
49
22
15 Exploded DrawingÑModel No.
English Manual - Page 16
... use , costs of removal, installation or other consequential damages of its authorized service centers with respect to any product or damage to a product caused by sufficient proof of purchase. until 6 p.m. All products for a period of ninety (90) days from state to you . The MODEL NUMBER of the product (WEIDER¨ PRO 136 Weight Bench).
3. The NAME of the...
Weider Pro 136 Reviews
We have not received any reviews for Weider yet.