
User Guide
Page 10
... environment....... 31 Keeping yourself comfortable 32 Precautions 35 Setting up your computer 37 Setting up your software 37 Registering your computer with Toshiba ......... 39 Adding external devices 39 Connecting the AC adapter 40 Charging the main battery 41 Using the computer for the first time... 42 Turning on the power 42 Using the TouchPad 43 Control buttons 44 Disabling or enabling the TouchPad 44 Installing additional memory (optional 45 Removing a memory module 49 Connecting a mouse 49 Connecting a printer 50 Setting up a printer 52 Turning off the computer 55 Caring ...
... environment....... 31 Keeping yourself comfortable 32 Precautions 35 Setting up your computer 37 Setting up your software 37 Registering your computer with Toshiba ......... 39 Adding external devices 39 Connecting the AC adapter 40 Charging the main battery 41 Using the computer for the first time... 42 Turning on the power 42 Using the TouchPad 43 Control buttons 44 Disabling or enabling the TouchPad 44 Installing additional memory (optional 45 Removing a memory module 49 Connecting a mouse 49 Connecting a printer 50 Setting up a printer 52 Turning off the computer 55 Caring ...
User Guide
Page 15
... can help you 171 Resolving a hardware conflict 171 A plan of action 172 Resolving hardware conflicts on your own .... 172 Fixing a problem with Device Manager .......... 174 Memory card problems 176 Power and the batteries 176 Keyboard problems 178 Display problems 178 Disk drive problems 180 DVD-ROM drive problems 182 Sound system... Card problems 191 Printer problems 194 Modem problems 195 Develop good computing habits 196 If you need further assistance 197 Before you call 197 Contacting Toshiba 198 Other Toshiba Internet Web sites 199 Toshiba's worldwide offices 200
... can help you 171 Resolving a hardware conflict 171 A plan of action 172 Resolving hardware conflicts on your own .... 172 Fixing a problem with Device Manager .......... 174 Memory card problems 176 Power and the batteries 176 Keyboard problems 178 Display problems 178 Disk drive problems 180 DVD-ROM drive problems 182 Sound system... Card problems 191 Printer problems 194 Modem problems 195 Develop good computing habits 196 If you need further assistance 197 Before you call 197 Contacting Toshiba 198 Other Toshiba Internet Web sites 199 Toshiba's worldwide offices 200

User Guide
Page 29
... Way Around Underside 29 The numeric mode light glows when the numeric overlay is the computer's permanent data storage device. See "Installing additional memory (optional)" on page 63. The hard disk drive is on the top of data. When this light is in loss of the key.... Doing so may damage the media and result in use. Underside Memory slot cover Battery pack Battery release latch Battery latch lock The expansion memory slot cover protects the two expansion memory slots where you insert additional memory. CAUTION: Never turn off the computer while any drive is on,...
... Way Around Underside 29 The numeric mode light glows when the numeric overlay is the computer's permanent data storage device. See "Installing additional memory (optional)" on page 63. The hard disk drive is on the top of data. When this light is in loss of the key.... Doing so may damage the media and result in use. Underside Memory slot cover Battery pack Battery release latch Battery latch lock The expansion memory slot cover protects the two expansion memory slots where you insert additional memory. CAUTION: Never turn off the computer while any drive is on,...
User Guide
Page 37
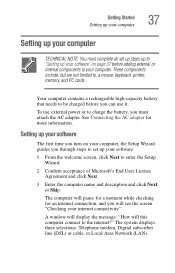
... Setting up your computer TECHNICAL NOTE: You must attach the AC adapter. Your computer contains a rechargeable high-capacity battery that needs to , a mouse, keyboard, printer, memory, and PC cards. The system displays three selections: Telephone modem, Digital subscriber line (DSL) or cable, or Local Area Network (LAN). These components include, but...
... Setting up your computer TECHNICAL NOTE: You must attach the AC adapter. Your computer contains a rechargeable high-capacity battery that needs to , a mouse, keyboard, printer, memory, and PC cards. The system displays three selections: Telephone modem, Digital subscriber line (DSL) or cable, or Local Area Network (LAN). These components include, but...

User Guide
Page 39
... your software first. Adding external devices NOTE: Before adding external devices, Toshiba recommends setting up -to-date with Toshiba by mailing the registration card that may also want to use your computer. Before starting to : ❖ Add more memory (see "Installing additional memory (optional)" on page 45) ❖ Connect a mouse (see "Connecting a mouse" on...
... your software first. Adding external devices NOTE: Before adding external devices, Toshiba recommends setting up -to-date with Toshiba by mailing the registration card that may also want to use your computer. Before starting to : ❖ Add more memory (see "Installing additional memory (optional)" on page 45) ❖ Connect a mouse (see "Connecting a mouse" on...
User Guide
Page 45
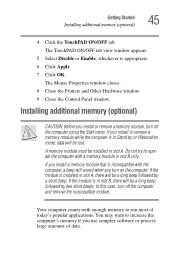
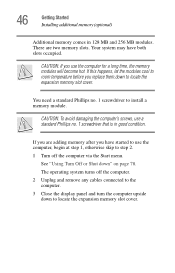
... is in slot A, there will be a long beep followed by a short beep. If you install a memory module that is in slot B, there will sound when you install or remove a memory module while the computer is installed in Stand by or Hibernation mode, data will be installed in slot B only.... In this case, turn off the computer and remove the incompatible module. If the module is incompatible with enough memory to increase the computer's memory if you install or remove a memory module, turn off the computer using the Start menu. You may want to run most of data...
... is in slot A, there will be a long beep followed by a short beep. If you install a memory module that is in slot B, there will sound when you install or remove a memory module while the computer is installed in Stand by or Hibernation mode, data will be installed in slot B only.... In this case, turn off the computer and remove the incompatible module. If the module is incompatible with enough memory to increase the computer's memory if you install or remove a memory module, turn off the computer using the Start menu. You may want to run most of data...
User Guide
Page 46
... in good condition. You need a standard Phillips no . 1 screwdriver that is in 128 MB and 256 MB modules. CAUTION: If you are two memory slots. If you use a standard Phillips no . 1 screwdriver to step 2. 1 Turn off the computer. 2 Unplug and remove any cables connected to the ...computer. 3 Close the display panel and turn the computer upside down to locate the expansion memory slot cover. There are adding memory after you replace them.down " on page 78. The operating system turns off the computer via the Start menu. See "Using...
... in good condition. You need a standard Phillips no . 1 screwdriver that is in 128 MB and 256 MB modules. CAUTION: If you are two memory slots. If you use a standard Phillips no . 1 screwdriver to step 2. 1 Turn off the computer. 2 Unplug and remove any cables connected to the ...computer. 3 Close the display panel and turn the computer upside down to locate the expansion memory slot cover. There are adding memory after you replace them.down " on page 78. The operating system turns off the computer via the Start menu. See "Using...
User Guide
Page 47
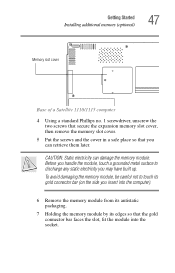
Getting Started Installing additional memory (optional) 47 Memory slot cover Base of a Satellite 1110/1115 computer 4 Using a standard Phillips no. 1 screwdriver, unscrew the two screws that secure the expansion memory slot cover, then remove the memory slot cover. 5 Put the screws and the cover in a safe place so that ...on the side you insert into the computer). 6 Remove the memory module from its antistatic packaging. 7 Holding the memory module by its edges so that you may have built up. To avoid damaging the memory module, be careful not to discharge any static electricity you can...
Getting Started Installing additional memory (optional) 47 Memory slot cover Base of a Satellite 1110/1115 computer 4 Using a standard Phillips no. 1 screwdriver, unscrew the two screws that secure the expansion memory slot cover, then remove the memory slot cover. 5 Put the screws and the cover in a safe place so that ...on the side you insert into the computer). 6 Remove the memory module from its antistatic packaging. 7 Holding the memory module by its edges so that you may have built up. To avoid damaging the memory module, be careful not to discharge any static electricity you can...
User Guide
Page 48
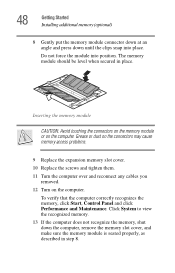
... Panel and click Performance and Maintenance. Inserting the memory module CAUTION: Avoid touching the connectors on the memory module or on the computer. Click System to view the recognized memory. 13 If the computer does not recognize the memory, shut down until the clips snap into position.... over and reconnect any cables you removed. 12 Turn on the computer. The memory module should be level when secured in step 8. 48 Getting Started Installing additional memory (optional) 8 Gently put the memory module connector down at an angle and press down the computer, remove the...
... Panel and click Performance and Maintenance. Inserting the memory module CAUTION: Avoid touching the connectors on the memory module or on the computer. Click System to view the recognized memory. 13 If the computer does not recognize the memory, shut down until the clips snap into position.... over and reconnect any cables you removed. 12 Turn on the computer. The memory module should be level when secured in step 8. 48 Getting Started Installing additional memory (optional) 8 Gently put the memory module connector down at an angle and press down the computer, remove the...

User Guide
Page 49
... pops up. Connecting a mouse You may want to pull it out of the USB ports. Getting Started Installing additional memory (optional) 49 Removing a memory module 1 Follow steps 1 through 12 in pointing device. To connect a USB mouse, plug the mouse cable into one of the slot. 4 Complete the procedure by ...
... pops up. Connecting a mouse You may want to pull it out of the USB ports. Getting Started Installing additional memory (optional) 49 Removing a memory module 1 Follow steps 1 through 12 in pointing device. To connect a USB mouse, plug the mouse cable into one of the slot. 4 Complete the procedure by ...

User Guide
Page 50
... printer manufacturer, the printer may damage the printer, the computer, or both. NOTE: You must supply the proper printer cable. 50 Getting Started Installing additional memory (optional) Connecting a printer NOTE: Read the documentation that came with your printer. Follow the manufacturer's instructions when connecting a local printer. or IEEE-compliant, make sure...
... printer manufacturer, the printer may damage the printer, the computer, or both. NOTE: You must supply the proper printer cable. 50 Getting Started Installing additional memory (optional) Connecting a printer NOTE: Read the documentation that came with your printer. Follow the manufacturer's instructions when connecting a local printer. or IEEE-compliant, make sure...

User Guide
Page 51
... printer cable while the computer is on your computer 2 Plug the printer's power cable into a live AC outlet. See your printer. Getting Started Installing additional memory (optional) 51 To achieve the connection, you need a suitable USB cable, which may damage the printer, the computer, or both. 1 Connect the printer cable to...
... printer cable while the computer is on your computer 2 Plug the printer's power cable into a live AC outlet. See your printer. Getting Started Installing additional memory (optional) 51 To achieve the connection, you need a suitable USB cable, which may damage the printer, the computer, or both. 1 Connect the printer cable to...
User Guide
Page 52
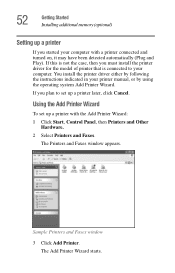
... the operating system Add Printer Wizard. You install the printer driver either by following the instructions indicated in your computer. 52 Getting Started Installing additional memory (optional) Setting up a printer with a printer connected and turned on, it may have been detected automatically (Plug and Play). If you must install the printer...
... the operating system Add Printer Wizard. You install the printer driver either by following the instructions indicated in your computer. 52 Getting Started Installing additional memory (optional) Setting up a printer with a printer connected and turned on, it may have been detected automatically (Plug and Play). If you must install the printer...
User Guide
Page 53
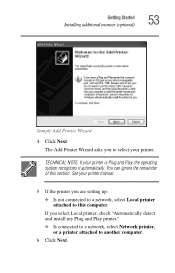
.... 5 If the printer you are setting up: ❖ Is not connected to a network, select Local printer attached to select your printer. Getting Started Installing additional memory (optional) 53 Sample Add Printer Wizard 4 Click Next. You can ignore the remainder of this computer.
.... 5 If the printer you are setting up: ❖ Is not connected to a network, select Local printer attached to select your printer. Getting Started Installing additional memory (optional) 53 Sample Add Printer Wizard 4 Click Next. You can ignore the remainder of this computer.
User Guide
Page 54
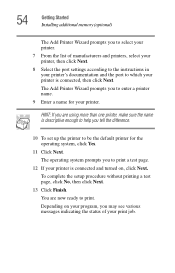
... help you tell the difference. 10 To set up the printer to be the default printer for your print job. 54 Getting Started Installing additional memory (optional) The Add Printer Wizard prompts you to select your printer. 7 From the list of your printer. The operating system prompts you to print a test...
... help you tell the difference. 10 To set up the printer to be the default printer for your print job. 54 Getting Started Installing additional memory (optional) The Add Printer Wizard prompts you to select your printer. 7 From the list of your printer. The operating system prompts you to print a test...
User Guide
Page 55
..., you can use . Getting Started Turning off the computer 55 Turning off the computer It is a good idea to turn off your system settings to memory so that, when you turn on page 77.
..., you can use . Getting Started Turning off the computer 55 Turning off the computer It is a good idea to turn off your system settings to memory so that, when you turn on page 77.
User Guide
Page 59
... hard disk at preset intervals. See your file to the disk. You will lose all unsaved work frequently. Your work temporarily stays in the computer's memory until you save feature which you must restart your computer, or your work , if, for details. 59 Chapter 3 Learning the Basics This chapter lists some...
... hard disk at preset intervals. See your file to the disk. You will lose all unsaved work frequently. Your work temporarily stays in the computer's memory until you save feature which you must restart your computer, or your work , if, for details. 59 Chapter 3 Learning the Basics This chapter lists some...
User Guide
Page 79
...the operating system, and then returns to the state in Hibernation mode, the computer uses no battery power. ❖ Because the state of memory. For more time and battery power than restarting from Standby because information is open, changes the Stand By button to maintain the saved information, ... of the computer to the hard disk. Restoring information from the hard disk takes longer than restarting from Turn Off. ❖ Restarting from memory. Learning the Basics Using Turn Off or Shut down 79 2 Select Shut down from the drop-down completely. NOTE: Holding the shift key...
...the operating system, and then returns to the state in Hibernation mode, the computer uses no battery power. ❖ Because the state of memory. For more time and battery power than restarting from Standby because information is open, changes the Stand By button to maintain the saved information, ... of the computer to the hard disk. Restoring information from the hard disk takes longer than restarting from Turn Off. ❖ Restarting from memory. Learning the Basics Using Turn Off or Shut down 79 2 Select Shut down from the drop-down completely. NOTE: Holding the shift key...
User Guide
Page 80
Standby holds the current state of the computer in memory so that, when you restart the computer, you can continue working from Turn Off or Hibernation mode. ❖ When starting up again, the computer returns ...
Standby holds the current state of the computer in memory so that, when you restart the computer, you can continue working from Turn Off or Hibernation mode. ❖ When starting up again, the computer returns ...
User Guide
Page 84
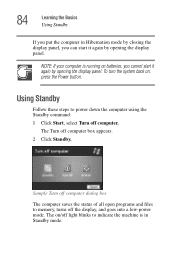
... blinks to indicate the machine is running on batteries, you cannot start it again by opening the display panel. Using Standby Follow these steps to memory, turns off computer. To turn the system back on /off computer box appears. 2 Click Standby. The on , press the Power button. 84 Learning the Basics...
... blinks to indicate the machine is running on batteries, you cannot start it again by opening the display panel. Using Standby Follow these steps to memory, turns off computer. To turn the system back on /off computer box appears. 2 Click Standby. The on , press the Power button. 84 Learning the Basics...


