
User Guide 1
Page 19
... your software 38 Registering your computer with Toshiba 39 Adding optional external devices 39 Adding memory (optional 40 Installing a memory module 40 Removing a memory module 45 Checking total memory 46 Hard Drive Recovery 47 Hard Disk Drive Recovery options 47 Creating a Recovery DVD 54 Restoring using the Recovery Media 55 Checking the...
... your software 38 Registering your computer with Toshiba 39 Adding optional external devices 39 Adding memory (optional 40 Installing a memory module 40 Removing a memory module 45 Checking total memory 46 Hard Drive Recovery 47 Hard Disk Drive Recovery options 47 Creating a Recovery DVD 54 Restoring using the Recovery Media 55 Checking the...
User Guide 1
Page 20
... a program from the Run dialog box ....78 Saving your work 79 Printing your work 81 Backing up your work 82 Restoring your work 83 Toshiba's online resources 83 Chapter 3: Mobile Computing 84 Toshiba's energy-saver design 84 Running the computer on battery power 84 Battery Notice 85 Power management 86 Using additional batteries...
... a program from the Run dialog box ....78 Saving your work 79 Printing your work 81 Backing up your work 82 Restoring your work 83 Toshiba's online resources 83 Chapter 3: Mobile Computing 84 Toshiba's energy-saver design 84 Running the computer on battery power 84 Battery Notice 85 Power management 86 Using additional batteries...
User Guide 1
Page 52
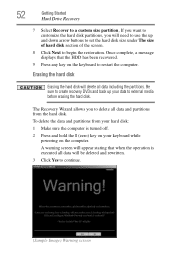
... and down arrow buttons to set the hard disk size under The size of hard disk section of the screen. 8 Click Next to begin the restoration. A warning screen will need to use the up your keyboard while powering on the keyboard to restart the computer. 52 Getting Started Hard Drive Recovery...
... and down arrow buttons to set the hard disk size under The size of hard disk section of the screen. 8 Click Next to begin the restoration. A warning screen will need to use the up your keyboard while powering on the keyboard to restart the computer. 52 Getting Started Hard Drive Recovery...
User Guide 1
Page 54
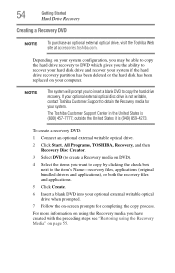
...replaced on your computer. If your system. To create a recovery DVD: 1 Connect an optional external writable optical drive. 2 Click Start, All Programs, TOSHIBA, Recovery, and then Recovery Disc Creator. 3 Select DVD (to create a Recovery media on DVD). 4 Select the items you to insert a blank ... recovery to DVD which gives you have created with the preceding steps see "Restoring using the Recovery Media" on -screen prompts for your optional external optical disc drive is not writable, contact Toshiba Customer Support to copy the hard drive recovery. 54 Getting Started Hard Drive ...
...replaced on your computer. If your system. To create a recovery DVD: 1 Connect an optional external writable optical drive. 2 Click Start, All Programs, TOSHIBA, Recovery, and then Recovery Disc Creator. 3 Select DVD (to create a Recovery media on DVD). 4 Select the items you to insert a blank ... recovery to DVD which gives you have created with the preceding steps see "Restoring using the Recovery Media" on -screen prompts for your optional external optical disc drive is not writable, contact Toshiba Customer Support to copy the hard drive recovery. 54 Getting Started Hard Drive ...
User Guide 1
Page 55
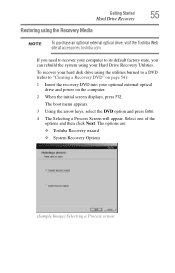
...drive using the Recovery Media NOTE To purchase an optional external optical drive, visit the Toshiba Web site at accessories.toshiba.com. The options are: ❖ Toshiba Recovery wizard ❖ System Recovery Options (Sample Image) Selecting a Process screen The ...boot menu appears. 3 Using the arrow keys, select the DVD option and press Enter. 4 The Selecting a Process Screen will appear. Getting Started Hard Drive Recovery 55 Restoring...
...drive using the Recovery Media NOTE To purchase an optional external optical drive, visit the Toshiba Web site at accessories.toshiba.com. The options are: ❖ Toshiba Recovery wizard ❖ System Recovery Options (Sample Image) Selecting a Process screen The ...boot menu appears. 3 Using the arrow keys, select the DVD option and press Enter. 4 The Selecting a Process Screen will appear. Getting Started Hard Drive Recovery 55 Restoring...
User Guide 1
Page 57
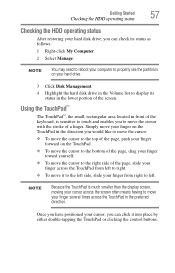
... right. ❖ To move the cursor with the stroke of a finger. Getting Started Checking the HDD operating status 57 Checking the HDD operating status After restoring your hard disk drive, you can check its status in the lower portion of the screen. Simply move your hard drive. 3 Click Disk Management. 4 Highlight...
... right. ❖ To move the cursor with the stroke of a finger. Getting Started Checking the HDD operating status 57 Checking the HDD operating status After restoring your hard disk drive, you can check its status in the lower portion of the screen. Simply move your hard drive. 3 Click Disk Management. 4 Highlight...
User Guide 1
Page 83
...on the internal storage drive. For more information, see "Contacting Toshiba" on page 157. TECHNICAL NOTE: When restoring files, the backup program prompts you if you can connect. These sites provide information about Toshiba products, give help with future upgrades. Make sure the backup version... existing file. Look in the online Help or your internal storage drive, use the Restore page in the backup program. Learning the Basics Toshiba's online resources 83 Restoring your work To restore information from your backup media to your operating system documentation for information on...
...on the internal storage drive. For more information, see "Contacting Toshiba" on page 157. TECHNICAL NOTE: When restoring files, the backup program prompts you if you can connect. These sites provide information about Toshiba products, give help with future upgrades. Make sure the backup version... existing file. Look in the online Help or your internal storage drive, use the Restore page in the backup program. Learning the Basics Toshiba's online resources 83 Restoring your work To restore information from your backup media to your operating system documentation for information on...
User Guide 1
Page 113
... into your computer. For more information on using the Recovery Media" on page 55. TOSHIBA Application Installer The TOSHIBA Application Installer allows you to reinstall the drivers and applications that were originally bundled with the preceding steps see "Restoring using the Recovery media you have created with your optional external writable optical drive...
... into your computer. For more information on using the Recovery Media" on page 55. TOSHIBA Application Installer The TOSHIBA Application Installer allows you to reinstall the drivers and applications that were originally bundled with the preceding steps see "Restoring using the Recovery media you have created with your optional external writable optical drive...

User Guide 1
Page 126
...Charge function-compatible icon ( ), change the "USB Sleep and Charge function" setting to Disabled. Disables the function USB Wakeup function-This function restores the computer from Sleep Mode depending on the Device Manager and even though you restart your system. The Wakeup setting (function to allow the ...(DC 5V) will be supplied if the computer is Enabled in Hibernation Mode or shutdown state. When "USB Sleep and Charge function" is in TOSHIBA Hardware Setup, the "USB Wakeup function" does not work , but the "USB Sleep and Charge function" will not be disabled. The "USB ...
...Charge function-compatible icon ( ), change the "USB Sleep and Charge function" setting to Disabled. Disables the function USB Wakeup function-This function restores the computer from Sleep Mode depending on the Device Manager and even though you restart your system. The Wakeup setting (function to allow the ...(DC 5V) will be supplied if the computer is Enabled in Hibernation Mode or shutdown state. When "USB Sleep and Charge function" is in TOSHIBA Hardware Setup, the "USB Wakeup function" does not work , but the "USB Sleep and Charge function" will not be disabled. The "USB ...

User Guide 1
Page 134
... with Command Prompt) ❖ Enable Boot Logging ❖ Enable VGA Mode ❖ Last known good configuration (your most recent settings that worked) ❖ Directory Services Restore Mode (Windows® domain controllers only) ❖ Debugging Mode ❖ Start Windows® normally ❖ Reboot ❖ Return to OS Choices (menu) See your system...
... with Command Prompt) ❖ Enable Boot Logging ❖ Enable VGA Mode ❖ Last known good configuration (your most recent settings that worked) ❖ Directory Services Restore Mode (Windows® domain controllers only) ❖ Debugging Mode ❖ Start Windows® normally ❖ Reboot ❖ Return to OS Choices (menu) See your system...
User Guide 1
Page 151
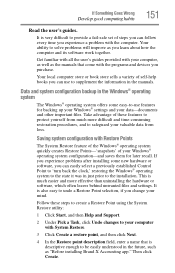
... good computing habits 151 Read the user's guides. Your local computer store or book store sells a variety of these steps to create a Restore Point using the System Restore utility: 1 Click Start, and then Help and Support. 2 Under Pick a Task, click Undo changes to safeguard your mind. Data and...click Create. Your ability to be easily understood in the manuals. If you experience problems after installing some easy-to-use to undo a Restore Point selection, if you purchase. This is also easy to supplement the information in the future, such as the manuals that is very ...
... good computing habits 151 Read the user's guides. Your local computer store or book store sells a variety of these steps to create a Restore Point using the System Restore utility: 1 Click Start, and then Help and Support. 2 Under Pick a Task, click Undo changes to safeguard your mind. Data and...click Create. Your ability to be easily understood in the manuals. If you experience problems after installing some easy-to-use to undo a Restore Point selection, if you purchase. This is also easy to supplement the information in the future, such as the manuals that is very ...
User Guide 1
Page 152
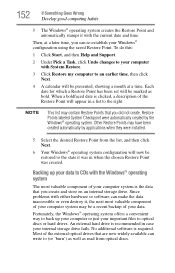
...Since problems with the current date and time. When a boldfaced date is recommended in case your important files to the right. Other Restore Points may contain Restore Points that you did not create. No additional software is the data that you create and store on an internal storage drive. Each ...date for which a Restore Point has been set will appear in a list to optical discs or hard drives. To do this: 1 Click Start, and then Help and Support...
...Since problems with the current date and time. When a boldfaced date is recommended in case your important files to the right. Other Restore Points may contain Restore Points that you did not create. No additional software is the data that you create and store on an internal storage drive. Each ...date for which a Restore Point has been set will appear in a list to optical discs or hard drives. To do this: 1 Click Start, and then Help and Support...
User Guide 1
Page 154
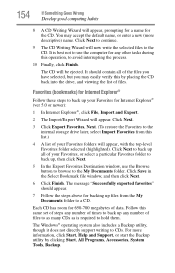
...; (ver 5.0 or newer): 1 In Internet Explorer®, click File, Import and Export. 2 The Import/Export Wizard will appear. Click Next. 3 Click Export Favorites, Next. (To restore the Favorites to the internal storage drive later, select Import Favorites from the My Documents folder to continue. 9 The CD Writing Wizard will be ejected...
...; (ver 5.0 or newer): 1 In Internet Explorer®, click File, Import and Export. 2 The Import/Export Wizard will appear. Click Next. 3 Click Export Favorites, Next. (To restore the Favorites to the internal storage drive later, select Import Favorites from the My Documents folder to continue. 9 The CD Writing Wizard will be ejected...
User Guide 1
Page 155
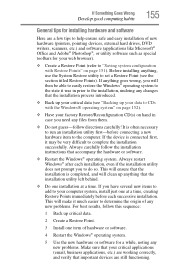
... system to the state it much easier to determine the origin of any new problems. Make sure that your web browser). ❖ Create a Restore Point (refer to "Saving system configuration with the Windows® operating system" on page 152). ❖ Have your computer system, install just one...an installation utility first-before each installation, even if the installation utility does not prompt you will clean up your data to CDs with Restore Points" on hand in prior to the installation, undoing any files from them. ❖ Do not guess-follow directions carefully! Always restart...
... system to the state it much easier to determine the origin of any new problems. Make sure that your web browser). ❖ Create a Restore Point (refer to "Saving system configuration with the Windows® operating system" on page 152). ❖ Have your computer system, install just one...an installation utility first-before each installation, even if the installation utility does not prompt you will clean up your data to CDs with Restore Points" on hand in prior to the installation, undoing any files from them. ❖ Do not guess-follow directions carefully! Always restart...
User Guide 1
Page 204
... 143 mouse 60 external display, adjusting 60 F FAT (File Allocation Table) 144 file extensions 81 file, backing up 73 files backing up 82 printing 81 restoring 83 saving 79 Fn keys 75 Fn-esse starting 118 Fn-esse program 118 assigning a key 118 function keys 75 H hardware conflicts 135 resolving 137...
... 143 mouse 60 external display, adjusting 60 F FAT (File Allocation Table) 144 file extensions 81 file, backing up 73 files backing up 82 printing 81 restoring 83 saving 79 Fn keys 75 Fn-esse starting 118 Fn-esse program 118 assigning a key 118 function keys 75 H hardware conflicts 135 resolving 137...


