
Revision History
Page 41
Trademark information • HDMI, the HDMI logo and High-Definition Multimedia Interface are trademarks or registered trademarks of HDMI Licensing LLC. • "BRAVIA" and are of Sony Corporation. 2 GB The illustrations used in this Sony product. Introduction Thank you for future reference. Before operating the TV, please read this manual thoroughly and retain it for choosing this manual are trademarks of the KLV-32S400A unless otherwise stated.
Trademark information • HDMI, the HDMI logo and High-Definition Multimedia Interface are trademarks or registered trademarks of HDMI Licensing LLC. • "BRAVIA" and are of Sony Corporation. 2 GB The illustrations used in this Sony product. Introduction Thank you for future reference. Before operating the TV, please read this manual thoroughly and retain it for choosing this manual are trademarks of the KLV-32S400A unless otherwise stated.
Revision History
Page 57
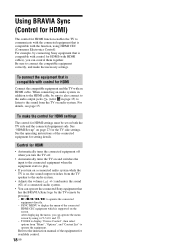
... system. • You can operate the connected Sony equipment that is compatible with control for HDMI Connect the compatible equipment and the TV with an HDMI cable. After displaying the menu, you can operate the menu screen by using HDMI CEC (Consumer Electronics Control). Refer to the instruction manual... set on the screen. For example, by pressing: - To connect the equipment that has the BRAVIA Sync logo by the TV remote by connecting Sony equipment that is supported on both the TV side and the connected equipment side. For details, see page 15. To make the necessary settings...
... system. • You can operate the connected Sony equipment that is compatible with control for HDMI Connect the compatible equipment and the TV with an HDMI cable. After displaying the menu, you can operate the menu screen by using HDMI CEC (Consumer Electronics Control). Refer to the instruction manual... set on the screen. For example, by pressing: - To connect the equipment that has the BRAVIA Sync logo by the TV remote by connecting Sony equipment that is supported on both the TV side and the connected equipment side. For details, see page 15. To make the necessary settings...


