
Operating Instructions
Page 2
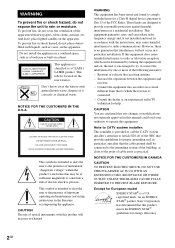
.... Reorient or relocate the receiving antenna. - Consult the dealer or an experienced radio/TV technician for a Class B digital device, pursuant to Part 15 of it correctly as a CLASS 1 LASER product. Note to CATV system installer: This reminder is encouraged to try to correct the interference by turning the equipment off and on, the user is provided to call...
.... Reorient or relocate the receiving antenna. - Consult the dealer or an experienced radio/TV technician for a Class B digital device, pursuant to Part 15 of it correctly as a CLASS 1 LASER product. Note to CATV system installer: This reminder is encouraged to try to correct the interference by turning the equipment off and on, the user is provided to call...
Operating Instructions
Page 3
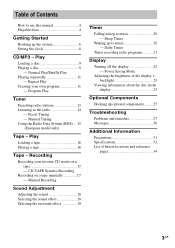
... own program 11 - Manual Recording Sound Adjustment Adjusting the sound 18 Selecting the sound effect 18 Selecting the surround effect 19 Timer Falling asleep to the radio 14 - Normal Play/Shuffle Play Playing repeatedly 11 - Preset Tuning - Sleep Timer Waking up optional components......... 25 Troubleshooting Problems and remedies 27 Messages 30 Additional Information Precautions 31 Specifications 32 List of button locations and reference pages 34 3GB Power Saving Mode Adjusting the brightness of the display...
... own program 11 - Manual Recording Sound Adjustment Adjusting the sound 18 Selecting the sound effect 18 Selecting the surround effect 19 Timer Falling asleep to the radio 14 - Normal Play/Shuffle Play Playing repeatedly 11 - Preset Tuning - Sleep Timer Waking up optional components......... 25 Troubleshooting Problems and remedies 27 Messages 30 Additional Information Precautions 31 Specifications 32 List of button locations and reference pages 34 3GB Power Saving Mode Adjusting the brightness of the display...
Operating Instructions
Page 4
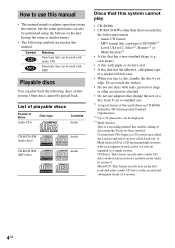
...; A disc with MP3 Playable discs You can be displayed. *3 Multi Session This is a recording method that enables adding of data using the buttons on the unit having multiple sessions, with audio CDs Functions that can play • CD-ROMs • CD-Rs/CD-RWs other accessories attached. • Do not use this manual • This manual mainly explains operations using the remote, but the same operations...
...; A disc with MP3 Playable discs You can be displayed. *3 Multi Session This is a recording method that enables adding of data using the buttons on the unit having multiple sessions, with audio CDs Functions that can play • CD-ROMs • CD-Rs/CD-RWs other accessories attached. • Do not use this manual • This manual mainly explains operations using the remote, but the same operations...
Operating Instructions
Page 7
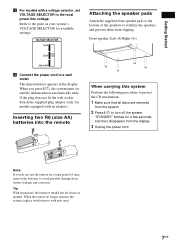
... Attach the supplied front speaker pads to the bottom of time, remove the batteries to the local power line voltage. When the remote no longer operates the system, replace both batteries with an adaptor). When you do not use , the batteries should last for a few seconds, and then disappears from the display. 3 Unplug the power cord. "STANDBY" flashes for about six months...
... Attach the supplied front speaker pads to the bottom of time, remove the batteries to the local power line voltage. When the remote no longer operates the system, replace both batteries with an adaptor). When you do not use , the batteries should last for a few seconds, and then disappears from the display. 3 Unplug the power cord. "STANDBY" flashes for about six months...
Operating Instructions
Page 8
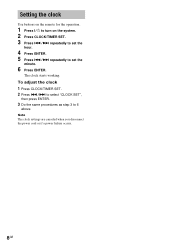
To adjust the clock 1 Press CLOCK/TIMER SET. 2 Press ./> to select "CLOCK SET", then press ENTER. 3 Do the same procedures as step 3 to set the minute. 6 Press ENTER. Note The clock settings are canceled when you disconnect the power cord or if a power failure occurs. 8GB Setting the clock Use buttons on the remote for the operation. 1 Press ?/1 to turn on the system. 2 Press CLOCK/TIMER SET. 3 Press ./> repeatedly to set the hour. 4 Press ENTER. 5 Press ./> repeatedly to 6 above. The clock starts working.
To adjust the clock 1 Press CLOCK/TIMER SET. 2 Press ./> to select "CLOCK SET", then press ENTER. 3 Do the same procedures as step 3 to set the minute. 6 Press ENTER. Note The clock settings are canceled when you disconnect the power cord or if a power failure occurs. 8GB Setting the clock Use buttons on the remote for the operation. 1 Press ?/1 to turn on the system. 2 Press CLOCK/TIMER SET. 3 Press ./> repeatedly to set the hour. 4 Press ENTER. 5 Press ./> repeatedly to 6 above. The clock starts working.
Operating Instructions
Page 10
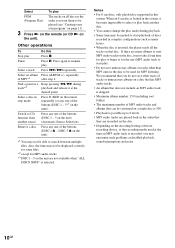
... buttons (DISC 1 - 5 on the unit) (Automatic Source Selection). Select an album Press ALBUM +/- repeatedly of the buttons (DISC 1 Z - Select To play PGM The tracks on all the tracks on that disc. Select a disc in a Keep pressing m/M during playback. • Some time may not be played (see "Creating your own program" on page 11). 3 Press N on the remote (or CD N on the unit). Find a point in stop mode...
... buttons (DISC 1 - 5 on the unit) (Automatic Source Selection). Select an album Press ALBUM +/- repeatedly of the buttons (DISC 1 Z - Select To play PGM The tracks on all the tracks on that disc. Select a disc in a Keep pressing m/M during playback. • Some time may not be played (see "Creating your own program" on page 11). 3 Press N on the remote (or CD N on the unit). Find a point in stop mode...
Operating Instructions
Page 13
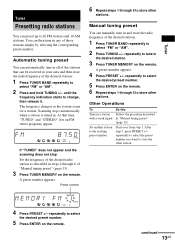
... tune in "Manual tuning preset" (page 13). repeatedly to select the desired preset number. 5 Press ENTER on the remote. 6 Repeat steps 1 through 6 of "Manual tuning preset" (page 13). 3 Press TUNER MEMORY on the remote. Other Operations To Tune in steps 2 through 5 to the existing preset number Do this Follow the procedure described in the desired station. 3 Press TUNER MEMORY on the remote. The frequency changes as described in a station with a weak signal Set another station to...
... tune in "Manual tuning preset" (page 13). repeatedly to select the desired preset number. 5 Press ENTER on the remote. 6 Repeat steps 1 through 6 of "Manual tuning preset" (page 13). 3 Press TUNER MEMORY on the remote. Other Operations To Tune in steps 2 through 5 to the existing preset number Do this Follow the procedure described in the desired station. 3 Press TUNER MEMORY on the remote. The frequency changes as described in a station with a weak signal Set another station to...
Operating Instructions
Page 14
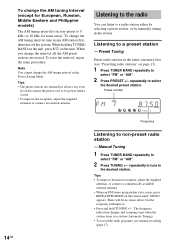
When you disconnect the power cord or if a power failure occurs. • To improve the reception, adjust the supplied antennas or connect an external antenna. repeatedly to tune in the desired station. repeatedly to select the desired preset station. Preset Tuning Preset radio stations in the tuner's memory first (see "Presetting radio stations" on the remote until "MONO" appears. Preset number 14GB Frequency Listening to a preset station - Listening to non-preset radio station - To change the AM tuning interval (except for European, Russian...
When you disconnect the power cord or if a power failure occurs. • To improve the reception, adjust the supplied antennas or connect an external antenna. repeatedly to tune in the desired station. repeatedly to select the desired preset station. Preset Tuning Preset radio stations in the tuner's memory first (see "Presetting radio stations" on the remote until "MONO" appears. Preset number 14GB Frequency Listening to a preset station - Listening to non-preset radio station - To change the AM tuning interval (except for European, Russian...
Operating Instructions
Page 15
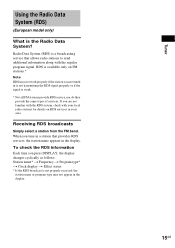
... select a station from the FM band. Using the Radio Data System (RDS) (European model only) What is not properly received, the station name or program type may not work properly if the station you are not familiar with the RDS system, check with the regular program signal. When you are tuned in is not transmitting the RDS signal properly or if the signal is a broadcasting service...
... select a station from the FM band. Using the Radio Data System (RDS) (European model only) What is not properly received, the station name or program type may not work properly if the station you are not familiar with the RDS system, check with the regular program signal. When you are tuned in is not transmitting the RDS signal properly or if the signal is a broadcasting service...
Operating Instructions
Page 17
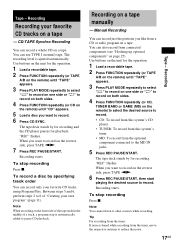
... a tape manually - The recording level is automatically added to record. • CD: To record from this system's CD player. • TUNER: To record from this system's tuner. • MD: To record from connected components (see "Hooking up optional components" on a tape. "REC" flashes. Note When recording on a tape. The tape deck stands by for the operation. 1 Load a recordable tape. 2 Press FUNCTION repeatedly (or TAPE A/B on the remote) until "TAPE" appears. 3 Press PLAY MODE...
... a tape manually - The recording level is automatically added to record. • CD: To record from this system's CD player. • TUNER: To record from this system's tuner. • MD: To record from connected components (see "Hooking up optional components" on a tape. "REC" flashes. Note When recording on a tape. The tape deck stands by for the operation. 1 Load a recordable tape. 2 Press FUNCTION repeatedly (or TAPE A/B on the remote) until "TAPE" appears. 3 Press PLAY MODE...
Operating Instructions
Page 20
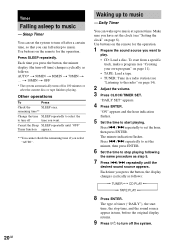
... automatically turns off time) changes cyclically as follows: t TUNER y CD PLAY T t TAPE PLAY T 8 Press ENTER. Make sure you press the button, the minute display (the turn-off in a radio station (see "Setting the clock" on the remote for the operation. 1 Prepare the sound source you select "AUTO". Use buttons on page 14). 2 Adjust the volume. 3 Press CLOCK/TIMER SET. "ON" appears and the hour indication flashes. 5 Set the time to play. • CD: Load a disc. Timer Falling asleep to music - Use buttons...
... automatically turns off time) changes cyclically as follows: t TUNER y CD PLAY T t TAPE PLAY T 8 Press ENTER. Make sure you press the button, the minute display (the turn-off in a radio station (see "Setting the clock" on the remote for the operation. 1 Prepare the sound source you select "AUTO". Use buttons on page 14). 2 Adjust the volume. 3 Press CLOCK/TIMER SET. "ON" appears and the hour indication flashes. 5 Set the time to play. • CD: Load a disc. Timer Falling asleep to music - Use buttons...
Operating Instructions
Page 21
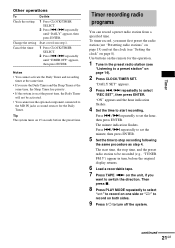
... tape. 7 Press TAPE nN on the unit, if you use the optional component connected to set the clock (see "Setting the clock" on the remote for the Daily Timer. "ON" appears and the hour indication flashes. 4 Set the time to switch the direction. To timer record, you must first preset the radio station (see "Listening to a preset station" on page 13) and set the minute, then press ENTER. 5 Set the time...
... tape. 7 Press TAPE nN on the unit, if you use the optional component connected to set the clock (see "Setting the clock" on the remote for the Daily Timer. "ON" appears and the hour indication flashes. 4 Set the time to switch the direction. To timer record, you must first preset the radio station (see "Listening to a preset station" on page 13) and set the minute, then press ENTER. 5 Set the time...
Operating Instructions
Page 22
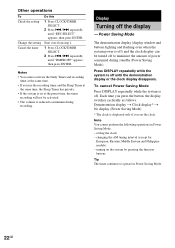
Power Saving Mode The demonstration display (display window and buttons lighting and flashing even when the system power is off) and the clock display can be activated. • The volume is off to operate in Power Saving Mode. - Note You cannot perform the following operations in Power Saving Mode. 22GB changing the AM tuning interval (except for European, Russian, Middle Eastern and Philippine models) - turning on at the preset time, the timer recording...
Power Saving Mode The demonstration display (display window and buttons lighting and flashing even when the system power is off) and the clock display can be activated. • The volume is off to operate in Power Saving Mode. - Note You cannot perform the following operations in Power Saving Mode. 22GB changing the AM tuning interval (except for European, Russian, Middle Eastern and Philippine models) - turning on at the preset time, the timer recording...
Operating Instructions
Page 25
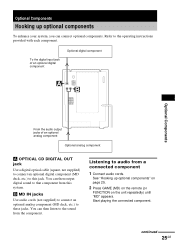
... to that component from a connected component 1 Connect audio cords. To the digital input jack of an optional digital component Optional digital component Optional Components From the audio output jacks of an optional analog component Optional analog component A OPTICAL CD DIGITAL OUT jack Use a digital optical cable (square, not supplied) to connect an optional digital component (MD deck, etc.) to the operating instructions provided with each component. See "Hooking up optional components To enhance your system, you can then output digital sound to audio from this jack. Refer...
... to that component from a connected component 1 Connect audio cords. To the digital input jack of an optional digital component Optional digital component Optional Components From the audio output jacks of an optional analog component Optional analog component A OPTICAL CD DIGITAL OUT jack Use a digital optical cable (square, not supplied) to connect an optional digital component (MD deck, etc.) to the operating instructions provided with each component. See "Hooking up optional components To enhance your system, you can then output digital sound to audio from this jack. Refer...
Operating Instructions
Page 27
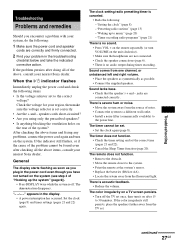
... nearest Sony dealer. Sound comes from the fluorescent light. jacks are not connected. • Check the speaker connections (page 6). • There is no audio output during timer recording. The remote does not function. • Remove the obstacle. • Move the remote closer to music" (page 20) -"Timer recording radio programs" (page 21) There is no sound. • Press VOL + on the remote repeatedly (or turn on the rear of "Hooking...
... nearest Sony dealer. Sound comes from the fluorescent light. jacks are not connected. • Check the speaker connections (page 6). • There is no audio output during timer recording. The remote does not function. • Remove the obstacle. • Move the remote closer to music" (page 20) -"Timer recording radio programs" (page 21) There is no sound. • Press VOL + on the remote repeatedly (or turn on the rear of "Hooking...
Operating Instructions
Page 28
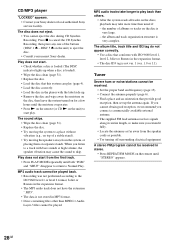
...). • Replace the disc. • Load the disc that conforms with ISO 9660 level 1, level 2, Joliet or Romeo in stereo. • Press REPEAT/FM MODE on the disc is not stored in the player with bass sounds at high volume, the speaker vibration may take longer to Normal Play. the album and track organization structure is loaded (The DISC indicator lights up the antenna again. Tuner Severe hum...
...). • Replace the disc. • Load the disc that conforms with ISO 9660 level 1, level 2, Joliet or Romeo in stereo. • Press REPEAT/FM MODE on the disc is not stored in the player with bass sounds at high volume, the speaker vibration may take longer to Normal Play. the album and track organization structure is loaded (The DISC indicator lights up the antenna again. Tuner Severe hum...
Operating Instructions
Page 29
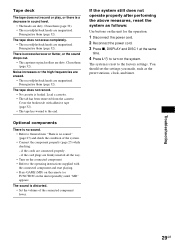
... as follows: Use buttons on the uint repeatedly) until "MD" appears. The sound is no sound." (page 27) and check the condition of the connected component lower. Tape deck The tape does not record or play, or there is no sound. • Refer to the factory settings. Demagnetise them (page 32). The system is reset to General item "There is a decrease in sound level. • The...
... as follows: Use buttons on the uint repeatedly) until "MD" appears. The sound is no sound." (page 27) and check the condition of the connected component lower. Tape deck The tape does not record or play, or there is no sound. • Refer to the factory settings. Demagnetise them (page 32). The system is reset to General item "There is a decrease in sound level. • The...
Operating Instructions
Page 31
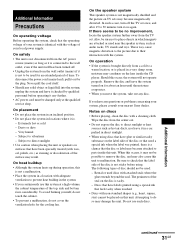
... again. Also, be used near the speaker system, such as it is connected to be used for an extended period of time. Should this system at the qualified service shop. Notes on discs • Before playing, clean the disc with the voltage of your local power supply. On safety ...the plug. Discs that have been specially treated (with the system. Very humid - Remove the disc and leave the system turned on TV sets may result. Be sure to parts inside the CD player. Additional Information Precautions On operating voltage Before operating the system, check that the operating ...
... again. Also, be used near the speaker system, such as it is connected to be used for an extended period of time. Should this system at the qualified service shop. Notes on discs • Before playing, clean the disc with the voltage of your local power supply. On safety ...the plug. Discs that have been specially treated (with the system. Very humid - Remove the disc and leave the system turned on TV sets may result. Be sure to parts inside the CD player. Additional Information Precautions On operating voltage Before operating the system, check that the operating ...
Operating Instructions
Page 32
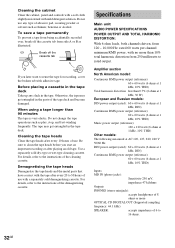
... RMS power output (reference): 60 + 60 watts (6 ohms at 1 kHz, 10% THD) Inputs MD IN (phono jacks): Sensitivity 250 mV, impedance 47 kilohms Outputs PHONES (stereo minijack): accepts headphones of the tape deck and become damaged. Cleaning the tape heads Clean the tape heads after playing an old tape. The tape may get entangled in the tape deck Take up any type of the cleaning cassette. Do not change the tape operations...
... RMS power output (reference): 60 + 60 watts (6 ohms at 1 kHz, 10% THD) Inputs MD IN (phono jacks): Sensitivity 250 mV, impedance 47 kilohms Outputs PHONES (stereo minijack): accepts headphones of the tape deck and become damaged. Cleaning the tape heads Clean the tape heads after playing an old tape. The tape may get entangled in the tape deck Take up any type of the cleaning cassette. Do not change the tape operations...
Operating Instructions
Page 33
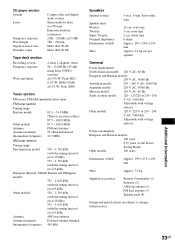
...: Remote Commander (1) Batteries (2) AM loop antenna (1) FM lead antenna (1) Speaker pads (8) Design and specifications are subject to -noise ratio Dynamic range Compact disc and digital audio system Semiconductor laser (λ=780 nm) Emission duration: continuous 2 Hz - 20 kHz (±0.5 dB) 780 - 790 nm More than 90 dB More than 90 dB Tape deck section Recording system Frequency response Wow and flutter 4-track 2-channel, stereo 50...
...: Remote Commander (1) Batteries (2) AM loop antenna (1) FM lead antenna (1) Speaker pads (8) Design and specifications are subject to -noise ratio Dynamic range Compact disc and digital audio system Semiconductor laser (λ=780 nm) Emission duration: continuous 2 Hz - 20 kHz (±0.5 dB) 780 - 790 nm More than 90 dB More than 90 dB Tape deck section Recording system Frequency response Wow and flutter 4-track 2-channel, stereo 50...


