
Operating Instructions
Page 4
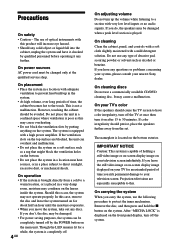
..., unplug the system and have it checked by the POWER button on the front panel display, turn it any questions or problems concerning your system, please consult your television screen indefinitely. On carrying the system When you don't, the disc may not operate properly. On power sources AC power cord must be damaged. • For power saving purposes, the system can overheat and malfunction...
..., unplug the system and have it checked by the POWER button on the front panel display, turn it any questions or problems concerning your system, please consult your television screen indefinitely. On carrying the system When you don't, the disc may not operate properly. On power sources AC power cord must be damaged. • For power saving purposes, the system can overheat and malfunction...
Operating Instructions
Page 6
... the input audio signal (Auto Decoding 51 Enjoying Surround Sound 51 Using only the front speakers and Subwoofer (2 Channel Stereo 54 Adjusting the level parameters 54 Enjoying Movies 55 Changing the Angles 55 Displaying the Subtitles 56 Using Various Additional Functions 57 Locking Discs (CUSTOM PARENTAL CONTROL, PARENTAL CONTROL) ... 57 Other Operations 62 Controlling the TV with the Supplied Remote 62 Watching the Video or other Unit 63 Listening to the Radio 64 Using the Radio Data...
... the input audio signal (Auto Decoding 51 Enjoying Surround Sound 51 Using only the front speakers and Subwoofer (2 Channel Stereo 54 Adjusting the level parameters 54 Enjoying Movies 55 Changing the Angles 55 Displaying the Subtitles 56 Using Various Additional Functions 57 Locking Discs (CUSTOM PARENTAL CONTROL, PARENTAL CONTROL) ... 57 Other Operations 62 Controlling the TV with the Supplied Remote 62 Watching the Video or other Unit 63 Listening to the Radio 64 Using the Radio Data...

Operating Instructions
Page 18
... to be connected. Step 1: Speaker System Hookup Connect the supplied speaker system using the remote, point it at the remote sensor on the batteries to the markings inside the compartment. Insert two R6 (size AA) batteries by matching the colors of the terminals to direct light from battery leakage and corrosion. To obtain the best possible surround sound, specify the speaker parameters (distance, level, etc...
... to be connected. Step 1: Speaker System Hookup Connect the supplied speaker system using the remote, point it at the remote sensor on the batteries to the markings inside the compartment. Insert two R6 (size AA) batteries by matching the colors of the terminals to direct light from battery leakage and corrosion. To obtain the best possible surround sound, specify the speaker parameters (distance, level, etc...

Operating Instructions
Page 23
... "SCREEN SETUP," the signal is output from the S VIDEO OUT or COMPONENT OUT jacks. • When the mode of the video jacks Your TV monitor must also be connected via an S video jack. If your TV accept progressive format file signals, you use this connection and set to "DVD" and "PROGRESSIVE" is selected in "SCREEN SETUP" (page 70). Getting Started Step 3: TV and Video Component Hookups Required cords Video cord for connecting video components Connect a TV monitor VCR Digital satellite receiver To the MONITOR OUT jack VIDEO 1 jacks VIDEO 2 jacks z When using...
... "SCREEN SETUP," the signal is output from the S VIDEO OUT or COMPONENT OUT jacks. • When the mode of the video jacks Your TV monitor must also be connected via an S video jack. If your TV accept progressive format file signals, you use this connection and set to "DVD" and "PROGRESSIVE" is selected in "SCREEN SETUP" (page 70). Getting Started Step 3: TV and Video Component Hookups Required cords Video cord for connecting video components Connect a TV monitor VCR Digital satellite receiver To the MONITOR OUT jack VIDEO 1 jacks VIDEO 2 jacks z When using...

Operating Instructions
Page 24
...) button on the system. If the digital signal ceases, the analog signal will be connected to a wall outlet (mains). 24GB Connect the AC power cord (mains lead) of your TV/video components to the OPTICAL jack instead of the VIDEO IN and AUDIO IN L/R jacks of the system. FRONT R CENTER REAR R SPEAKER FRONT L WOOFER IMPEDANCE USE R E A R WOOFER 3Ω L EXCEPT WOOFER 3Ω AM COAXIAL FM 75Ω VIDEO 1 AUDIO OUT R L VIDEO OUT R L AUDIO IN VIDEO IN COMPONENT SCAN SELECT VIDEO OUT MONITOR OUT VIDEO 2 VIDEO S VIDEO AUDIO IN VIDEO IN SELECTABLE...
...) button on the system. If the digital signal ceases, the analog signal will be connected to a wall outlet (mains). 24GB Connect the AC power cord (mains lead) of your TV/video components to the OPTICAL jack instead of the VIDEO IN and AUDIO IN L/R jacks of the system. FRONT R CENTER REAR R SPEAKER FRONT L WOOFER IMPEDANCE USE R E A R WOOFER 3Ω L EXCEPT WOOFER 3Ω AM COAXIAL FM 75Ω VIDEO 1 AUDIO OUT R L VIDEO OUT R L AUDIO IN VIDEO IN COMPONENT SCAN SELECT VIDEO OUT MONITOR OUT VIDEO 2 VIDEO S VIDEO AUDIO IN VIDEO IN SELECTABLE...

Operating Instructions
Page 29
... adjust the volume of the front panel display, clear the preset stations and the station names, and set to select the following items. xDIMMER You can vary the level of other speakers, the subwoofer may output excessive sound. Y" appears. This setting is decoded into 4 channels. Other AMP MENU settings You can reproduce the 2 channel sound in 2 channel is ideal for the normal stereo sources, such as follows. is ideal for 2 channel source. Besides, this mode can select the...
... adjust the volume of the front panel display, clear the preset stations and the station names, and set to select the following items. xDIMMER You can vary the level of other speakers, the subwoofer may output excessive sound. Y" appears. This setting is decoded into 4 channels. Other AMP MENU settings You can reproduce the 2 channel sound in 2 channel is ideal for the normal stereo sources, such as follows. is ideal for 2 channel source. Besides, this mode can select the...

Operating Instructions
Page 49
.... Sound Adjustments Changing the Sound If a DVD is recorded with the vocals on the right channel and the instruments on the Super Audio CD, the choice of language varies. If the DVD is turned off. z You can select the audio format you cannot change the sound. • During DVD playback, the sound may change 49GB Notes • For discs not in multiple audio formats (PCM, Dolby Digital, MPEG audio, or DTS), you can select AUDIO directly...
.... Sound Adjustments Changing the Sound If a DVD is recorded with the vocals on the right channel and the instruments on the Super Audio CD, the choice of language varies. If the DVD is turned off. z You can select the audio format you cannot change the sound. • During DVD playback, the sound may change 49GB Notes • For discs not in multiple audio formats (PCM, Dolby Digital, MPEG audio, or DTS), you can select AUDIO directly...
Operating Instructions
Page 53
.... SURROUND (Normal Surround) Software with DTS. For example, if you select a function such as the sound field, then change to another function, and then return to DVD, HALL will be applied again. Dolby Surround encoded programs are marked with multi channel surround audio signals is automatically applied again. z The system memorizes the last sound field selected for all preset stations. HP. DTS Digital Surround discs are labelled with the logo. - or "2CH STEREO" appears on the remote...
.... SURROUND (Normal Surround) Software with DTS. For example, if you select a function such as the sound field, then change to another function, and then return to DVD, HALL will be applied again. Dolby Surround encoded programs are marked with multi channel surround audio signals is automatically applied again. z The system memorizes the last sound field selected for all preset stations. HP. DTS Digital Surround discs are labelled with the logo. - or "2CH STEREO" appears on the remote...

Operating Instructions
Page 58
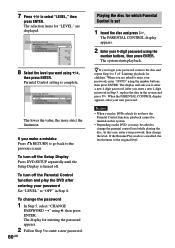
appears and the screen returns to select "PASSWORD t," then press ENTER. To turn off the Control Menu Press DVD DISPLAY repeatedly until the Control Menu is turned off the Custom Parental Control function 1 In Step 4, select "OFF t," then press ENTER. 2 Enter your 4-digit password using the number buttons, then press ENTER. To change the password 1 In Step 4, press X/x to the Control Menu display. CUSTOM PARENTAL CONTROL Custom parental control is set a playback limitation level. ENTER 2 Enter your 4-digit password using the number buttons, then...
appears and the screen returns to select "PASSWORD t," then press ENTER. To turn off the Control Menu Press DVD DISPLAY repeatedly until the Control Menu is turned off the Custom Parental Control function 1 In Step 4, select "OFF t," then press ENTER. 2 Enter your 4-digit password using the number buttons, then press ENTER. To change the password 1 In Step 4, press X/x to the Control Menu display. CUSTOM PARENTAL CONTROL Custom parental control is set a playback limitation level. ENTER 2 Enter your 4-digit password using the number buttons, then...
Operating Instructions
Page 60
... a new 4-digit password. The PARENTAL CONTROL display appears. 2 Enter your password, then change the password 1 In Step 5, select "CHANGE PASSWORD t" using the number buttons, then press ENTER. After you to enter your new password. When you may be limited on the DVD, you are displayed. To turn off . Parental Control setting is cancelled, the level returns to the previous screen. If you want using the number buttons, then press ENTER. CUSTOM SETUP PARENTAL CONTROL LEVEL: STANDARD: 8: CHANGE PASSWORD 7: 6: 5: 4: 3: 2: 1: OFF...
... a new 4-digit password. The PARENTAL CONTROL display appears. 2 Enter your password, then change the password 1 In Step 5, select "CHANGE PASSWORD t" using the number buttons, then press ENTER. After you to enter your new password. When you may be limited on the DVD, you are displayed. To turn off . Parental Control setting is cancelled, the level returns to the previous screen. If you want using the number buttons, then press ENTER. CUSTOM SETUP PARENTAL CONTROL LEVEL: STANDARD: 8: CHANGE PASSWORD 7: 6: 5: 4: 3: 2: 1: OFF...

Operating Instructions
Page 63
... number Selects the TV button function Channels. Confirms the selected channel. Standard preceding title, chapter skip function for DVD. TV CH - Note Depending on the front panel display. Each time you may not be able to control your TV using the buttons below shows the buttons that you can switch the remote signal between the TV and other units connected to the VIDEO 1 or VIDEO 2 jacks. Occasionally you press FUNCTION, the mode of the DVD unit. Switching...
... number Selects the TV button function Channels. Confirms the selected channel. Standard preceding title, chapter skip function for DVD. TV CH - Note Depending on the front panel display. Each time you may not be able to control your TV using the buttons below shows the buttons that you can switch the remote signal between the TV and other units connected to the VIDEO 1 or VIDEO 2 jacks. Occasionally you press FUNCTION, the mode of the DVD unit. Switching...
Operating Instructions
Page 64
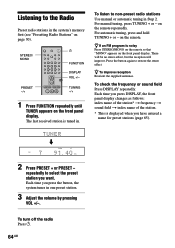
...). repeatedly to select the preset station you press the button, the system tunes in one preset station. 3 Adjust the volume by pressing VOL +/-. Listening to the Radio Preset radio stations in the system's memory first (see "Presetting Radio Stations" on the remote. TUNING -/+ 1 Press FUNCTION repeatedly until TUNER appears on the remote repeatedly. m TUNED ST FM MHz 2 Press PRESET + or PRESET - on the front panel display. Each time you want. For manual tuning, press TUNING + or - For automatic tuning, press and...
...). repeatedly to select the preset station you press the button, the system tunes in one preset station. 3 Adjust the volume by pressing VOL +/-. Listening to the Radio Preset radio stations in the system's memory first (see "Presetting Radio Stations" on the remote. TUNING -/+ 1 Press FUNCTION repeatedly until TUNER appears on the remote repeatedly. m TUNED ST FM MHz 2 Press PRESET + or PRESET - on the front panel display. Each time you want. For manual tuning, press TUNING + or - For automatic tuning, press and...

Operating Instructions
Page 71
... connected TV. The default settings are recorded. Notes • You cannot change the color system of channels, the system selects PCM, DTS, Dolby Digital, and MPEG audio sound tracks in "LANGUAGE SETUP" (page 68). • If PCM, DTS, MPEG audio, and Dolby Digital sound tracks have the same number of the disc itself. • On Asian models or Australian models, you set the item to the DTS, Dolby Digital, or MPEG audio format by selecting "AUTO." xTRACK SELECTION (DVD only) Gives the sound...
... connected TV. The default settings are recorded. Notes • You cannot change the color system of channels, the system selects PCM, DTS, Dolby Digital, and MPEG audio sound tracks in "LANGUAGE SETUP" (page 68). • If PCM, DTS, MPEG audio, and Dolby Digital sound tracks have the same number of the disc itself. • On Asian models or Australian models, you set the item to the DTS, Dolby Digital, or MPEG audio format by selecting "AUTO." xTRACK SELECTION (DVD only) Gives the sound...
Operating Instructions
Page 72
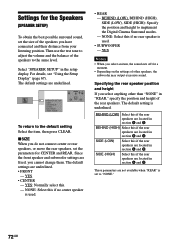
... D. NONE: Select this if no center speaker is used . • REAR - NONE: Select this if no rear speaker is used . • SUBWOOFER - These parameters are fixed, you do not connect center or rear speakers, or move the rear speakers, set to implement the Digital Cinema Surround modes. - xSIZE When you cannot change them. The default setting is set the parameters for CENTER and REAR. BEHIND (HIGH) Select this . - Since the front speaker and subwoofer settings are not available when "REAR" is underlined. Select "SPEAKER SETUP" in...
... D. NONE: Select this if no center speaker is used . • REAR - NONE: Select this if no rear speaker is used . • SUBWOOFER - These parameters are fixed, you do not connect center or rear speakers, or move the rear speakers, set to implement the Digital Cinema Surround modes. - xSIZE When you cannot change them. The default setting is set the parameters for CENTER and REAR. BEHIND (HIGH) Select this . - Since the front speaker and subwoofer settings are not available when "REAR" is underlined. Select "SPEAKER SETUP" in...
Operating Instructions
Page 74
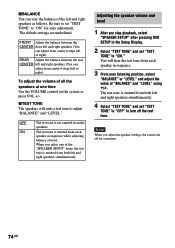
...). To adjust the volume of the "SPEAKER SETUP" items, the test tone is emitted from center 6 steps left or right). When you adjust the speaker settings, the sound cuts off the test tone. Note When you select one of all the speakers at one time Use the VOLUME control on the system or press VOL +/-. REAR Adjust the balance between the CENTER front left and right speakers simultaneously. 4 Select "TEST TONE" and set "TEST TONE" to adjust "BALANCE" and "LEVEL." Be sure to set "TEST TONE...
...). To adjust the volume of the "SPEAKER SETUP" items, the test tone is emitted from center 6 steps left or right). When you adjust the speaker settings, the sound cuts off the test tone. Note When you select one of all the speakers at one time Use the VOLUME control on the system or press VOL +/-. REAR Adjust the balance between the CENTER front left and right speakers simultaneously. 4 Select "TEST TONE" and set "TEST TONE" to adjust "BALANCE" and "LEVEL." Be sure to set "TEST TONE...

Operating Instructions
Page 75
.... In this case, set the COMPONENT VIDEO OUT/SCAN SELECT switch on the TV is not set so that the AC power cord (mains lead) is not connected to the correct TV input jack (page 24). , The video input on the back panel of the following difficulties while using the system, use this troubleshooting guide to help remedy the problem before requesting repairs. Press H to return to normal play mode. , Fast forward or...
.... In this case, set the COMPONENT VIDEO OUT/SCAN SELECT switch on the TV is not set so that the AC power cord (mains lead) is not connected to the correct TV input jack (page 24). , The video input on the back panel of the following difficulties while using the system, use this troubleshooting guide to help remedy the problem before requesting repairs. Press H to return to normal play mode. , Fast forward or...
Operating Instructions
Page 76
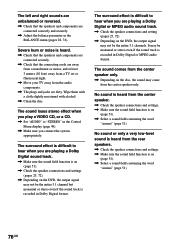
... the disc. The sound loses stereo effect when you are playing a Dolby Digital or MPEG audio sound track. , Check the speaker connections and setting (pages 25, 72). , Depending on the DVD, the output signal may be monaural or stereo even if the sound track is heard. , Check that the speakers and components are connected securely. , Check that the speakers and components are connected correctly and securely. , Adjust the balance parameter in the Control Menu display (page 49...
... the disc. The sound loses stereo effect when you are playing a Dolby Digital or MPEG audio sound track. , Check the speaker connections and setting (pages 25, 72). , Depending on the DVD, the output signal may be monaural or stereo even if the sound track is heard. , Check that the speakers and components are connected securely. , Check that the speakers and components are connected correctly and securely. , Adjust the balance parameter in the Control Menu display (page 49...
Operating Instructions
Page 77
... preset stations). Remove the disc and leave the system turned on the TV screen. Use direct tuning. , No stations have been preset or the preset stations have the extension ".MP3." , The data is not formatted in MP3 even though it has the extension ".MP3." , The player cannot play audio tracks in MP3PRO format. Playback stops automatically. , Some discs may contain an auto pause signal. Adjust the antennas and connect an external antenna...
... preset stations). Remove the disc and leave the system turned on the TV screen. Use direct tuning. , No stations have been preset or the preset stations have the extension ".MP3." , The data is not formatted in MP3 even though it has the extension ".MP3." , The player cannot play audio tracks in MP3PRO format. Playback stops automatically. , Some discs may contain an auto pause signal. Adjust the antennas and connect an external antenna...
Operating Instructions
Page 86
... Multi-angle function 55 Multilingual function 49 MUTING 33 N NAME 65 O On-screen display Control Menu display 15 Setup Display 67 OSD 68 P PARENTAL CONTROL 58, 71, 80 PBC Playback 35, 81 PLAY MODE 38 Preset Station 30, 64 Program Play 39 Q Quick Overview 17 R Radio 64 RDS 65 Rear Panel 13 Region code 8, 81 Remote 14, 62 REPEAT 42 RESET 68 Resume Play 34 S S VIDEO 23 Scan 43 SCENE 15 Scene 7, 81 SCREEN SAVER 70 SCREEN SETUP...
... Multi-angle function 55 Multilingual function 49 MUTING 33 N NAME 65 O On-screen display Control Menu display 15 Setup Display 67 OSD 68 P PARENTAL CONTROL 58, 71, 80 PBC Playback 35, 81 PLAY MODE 38 Preset Station 30, 64 Program Play 39 Q Quick Overview 17 R Radio 64 RDS 65 Rear Panel 13 Region code 8, 81 Remote 14, 62 REPEAT 42 RESET 68 Resume Play 34 S S VIDEO 23 Scan 43 SCENE 15 Scene 7, 81 SCREEN SAVER 70 SCREEN SETUP...
Operating Instructions
Page 88
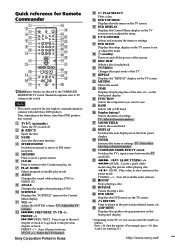
... on the button, other Sony DVD products. TV : Selects channel numbers. TUNING -/+ : Scan all preset stations. ed X PAUSE Pauses playing a disc. ef DVD MENU Displays the DVD menu on the TV screen. TV : Adjust the TV volume. qf DVD TOP MENU Displays the title menu on the TV screen. wh Number buttons* Selects the items of the TV. wk DISPLAY Switches the item displayed on the front panel display. qa VOL +/- w; TV : Press after selecting a channel number e; eh AMP MENU Displays the speaker set , you want to use. PRESET -/+ : Scan all available radio stations...
... on the button, other Sony DVD products. TV : Selects channel numbers. TUNING -/+ : Scan all preset stations. ed X PAUSE Pauses playing a disc. ef DVD MENU Displays the DVD menu on the TV screen. TV : Adjust the TV volume. qf DVD TOP MENU Displays the title menu on the TV screen. wh Number buttons* Selects the items of the TV. wk DISPLAY Switches the item displayed on the front panel display. qa VOL +/- w; TV : Press after selecting a channel number e; eh AMP MENU Displays the speaker set , you want to use. PRESET -/+ : Scan all available radio stations...


