
Operating Instructions
Page 4
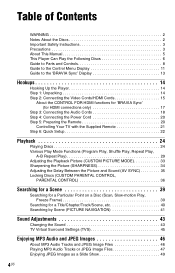
... Sync' (for HDMI connections only 17 Step 3: Connecting the Audio Cords 18 Step 4: Connecting the Power Cord 20 Step 5: Preparing the Remote 20 Controlling Your TV with the Supplied Remote 21 Step 6: Quick Setup 22 Playback 24 Playing Discs 24 Various Play Mode Functions (Program Play, Shuffle Play, Repeat Play, A-B Repeat Play...
... Sync' (for HDMI connections only 17 Step 3: Connecting the Audio Cords 18 Step 4: Connecting the Power Cord 20 Step 5: Preparing the Remote 20 Controlling Your TV with the Supplied Remote 21 Step 6: Quick Setup 22 Playback 24 Playing Discs 24 Various Play Mode Functions (Program Play, Shuffle Play, Repeat Play, A-B Repeat Play...
Operating Instructions
Page 5
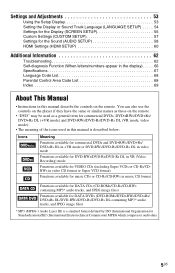
... Language Code List 68 Parental Control Area Code List 68 Index 69 About This Manual • Instructions in this manual describe the controls on the remote. • "DVD" may be used as a general term for commercial DVDs, DVD+RWs/DVD+Rs/ DVD+Rs DL (+VR mode) and DVD-RWs/DVD-Rs... compresses audio data. 5US You can also use the controls on the player if they have the same or similar names as those on the remote.
... Language Code List 68 Parental Control Area Code List 68 Index 69 About This Manual • Instructions in this manual describe the controls on the remote. • "DVD" may be used as a general term for commercial DVDs, DVD+RWs/DVD+Rs/ DVD+Rs DL (+VR mode) and DVD-RWs/DVD-Rs... compresses audio data. 5US You can also use the controls on the player if they have the same or similar names as those on the remote.
Operating Instructions
Page 8
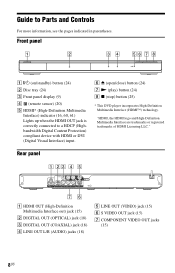
Front panel HDMI A [/1 (on/standby) button (24) B Disc tray (24) C Front panel display (9) D (remote sensor) (20) E HDMI* (High-Definition Multimedia Interface) indicator (16, 60, 61) Lights up when the HDMI OUT jack is correctly connected to Parts and Controls ...
Front panel HDMI A [/1 (on/standby) button (24) B Disc tray (24) C Front panel display (9) D (remote sensor) (20) E HDMI* (High-Definition Multimedia Interface) indicator (16, 60, 61) Lights up when the HDMI OUT jack is correctly connected to Parts and Controls ...

Operating Instructions
Page 10
... dot.* X x STOP button (25) Y X PAUSE button (25) Z SUR (surround) button (45) wj ANGLE button (25) * Use the tactile dot as a reference when operating the player. Remote A TV [/1 (on/standby) button (21) B Z OPEN/CLOSE button (25) C Number buttons (27) The number 5 button has a tactile dot.* D CLEAR button (30) E TOP MENU button (26...
... dot.* X x STOP button (25) Y X PAUSE button (25) Z SUR (surround) button (45) wj ANGLE button (25) * Use the tactile dot as a reference when operating the player. Remote A TV [/1 (on/standby) button (21) B Z OPEN/CLOSE button (25) C Number buttons (27) The number 5 button has a tactile dot.* D CLEAR button (30) E TOP MENU button (26...
Operating Instructions
Page 13
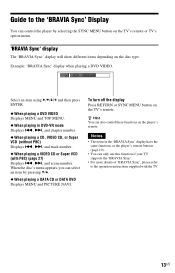
...9670; When playing a DVD VIDEO Displays MENU and TOP MENU. ◆ When playing in the 'BRAVIA Sync' display have the same functions as the player's remote buttons (page 10). • You can only use this function if your TV supports the 'BRAVIA Sync'. • For more details of 'BRAVIA Sync', please... playing a DATA CD or DATA DVD Displays MENU and PICTURE NAVI. To turn off the display Press RETURN or SYNC MENU button on the player's remote. Notes • The items in DVD-VR mode Displays ., >, and chapter number. ◆ When playing a CD, VIDEO CD, or Super VCD (without PBC) Displays ., ...
...9670; When playing a DVD VIDEO Displays MENU and TOP MENU. ◆ When playing in the 'BRAVIA Sync' display have the same functions as the player's remote buttons (page 10). • You can only use this function if your TV supports the 'BRAVIA Sync'. • For more details of 'BRAVIA Sync', please... playing a DATA CD or DATA DVD Displays MENU and PICTURE NAVI. To turn off the display Press RETURN or SYNC MENU button on the player's remote. Notes • The items in DVD-VR mode Displays ., >, and chapter number. ◆ When playing a CD, VIDEO CD, or Super VCD (without PBC) Displays ., ...

Operating Instructions
Page 14
... component before connecting. Step 1: Unpacking Check that does not have the following items: • Audio/Video cord (phono plug × 3 y phono plug × 3) (1) • Remote commander (remote) (1) • R6 (size AA) batteries (2) A plug adaptor is included with some models. 14US Hookups Hooking Up the Player Follow steps 1 to 6 to disconnect the power...
... component before connecting. Step 1: Unpacking Check that does not have the following items: • Audio/Video cord (phono plug × 3 y phono plug × 3) (1) • Remote commander (remote) (1) • R6 (size AA) batteries (2) A plug adaptor is included with some models. 14US Hookups Hooking Up the Player Follow steps 1 to 6 to disconnect the power...
Operating Instructions
Page 17
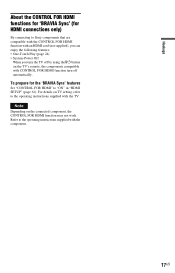
... the operating instructions supplied with CONTROL FOR HDMI function turn off automatically. Note Depending on the TV's remote, the components compatible with the component. 17US To prepare for HDMI connections only) By connecting to Sony components that are compatible with the CONTROL FOR HDMI function with an HDMI cord (not supplied), you...
... the operating instructions supplied with CONTROL FOR HDMI function turn off automatically. Note Depending on the TV's remote, the components compatible with the component. 17US To prepare for HDMI connections only) By connecting to Sony components that are compatible with the CONTROL FOR HDMI function with an HDMI cord (not supplied), you...

Operating Instructions
Page 20
... sun or a lighting apparatus. Insert two R6 (size AA) batteries by matching the 3 and # ends on the player. Notes • Do not leave the remote in an extremely hot or humid place. • Do not drop any foreign object into an AC outlet. When using the supplied... the player and TV power cords into the remote casing, particularly when replacing the batteries. • Do not expose the remote sensor to the markings inside the compartment. Step 5: Preparing the Remote You can control the player using the remote, point it at the remote sensor on the batteries to direct light from ...
... sun or a lighting apparatus. Insert two R6 (size AA) batteries by matching the 3 and # ends on the player. Notes • Do not leave the remote in an extremely hot or humid place. • Do not drop any foreign object into an AC outlet. When using the supplied... the player and TV power cords into the remote casing, particularly when replacing the batteries. • Do not expose the remote sensor to the markings inside the compartment. Step 5: Preparing the Remote You can control the player using the remote, point it at the remote sensor on the batteries to direct light from ...
Operating Instructions
Page 21
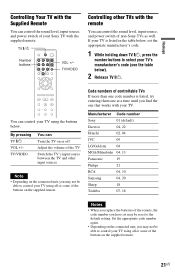
... may not be able to control your TV using all or some of the buttons on the supplied remote. 21US TV/VIDEO You can control your TV using the buttons below. Manufacturer Code number Sony 01 (default) Daewoo 04, 22 Hitachi 02, 04 JVC 09 LG/Goldstar 04 MGA/Mitsubishi 04, 13... one code number is listed in the table below ). 2 Release TV [/1. Hookups Controlling Your TV with the Supplied Remote You can control the sound level, input source, and power switch of non-Sony TVs as well. If your TV is listed, try entering them one at a time until you have set the...
... may not be able to control your TV using all or some of the buttons on the supplied remote. 21US TV/VIDEO You can control your TV using the buttons below. Manufacturer Code number Sony 01 (default) Daewoo 04, 22 Hitachi 02, 04 JVC 09 LG/Goldstar 04 MGA/Mitsubishi 04, 13... one code number is listed in the table below ). 2 Release TV [/1. Hookups Controlling Your TV with the Supplied Remote You can control the sound level, input source, and power switch of non-Sony TVs as well. If your TV is listed, try entering them one at a time until you have set the...
Operating Instructions
Page 24
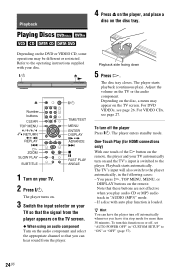
... operating instructions supplied with auto play ). For VIDEO CDs, see page 26. Playback starts automatically. Note that you can have the player turn on the remote, the player and your TV. 2 Press [/1. Depending on the TV screen. You press H, TOP MENU, MENU, or DISPLAY buttons on the disc ...tray. Playback Playing Discs 4 Press Z on the player, and place a disc on the remote. The player turns on. 3 Switch the input selector on the audio component and select the appropriate channel so that these buttons are not effective when...
... operating instructions supplied with auto play ). For VIDEO CDs, see page 26. Playback starts automatically. Note that you can have the player turn on the remote, the player and your TV. 2 Press [/1. Depending on the TV screen. You press H, TOP MENU, MENU, or DISPLAY buttons on the disc ...tray. Playback Playing Discs 4 Press Z on the player, and place a disc on the remote. The player turns on. 3 Switch the input selector on the audio component and select the appropriate channel so that these buttons are not effective when...

Operating Instructions
Page 26
...disc tray remains locked. Note Even if you select "RESET" under "SETUP" in standby mode, press O RETURN, ENTER, and then [/1 on the player or the remote does not work with some discs. • If "MULTI-DISC RESUME" in DVD-VR mode Some DVD-VR (Video Recording) mode have two types of...set to "ON" (default) for this function to work (page 57). • The point where you stopped playing is cleared when: - The Z button on the remote. If you store a resume playback point for the 7th disc, the resume playback point for playback: originally recorded titles (ORIGINAL) and titles that allows you...
...disc tray remains locked. Note Even if you select "RESET" under "SETUP" in standby mode, press O RETURN, ENTER, and then [/1 on the player or the remote does not work with some discs. • If "MULTI-DISC RESUME" in DVD-VR mode Some DVD-VR (Video Recording) mode have two types of...set to "ON" (default) for this function to work (page 57). • The point where you stopped playing is cleared when: - The Z button on the remote. If you store a resume playback point for the 7th disc, the resume playback point for playback: originally recorded titles (ORIGINAL) and titles that allows you...
Operating Instructions
Page 56
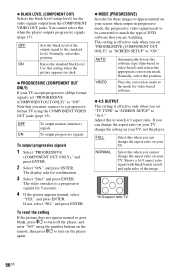
... needs to be converted to match the type of DVD software that you must connect to a progressive format TV using the number buttons on the remote, then press [/1 to turn off the player, and enter "369" using the COMPONENT VIDEO OUT jacks (page 15). If you set "PROGRESSIVE (COMPONENT OUT ONLY...
... needs to be converted to match the type of DVD software that you must connect to a progressive format TV using the number buttons on the remote, then press [/1 to turn off the player, and enter "369" using the COMPONENT VIDEO OUT jacks (page 15). If you set "PROGRESSIVE (COMPONENT OUT ONLY...

Operating Instructions
Page 57
... on which multiple audio formats (PCM, DTS, or Dolby Digital format) are underlined. AUTO The picture, including subjects that do not operate the player or remote for more than the "AUDIO" settings in memory may change. Does not store the resume setting in memory for up playback related and other settings...
... on which multiple audio formats (PCM, DTS, or Dolby Digital format) are underlined. AUTO The picture, including subjects that do not operate the player or remote for more than the "AUDIO" settings in memory may change. Does not store the resume setting in memory for up playback related and other settings...

Operating Instructions
Page 60
If the picture is not clear, natural or to turn on the remote, then press [/1 to your satisfaction, try another option that suits the disc and your TV/projector, etc. For details, refer also to the instruction manual ...; 1080i", "TV TYPE" to "16:9," and "YCBCR/RGB (HDMI)" to "YCBCR" automatically even though the current settings are not available. • If you want to a Sony's "PhotoTV HD"compatible device Displays standard definition picture with black frame. The default settings are suitable for your HDMI connection. HDMI SETUP HDMI RESOLUTION: AUTO...
If the picture is not clear, natural or to turn on the remote, then press [/1 to your satisfaction, try another option that suits the disc and your TV/projector, etc. For details, refer also to the instruction manual ...; 1080i", "TV TYPE" to "16:9," and "YCBCR/RGB (HDMI)" to "YCBCR" automatically even though the current settings are not available. • If you want to a Sony's "PhotoTV HD"compatible device Displays standard definition picture with black frame. The default settings are suitable for your HDMI connection. HDMI SETUP HDMI RESOLUTION: AUTO...
Operating Instructions
Page 62
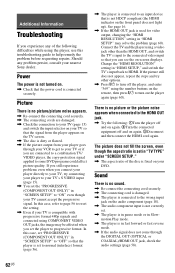
... no picture or the picture noise appears when connected to the HDMI OUT jack. , Try the following difficulties while using the number buttons on the remote, then press [/1 to turn off and on the player again (page 60). If you still experience problems even when you are damaged. , Check the ... than the HDMI OUT, and switch the TV's input to the connected video input so that the signal from the player appears on your nearest Sony dealer. There is no sound. , Re-connect the connecting cord securely. , The connecting cord is damaged. , The player is connected to the wrong input ...
... no picture or the picture noise appears when connected to the HDMI OUT jack. , Try the following difficulties while using the number buttons on the remote, then press [/1 to turn off and on the player again (page 60). If you still experience problems even when you are damaged. , Check the ... than the HDMI OUT, and switch the TV's input to the connected video input so that the signal from the player appears on your nearest Sony dealer. There is no sound. , Re-connect the connecting cord securely. , The connecting cord is damaged. , The player is connected to the wrong input ...
Operating Instructions
Page 63
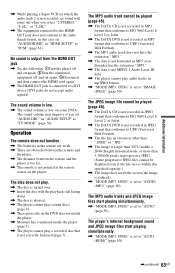
... than 3072 (width) × 2048 (height) in normal mode, or more than 3,300,000 pixels in "AUDIO SETUP" to "AUDIO (MP3)" (page 50). Operation The remote does not function. , The batteries in mp3PRO format. , "MODE (MP3, JPEG)" is set to "IMAGE (JPEG)" (page 50). The player's internal background sound and JPEG... does not fit the screen (the image is reduced). , "MODE (MP3, JPEG)" is set "AUDIO(HDMI)" in JPEG format that is not pointed at the remote sensor on the player. The JPEG image file cannot be displayed even if the file size is within this case set to a DVI device (DVI...
... than 3072 (width) × 2048 (height) in normal mode, or more than 3,300,000 pixels in "AUDIO SETUP" to "AUDIO (MP3)" (page 50). Operation The remote does not function. , The batteries in mp3PRO format. , "MODE (MP3, JPEG)" is set to "IMAGE (JPEG)" (page 50). The player's internal background sound and JPEG... does not fit the screen (the image is reduced). , "MODE (MP3, JPEG)" is set "AUDIO(HDMI)" in JPEG format that is not pointed at the remote sensor on the player. The JPEG image file cannot be displayed even if the file size is within this case set to a DVI device (DVI...

Operating Instructions
Page 64
...26). The angles cannot be changed. , Try using the DVD's menu instead of the direct selection button on the remote (page 26). , Multilingual subtitles are not recorded on the DVD being played. , The angle can only display numbers... etc., may not be changed. , Try using the DVD's menu instead of the direct selection button on the remote (page 26). , Multilingual tracks are displayed on the screen and on the front panel display. , The self-diagnosis... the " " indicator lights up on the front panel display. , Contact your Sony dealer or local authorized Sony service facility. 64US
...26). The angles cannot be changed. , Try using the DVD's menu instead of the direct selection button on the remote (page 26). , Multilingual subtitles are not recorded on the DVD being played. , The angle can only display numbers... etc., may not be changed. , Try using the DVD's menu instead of the direct selection button on the remote (page 26). , Multilingual tracks are displayed on the screen and on the front panel display. , The self-diagnosis... the " " indicator lights up on the front panel display. , Contact your Sony dealer or local authorized Sony service facility. 64US

Operating Instructions
Page 69
... NAVIGATION 41, 48 PLAY LIST 26 PROGRAM 29 Program Play 29 PROGRESSIVE (COMPONENT OUT ONLY) 56 Progressive format 56 Q QUICK 54 Quick Setup 22, 54 R Remote 10, 20, 21 REPEAT 31 Repeat Play 31 REPLAY 25 RESET 54 S Scan 39 SCENE 40 SCREEN SAVER 55 SCREEN SETUP 55 Searching 39 SETUP...
... NAVIGATION 41, 48 PLAY LIST 26 PROGRAM 29 Program Play 29 PROGRESSIVE (COMPONENT OUT ONLY) 56 Progressive format 56 Q QUICK 54 Quick Setup 22, 54 R Remote 10, 20, 21 REPEAT 31 Repeat Play 31 REPLAY 25 RESET 54 S Scan 39 SCENE 40 SCREEN SAVER 55 SCREEN SETUP 55 Searching 39 SETUP...

