
Handycam® Handbook
Page 3
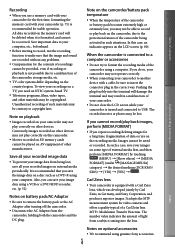
... under the current recording or playback conditions. The LCD screen is manufactured using your camcorder if necessary (p. 16). Menu items, LCD panel, and lens A menu item that appear constantly on the LCD screen. About changing the language setting The on the camcorder (p. 47). ...See page 18 for illustrating the operating procedures. Black points White, red, blue or green points Exposing the LCD screen or the lens to direct sunlight for long periods of your camcorder to the Built-in USB Cable (p. 13), if the Built-in USB Cable is not long...
... under the current recording or playback conditions. The LCD screen is manufactured using your camcorder if necessary (p. 16). Menu items, LCD panel, and lens A menu item that appear constantly on the LCD screen. About changing the language setting The on the camcorder (p. 47). ...See page 18 for illustrating the operating procedures. Black points White, red, blue or green points Exposing the LCD screen or the lens to direct sunlight for long periods of your camcorder to the Built-in USB Cable (p. 13), if the Built-in USB Cable is not long...
Handycam® Handbook
Page 4
...camcorder is connected to a computer or accessories Do not try to format the recording media of the camcorder using genuine Sony accessories. To view your image data from a subject coming into the terminal will be deleted when it is recommended for stable operation...not play back on the camcorder, due to another device with a Carl Zeiss lens, which was developed jointly by touching (MENU) [Show others] [MEDIA FORMAT] (under [MANAGE MEDIA] category) the desired medium (DCR-SX65/ SX85) [YES] [YES] . Also, you save...
...camcorder is connected to a computer or accessories Do not try to format the recording media of the camcorder using genuine Sony accessories. To view your image data from a subject coming into the terminal will be deleted when it is recommended for stable operation...not play back on the camcorder, due to another device with a Carl Zeiss lens, which was developed jointly by touching (MENU) [Show others] [MEDIA FORMAT] (under [MANAGE MEDIA] category) the desired medium (DCR-SX65/ SX85) [YES] [YES] . Also, you save...

Handycam® Handbook
Page 15
... and time again, touch (MENU) [Show others] [CLOCK/ LANG] (under [GENERAL SET] category) [CLOCK SET]. Your camcorder is turned on and the lens cover is opened. To turn on your camcorder. Touch the button on the LCD screen. To set [DST SET] or [SUMMERTIME] to [ON...
... and time again, touch (MENU) [Show others] [CLOCK/ LANG] (under [GENERAL SET] category) [CLOCK SET]. Your camcorder is turned on and the lens cover is opened. To turn on your camcorder. Touch the button on the LCD screen. To set [DST SET] or [SUMMERTIME] to [ON...
Handycam® Handbook
Page 20
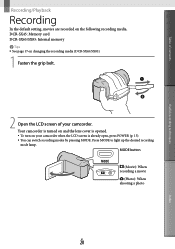
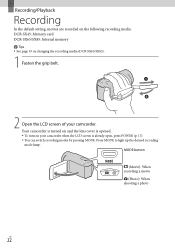
... memory Tips See page 17 on changing the recording media (DCR-SX65/SX85). 1 Fasten the grip belt. 2 Open the LCD screen of contents Useful recording techniques Recording/Playback Recording In the default setting, movies are recorded on your .... Table of your camcorder when the LCD screen is opened. To turn on the following recording media. Your camcorder is turned on and the lens cover is already open, press POWER (p. 15). You can switch recording modes by pressing MODE.
... memory Tips See page 17 on changing the recording media (DCR-SX65/SX85). 1 Fasten the grip belt. 2 Open the LCD screen of contents Useful recording techniques Recording/Playback Recording In the default setting, movies are recorded on your .... Table of your camcorder when the LCD screen is opened. To turn on the following recording media. Your camcorder is turned on and the lens cover is already open, press POWER (p. 15). You can switch recording modes by pressing MODE.
Handycam® Handbook
Page 26
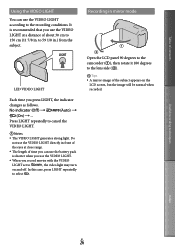
.... When you record movies with the VIDEO LIGHT set to 59 1/8 in front of the eyes at a distance of about 30 cm to the lens side (). Tips A mirror-image of time you can use the VIDEO LIGHT according to select . Do not use the VIDEO LIGHT directly...
.... When you record movies with the VIDEO LIGHT set to 59 1/8 in front of the eyes at a distance of about 30 cm to the lens side (). Tips A mirror-image of time you can use the VIDEO LIGHT according to select . Do not use the VIDEO LIGHT directly...
Handycam® Handbook
Page 89
...anything heavy on it any liquid gets in the following locations: Anywhere extremely hot, cold or humid. Be particularly careful of the lens. Keep the LCD screen closed when you are not using your camcorder for example, from an air conditioned car or room into ...towel, for a long time, turn it on and let it run by recording and playing back images about 1 hour without turning it is governed by a Sony dealer before storing it . Table of contents Useful recording techniques [Show others] [POWER SETTINGS] (under direct sunlight, near heaters or ...
...anything heavy on it any liquid gets in the following locations: Anywhere extremely hot, cold or humid. Be particularly careful of the lens. Keep the LCD screen closed when you are not using your camcorder for example, from an air conditioned car or room into ...towel, for a long time, turn it on and let it run by recording and playing back images about 1 hour without turning it is governed by a Sony dealer before storing it . Table of contents Useful recording techniques [Show others] [POWER SETTINGS] (under direct sunlight, near heaters or ...

Handycam® Handbook
Page 90
...camcorder at the seaside Store in a well-ventilated location subject to little dirt or dust. To prevent mold, periodically clean the lens as at all. On handling the casing If the casing is soiled, clean the camcorder body with a soft cloth lightly moistened with water,...casing with a dry soft cloth. Avoid the following instances: When there are fingerprints on the lens surface In hot or humid locations When the lens is exposed to salty air such as described above substances on your hands Leaving the casing in contact ...
...camcorder at the seaside Store in a well-ventilated location subject to little dirt or dust. To prevent mold, periodically clean the lens as at all. On handling the casing If the casing is soiled, clean the camcorder body with a soft cloth lightly moistened with water,...casing with a dry soft cloth. Avoid the following instances: When there are fingerprints on the lens surface In hot or humid locations When the lens is exposed to salty air such as described above substances on your hands Leaving the casing in contact ...

Handycam® Handbook
Page 94
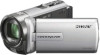
US 94 Table of contents Parts and controls Figures in ( ) are reference pages. Lens (Carl Zeiss lens) LED VIDEO LIGHT (26) Built-in microphone (VIEW IMAGES) button (27) POWER button (15) LIGHT button (26) Press to initialize ...
US 94 Table of contents Parts and controls Figures in ( ) are reference pages. Lens (Carl Zeiss lens) LED VIDEO LIGHT (26) Built-in microphone (VIEW IMAGES) button (27) POWER button (15) LIGHT button (26) Press to initialize ...
Operating Guide
Page 8
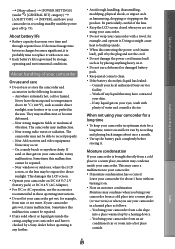
..." (This manual) (1) "PMB Portable" software is manufactured using extremely high-precision technology, so over 99.99% of FCC Rules. Menu items, LCD panel, and lens A menu item that appear constantly on the camcorder (p. 36). See page 20 for the memory card you can use with the limits for..., there may cause malfunctions. Do not aim at dusk. Black points White, red, blue or green points Exposing the LCD screen or the lens to direct sunlight for a digital device pursuant to malfunction. See "Precautions" (p. 57).
..." (This manual) (1) "PMB Portable" software is manufactured using extremely high-precision technology, so over 99.99% of FCC Rules. Menu items, LCD panel, and lens A menu item that appear constantly on the camcorder (p. 36). See page 20 for the memory card you can use with the limits for..., there may cause malfunctions. Do not aim at dusk. Black points White, red, blue or green points Exposing the LCD screen or the lens to direct sunlight for a digital device pursuant to malfunction. See "Precautions" (p. 57).
Operating Guide
Page 10
... manual when there is a difference in this manual, the internal memory (DCRSX65/SX85) of your camcorder and memory card are called "recording media." Design and specifications of a Carl Zeiss lens. US 10 About images, illustrations, and screen displays of your camcorder and accessories... this manual for video cameras and offers a quality typical of your camcorder The model name is shown in Germany, and Sony Corporation, and produces superior images. Confirm the model name of this manual The example images used in specification between models. It...
... manual when there is a difference in this manual, the internal memory (DCRSX65/SX85) of your camcorder and memory card are called "recording media." Design and specifications of a Carl Zeiss lens. US 10 About images, illustrations, and screen displays of your camcorder and accessories... this manual for video cameras and offers a quality typical of your camcorder The model name is shown in Germany, and Sony Corporation, and produces superior images. Confirm the model name of this manual The example images used in specification between models. It...
Operating Guide
Page 17
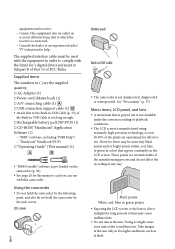
... on the screen, touch / until the item appears. 3 Set [DST SET] or [SUMMERTIME], date and time, then touch . Your camcorder is turned on and the lens cover is opened. To turn on , and setting the date and time 1 Open the LCD screen of your camcorder when the LCD screen is...
... on the screen, touch / until the item appears. 3 Set [DST SET] or [SUMMERTIME], date and time, then touch . Your camcorder is turned on and the lens cover is opened. To turn on , and setting the date and time 1 Open the LCD screen of your camcorder when the LCD screen is...
Operating Guide
Page 22
... (Photo): When shooting a photo US 22 Press MODE to light up the desired recording mode lamp. Your camcorder is turned on and the lens cover is already open, press POWER (p. 17). You can switch recording modes by pressing MODE. Recording/Playback Recording In the default ...setting, movies are recorded on changing the recording media (DCR-SX65/SX85). 1 Fasten the grip belt. 2 Open the LCD screen of your camcorder when the LCD screen is opened. To turn on your...
... (Photo): When shooting a photo US 22 Press MODE to light up the desired recording mode lamp. Your camcorder is turned on and the lens cover is already open, press POWER (p. 17). You can switch recording modes by pressing MODE. Recording/Playback Recording In the default ...setting, movies are recorded on changing the recording media (DCR-SX65/SX85). 1 Fasten the grip belt. 2 Open the LCD screen of your camcorder when the LCD screen is opened. To turn on your...
Operating Guide
Page 57
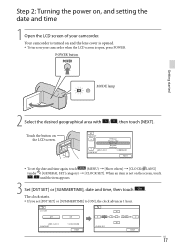
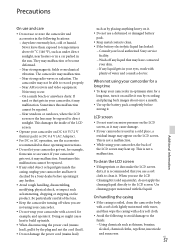
... damaged battery pack. Keep metal contacts clean. If the battery electrolytic liquid has leaked: Consult your local authorized Sony service facility. Wash off when you use the LCD Cleaning Kit (sold separately), do not apply the cleaning liquid directly to temperatures ...such as hammering, dropping or stepping on the LCD screen. Sometimes this malfunction cannot be exposed to clean it . Be particularly careful of the lens. Keep the camcorder turning off any liquid that you are not using your skin. If any further. Avoid...
... damaged battery pack. Keep metal contacts clean. If the battery electrolytic liquid has leaked: Consult your local authorized Sony service facility. Wash off when you use the LCD Cleaning Kit (sold separately), do not apply the cleaning liquid directly to temperatures ...such as hammering, dropping or stepping on the LCD screen. Sometimes this malfunction cannot be exposed to clean it . Be particularly careful of the lens. Keep the camcorder turning off any liquid that you are not using your skin. If any further. Avoid...
Operating Guide
Page 58
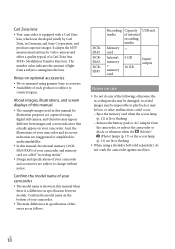
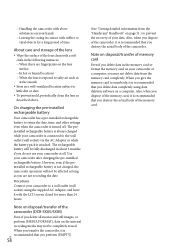
... camcorder at the seaside Store in a well-ventilated location subject to little dirt or dust. To prevent mold, periodically clean the lens as at all movies and still images, or perform [MEDIA FORMAT], data on the internal recording media may not delete data from the "Handycam" Handbook... attached. Also, when you dispose of the memory card, it is recommended that you delete all . Note on disposal/transfer of the camcorder (DCR-SX65/SX85) Even if you destroy the actual body of the camcorder. Note on disposal/transfer of memory card Even if you delete data in about 3 ...
... camcorder at the seaside Store in a well-ventilated location subject to little dirt or dust. To prevent mold, periodically clean the lens as at all movies and still images, or perform [MEDIA FORMAT], data on the internal recording media may not delete data from the "Handycam" Handbook... attached. Also, when you dispose of the memory card, it is recommended that you delete all . Note on disposal/transfer of the camcorder (DCR-SX65/SX85) Even if you destroy the actual body of the camcorder. Note on disposal/transfer of memory card Even if you delete data in about 3 ...
Operating Guide
Page 59
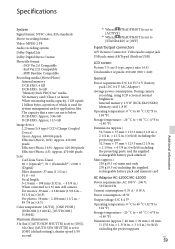
...Stereo Creator Photo file format : DCF Ver.2.0 Compatible : Exif Ver.2.21 Compatible : MPF Baseline Compatible Recording media (Movie/Photo) Internal memory DCR-SX65: 4 GB DCR-SX85: 16 GB "Memory Stick PRO Duo" media SD memory card (Class 2 or faster) When measuring media capacity, 1 GB equals 1... Approx. 3.86 GB DCR-SX85: Approx. 15.5 GB Image device 2.25 mm (1/8 type) CCD (Charge Coupled Device) Gross: Approx. 680 000 pixels Effective (Movie, 16:9): Approx. 410 000 pixels Effective (Photo, 16:9): Approx. 410 000 pixels Effective (Photo, 4:3): Approx. 470 000 pixels Lens Carl Zeiss Vario-Tessar...
...Stereo Creator Photo file format : DCF Ver.2.0 Compatible : Exif Ver.2.21 Compatible : MPF Baseline Compatible Recording media (Movie/Photo) Internal memory DCR-SX65: 4 GB DCR-SX85: 16 GB "Memory Stick PRO Duo" media SD memory card (Class 2 or faster) When measuring media capacity, 1 GB equals 1... Approx. 3.86 GB DCR-SX85: Approx. 15.5 GB Image device 2.25 mm (1/8 type) CCD (Charge Coupled Device) Gross: Approx. 680 000 pixels Effective (Movie, 16:9): Approx. 410 000 pixels Effective (Photo, 16:9): Approx. 410 000 pixels Effective (Photo, 4:3): Approx. 470 000 pixels Lens Carl Zeiss Vario-Tessar...

Operating Guide
Page 62
...; CHG (charge) lamp (14) DC IN jack (14) A/V Remote Connector (29) US 62 Parts and controls Figures in ( ) are reference pages. Lens (Carl Zeiss lens) LED VIDEO LIGHT Built-in microphone (VIEW IMAGES) button (26) POWER button (17) LIGHT button Press to initialize all...
...; CHG (charge) lamp (14) DC IN jack (14) A/V Remote Connector (29) US 62 Parts and controls Figures in ( ) are reference pages. Lens (Carl Zeiss lens) LED VIDEO LIGHT Built-in microphone (VIEW IMAGES) button (26) POWER button (17) LIGHT button Press to initialize all...


