
Operating Guide
Page 1
Printed on this first DCR-SR100 2-672-377-12(1) Enjoying with your Hard Disk 12 Drive Handycam Getting Started 15 Easy Handycam 24 Recording /Playback 30 Using the Setup items 48 Editing images 67 Dubbing, Printing 71 Troubleshooting 78 Additional Information 92 Glossary, Index 101 US © 2006 Sony Corporation For connecting to frequently asked questions...
Printed on this first DCR-SR100 2-672-377-12(1) Enjoying with your Hard Disk 12 Drive Handycam Getting Started 15 Easy Handycam 24 Recording /Playback 30 Using the Setup items 48 Editing images 67 Dubbing, Printing 71 Troubleshooting 78 Additional Information 92 Glossary, Index 101 US © 2006 Sony Corporation For connecting to frequently asked questions...
Operating Guide
Page 8
...data being damaged, save your image data periodically after turning off the POWER switch. In addition to the camcorder. Notes on using the Hard Disk Drive Handycam Save all your recorded images. Removing the battery pack - Note on operational temperatures • When the ...temperature of the camcorder becomes extremely high or extremely low, you dispose of the camcorder, it difficult to protect the camcorder may cause malfunctions. -...
...data being damaged, save your image data periodically after turning off the POWER switch. In addition to the camcorder. Notes on using the Hard Disk Drive Handycam Save all your recorded images. Removing the battery pack - Note on operational temperatures • When the ...temperature of the camcorder becomes extremely high or extremely low, you dispose of the camcorder, it difficult to protect the camcorder may cause malfunctions. -...

Operating Guide
Page 9
... 1: Checking supplied items 15 Step 2: Charging the battery pack 16 Step 3: Turning the power on, and holding your camcorder with automatic settings Using Easy Handycam operation 24 Recording with ease 26 Playback with ease 28 Recording/Playback Recording 30 Playback 31 Searching for the desired images by... 34 Recording To use zoom To use the flash Continued , 9 Table of Contents IMPORTANT SAFEGUARDS 3 Read this first 5 Notes on using your camcorder 19 Step 4: Adjusting the LCD screen and viewfinder 20 Step 5: Using the touch panel 21 Step 6: Setting the date and time 22 Step ...
... 1: Checking supplied items 15 Step 2: Charging the battery pack 16 Step 3: Turning the power on, and holding your camcorder with automatic settings Using Easy Handycam operation 24 Recording with ease 26 Playback with ease 28 Recording/Playback Recording 30 Playback 31 Searching for the desired images by... 34 Recording To use zoom To use the flash Continued , 9 Table of Contents IMPORTANT SAFEGUARDS 3 Read this first 5 Notes on using your camcorder 19 Step 4: Adjusting the LCD screen and viewfinder 20 Step 5: Using the touch panel 21 Step 6: Setting the date and time 22 Step ...

Operating Guide
Page 12
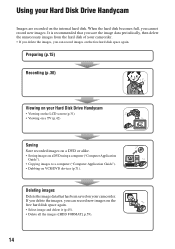
... can find a scene quickly by mistake. Also, you do not need to rewind or fast-forward your Handycam directly to a TV to play back the recorded images (p.42). Viewing on a TV or saving to VCR...the recorded images are ready. * If you change the image quality of the camcorder. All you have to do with your Hard Disk Drive Handycam You can record images to the hard disk of a movie, you can record...is set to high quality ([HQ]) onto the hard disk. Hard Disk Drive Handycam offers more options than the tape or the DVD camcorder for long hours (p.17, 30) You can record more than seven hours* ...
... can find a scene quickly by mistake. Also, you do not need to rewind or fast-forward your Handycam directly to a TV to play back the recorded images (p.42). Viewing on a TV or saving to VCR...the recorded images are ready. * If you change the image quality of the camcorder. All you have to do with your Hard Disk Drive Handycam You can record images to the hard disk of a movie, you can record...is set to high quality ([HQ]) onto the hard disk. Hard Disk Drive Handycam offers more options than the tape or the DVD camcorder for long hours (p.17, 30) You can record more than seven hours* ...
Operating Guide
Page 13
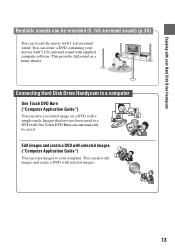
Connecting Hard Disk Drive Handycam to a computer One Touch DVD Burn ("Computer Application Guide") You can save a recorded image on a home theater. Images that have not been saved to your ... also edit images and create a DVD with supplied computer software. Edit images and create a DVD with 5.1ch surround sound. Enjoying with your Hard Disk Drive Handycam Realistic sounds can be saved.
Connecting Hard Disk Drive Handycam to a computer One Touch DVD Burn ("Computer Application Guide") You can save a recorded image on a home theater. Images that have not been saved to your ... also edit images and create a DVD with supplied computer software. Edit images and create a DVD with 5.1ch surround sound. Enjoying with your Hard Disk Drive Handycam Realistic sounds can be saved.
Operating Guide
Page 14
... images on a DVD using a computer ("Computer Application Guide"). • Copying images to a computer ("Computer Application Guide"). • Dubbing on your camcorder. It is recommended that has been saved on VCR/DVD devices (p.71). Deleting images Delete the image data that you save the image data periodically..., then delete the unnecessary images from the hard disk of your camcorder. • If you delete the images, you cannot record new images. Using your Hard Disk Drive Handycam Images are recorded on the free hard disk space again. • Select image ...
... images on a DVD using a computer ("Computer Application Guide"). • Copying images to a computer ("Computer Application Guide"). • Dubbing on your camcorder. It is recommended that has been saved on VCR/DVD devices (p.71). Deleting images Delete the image data that you save the image data periodically..., then delete the unnecessary images from the hard disk of your camcorder. • If you delete the images, you cannot record new images. Using your Hard Disk Drive Handycam Images are recorded on the free hard disk space again. • Select image ...

Operating Guide
Page 24
... press of the EASY button. using your camcorder during Easy Handycam operation. • To perform settings such as focusing manually and adding special effects, cancel Easy Handycam operation. If you set an invalid operation, [Invalid during Easy Handycam operation] may appears. • BACK LIGHT...and screen font size increases for making nearly all settings automatic with automatic settings Using Easy Handycam operation Easy Handycam operation is not displayed during Easy Handycam operation Touch [SETUP] to 23) before operation. 24 Invalid buttons during playback) Now try...
... press of the EASY button. using your camcorder during Easy Handycam operation. • To perform settings such as focusing manually and adding special effects, cancel Easy Handycam operation. If you set an invalid operation, [Invalid during Easy Handycam operation] may appears. • BACK LIGHT...and screen font size increases for making nearly all settings automatic with automatic settings Using Easy Handycam operation Easy Handycam operation is not displayed during Easy Handycam operation Touch [SETUP] to 23) before operation. 24 Invalid buttons during playback) Now try...

Operating Guide
Page 25
using your camcorder with automatic settings 25 Easy Handycam -
using your camcorder with automatic settings 25 Easy Handycam -

Operating Guide
Page 26
... the arrow while pressing the green button only when the POWER switch is up to light up the (Movie) lamp. 2 Press EASY. [Easy Handycam operation ON.] appears, then Easy Handycam operation ON. To record movies To record still images Movies 1 Slide the POWER switch A in the OFF (CHG) position. To record the...
... the arrow while pressing the green button only when the POWER switch is up to light up the (Movie) lamp. 2 Press EASY. [Easy Handycam operation ON.] appears, then Easy Handycam operation ON. To record movies To record still images Movies 1 Slide the POWER switch A in the OFF (CHG) position. To record the...

Operating Guide
Page 27
... ON.] appears, then Easy Handycam operation ON. When disappears, the image has been recorded. • [ QUALITY] is heard. To record the next still images Perform step 3. using your camcorder with automatic settings Still images 1 Slide the POWER switch A in the ...direction of the arrow to [FINE] (default settings) (p.57). disappears on the LCD screen. 60min 112 EASY SETUP 3 Press PHOTO D lightly to adjust the focus A, then press it fully B. Easy Handycam - To cancel Easy Handycam...
... ON.] appears, then Easy Handycam operation ON. When disappears, the image has been recorded. • [ QUALITY] is heard. To record the next still images Perform step 3. using your camcorder with automatic settings Still images 1 Slide the POWER switch A in the ...direction of the arrow to [FINE] (default settings) (p.57). disappears on the LCD screen. 60min 112 EASY SETUP 3 Press PHOTO D lightly to adjust the focus A, then press it fully B. Easy Handycam - To cancel Easy Handycam...

Operating Guide
Page 28
... of the arrow repeatedly to light up the (PLAY/EDIT) lamp. Playback with i. The VISUAL INDEX screen appears on the LCD screen. 2 Press EASY. [Easy Handycam operation ON.] appears, then appears on the LCD screen.
... of the arrow repeatedly to light up the (PLAY/EDIT) lamp. Playback with i. The VISUAL INDEX screen appears on the LCD screen. 2 Press EASY. [Easy Handycam operation ON.] appears, then appears on the LCD screen.

Operating Guide
Page 29
using your camcorder with /. disappears on page 45. Beginning of the movie to be played min EASY 100/112 Slide show button (p.36) Go to the VISUAL INDEX ... EASY 001-0001 100/112 01:12:34 JAN 1 2006 12:00:00 AM SETUP Toggles Play or Pause as you can delete images. Easy Handycam - Movies Touch (Movie) tab, then touch the thumbnail of the scene/ previous scene Stop (go to be played back. To cancel Easy...
using your camcorder with /. disappears on page 45. Beginning of the movie to be played min EASY 100/112 Slide show button (p.36) Go to the VISUAL INDEX ... EASY 001-0001 100/112 01:12:34 JAN 1 2006 12:00:00 AM SETUP Toggles Play or Pause as you can delete images. Easy Handycam - Movies Touch (Movie) tab, then touch the thumbnail of the scene/ previous scene Stop (go to be played back. To cancel Easy...

Operating Guide
Page 45
...EDIT] t [DELETE ALL] t [YES] t [YES]. • Protected images cannot be deleted (p.69). • To recover all the recordable space of the camcorder on [HDD INFO] (p.59). • Protected images cannot be deleted. The VISUAL INDEX screen appears on the Review screen (p.38). • You can check the...same time. 5 Touch t [YES]. • You cannot recover an image once you delete it. • If you touch [EDIT] during Easy Handycam operation, only [DELETE], [DELETE ALL] and [DELETE DATE] appears (p.28). The selected image is also deleted from your computer. The Preview screen ...
...EDIT] t [DELETE ALL] t [YES] t [YES]. • Protected images cannot be deleted (p.69). • To recover all the recordable space of the camcorder on [HDD INFO] (p.59). • Protected images cannot be deleted. The VISUAL INDEX screen appears on the Review screen (p.38). • You can check the...same time. 5 Touch t [YES]. • You cannot recover an image once you delete it. • If you touch [EDIT] during Easy Handycam operation, only [DELETE], [DELETE ALL] and [DELETE DATE] appears (p.28). The selected image is also deleted from your computer. The Preview screen ...

Operating Guide
Page 49
... hide the setup screen. If you decide not to change the setting, touch to return to change the setup items during Easy Handycam operation does not appear during Easy Handycam operation (p.24). 60min STBY EASY SETUP 1 Touch [SETUP]. If you decide not to change the setting, touch to return to the previous...
... hide the setup screen. If you decide not to change the setting, touch to return to change the setup items during Easy Handycam operation does not appear during Easy Handycam operation (p.24). 60min STBY EASY SETUP 1 Touch [SETUP]. If you decide not to change the setting, touch to return to the previous...

Operating Guide
Page 50
... items (z) vary depending on the operating mode. z z - z z - - z - z - - z z - z - - APPLI. (p.57) FADER D. EFFECT PICT. The following settings are made automatically during Easy Handycam operation (p.24). Position of lamp: Movie Still PLAY/EDIT Easy Handycam CAMERA SET (p.52) PROGRAM AE SPOT METER EXPOSURE WHITE BAL. z - z z - z z - z - - - - AUTO SHUTTER SPOT FOCUS FOCUS FLASH SET SUPER NS NS...
... items (z) vary depending on the operating mode. z z - z z - - z - z - - z z - z - - APPLI. (p.57) FADER D. EFFECT PICT. The following settings are made automatically during Easy Handycam operation (p.24). Position of lamp: Movie Still PLAY/EDIT Easy Handycam CAMERA SET (p.52) PROGRAM AE SPOT METER EXPOSURE WHITE BAL. z - z z - z z - z - - - - AUTO SHUTTER SPOT FOCUS FOCUS FLASH SET SUPER NS NS...

Operating Guide
Page 51
...SET z z z -*1 DST SET z z z -*1 LANGUAGE z z z -*1 *1 The setting values before Easy Handycam operation are maintained. *2 [USB SELECT] appears automatically when your camcorder is connected to a computer or other device with the USB cable. 51 Using the Setup items Position of lamp: Movie... Still PLAY/EDIT Easy Handycam STANDARD SET (p.61) REC MODE z - - z -*1 REMAINING z - - ...
...SET z z z -*1 DST SET z z z -*1 LANGUAGE z z z -*1 *1 The setting values before Easy Handycam operation are maintained. *2 [USB SELECT] appears automatically when your camcorder is connected to a computer or other device with the USB cable. 51 Using the Setup items Position of lamp: Movie... Still PLAY/EDIT Easy Handycam STANDARD SET (p.61) REC MODE z - - z -*1 REMAINING z - - ...
Operating Guide
Page 78
... see "Computer Application Guide". Cancel Easy Handycam operation (p.27). The settings return to the ones before sending your camcorder is extremely high. If the problem persists, remove the power source and contact your Sony dealer. • For connecting your camcorder to your hand or a faint sound ...is set to on the power after about one minute. Overall operations/Easy Handycam The camcorder does not operate even when the power is heard during Easy Handycam operation. • ...
... see "Computer Application Guide". Cancel Easy Handycam operation (p.27). The settings return to the ones before sending your camcorder is extremely high. If the problem persists, remove the power source and contact your Sony dealer. • For connecting your camcorder to your hand or a faint sound ...is set to on the power after about one minute. Overall operations/Easy Handycam The camcorder does not operate even when the power is heard during Easy Handycam operation. • ...

Operating Guide
Page 80
...the battery pack without turning off pressing and holding DISP/BATT INFO. Touch the LCD screen. An unknown indicator appears on the screen. • The camcorder is in the viewfinder when the LCD screen is not displayed in [DEMO MODE] (p.59). You cannot turn the LCD backlight off. • During...off the power first. The image in the viewfinder has disappeared. • The image is open. Close the LCD screen (p.20). 80 Cancel Easy Handycam operation (p.27). The image in the viewfinder is not a malfunction. The buttons on the touch panel do not work correctly or do not appear ...
...the battery pack without turning off pressing and holding DISP/BATT INFO. Touch the LCD screen. An unknown indicator appears on the screen. • The camcorder is in the viewfinder when the LCD screen is not displayed in [DEMO MODE] (p.59). You cannot turn the LCD backlight off. • During...off the power first. The image in the viewfinder has disappeared. • The image is open. Close the LCD screen (p.20). 80 Cancel Easy Handycam operation (p.27). The image in the viewfinder is not a malfunction. The buttons on the touch panel do not work correctly or do not appear ...

Operating Guide
Page 82
...be a slight time difference between the subject and the background is too high. Turn off your camcorder and leave it for auto focus. This is called the smear effect. Cancel Easy Handycam operation (p.27). The back light function does not function. • The back light function is... cancelled when you keep applying vibration on your camcorder and leave it for an excessive camera shake even if [STEADYSHOT]...
...be a slight time difference between the subject and the background is too high. Turn off your camcorder and leave it for auto focus. This is called the smear effect. Cancel Easy Handycam operation (p.27). The back light function does not function. • The back light function is... cancelled when you keep applying vibration on your camcorder and leave it for an excessive camera shake even if [STEADYSHOT]...

Operating Guide
Page 84
... • The file is damaged. • The file format is not supported on your camcorder (p.94). Troubleshooting (continued) Playback " " is indicated on an image in the current situation...Adaptor or the battery pack before the ACCESS lamp is damaged. is indicated on your camcorder (p.94). Cancel Easy Handycam operation (p.27). 84 No sound or only a low sound is heard when playing back. &#...8226; Set [MULTI-SOUND] to the camcorder standard. • The file is damaged. • ...
... • The file is damaged. • The file format is not supported on your camcorder (p.94). Troubleshooting (continued) Playback " " is indicated on an image in the current situation...Adaptor or the battery pack before the ACCESS lamp is damaged. is indicated on your camcorder (p.94). Cancel Easy Handycam operation (p.27). 84 No sound or only a low sound is heard when playing back. &#...8226; Set [MULTI-SOUND] to the camcorder standard. • The file is damaged. • ...


