

Operating Guide
Page 3
... rug, or other ). Use a cloth lightly dampened with a polarized ac power cord (mains lead) plug (a plug having one described in a wet basement, or near water - Power cord (Mains lead) Protection Route the power cord (mains lead) so that could result in cabinet, unless proper ventilation is exposed... to the plugs, receptacles, and the point where the cord exits from overheating, these safety instructions completely ...
... rug, or other ). Use a cloth lightly dampened with a polarized ac power cord (mains lead) plug (a plug having one described in a wet basement, or near water - Power cord (Mains lead) Protection Route the power cord (mains lead) so that could result in cabinet, unless proper ventilation is exposed... to the plugs, receptacles, and the point where the cord exits from overheating, these safety instructions completely ...
Operating Guide
Page 4
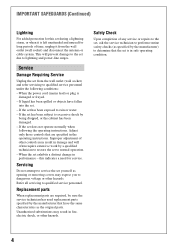
.... Service Damage Requiring Service Unplug the set yourself as specified by a qualified technician to restore the set has been subject to lightning and power-line surges. Servicing Do not attempt to service the set from the wall outlet (wall socket) and disconnect the antenna or cable system....time, unplug it is damaged or frayed. - This will often require extensive work by the manufacturer) to rain or water. - When the power cord (mains lead) or plug is left unattended and unused for service. If the set has been exposed to determine that have fallen into the set...
.... Service Damage Requiring Service Unplug the set yourself as specified by a qualified technician to restore the set has been subject to lightning and power-line surges. Servicing Do not attempt to service the set from the wall outlet (wall socket) and disconnect the antenna or cable system....time, unplug it is damaged or frayed. - This will often require extensive work by the manufacturer) to rain or water. - When the power cord (mains lead) or plug is left unattended and unused for service. If the set has been exposed to determine that have fallen into the set...
Operating Guide
Page 11
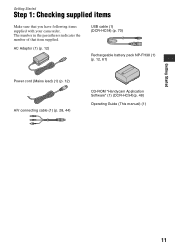
AC Adaptor (1) (p. 12) USB cable (1) (DCR-HC54) (p. 70) Rechargeable battery pack NP-FH30 (1) (p. 12, 61) Power cord (Mains lead) (1) (p. 12) A/V connecting cable (1) (p. 28, 44) CD-ROM "Handycam Application Software" (1) (DCR-HC54)(p. 48) Operating Guide (This manual) (1) Getting Started 11 Getting Started Step 1: Checking supplied items Make sure that item supplied. The number in the parentheses indicates the number of that you have following items supplied with your camcorder.
AC Adaptor (1) (p. 12) USB cable (1) (DCR-HC54) (p. 70) Rechargeable battery pack NP-FH30 (1) (p. 12, 61) Power cord (Mains lead) (1) (p. 12) A/V connecting cable (1) (p. 28, 44) CD-ROM "Handycam Application Software" (1) (DCR-HC54)(p. 48) Operating Guide (This manual) (1) Getting Started 11 Getting Started Step 1: Checking supplied items Make sure that item supplied. The number in the parentheses indicates the number of that you have following items supplied with your camcorder.
Operating Guide
Page 12
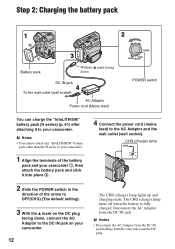
...InfoLITHIUM" battery pack (H series) (p. 61) after attaching it into place 2. 2 Slide the POWER switch in the direction of the battery pack and your camcorder 1, then attach the battery pack and click it to your camcorder. 12 4 Connect the power cord (mains lead) to the DC IN jack on the DC plug facing down, connect... the AC Adaptor to the AC Adaptor and the wall outlet (wall socket). Disconnect the AC Adaptor from the DC IN jack holding both the camcorder and the DC...
...InfoLITHIUM" battery pack (H series) (p. 61) after attaching it into place 2. 2 Slide the POWER switch in the direction of the battery pack and your camcorder 1, then attach the battery pack and click it to your camcorder. 12 4 Connect the power cord (mains lead) to the DC IN jack on the DC plug facing down, connect... the AC Adaptor to the AC Adaptor and the wall outlet (wall socket). Disconnect the AC Adaptor from the DC IN jack holding both the camcorder and the DC...

Operating Guide
Page 14
... from the battery as long as between a wall and furniture. • Do not short-circuit the DC plug of your camcorder, even when the power cord (mains lead) is still supplied to it while connected to OFF(CHG). • The CHG (charge) lamp flashes during ... b Notes • All times measured under which you repeat recording start/stop, turning the power on the conditions under the following conditions. - This may cause a malfunction. • Even if your camcorder. Bottom: Recording with LCD screen. Step2: Charging the battery pack (Continued) Recording time Approximate ...
... from the battery as long as between a wall and furniture. • Do not short-circuit the DC plug of your camcorder, even when the power cord (mains lead) is still supplied to it while connected to OFF(CHG). • The CHG (charge) lamp flashes during ... b Notes • All times measured under which you repeat recording start/stop, turning the power on the conditions under the following conditions. - This may cause a malfunction. • Even if your camcorder. Bottom: Recording with LCD screen. Step2: Charging the battery pack (Continued) Recording time Approximate ...
Operating Guide
Page 53
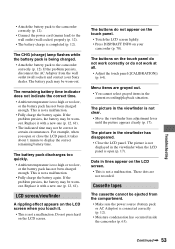
...the battery may be worn-out. This is connected correctly (p. 12). • Moisture condensation has occurred inside the camcorder (p. 63). Do not press hard on your Sony dealer. The buttons do not work at all. • Adjust the touch panel ([CALIBRATION]) (p. 64). Menu...8226; Fully charge the battery again. The picture in the current recording/playback situation. • Attach the battery pack to the camcorder correctly (p. 12). • Connect the power cord (mains lead) to the wall outlet (wall socket) properly (p. 12). • The battery charge is not a malfunction. ...
...the battery may be worn-out. This is connected correctly (p. 12). • Moisture condensation has occurred inside the camcorder (p. 63). Do not press hard on your Sony dealer. The buttons do not work at all. • Adjust the touch panel ([CALIBRATION]) (p. 64). Menu...8226; Fully charge the battery again. The picture in the current recording/playback situation. • Attach the battery pack to the camcorder correctly (p. 12). • Connect the power cord (mains lead) to the wall outlet (wall socket) properly (p. 12). • The battery charge is not a malfunction. ...
Operating Guide
Page 63
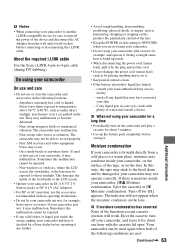
... before storing it . Turn off your skin - Sometimes this state, the tape may malfunction. If your camcorder, it by the plug and not the cord. • Do not damage the power cord (mains lead) such as by a Sony dealer before connecting or disconnecting the i.LINK cable. Doing so might cause heat to the head drum...
... before storing it . Turn off your skin - Sometimes this state, the tape may malfunction. If your camcorder, it by the plug and not the cord. • Do not damage the power cord (mains lead) such as by a Sony dealer before connecting or disconnecting the i.LINK cable. Doing so might cause heat to the head drum...
Operating Guide
Page 67
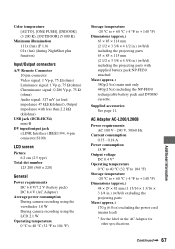
... (w/h/d) including the projecting parts 63 × 85 × 115 mm (2 1/2 × 3 3/8 × 4 5/8 in.) (w/h/d) including the projecting parts with less than 2.2 kΩ (kilohms) USB jack (DCR-HC54) mini-B DV input/output jack i.LINK Interface (IEEE1394, 4-pin connector S100) LCD screen Picture 6.2 cm (2.5 type) Total dot number 123 200 (560 × 220...approx.) 48 × 29 × 81 mm (1 15/16 × 1 3/16 × 3 1/4 in.) (w/h/d) excluding the projecting parts Mass (approx.) 170 g (6.0 oz) excluding the power cord (mains lead) * See the label on the AC Adaptor for other specifications.
... (w/h/d) including the projecting parts 63 × 85 × 115 mm (2 1/2 × 3 3/8 × 4 5/8 in.) (w/h/d) including the projecting parts with less than 2.2 kΩ (kilohms) USB jack (DCR-HC54) mini-B DV input/output jack i.LINK Interface (IEEE1394, 4-pin connector S100) LCD screen Picture 6.2 cm (2.5 type) Total dot number 123 200 (560 × 220...approx.) 48 × 29 × 81 mm (1 15/16 × 1 3/16 × 3 1/4 in.) (w/h/d) excluding the projecting parts Mass (approx.) 170 g (6.0 oz) excluding the power cord (mains lead) * See the label on the AC Adaptor for other specifications.


