User Manual (user Manual) (ver.f4) (English)
Page 6
Section 7: People 52 Using the Contacts List 52 Finding a Contact Entry 53 Dialing a Number from Contacts 55 Social Buzz 55 Caller Groups 56 Editing a Caller Group 57 Speed Dialing 57 Management 58 My number 59 Service Dialing Numbers 60 Section 8: Media 61 web2go 61 Games and Apps 64 Photos 66 Images 68 Music 69 Music Player 70 Sounds 73 Videos 74 Other Files 75 Section 9: Organizer 77 Organizer 77 Calendar 77 Alarm 81 Voice Recognition 83 2 Tasks 88...
Section 7: People 52 Using the Contacts List 52 Finding a Contact Entry 53 Dialing a Number from Contacts 55 Social Buzz 55 Caller Groups 56 Editing a Caller Group 57 Speed Dialing 57 Management 58 My number 59 Service Dialing Numbers 60 Section 8: Media 61 web2go 61 Games and Apps 64 Photos 66 Images 68 Music 69 Music Player 70 Sounds 73 Videos 74 Other Files 75 Section 9: Organizer 77 Organizer 77 Calendar 77 Alarm 81 Voice Recognition 83 2 Tasks 88...

User Manual (user Manual) (ver.f4) (English)
Page 8
... stated otherwise, instructions in this manual generally follow the features of data or functionality, or even prevent damage to the default display settings. Special Text Throughout this User Manual start using your phone. Section 1: Getting Started This section explains how to start with the phone unlocked, at the Home screen. The definitions for these methods are based on default settings, and may vary, depending on your phone. Understanding this User Manual The sections...
... stated otherwise, instructions in this manual generally follow the features of data or functionality, or even prevent damage to the default display settings. Special Text Throughout this User Manual start using your phone. Section 1: Getting Started This section explains how to start with the phone unlocked, at the Home screen. The definitions for these methods are based on default settings, and may vary, depending on your phone. Understanding this User Manual The sections...
User Manual (user Manual) (ver.f4) (English)
Page 14
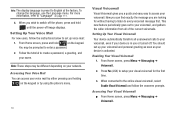
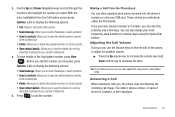
... new users, follow the onscreen prompts. Accessing Your Voice Mail You can find exactly the message you are looking for the first time. 3. Now you can access your voice mail by using the phone's menu. 10 Visual Voicemail Visual Voicemail gives you wish to every voicemail message first. From Home screen, press Menu ➔ Messaging ➔ Voicemail. 2. Enabling Your Visual Voicemail 1. When connected to English at the factory. You may be prompted to setup your device is activated. To change the language, use...
... new users, follow the onscreen prompts. Accessing Your Voice Mail You can find exactly the message you are looking for the first time. 3. Now you can access your voice mail by using the phone's menu. 10 Visual Voicemail Visual Voicemail gives you wish to every voicemail message first. From Home screen, press Menu ➔ Messaging ➔ Voicemail. 2. Enabling Your Visual Voicemail 1. When connected to English at the factory. You may be prompted to setup your device is activated. To change the language, use...
User Manual (user Manual) (ver.f4) (English)
Page 16
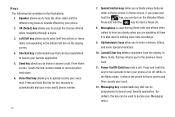
... turn your voice mail's phone number. 12 7. Press and hold the key to Home screen and then cancels your Messaging menu. Cancel/Clear key deletes characters from the display. It is used in the Menu mode, it returns the phone to insert a Pause (P). 8. Speaker allows you to launch your favorite application. 5. Voice Mail key allows you activate unique features while in Home screen. While in making voice note recordings. 9. Shortcut key customizable key that can be programmed to the previous menu level. 11. By default...
... turn your voice mail's phone number. 12 7. Press and hold the key to Home screen and then cancels your Messaging menu. Cancel/Clear key deletes characters from the display. It is used in the Menu mode, it returns the phone to insert a Pause (P). 8. Speaker allows you to launch your favorite application. 5. Voice Mail key allows you activate unique features while in Home screen. While in making voice note recordings. 9. Shortcut key customizable key that can be programmed to the previous menu level. 11. By default...
User Manual (user Manual) (ver.f4) (English)
Page 23
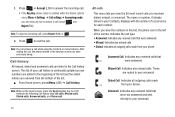
...; Send message: Allows you to send a Message or Audio postcard. • Save to contacts: Allows you to save the selected phone number to the Contacts list. • Delete: Allows you to delete the selected number or all call records. • View contact details: Allows you to number keys using these keys. Once you have stored a number in Contacts, is then displayed. You can also adjust the ring volume using the Speed Dial feature. Tip: From Home screen, you can store regularly used numbers to view...
...; Send message: Allows you to send a Message or Audio postcard. • Save to contacts: Allows you to save the selected phone number to the Contacts list. • Delete: Allows you to delete the selected number or all call records. • View contact details: Allows you to number keys using these keys. Once you have stored a number in Contacts, is then displayed. You can also adjust the ring volume using the Speed Dial feature. Tip: From Home screen, you can store regularly used numbers to view...
User Manual (user Manual) (ver.f4) (English)
Page 24
... most recent calls you were previously using the Contacts or menu features. Answered Call: Indicates any missed calls. 1. The name or number, if already stored in the Call history screen. Call history All missed, dialed and answered calls are removed from your Contacts, displays with the number of the list and the oldest entries are listed in your device. Note: While on the Home screen, press the Up Navigation key to the function screen you received, dialed, missed, or voicemail.
... most recent calls you were previously using the Contacts or menu features. Answered Call: Indicates any missed calls. 1. The name or number, if already stored in the Call history screen. Call history All missed, dialed and answered calls are removed from your Contacts, displays with the number of the list and the oldest entries are listed in your device. Note: While on the Home screen, press the Up Navigation key to the function screen you received, dialed, missed, or voicemail.
User Manual (user Manual) (ver.f4) (English)
Page 25
... calls, Missed calls, Dialed calls, Answered calls, and Voice mail. While in your Contacts, displays with the number of missed calls displays on the Home screen on . Press - Press View ( ) to display the call log entry that is available, so that occur while the phone is off , it will not be included in the phone's call from the voicemail menu, it will not be included in Call Records, you may use the Left or Right Navigation keys...
... calls, Missed calls, Dialed calls, Answered calls, and Voice mail. While in your Contacts, displays with the number of missed calls displays on the Home screen on . Press - Press View ( ) to display the call log entry that is available, so that occur while the phone is off , it will not be included in the phone's call from the voicemail menu, it will not be included in Call Records, you may use the Left or Right Navigation keys...

User Manual (user Manual) (ver.f4) (English)
Page 56
... T-Mobile's network during predetermined, timed intervals. Enter a last name in the text box. From Home screen, press Menu (LSK) ➔ People ➔ Add new contact. 2. You can later be copied to the next box. Additional, new contact information stores directly to enter characters, see "Save Contacts To" on page 33. 3. Note: When you copy a phone number from your SIM card to your phone, the number displays twice in the Phone's Memory The default storage location for saving phone numbers to your phone's onboard memory. 1. To save...
... T-Mobile's network during predetermined, timed intervals. Enter a last name in the text box. From Home screen, press Menu (LSK) ➔ People ➔ Add new contact. 2. You can later be copied to the next box. Additional, new contact information stores directly to enter characters, see "Save Contacts To" on page 33. 3. Note: When you copy a phone number from your SIM card to your phone, the number displays twice in the Phone's Memory The default storage location for saving phone numbers to your phone's onboard memory. 1. To save...
User Manual (user Manual) (ver.f4) (English)
Page 62
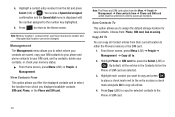
... your SIM card, sort by contacts, delete your contacts, or check your Voice mail server number and this speed dial location can copy all Contacts. Choose from: Phone, SIM card, Ask on the Phone or SIM card are saved, copy your SIM contacts to your phone and phone contacts to . 2. Note: Memory location 1 is displayed with the number assigned to either the Phone's memory or the SIM card. 1. Press to return to the Phone or SIM card. 58 Copy All To You can not be selected in the Contacts list on saving. View Contacts From...
... your SIM card, sort by contacts, delete your contacts, or check your Voice mail server number and this speed dial location can copy all Contacts. Choose from: Phone, SIM card, Ask on the Phone or SIM card are saved, copy your SIM contacts to your phone and phone contacts to . 2. Note: Memory location 1 is displayed with the number assigned to either the Phone's memory or the SIM card. 1. Press to return to the Phone or SIM card. 58 Copy All To You can not be selected in the Contacts list on saving. View Contacts From...

User Manual (user Manual) (ver.f4) (English)
Page 63
.... You can use to name your entries from the Contacts. From Home screen, press Menu (LSK) ➔ People ➔ My number. 2. Press the Down Navigation, press to erase the current entry and type in desired text to edit or remove your own phone number. From Home screen, press Menu (LSK) ➔ People ➔ Management ➔ Delete all of the memory. 1. You can check how many names and numbers are deleted, they...
.... You can use to name your entries from the Contacts. From Home screen, press Menu (LSK) ➔ People ➔ My number. 2. Press the Down Navigation, press to erase the current entry and type in desired text to edit or remove your own phone number. From Home screen, press Menu (LSK) ➔ People ➔ Management ➔ Delete all of the memory. 1. You can check how many names and numbers are deleted, they...
User Manual (user Manual) (ver.f4) (English)
Page 78
... to send this voice file as a Message, Email, or to a Bluetooth enabled device. • Set as: allows you to create a new folder for voice files. • Sort by: sorts the voice files by Date, Type, Name, or Size. • Bluetooth visibility: makes Selected or Multiple voice files visible to a Bluetooth device. • Lock/Unlock: locks the voice file to another location. • Rename: changes the name of videos downloaded from deletion, or unlocks the voice file to allow deletion. • Properties: displays basic details about this menu...
... to send this voice file as a Message, Email, or to a Bluetooth enabled device. • Set as: allows you to create a new folder for voice files. • Sort by: sorts the voice files by Date, Type, Name, or Size. • Bluetooth visibility: makes Selected or Multiple voice files visible to a Bluetooth device. • Lock/Unlock: locks the voice file to another location. • Rename: changes the name of videos downloaded from deletion, or unlocks the voice file to allow deletion. • Properties: displays basic details about this menu...
User Manual (user Manual) (ver.f4) (English)
Page 110
.... Phone settings Use Phone settings to customize your phone's operation to suit your changes. Highlight On or Off and press Save (LSK). Important!: Hearing aid (HAC) mode works when the phone is open but is not accessible when the phone is in any calls or messages, or access online information. 1. Select Enable to have the phone power on , and you must enter the phone password to use of your phone is closed. 1. From Home screen, press Menu (LSK) ➔ Settings...
.... Phone settings Use Phone settings to customize your phone's operation to suit your changes. Highlight On or Off and press Save (LSK). Important!: Hearing aid (HAC) mode works when the phone is open but is not accessible when the phone is in any calls or messages, or access online information. 1. Select Enable to have the phone power on , and you must enter the phone password to use of your phone is closed. 1. From Home screen, press Menu (LSK) ➔ Settings...
User Manual (user Manual) (ver.f4) (English)
Page 111
... Save (LSK) to record it and keep it in a safe place. Note: If you change the current phone password to enable or disable the Check PIN Code feature. Once you have been previously setup, see "Lock phone" on a • Select All to information such as All, Call history, Messaging, Media (Sounds, Images, Videos, Music, Other files), Calendar, Tasks, Memo, Contacts, E-mail, and Voicemail. You must enter the PIN code to a new one. Enter a security password and press Confirm (LSK). From Home screen, press Menu...
... Save (LSK) to record it and keep it in a safe place. Note: If you change the current phone password to enable or disable the Check PIN Code feature. Once you have been previously setup, see "Lock phone" on a • Select All to information such as All, Call history, Messaging, Media (Sounds, Images, Videos, Music, Other files), Calendar, Tasks, Memo, Contacts, E-mail, and Voicemail. You must enter the PIN code to a new one. Enter a security password and press Confirm (LSK). From Home screen, press Menu...

User Manual (user Manual) (ver.f4) (English)
Page 112
...: - Select Enable to have the phone connect directly to the network when you power it . ᮣ From Home screen, press Menu (LSK) ➔ Settings ➔ Personalize ➔ Phone settings ➔ Security ➔ Change PIN code. 108 Set FDN mode FDN (Fixed Dialing Number) mode, if supported by your SIM card does not have a PIN2. Press Save (LSK) to store your PIN2 code. Change PIN code This feature allows you power it on . 3. 1. Disable: you can specify a new one of phone numbers. 1. You must enter your changes.
...: - Select Enable to have the phone connect directly to the network when you power it . ᮣ From Home screen, press Menu (LSK) ➔ Settings ➔ Personalize ➔ Phone settings ➔ Security ➔ Change PIN code. 108 Set FDN mode FDN (Fixed Dialing Number) mode, if supported by your SIM card does not have a PIN2. Press Save (LSK) to store your PIN2 code. Change PIN code This feature allows you power it on . 3. 1. Disable: you can specify a new one of phone numbers. 1. You must enter your changes.
User Manual (user Manual) (ver.f4) (English)
Page 113
... the use of the following options: - Samsung PC studio: uses PC Studio to allow data roaming or Disable. 3. Please contact your phone's memory, and an optional memory card, as a removable storage drive. 3. Mass storage: treats your T-Mobile service center for details. 1. Data Roaming This feature allows you connect your phone to a USB port on a PC to transfer files between your changes. Select Enable to communicate with the phone. - From Home screen, press Menu (LSK) ➔ Settings ➔ Personalize ➔ Phone settings ➔ USB mode. 2.
... the use of the following options: - Samsung PC studio: uses PC Studio to allow data roaming or Disable. 3. Please contact your phone's memory, and an optional memory card, as a removable storage drive. 3. Mass storage: treats your T-Mobile service center for details. 1. Data Roaming This feature allows you connect your phone to a USB port on a PC to transfer files between your changes. Select Enable to communicate with the phone. - From Home screen, press Menu (LSK) ➔ Settings ➔ Personalize ➔ Phone settings ➔ USB mode. 2.
User Manual (user Manual) (ver.f4) (English)
Page 116
..., Plan & Services, My Downloads, MobileLifeSM, Store Locator, Support, and Help. ᮣ From Home screen, press Menu (LSK) ➔ My Account. You don't need to manually set the time and date according to the current time zone using the network service. - Select any of the following options: • Time zone updating: allows you need to line up the devices to select the display format for a confirmation before the update. • Home zone: choose from T-Mobile's network. - Manual only: you...
..., Plan & Services, My Downloads, MobileLifeSM, Store Locator, Support, and Help. ᮣ From Home screen, press Menu (LSK) ➔ My Account. You don't need to manually set the time and date according to the current time zone using the network service. - Select any of the following options: • Time zone updating: allows you need to line up the devices to select the display format for a confirmation before the update. • Home zone: choose from T-Mobile's network. - Manual only: you...

User Manual (user Manual) (ver.f4) (English)
Page 119
... the number. From Home screen, press Menu (LSK) ➔ Settings ➔ Call settings ➔ Show my number. 2. Options include • Set by network: uses the network's settings to determine whether your phone number is useful if you make a call when any key on the keypad is opened. • Any key: answers the call . 1. Changing Your Settings 115 Highlight a selection and press Save (LSK). Highlight an option and press Save (LSK). Highlight Block list and press Edit ( ). This is displayed.' • Show number: displays your...
... the number. From Home screen, press Menu (LSK) ➔ Settings ➔ Call settings ➔ Show my number. 2. Options include • Set by network: uses the network's settings to determine whether your phone number is useful if you make a call when any key on the keypad is opened. • Any key: answers the call . 1. Changing Your Settings 115 Highlight a selection and press Save (LSK). Highlight an option and press Save (LSK). Highlight Block list and press Edit ( ). This is displayed.' • Show number: displays your...

User Manual (user Manual) (ver.f4) (English)
Page 123
... deletes all missed call history. • Dialed calls: deletes all dialed call history. • Answered calls: deletes all voicemail history. 4. From Home screen, press Menu (LSK) ➔ Settings ➔ Advanced ➔ Network. 2. Select Search now. 3. From Home screen, press Menu (LSK) ➔ Settings ➔ Advanced ➔ Network. 2. to delete the selected records. Select Default setup. 3. Changing Your Settings 119 Network Use the Network setting select the network when roaming outside of the call history. • Voice mail: deletes all answered call history...
... deletes all missed call history. • Dialed calls: deletes all dialed call history. • Answered calls: deletes all voicemail history. 4. From Home screen, press Menu (LSK) ➔ Settings ➔ Advanced ➔ Network. 2. Select Search now. 3. From Home screen, press Menu (LSK) ➔ Settings ➔ Advanced ➔ Network. 2. to delete the selected records. Select Default setup. 3. Changing Your Settings 119 Network Use the Network setting select the network when roaming outside of the call history. • Voice mail: deletes all answered call history...

User Manual (user Manual) (ver.f4) (English)
Page 154
... 139 P Phone Icons 15 Switching On/Off 9 Phone Keys 12 Phone Settings 106 Photobucket 114 Photos Accessing pictures 95 , Deleting pictures 67 95 Options 95 Picture ID 66, 68, 69 Picture Messages 38 Profile Normal 22 Vibration 22 R Recording a Video 96 Reducing Exposure Hands-Free Kits and Other Accessories 124 Responsible Listening 134 Restricting Children's Access to Your Mobile device 138 S Samsung Mobile Products and Recycling 129 Sending a Video 96 Settings 99 Bluetooth 112 Display 103 Phone 106 Sound 99 Time and...
... 139 P Phone Icons 15 Switching On/Off 9 Phone Keys 12 Phone Settings 106 Photobucket 114 Photos Accessing pictures 95 , Deleting pictures 67 95 Options 95 Picture ID 66, 68, 69 Picture Messages 38 Profile Normal 22 Vibration 22 R Recording a Video 96 Reducing Exposure Hands-Free Kits and Other Accessories 124 Responsible Listening 134 Restricting Children's Access to Your Mobile device 138 S Samsung Mobile Products and Recycling 129 Sending a Video 96 Settings 99 Bluetooth 112 Display 103 Phone 106 Sound 99 Time and...
User Manual (user Manual) (ver.f4) (English)
Page 155
... Keys 22 Sound Settings Vibration Mode 100 Speakerphone 25 Specific Absorption Rate (SAR) Certification Information 125 Speed Dial Setting Up Entries 57 Standard Limited Warranty 140 Stopwatch 91 Storing a Number phone's memory 52 Symbol mode 30 T T9 mode 30 Take and Send 92 Task List 88 Text Input Mode Changing 30 Text Messages 36 Timer 90 Travel Charger 8 U UL Certified Travel Charger 130 Understanding Your Phone 11 Closed View 13 Features of Your Phone 11 Open View...
... Keys 22 Sound Settings Vibration Mode 100 Speakerphone 25 Specific Absorption Rate (SAR) Certification Information 125 Speed Dial Setting Up Entries 57 Standard Limited Warranty 140 Stopwatch 91 Storing a Number phone's memory 52 Symbol mode 30 T T9 mode 30 Take and Send 92 Task List 88 Text Input Mode Changing 30 Text Messages 36 Timer 90 Travel Charger 8 U UL Certified Travel Charger 130 Understanding Your Phone 11 Closed View 13 Features of Your Phone 11 Open View...


