
User Guide
Page 5
... OHITETTAESSA OLET ALTTIINA NÄKYMÄTTÖMÄLLE LASERSÄTEILYLLE ÄLÄ KATSO SÄTEESEEN. Hot Surface. Environmental and Safety Consideration Laser Safety Statement The printer is never any human access to laser radiation above a Class I level during normal operation, user maintenance.... to conform to the requirements of DHHS 21 CFR, chapter 1 Subchapter J for Class I(1) laser products, and elsewhere is certified as a Class I STRÅLEN. The laser system and printer are not considered to the requirements of IEC 825. CAUTION - DO NOT OPEN THIS COVER. ...
... OHITETTAESSA OLET ALTTIINA NÄKYMÄTTÖMÄLLE LASERSÄTEILYLLE ÄLÄ KATSO SÄTEESEEN. Hot Surface. Environmental and Safety Consideration Laser Safety Statement The printer is never any human access to laser radiation above a Class I level during normal operation, user maintenance.... to conform to the requirements of DHHS 21 CFR, chapter 1 Subchapter J for Class I(1) laser products, and elsewhere is certified as a Class I STRÅLEN. The laser system and printer are not considered to the requirements of IEC 825. CAUTION - DO NOT OPEN THIS COVER. ...

User Guide
Page 22
... Data light remains on the power. ML-1430 Laser Beam Printer Excellent Performance Saving & Convenience SETTING UP YOUR PRINTER 2.7 Hold down the button for about 2 seconds until all the printer control panel lights turn on briefly. Demo The demo page provides a sample of the printer. 2 Plug the other end into the... power receptacle on the back of the print quality and helps you verify the printer is printing correctly. To AC outlet ➜ Print a Demo Page! Turn on the Printer 1 Plug the power cord into a properly grounded AC outlet. 3 Turn on , press and ...
... Data light remains on the power. ML-1430 Laser Beam Printer Excellent Performance Saving & Convenience SETTING UP YOUR PRINTER 2.7 Hold down the button for about 2 seconds until all the printer control panel lights turn on briefly. Demo The demo page provides a sample of the printer. 2 Plug the other end into the... power receptacle on the back of the print quality and helps you verify the printer is printing correctly. To AC outlet ➜ Print a Demo Page! Turn on the Printer 1 Plug the power cord into a properly grounded AC outlet. 3 Turn on , press and ...

User Guide
Page 46
... is on Envelopes Guidelines • Only use envelopes with clasps, snaps, windows, coated lining, or self-stick adhesives as these envelopes may severely damage the printer. 1 Flex or fan the envelopes before loading. 2 Load the envelopes into the input tray with the stamp area enters the tray first. 3 Adjust the guide... input tray, make sure that they are undamaged and are not stuck together. • Do not feed stamped envelopes. • Never use envelopes recommended for laser printers. Printing on the right side and the end of the envelope stack.
... is on Envelopes Guidelines • Only use envelopes with clasps, snaps, windows, coated lining, or self-stick adhesives as these envelopes may severely damage the printer. 1 Flex or fan the envelopes before loading. 2 Load the envelopes into the input tray with the stamp area enters the tray first. 3 Adjust the guide... input tray, make sure that they are undamaged and are not stuck together. • Do not feed stamped envelopes. • Never use envelopes recommended for laser printers. Printing on the right side and the end of the envelope stack.

User Guide
Page 49
... printed label sheets stack up . For details, see page 5.3. 4 Press Demo to printer components. • Do not feed a sheet of labels through the printer. • Do not use labels that there is designed for one pass through the printer more than once. Printing on labels, configure the paper source, type and size... Exposed adhesive can tolerate a fusing temperature of the labels. 2 Push the output lever down. 3 To print on Labels Guidelines • Only use labels recommended for laser printers. • Verify that the labels' adhesive material can also cause damage to start feeding.
... printed label sheets stack up . For details, see page 5.3. 4 Press Demo to printer components. • Do not feed a sheet of labels through the printer. • Do not use labels that there is designed for one pass through the printer more than once. Printing on labels, configure the paper source, type and size... Exposed adhesive can tolerate a fusing temperature of the labels. 2 Push the output lever down. 3 To print on Labels Guidelines • Only use labels recommended for laser printers. • Verify that the labels' adhesive material can also cause damage to start feeding.

User Guide
Page 50
... the transparencies. 2 Push the output lever down. 3 To print on Transparencies Guidelines • Only use transparencies recommended for use in laser printers. • Insure transparencies are printed out. • Place transparencies on the print side. 1 Load transparencies in the software application. Printing...edges. • Hold the transparencies by the edges and avoid touching the print side. Notes: • To prevent transparencies from the printer. PRINT MEDIA 4.11 For details, see page 5.3. 4 Press Demo to scratch or leave fingerprints on a flat surface after removing ...
... the transparencies. 2 Push the output lever down. 3 To print on Transparencies Guidelines • Only use transparencies recommended for use in laser printers. • Insure transparencies are printed out. • Place transparencies on the print side. 1 Load transparencies in the software application. Printing...edges. • Hold the transparencies by the edges and avoid touching the print side. Notes: • To prevent transparencies from the printer. PRINT MEDIA 4.11 For details, see page 5.3. 4 Press Demo to scratch or leave fingerprints on a flat surface after removing ...

User Guide
Page 120
... not use labels with no exposed backing between them. APPENDIX A.9 Transparencies Transparencies used in the printer must lie flat with wrinkles, bubbles, or other indications of labels. CAUTION: To avoid damaging the printer, use only transparencies recommended for laser printers. • To prevent jams, always use the face-up output slot. • Never print...
... not use labels with no exposed backing between them. APPENDIX A.9 Transparencies Transparencies used in the printer must lie flat with wrinkles, bubbles, or other indications of labels. CAUTION: To avoid damaging the printer, use only transparencies recommended for laser printers. • To prevent jams, always use the face-up output slot. • Never print...

User Guide
Page 122
... came with your printer into the CD-ROM drive. 3 Double-click ML-1430 on your Macintosh computer. If you are using a USB hub, connect the printer's cable to the first tier of the cable to an available USB port on your Macintosh desktop. 4 Click the Samsung Laser Printer Installer icon next ...to the each language to select the correct one. Note: If you have any connection problems, please refer to your computer documentation. Using Your Printer with Macintosh 2 Hold the USB cable so the icon...
... came with your printer into the CD-ROM drive. 3 Double-click ML-1430 on your Macintosh computer. If you are using a USB hub, connect the printer's cable to the first tier of the cable to an available USB port on your Macintosh desktop. 4 Click the Samsung Laser Printer Installer icon next ...to the each language to select the correct one. Note: If you have any connection problems, please refer to your computer documentation. Using Your Printer with Macintosh 2 Hold the USB cable so the icon...
User Guide
Page 123
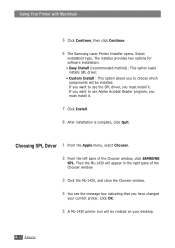
Select installation type. Click OK. 5 A ML-1430 printer icon will be installed. Using Your Printer with Macintosh 5 Click Continue, then click Continue. 6 The Samsung Laser Printer Installer opens. Choosing SPL Driver 1 From the Apple menu, select Chooser. 2 From the left pane of the Chooser window. 3 Click the ML-1430, and close the Chooser window. 4 You see the message box indicating...
Select installation type. Click OK. 5 A ML-1430 printer icon will be installed. Using Your Printer with Macintosh 5 Click Continue, then click Continue. 6 The Samsung Laser Printer Installer opens. Choosing SPL Driver 1 From the Apple menu, select Chooser. 2 From the left pane of the Chooser window. 3 Click the ML-1430, and close the Chooser window. 4 You see the message box indicating...


