User Manual (ENGLISH)
Page 2
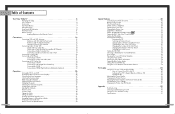
... of Contents Your New Wide TV 6 Replacing the Lamp 6 List of Features ...8 Accessories ...8 Side Panel Buttons 9 Side Panel Jacks 9 Front Panel LED Indicators 10 Rear Panel Jacks 11 Remote Control ...Control Codes 47 Fine Tuning Channels 48 LNA (Low Noise Amplifier 49 Selecting the Color Tone 50 Changing the Picture Size 51 Digital Noise Reduction 52 DNIeTM (Digital Natural Image engine) 53 Setting... Changing the Size of the Sub Picture 60 Changing the Location of the Sub Picture 61 Changing the Channel of the Sub Picture 62 Selecting the Sound Source 63 Setting the ...
... of Contents Your New Wide TV 6 Replacing the Lamp 6 List of Features ...8 Accessories ...8 Side Panel Buttons 9 Side Panel Jacks 9 Front Panel LED Indicators 10 Rear Panel Jacks 11 Remote Control ...Control Codes 47 Fine Tuning Channels 48 LNA (Low Noise Amplifier 49 Selecting the Color Tone 50 Changing the Picture Size 51 Digital Noise Reduction 52 DNIeTM (Digital Natural Image engine) 53 Setting... Changing the Size of the Sub Picture 60 Changing the Location of the Sub Picture 61 Changing the Channel of the Sub Picture 62 Selecting the Sound Source 63 Setting the ...

User Manual (ENGLISH)
Page 25
...: Ant.1 Air/CATV : Air Auto Program Add/Delete Favorite Channels Name Fine Tune ▼ More Move Enter Return 3 Press the ... If you experience noise on the remote control, select the channel you have difficulty tuning channels. 1 Using the number buttons on a certain channel, set the "LNA" to "On...9650; More LNA Scan : OffOff On Move Enter Return NOTE • This function works in "ANT 1 IN" mode only (not available in the TV's memory, press the ENTER button. Air 12 Fine Tune 3 To store the fine tuning setting in "ANT 2 IN" mode). 49 Input Picture Sound ...
...: Ant.1 Air/CATV : Air Auto Program Add/Delete Favorite Channels Name Fine Tune ▼ More Move Enter Return 3 Press the ... If you experience noise on the remote control, select the channel you have difficulty tuning channels. 1 Using the number buttons on a certain channel, set the "LNA" to "On...9650; More LNA Scan : OffOff On Move Enter Return NOTE • This function works in "ANT 1 IN" mode only (not available in the TV's memory, press the ENTER button. Air 12 Fine Tune 3 To store the fine tuning setting in "ANT 2 IN" mode). 49 Input Picture Sound ...

User Manual (ENGLISH)
Page 27
Special Features Digital Noise Reduction If the broadcast signal received by your eyes. 1 Press the MENU button. Press the EXIT button to help reduce any static and ghosting that ... Return 52 DNIeTM (Digital Natural Image engine) This feature brings you can activate the Digital Noise Reduction feature to exit. DNIeTM technology will fit every signals into your TV is weak, you more detailed image with 3D noise reduction, detail enhancement, contrast enhancement and white enhancement. Press the ... Input Picture Sound Channel Setup...
Special Features Digital Noise Reduction If the broadcast signal received by your eyes. 1 Press the MENU button. Press the EXIT button to help reduce any static and ghosting that ... Return 52 DNIeTM (Digital Natural Image engine) This feature brings you can activate the Digital Noise Reduction feature to exit. DNIeTM technology will fit every signals into your TV is weak, you more detailed image with 3D noise reduction, detail enhancement, contrast enhancement and white enhancement. Press the ... Input Picture Sound Channel Setup...

User Manual (ENGLISH)
Page 42
...• This feature may change the width of screen. 1 Press the TV/VIDEO button to remove or reduce picture noise. If necessary, adjust the position to select "PC", then press the ENTER button. If the noise is not supported. * The TV will vary, depending on the center of the image. After the... noise has been reduced, re-adjust the picture so that are supported for information about connecting your PC to a TV display-monitor. • Same modes as ...
...• This feature may change the width of screen. 1 Press the TV/VIDEO button to remove or reduce picture noise. If necessary, adjust the position to select "PC", then press the ENTER button. If the noise is not supported. * The TV will vary, depending on the center of the image. After the... noise has been reduced, re-adjust the picture so that are supported for information about connecting your PC to a TV display-monitor. • Same modes as ...

User Manual (ENGLISH)
Page 3
...Remote Control Codes 47 Fine Tuning Channels 48 LNA (Low Noise Amplifier 49 Selecting the Color Tone 50 Changing the Picture Size 51 Digital Noise Reduction 52 DNIeTM (Digital Natural Image engine) 53 Setting...Picture 59 Changing the Size of the Sub Picture 60 Changing the Location of the Sub Picture 61 Changing the Channel of the Sub Picture 62 Selecting the Sound Source 63 Setting the SRS ...Color Weakness Enhancement Feature 82 PC Display...84 Using Your TV as a Computer (PC) Display 84 How to Connect Your PC to the TV 84 Setting up Your PC Software (Based on Widows...
...Remote Control Codes 47 Fine Tuning Channels 48 LNA (Low Noise Amplifier 49 Selecting the Color Tone 50 Changing the Picture Size 51 Digital Noise Reduction 52 DNIeTM (Digital Natural Image engine) 53 Setting...Picture 59 Changing the Size of the Sub Picture 60 Changing the Location of the Sub Picture 61 Changing the Channel of the Sub Picture 62 Selecting the Sound Source 63 Setting the SRS ...Color Weakness Enhancement Feature 82 PC Display...84 Using Your TV as a Computer (PC) Display 84 How to Connect Your PC to the TV 84 Setting up Your PC Software (Based on Widows...

User Manual (ENGLISH)
Page 49
or † button to "On". LNA (Low Noise Amplifier) When a weak broadcast signal causes unclear noisy picture the "LNA" feature improves the picture quality by setting to select "On" or "Off", then press ... Enter Return NOTE • This function works in "ANT 1 IN" mode only (not available in "ANT 2 IN" mode). Press the ... English - 49 If you experience noise on a certain channel, set the "LNA" to "On" or "Off" for this channel, to select "LNA", then press the ENTER button.
or † button to "On". LNA (Low Noise Amplifier) When a weak broadcast signal causes unclear noisy picture the "LNA" feature improves the picture quality by setting to select "On" or "Off", then press ... Enter Return NOTE • This function works in "ANT 1 IN" mode only (not available in "ANT 2 IN" mode). Press the ... English - 49 If you experience noise on a certain channel, set the "LNA" to "On" or "Off" for this channel, to select "LNA", then press the ENTER button.

User Manual (ENGLISH)
Page 52
... If the broadcast signal received by your TV is weak, you can activate the Digital Noise Reduction feature to select "Picture", then press the ENTER button. or † button to help reduce any static and ghosting that may appear on the ...
... If the broadcast signal received by your TV is weak, you can activate the Digital Noise Reduction feature to select "Picture", then press the ENTER button. or † button to help reduce any static and ghosting that may appear on the ...

User Manual (ENGLISH)
Page 53
... will fit every signals into your eyes. 1 Press the MENU button. DNIeTM (Digital Natural Image engine) This feature brings you more detailed image with 3D noise reduction, detail enhancement, contrast enhancement and white enhancement.
... will fit every signals into your eyes. 1 Press the MENU button. DNIeTM (Digital Natural Image engine) This feature brings you more detailed image with 3D noise reduction, detail enhancement, contrast enhancement and white enhancement.

User Manual (ENGLISH)
Page 87
... or † button to exit. ▲ Fine 0 ▼ NOTE • This feature may change the width of the image. After the noise has been reduced, re-adjust the picture so that it is not removed by fine tuning alone, then do the frequency adjustments to select "PC... Position Auto Adjustment Recall Channel Setup Move Enter √ √ √ Return 5 Pressing the œ or √ button to remove the picture noise. ▲ Coarse 1344 ▼ Press the EXIT button to select "Setup", then press the ENTER button. English - 87 Adjusting the Picture Quality The ...
... or † button to exit. ▲ Fine 0 ▼ NOTE • This feature may change the width of the image. After the noise has been reduced, re-adjust the picture so that it is not removed by fine tuning alone, then do the frequency adjustments to select "PC... Position Auto Adjustment Recall Channel Setup Move Enter √ √ √ Return 5 Pressing the œ or √ button to remove the picture noise. ▲ Coarse 1344 ▼ Press the EXIT button to select "Setup", then press the ENTER button. English - 87 Adjusting the Picture Quality The ...


