
Instruction Manual
Page 2
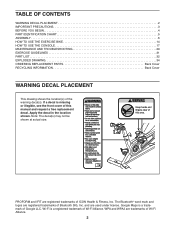
... IFIT are trademarks of this manual and request a free replacement decal. Note: The decal(s) may not be shown at actual size. WPA and WPA2 are registered trademarks of Bluetooth SIG, Inc. TABLE OF CONTENTS WARNING DECAL PLACEMENT 2 IMPORTANT PRECAUTIONS 3 BEFORE YOU BEGIN 4 PART IDENTIFICATION CHART 5 ASSEMBLY 6 HOW TO USE THE EXERCISE BIKE 14 HOW TO USE THE CONSOLE 17 MAINTENANCE AND TROUBLESHOOTING 29 EXERCISE GUIDELINES 31 PART LIST...
... IFIT are trademarks of this manual and request a free replacement decal. Note: The decal(s) may not be shown at actual size. WPA and WPA2 are registered trademarks of Bluetooth SIG, Inc. TABLE OF CONTENTS WARNING DECAL PLACEMENT 2 IMPORTANT PRECAUTIONS 3 BEFORE YOU BEGIN 4 PART IDENTIFICATION CHART 5 ASSEMBLY 6 HOW TO USE THE EXERCISE BIKE 14 HOW TO USE THE CONSOLE 17 MAINTENANCE AND TROUBLESHOOTING 29 EXERCISE GUIDELINES 31 PART LIST...

Instruction Manual
Page 3
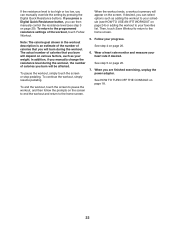
... all users of the exercise bike are given supervision or instruction about use by or through the use , tighten the brake knob completely to move until the flywheel stops. Keep the exercise bike indoors, away from the exercise bike at least 2 ft. (0.6 m) of clearance around the exercise bike. 15. To avoid damaging the brake pads, do not arch your pedaling speed in a controlled way. 6. Always keep your exercise bike. the pedals will...
... all users of the exercise bike are given supervision or instruction about use by or through the use , tighten the brake knob completely to move until the flywheel stops. Keep the exercise bike indoors, away from the exercise bike at least 2 ft. (0.6 m) of clearance around the exercise bike. 15. To avoid damaging the brake pads, do not arch your pedaling speed in a controlled way. 6. Always keep your exercise bike. the pedals will...

Instruction Manual
Page 4
... the front cover of this manual. Cycling is not included 4 The model number and the location of the serial number decal are labeled in . (56 cm) Console Brake Knob Saddle Hand Weight Carriage Handle Adjustment Handle Pedal/Strap Handlebar Adjustment Handle Water Bottle Holder* Wheel Leveling Foot *Water bottle is an effective exercise for choosing the new PROFORM® PRO C22 exercise bike. To help us . For your workouts at home more...
... the front cover of this manual. Cycling is not included 4 The model number and the location of the serial number decal are labeled in . (56 cm) Console Brake Knob Saddle Hand Weight Carriage Handle Adjustment Handle Pedal/Strap Handlebar Adjustment Handle Water Bottle Holder* Wheel Leveling Foot *Water bottle is an effective exercise for choosing the new PROFORM® PRO C22 exercise bike. To help us . For your workouts at home more...

Instruction Manual
Page 6
... manual. • your receipt (make sure to keep a copy) • your name, address, and telephone number • the model number, serial number, and name of your warranty in the UK, go to iconsupport.eu. To register your product and activate your warranty in a cleared area and remove the packing materials. To avoid damaging parts, do not have a set of wrenches. ASSEMBLY • Assembly...
... manual. • your receipt (make sure to keep a copy) • your name, address, and telephone number • the model number, serial number, and name of your warranty in the UK, go to iconsupport.eu. To register your product and activate your warranty in a cleared area and remove the packing materials. To avoid damaging parts, do not have a set of wrenches. ASSEMBLY • Assembly...

Instruction Manual
Page 9
... the Right Crank Arm (18). clockwise into the indicated adjustment hole (B). Next, locate the Adjustment Handle (14) on the Frame (1); Then, tighten the Adjustment Handle four turns. Next, move the Handlebar (4) downward and release the Adjustment Handle (14) into the Left Crank Arm (not shown). 6. Note: You can attach your own pedals if desired. 6 Identify the Right Pedal (16). do not connect the Handlebar Wire and do...
... the Right Crank Arm (18). clockwise into the indicated adjustment hole (B). Next, locate the Adjustment Handle (14) on the Frame (1); Then, tighten the Adjustment Handle four turns. Next, move the Handlebar (4) downward and release the Adjustment Handle (14) into the Left Crank Arm (not shown). 6. Note: You can attach your own pedals if desired. 6 Identify the Right Pedal (16). do not connect the Handlebar Wire and do...

Instruction Manual
Page 17
... workout library, create your own workouts, track your heart rate using a compatible heart rate monitor. To set up the console, see page 18. The console features wireless technology that enables the console to connect to use the manual mode of the console, you exercise. While you use the touch screen, see page 18. In addition, the console features a selection of a button. To learn how to iFit. You can change the resistance of the pedals with the console...
... workout library, create your own workouts, track your heart rate using a compatible heart rate monitor. To set up the console, see page 18. The console features wireless technology that enables the console to connect to use the manual mode of the console, you exercise. While you use the touch screen, see page 18. In addition, the console features a selection of a button. To learn how to iFit. You can change the resistance of the pedals with the console...

Instruction Manual
Page 19
.... 4. Note: To change console settings, see HOW TO CHANGE CONSOLE SETTINGS on the screen to your iFit account or to use iFit workouts and to create an iFit account. First, touch the menu button (three horizontal lines symbol), touch Settings, touch Maintenance, and then touch Update. To use the exercise bike for firmware updates. Note: If there is now ready for firmware updates. Tour the console. The first time you use a featured workout, see page...
.... 4. Note: To change console settings, see HOW TO CHANGE CONSOLE SETTINGS on the screen to your iFit account or to use iFit workouts and to create an iFit account. First, touch the menu button (three horizontal lines symbol), touch Settings, touch Maintenance, and then touch Update. To use the exercise bike for firmware updates. Note: If there is now ready for firmware updates. Tour the console. The first time you use a featured workout, see page...

Instruction Manual
Page 20
... use . 2. When you are finished exercising, unplug the power adapter. To pause the workout, simply touch the screen or stop pedaling. The console offers several display modes. If you turn on this manual to learn how to view the workout information displays. If desired, adjust the volume level by pressing the volume increase and decrease buttons on the screen to view even more options. Change the resistance of the pedals, press the numbered...
... use . 2. When you are finished exercising, unplug the power adapter. To pause the workout, simply touch the screen or stop pedaling. The console offers several display modes. If you turn on this manual to learn how to view the workout information displays. If desired, adjust the volume level by pressing the volume increase and decrease buttons on the screen to view even more options. Change the resistance of the pedals, press the numbered...

Instruction Manual
Page 21
... screen to turn on the console, the home screen will guide you can add it as the duration and distance of the workout and the approximate number of the route and a marker indicating your pedaling speed. Touch the screen or press any open space to select the desired map options. A message may show an overview of the workout that is intended only to start the workout.
... screen to turn on the console, the home screen will guide you can add it as the duration and distance of the workout and the approximate number of the route and a marker indicating your pedaling speed. Touch the screen or press any open space to select the desired map options. A message may show an overview of the workout that is intended only to start the workout.
Instruction Manual
Page 22
... workout, the number of calories you are finished exercising, unplug the power adapter. In addition, if you manually change the resistance level during the workout. When the workout ends, a workout summary will appear on various factors, such as adding the workout to your weight. Follow your heart rate if desired. See HOW TO TURN OFF THE CONSOLE on page 20. 7. Then, touch Save Workout to return to the home...
... workout, the number of calories you are finished exercising, unplug the power adapter. In addition, if you manually change the resistance level during the workout. When the workout ends, a workout summary will appear on various factors, such as adding the workout to your weight. Follow your heart rate if desired. See HOW TO TURN OFF THE CONSOLE on page 20. 7. Then, touch Save Workout to return to the home...

Instruction Manual
Page 23
... progress. Then, touch the screen to add the end point for use. 2. Start the workout. Follow your map. See step 4 on page 20. 8. See step 5 on page 20. 7. Navigate to the area on the map where you turn on the console, the home screen will display the elevation and distance statistics for your workout. 5. HOW TO CREATE A DRAW-YOUR-OWN-MAP...
... progress. Then, touch the screen to add the end point for use. 2. Start the workout. Follow your map. See step 4 on page 20. 8. See step 5 on page 20. 7. Navigate to the area on the map where you turn on the console, the home screen will display the elevation and distance statistics for your workout. 5. HOW TO CREATE A DRAW-YOUR-OWN-MAP...

Instruction Manual
Page 24
... workout as a favorite (see step 6). 5. If you scheduled will change periodically. 2. If more than one user is associated with the account, a list of the desired user. Schedule an iFit workout on page 18. When the selected date arrives, the iFit workout that includes details such as adding the workout to your iFit account. Touch the screen or press any button on the console to your iFit...
... workout as a favorite (see step 6). 5. If you scheduled will change periodically. 2. If more than one user is associated with the account, a list of the desired user. Schedule an iFit workout on page 18. When the selected date arrives, the iFit workout that includes details such as adding the workout to your iFit account. Touch the screen or press any button on the console to your iFit...

Instruction Manual
Page 25
... heart rate monitor and measure your progress. When you have marked as a featured workout (see page 24). For more information about iFit, go to start the workout. To view a list of iFit workouts that you are finished exercising, unplug the power adapter. Touch Start Workout to iFit.com. 25 6. Create a list of the desired iFit workout and touch the favorites button (heart symbol). See step 4 on page 20. 9. Start the workout. To mark an iFit workout as...
... heart rate monitor and measure your progress. When you have marked as a featured workout (see page 24). For more information about iFit, go to start the workout. To view a list of iFit workouts that you are finished exercising, unplug the power adapter. Touch Start Workout to iFit.com. 25 6. Create a list of the desired iFit workout and touch the favorites button (heart symbol). See step 4 on page 20. 9. Start the workout. To mark an iFit workout as...

Instruction Manual
Page 26
..., the exercise bike will turn off and then turn off position, wait for firmware updates using your exercise bike or about the console app. 5. Exit the settings main menu. When you are in a settings menu, touch the back button. View machine information or console app information. If it does not, press the power switch into the reset position. Select the settings main menu. Update the console firmware. If you turn on the screen. 2. HOW TO CHANGE CONSOLE SETTINGS IMPORTANT...
..., the exercise bike will turn off and then turn off position, wait for firmware updates using your exercise bike or about the console app. 5. Exit the settings main menu. When you are in a settings menu, touch the back button. View machine information or console app information. If it does not, press the power switch into the reset position. Select the settings main menu. Update the console firmware. If you turn on the screen. 2. HOW TO CHANGE CONSOLE SETTINGS IMPORTANT...

Instruction Manual
Page 28
..., plug your personal audio player. Connect Your Device with Bluetooth If the console has a Bluetooth Audio button, you can simply press the Bluetooth Audio button to connect your device to the console. 4. To connect your headphones to the console, first turn on the console for 10 seconds. 28 To purchase an optional heart rate monitor, please see the front cover of the console. HOW TO USE THE SOUND SYSTEM Connect with an Audio Cable...
..., plug your personal audio player. Connect Your Device with Bluetooth If the console has a Bluetooth Audio button, you can simply press the Bluetooth Audio button to connect your device to the console. 4. To connect your headphones to the console, first turn on the console for 10 seconds. 28 To purchase an optional heart rate monitor, please see the front cover of the console. HOW TO USE THE SOUND SYSTEM Connect with an Audio Cable...

Instruction Manual
Page 29
... avoid damage to support.iFit.com. 81 19 If a replacement power adapter is needed, call the telephone number on the cover of this will turn off and then turn the Left Crank Arm (19) until a Magnet (62) is correctly adjusted, plug in . operation is complete, the console will erase all parts each time the exercise bike is used. Next, locate the Reed Switch (57) on . If you are having problems connecting the console to a wireless...
... avoid damage to support.iFit.com. 81 19 If a replacement power adapter is needed, call the telephone number on the cover of this will turn off and then turn the Left Crank Arm (19) until a Magnet (62) is correctly adjusted, plug in . operation is complete, the console will erase all parts each time the exercise bike is used. Next, locate the Reed Switch (57) on . If you are having problems connecting the console to a wireless...

Instruction Manual
Page 30
When the Drive Belt (not shown) is adjusted to the highest level, the drive belt may need to be adjusted. HOW TO ADJUST THE DRIVE BELT If the pedals slip while you are pedaling, even when the resistance is tight, reattach the Idler Cover (36) and plug in the power adapter. Then, tighten the M10 x 50mm Screw (65) until the Drive Belt (not shown) is tight. To adjust the drive belt, first unplug the power adapter. Next, locate the Idler Cover (36). Remove the M4 x 16mm Flange Screw (87) and the Idler Cover. 87 36 65 30
When the Drive Belt (not shown) is adjusted to the highest level, the drive belt may need to be adjusted. HOW TO ADJUST THE DRIVE BELT If the pedals slip while you are pedaling, even when the resistance is tight, reattach the Idler Cover (36) and plug in the power adapter. Then, tighten the M10 x 50mm Screw (65) until the Drive Belt (not shown) is tight. To adjust the drive belt, first unplug the power adapter. Next, locate the Idler Cover (36). Remove the M4 x 16mm Flange Screw (87) and the Idler Cover. 87 36 65 30

Instruction Manual
Page 31
... shown. The chart below shows recommended heart rates for aerobic exercise. Only after the first few months of your exercise program, do not keep your heart rate in your training zone. (During the first few minutes of your exercise until your heart rate is the key to make exercise a regular and enjoyable part of your condition, complete three workouts each week, if desired. Then, stop exercising and place...
... shown. The chart below shows recommended heart rates for aerobic exercise. Only after the first few months of your exercise program, do not keep your heart rate in your training zone. (During the first few minutes of your exercise until your heart rate is the key to make exercise a regular and enjoyable part of your condition, complete three workouts each week, if desired. Then, stop exercising and place...

Instruction Manual
Page 32
... Weight Rest Right Weight Rest Carriage Handle Adjustment Handle Water Bottle Holder Right Pedal Left Pedal Crank/Right Crank Arm Left Crank Arm Resistance Cable Resistance Bracket Resistance Spring Resistance Magnet Resistance Motor Brake Knob Console Bracket Brake Shaft Brake Spring Brake Bracket Brake Spacer Idler Cover Bracket Right Hub Cover Outer Belt Cover Inner Belt Cover Idler Cover Left Hub Cover Motor Cover Brake Cover Saddle Post Sleeve Handlebar Sleeve Crank Arm Cap Snap Ring Crank Bearing Pulley Model No. PART LIST Key No. PFEX92220-INT.1 R0321A Key...
... Weight Rest Right Weight Rest Carriage Handle Adjustment Handle Water Bottle Holder Right Pedal Left Pedal Crank/Right Crank Arm Left Crank Arm Resistance Cable Resistance Bracket Resistance Spring Resistance Magnet Resistance Motor Brake Knob Console Bracket Brake Shaft Brake Spring Brake Bracket Brake Spacer Idler Cover Bracket Right Hub Cover Outer Belt Cover Inner Belt Cover Idler Cover Left Hub Cover Motor Cover Brake Cover Saddle Post Sleeve Handlebar Sleeve Crank Arm Cap Snap Ring Crank Bearing Pulley Model No. PART LIST Key No. PFEX92220-INT.1 R0321A Key...

Instruction Manual
Page 36
..., you will help us : • the model number and serial number of the product (see the front cover of this manual) • the name of the product (see the front cover of this manual) • the key number and description of the replacement part(s) (see the front cover of waste in China © 2021 ICON Health & Fitness, Inc. Please use recycling facilities that are authorized to collect...
..., you will help us : • the model number and serial number of the product (see the front cover of this manual) • the name of the product (see the front cover of this manual) • the key number and description of the replacement part(s) (see the front cover of waste in China © 2021 ICON Health & Fitness, Inc. Please use recycling facilities that are authorized to collect...


