Owner's Manual
Page 4
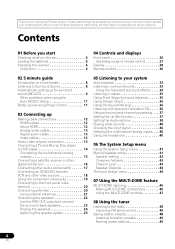
... 36 Listening with Acoustic Calibration EQ . . . . . 36 Using surround back channel processing . . . 37 Setting the Up Mix function 37 Setting the Audio options ...HDMI 12 Analog audio cables 13 Digital audio cables 13 Video cables 13 About video outputs connection 13 Connecting a TV and Blu-ray Disc player or DVD player 14 Connecting the multichannel analog outputs 15 Connecting a satellite receiver...stations 49 4 En Please read through these operating instructions so you for buying this Pioneer product. Thank you will know how to operate your system Auto playback 33 Listening ...
... 36 Listening with Acoustic Calibration EQ . . . . . 36 Using surround back channel processing . . . 37 Setting the Up Mix function 37 Setting the Audio options ...HDMI 12 Analog audio cables 13 Digital audio cables 13 Video cables 13 About video outputs connection 13 Connecting a TV and Blu-ray Disc player or DVD player 14 Connecting the multichannel analog outputs 15 Connecting a satellite receiver...stations 49 4 En Please read through these operating instructions so you for buying this Pioneer product. Thank you will know how to operate your system Auto playback 33 Listening ...
Owner's Manual
Page 5
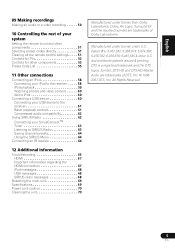
...trademarks of your system Setting the remote to SIRIUS Radio 63 Saving channel presets 64 Using the SIRIUS Menu 64 Connecting an IR receiver 64 12 Additional information Troubleshooting 65 HDMI 67 Important information regarding the HDMI connection 67 iPod messages 68 USB messages 68 SIRIUS radio messages 68...,616; 6,487,535 & other components 53 Preset Code List 55 11 Other connections Connecting an iPod 58 Connecting your iPod to the receiver . . . . . 58 iPod playback 59 Watching photos and video content 60 About iPod 60 Connecting a USB device 60 Connecting your USB device ...
...trademarks of your system Setting the remote to SIRIUS Radio 63 Saving channel presets 64 Using the SIRIUS Menu 64 Connecting an IR receiver 64 12 Additional information Troubleshooting 65 HDMI 67 Important information regarding the HDMI connection 67 iPod messages 68 USB messages 68 SIRIUS radio messages 68...,616; 6,487,535 & other components 53 Preset Code List 55 11 Other connections Connecting an iPod 58 Connecting your iPod to the receiver . . . . . 58 iPod playback 59 Watching photos and video content 60 About iPod 60 Connecting a USB device 60 Connecting your USB device ...
Owner's Manual
Page 9
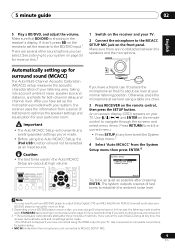
...to set your BD/DVD player to your TV. After you have connected using the HDMI output to output Dolby Digital, DTS and 88.2 kHz/96 kHz PCM (2 channel) audio (see Listening in surround sound on the receiver and your TV. 2 Connect the microphone to exit the current menu. • ...Press SETUP at your particular room. The system outputs a series of your BD/DVD player's manual for both channel delay and channel level. In this ). 2...
...to set your BD/DVD player to your TV. After you have connected using the HDMI output to output Dolby Digital, DTS and 88.2 kHz/96 kHz PCM (2 channel) audio (see Listening in surround sound on the receiver and your TV. 2 Connect the microphone to exit the current menu. • ...Press SETUP at your particular room. The system outputs a series of your BD/DVD player's manual for both channel delay and channel level. In this ). 2...
Owner's Manual
Page 12
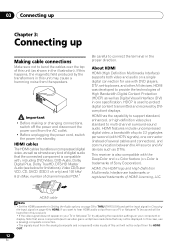
... audio that may cause a humming noise from your component or display. HDMI cable Note 1 • Set the HDMI parameter in Setting the Audio options on page 38 to THRU (THROUGH) and set -top boxes, and other AV devices. Note that some components (such as DTVs. Important • ...channel inputs) PCM.1 Be careful to connect the terminal in Choosing the input signal on page 40 to HDMI, if you want to hear HDMI audio output from the speakers. HDMI has the capability to support standard, enhanced, or high-definition video plus standard to protect digital content transmitted and received...
... audio that may cause a humming noise from your component or display. HDMI cable Note 1 • Set the HDMI parameter in Setting the Audio options on page 38 to THRU (THROUGH) and set -top boxes, and other AV devices. Note that some components (such as DTVs. Important • ...channel inputs) PCM.1 Be careful to connect the terminal in Choosing the input signal on page 40 to HDMI, if you want to hear HDMI audio output from the speakers. HDMI has the capability to support standard, enhanced, or high-definition video plus standard to protect digital content transmitted and received...
Owner's Manual
Page 15
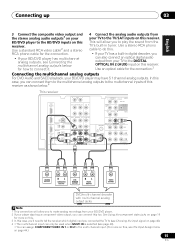
Use an optical cable for more on this, see Connecting the multichannel analog outputs below .4 This receiver HDMI BD/DVD IN TV/SAT IN IR IN R AUX L IN OUT CD-R/TAPE IN CD IN L R OUT DVR/VCR IN TV/SAT IN L SURROUND AUDIO R ... IN AM LOOP COMPONENT VIDEO IN 1 (BD/DVD) ASSIGNABLE 1-2 CENTER OUTPUT RL SURROUND OUTPUT SUBWOOFER OUTPUT RL FRONT OUTPUT VIDEO OUTPUT DVD/multi-channel decoder with multi-channel analog output jacks Note 1 This connection will allow you to play the sound from the TV's built-in digital decoder, you to make analog...
Use an optical cable for more on this, see Connecting the multichannel analog outputs below .4 This receiver HDMI BD/DVD IN TV/SAT IN IR IN R AUX L IN OUT CD-R/TAPE IN CD IN L R OUT DVR/VCR IN TV/SAT IN L SURROUND AUDIO R ... IN AM LOOP COMPONENT VIDEO IN 1 (BD/DVD) ASSIGNABLE 1-2 CENTER OUTPUT RL SURROUND OUTPUT SUBWOOFER OUTPUT RL FRONT OUTPUT VIDEO OUTPUT DVD/multi-channel decoder with multi-channel analog output jacks Note 1 This connection will allow you to play the sound from the TV's built-in digital decoder, you to make analog...

Owner's Manual
Page 39
...: 3 (NEO:6 MUSIC), 10 (NEO:6 CINEMA) a. LFEATT 0 (0 dB) LFEATT 10 (-10 dB)/ LFEATT ** (OFF) HDMI (HDMI Audio) Specifies the routing of the HDMI audio signal out of this receiver. The audio delay time is set depending on the operational status ON of the display connected with (Center image) vocals.... Adjust the effect from 0 (all center channel sent to front (Applicable only when right and left...
...: 3 (NEO:6 MUSIC), 10 (NEO:6 CINEMA) a. LFEATT 0 (0 dB) LFEATT 10 (-10 dB)/ LFEATT ** (OFF) HDMI (HDMI Audio) Specifies the routing of the HDMI audio signal out of this receiver. The audio delay time is set depending on the operational status ON of the display connected with (Center image) vocals.... Adjust the effect from 0 (all center channel sent to front (Applicable only when right and left...

Owner's Manual
Page 40
...details, refer to the instruction manual supplied with your DVD player. 2 When the HDMI option in step 1. Choosing the input signal On this receiver (page 15), you want to the source component. When DIGITAL (C1/O1/O2) or HDMI (H) is selected and the selected audio input is not provided, A (analog) ...connected a decoder or a BD/DVD player with multichannel analog outputs according to the number of the sound features/modes and only the volume and channel levels can only play back Dolby Digital, PCM (32 kHz to select SP OFF. To prevent noise, make the proper digital connections (page 14...
...details, refer to the instruction manual supplied with your DVD player. 2 When the HDMI option in step 1. Choosing the input signal On this receiver (page 15), you want to the source component. When DIGITAL (C1/O1/O2) or HDMI (H) is selected and the selected audio input is not provided, A (analog) ...connected a decoder or a BD/DVD player with multichannel analog outputs according to the number of the sound features/modes and only the volume and channel levels can only play back Dolby Digital, PCM (32 kHz to select SP OFF. To prevent noise, make the proper digital connections (page 14...

Owner's Manual
Page 63
... which uniquely identifies your tuner. The SID may need to move the SiriusConnect tuner antenna near the end of this receiver to select channels using the front panel display. Connect SIRIUS on the internet at: https://activate.siriusradio.com Follow the prompts to activate... select the channel. For best reception, you have a printed 12-digit SID number. Other connections 11 English Deutsch Français Italiano Nederlands Español Connecting your SiriusConnectTM Tuner To receive SIRIUS Satellite Radio broadcasts, you will need to activate your SiriusConnect tuner.1 HDMI BD/DVD...
... which uniquely identifies your tuner. The SID may need to move the SiriusConnect tuner antenna near the end of this receiver to select channels using the front panel display. Connect SIRIUS on the internet at: https://activate.siriusradio.com Follow the prompts to activate... select the channel. For best reception, you have a printed 12-digit SID number. Other connections 11 English Deutsch Français Italiano Nederlands Español Connecting your SiriusConnectTM Tuner To receive SIRIUS Satellite Radio broadcasts, you will need to activate your SiriusConnect tuner.1 HDMI BD/DVD...
Owner's Manual
Page 67
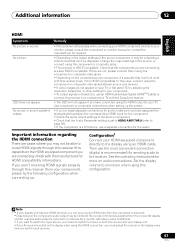
.... • Since the sound is reduced to 2 channels for a monitor with the manufacturer for audio, make sure you 'll have assigned the analog/digital jack(s) to switch functions on the HDMI equipped component you aren't receiving HDMI signals properly through this receiver (this depends on both the receiver and your TV. If they are also HDCP...
.... • Since the sound is reduced to 2 channels for a monitor with the manufacturer for audio, make sure you 'll have assigned the analog/digital jack(s) to switch functions on the HDMI equipped component you aren't receiving HDMI signals properly through this receiver (this depends on both the receiver and your TV. If they are also HDCP...

Owner's Manual
Page 69
...Speed (Type A) iPod terminal. . . . . appear in the display. 4 Press 'STEREO/A.L.C.' Specifications Amplifier section Continuous average power output of 80 watts* per channel Guaranteed speaker impedance FRONT:A, B 6 Ω to 16 Ω FRONT:A+B 12 Ω to 16 Ω SURROUND, CENTER 6 Ω to 16 Ω... 19-pin (Not DVI) HDMI output type 5 V, 100 mA USB terminal . . . . . Additional information 12 English Deutsch Français Italiano Nederlands Español Resetting the main unit Use this . 1 Switch the receiver into standby. 2 While holding down the BAND button, ...
...Speed (Type A) iPod terminal. . . . . appear in the display. 4 Press 'STEREO/A.L.C.' Specifications Amplifier section Continuous average power output of 80 watts* per channel Guaranteed speaker impedance FRONT:A, B 6 Ω to 16 Ω FRONT:A+B 12 Ω to 16 Ω SURROUND, CENTER 6 Ω to 16 Ω... 19-pin (Not DVI) HDMI output type 5 V, 100 mA USB terminal . . . . . Additional information 12 English Deutsch Français Italiano Nederlands Español Resetting the main unit Use this . 1 Switch the receiver into standby. 2 While holding down the BAND button, ...


