Operating Instructions
Page 2
Contents Thank you will know how to your model properly. Please read through these operating instructions so you for buying this Pioneer product. Before you start 3 Checking what's in the box 3 Installing the receiver 3 Flow of settings on the receiver 3 1 Controls and displays Front panel 4 Display 5 Remote ... menu 29 The HDMI Setup menu 30 6 Additional information Troubleshooting 31 General 31 HDMI 32 Important information regarding the HDMI connection 32 USB messages 32 Resetting the main unit 33 Cleaning the unit 33 Specifications 33 Software license notice 35 2
Contents Thank you will know how to your model properly. Please read through these operating instructions so you for buying this Pioneer product. Before you start 3 Checking what's in the box 3 Installing the receiver 3 Flow of settings on the receiver 3 1 Controls and displays Front panel 4 Display 5 Remote ... menu 29 The HDMI Setup menu 30 6 Additional information Troubleshooting 31 General 31 HDMI 32 Important information regarding the HDMI connection 32 USB messages 32 Resetting the main unit 33 Cleaning the unit 33 Specifications 33 Software license notice 35 2
Operating Instructions
Page 32
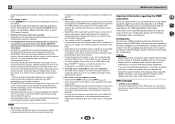
... will not output from the HDMI terminal. Set the BLUETOOTH wireless technology device and the receiver so that the components you have to the receiver. Reset the pairing. # Check that supports A2DP profile. Change the output settings of the USB device are not set to the default. # During ECO mode, the...
... will not output from the HDMI terminal. Set the BLUETOOTH wireless technology device and the receiver so that the components you have to the receiver. Reset the pairing. # Check that supports A2DP profile. Change the output settings of the USB device are not set to the default. # During ECO mode, the...

Operating Instructions
Page 33
... output type 5 V, 55 mA USB terminal . . . . . Important • If the Standby Through is not set to the factory default. 6 Additional information Resetting the main unit Use this . 1 Switch the receiver into standby. 2 While holding down BAND, press and hold ÍSTANDBY/ON for Amplifiers ** Measured by Audio...'s Trade Regulation rule on or near this unit, since these will corrode the surface. appear in the display to indicate that the receiver has been reset to 20 000 Hz with a dry cloth. Front (stereo 80 W + 80 W Power output (1 kHz, 6 Ω, 1 140 W per channel, min., at ...
... output type 5 V, 55 mA USB terminal . . . . . Important • If the Standby Through is not set to the factory default. 6 Additional information Resetting the main unit Use this . 1 Switch the receiver into standby. 2 While holding down BAND, press and hold ÍSTANDBY/ON for Amplifiers ** Measured by Audio...'s Trade Regulation rule on or near this unit, since these will corrode the surface. appear in the display to indicate that the receiver has been reset to 20 000 Hz with a dry cloth. Front (stereo 80 W + 80 W Power output (1 kHz, 6 Ω, 1 140 W per channel, min., at ...
