Owner's Manual
Page 2
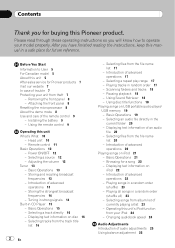
... tracks in a random order (shuffle) 23 - Browsing for buying this Pioneer product. Playing songs in random order 17 - Selecting songs from the track title list 16 2 En - After you have finished reading the instructions, keep this unit's iPod function from theft 7 - Selecting a source ...12 - Using Sound Retriever 18 - Selecting an audio file directly in a random order (shuffle all) 23 - Operating this manual in CD Player 15 - Using the remote control ...
... tracks in a random order (shuffle) 23 - Browsing for buying this Pioneer product. Playing songs in random order 17 - Selecting songs from the track title list 16 2 En - After you have finished reading the instructions, keep this unit's iPod function from theft 7 - Selecting a source ...12 - Using Sound Retriever 18 - Selecting an audio file directly in a random order (shuffle all) 23 - Operating this manual in CD Player 15 - Using the remote control ...
Owner's Manual
Page 29
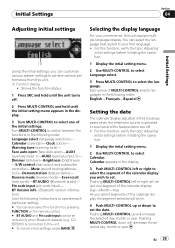
... initial settings 1 Using the initial settings, you wish to set the date. Calendar (calendar)-Clock (clock)- BT Version info. (Bluetooth version information) Use the following instructions to operate each particular setting. # You can also select the function by pressing FUNCTION on the remote control. # BT AUDIO and Pin code input can...
... initial settings 1 Using the initial settings, you wish to set the date. Calendar (calendar)-Clock (clock)- BT Version info. (Bluetooth version information) Use the following instructions to operate each particular setting. # You can also select the function by pressing FUNCTION on the remote control. # BT AUDIO and Pin code input can...
Owner's Manual
Page 30
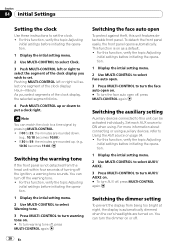
... the face auto open on . # To turn the face auto open off , press MULTI-CONTROL again. Section 04 Initial Settings Setting the clock Use these instructions to set . For this unit features detachable front panel. Note You can be activated individually. You can turn off . Set each AUX source to ON...
... the face auto open on . # To turn the face auto open off , press MULTI-CONTROL again. Section 04 Initial Settings Setting the clock Use these instructions to set . For this unit features detachable front panel. Note You can be activated individually. You can turn off . Set each AUX source to ON...
Owner's Manual
Page 38
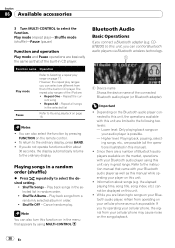
... audio player (or Bluetooth adapter). Play back songs from that of the built-in order. ! Important ! Refer to the instruction manual that came with this manual while operating your player on your Bluetooth audio player using MULTI-CONTROL. Repeat all the operations...players available on the remote control. ! To return to select the function. Depending on the Bluetooth audio player connected to Pausing playback on in CD player. If you can also turn this unit. ! CDBTB200) to Selecting a repeat play . Higher level: Playing back, pausing, selecting ...
... audio player (or Bluetooth adapter). Play back songs from that of the built-in order. ! Important ! Refer to the instruction manual that came with this manual while operating your player on your Bluetooth audio player using MULTI-CONTROL. Repeat all the operations...players available on the remote control. ! To return to select the function. Depending on the Bluetooth audio player connected to Pausing playback on in CD player. If you can also turn this unit. ! CDBTB200) to Selecting a repeat play . Higher level: Playing back, pausing, selecting ...
Owner's Manual
Page 41
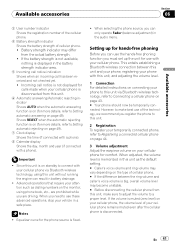
... phone for comfort. If the volume is disconnected. Since this unit, make best use with this unit, and adjusting the volume level. 1 Connection For detailed instructions on connecting your vehicle in the battery strength indicator area. 5 Incoming call notice indication Shows when an incoming call notice is not displayed for calls...
... phone for comfort. If the volume is disconnected. Since this unit, make best use with this unit, and adjusting the volume level. 1 Connection For detailed instructions on connecting your vehicle in the battery strength indicator area. 5 Incoming call notice indication Shows when an incoming call notice is not displayed for calls...
Owner's Manual
Page 44
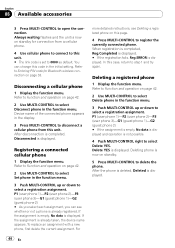
... the display. 3 Press MULTI-CONTROL to step 1 and try again. To replace an assignment with a new phone, first delete the current assignment. For more detailed instructions, see whether or not a phone is not possible. 4 Push MULTI-CONTROL right to 0000 as default. P1 (user phone 1)-P2 (user phone 2)-P3 (user phone...
... the display. 3 Press MULTI-CONTROL to step 1 and try again. To replace an assignment with a new phone, first delete the current assignment. For more detailed instructions, see whether or not a phone is not possible. 4 Push MULTI-CONTROL right to 0000 as default. P1 (user phone 1)-P2 (user phone 2)-P3 (user phone...

Owner's Manual
Page 45
... page 42. 2 Use MULTI-CONTROL to select Auto connect in the display. 3 Press MULTI-CONTROL to connect the selected cellular phone. For detailed instructions, refer to the instruction manual that came with your vehicle and apply the parking brake when performing this unit is completed. Invert names YES appears in the function...
... page 42. 2 Use MULTI-CONTROL to select Auto connect in the display. 3 Press MULTI-CONTROL to connect the selected cellular phone. For detailed instructions, refer to the instruction manual that came with your vehicle and apply the parking brake when performing this unit is completed. Invert names YES appears in the function...

Owner's Manual
Page 48
... menu. 3 Push MULTI-CONTROL up or down, the items are switched in the following order: 48 En To directly enter a desired phone number, see the instructions explained in previous pages. Refer to Function and operation on page 42. 2 Use MULTI-CONTROL to select Number dial in the function menu. # You can...
... menu. 3 Push MULTI-CONTROL up or down, the items are switched in the following order: 48 En To directly enter a desired phone number, see the instructions explained in previous pages. Refer to Function and operation on page 42. 2 Use MULTI-CONTROL to select Number dial in the function menu. # You can...

Owner's Manual
Page 63
... audio player/USB memory Message No Audio Cause Action No songs Transfer the audio files to the CD player. USB cable is connected Follow the USB memory instructions to disable the security. or ON and then connect the com- Additional Information Appendix Additional Information Error... messages When you contact your dealer or your nearest Pioneer Service Center, be sure to (maximum allow- does not contain any data ERROR-22, 23 The CD format...
... audio player/USB memory Message No Audio Cause Action No songs Transfer the audio files to the CD player. USB cable is connected Follow the USB memory instructions to disable the security. or ON and then connect the com- Additional Information Appendix Additional Information Error... messages When you contact your dealer or your nearest Pioneer Service Center, be sure to (maximum allow- does not contain any data ERROR-22, 23 The CD format...

Parts Catalog
Page 1
... found on the product are not in this manual. (In the case of lubricants or glue, follow the instructions in our Master Spare Parts List. For the applying amount of no amount instructions,apply as you think it appropriate.) 9.1 PACKING B C D E (1) PACKING SECTION PARTS LIST Mark No.... Bag 12 Polyethylene Bag 13 Unit Box 14 Contain Box 15 Protector 16 Protector 17 Remote Control Unit 18 Case Assy * 19 Polyethylene Bag 36 1 DEH-P600UB/XN/UC 2 3 Part No. Description * 1 Accessory Assy 2 Screw Assy 3 Screw * 4 Polyethylene Bag 5 Screw Part No. " Screw ...
... found on the product are not in this manual. (In the case of lubricants or glue, follow the instructions in our Master Spare Parts List. For the applying amount of no amount instructions,apply as you think it appropriate.) 9.1 PACKING B C D E (1) PACKING SECTION PARTS LIST Mark No.... Bag 12 Polyethylene Bag 13 Unit Box 14 Contain Box 15 Protector 16 Protector 17 Remote Control Unit 18 Case Assy * 19 Polyethylene Bag 36 1 DEH-P600UB/XN/UC 2 3 Part No. Description * 1 Accessory Assy 2 Screw Assy 3 Screw * 4 Polyethylene Bag 5 Screw Part No. " Screw ...


