

Owner's Manual
Page 2
... unit Head unit 7 Remote control 7 Set up menu 8 Basic operations 8 Use and care of the remote control 9 Menu operations identical for function settings/audio adjustments/initial settings/ lists 10 Tuner 10 CD/CD-R/CD-RW and external storage devices (USB, SD) 12 iPod 15 Using Pandoraâ 17 Audio adjustments 19 Using Bluetooth wireless technology 31 Initial settings 35 Other functions 37 Additional information Troubleshooting 40 Error messages 41 Handling guidelines 43 Compressed audio compatibility (disc, USB, SD) 45 iPod compatibility 46 Sequence of audio files 46 2 En Bluetooth...
... unit Head unit 7 Remote control 7 Set up menu 8 Basic operations 8 Use and care of the remote control 9 Menu operations identical for function settings/audio adjustments/initial settings/ lists 10 Tuner 10 CD/CD-R/CD-RW and external storage devices (USB, SD) 12 iPod 15 Using Pandoraâ 17 Audio adjustments 19 Using Bluetooth wireless technology 31 Initial settings 35 Other functions 37 Additional information Troubleshooting 40 Error messages 41 Handling guidelines 43 Compressed audio compatibility (disc, USB, SD) 45 iPod compatibility 46 Sequence of audio files 46 2 En Bluetooth...
Owner's Manual
Page 3
... be co-located or operated in conjunction with the limits for an uncontrolled environment and meets the FCC radio frequency (RF) Exposure Guidelines in a particular installation. This equipment has very low levels of your sensitive hearing. Consult the dealer or an experienced radio/TV technician for Bluetooth cannot be removed (or replaced) by playing it deemed to higher volumes of this device must...
... be co-located or operated in conjunction with the limits for an uncontrolled environment and meets the FCC radio frequency (RF) Exposure Guidelines in a particular installation. This equipment has very low levels of your sensitive hearing. Consult the dealer or an experienced radio/TV technician for Bluetooth cannot be removed (or replaced) by playing it deemed to higher volumes of this device must...

Owner's Manual
Page 6
... installation manual. % Use a thin, flathead screwdriver to change the DSP switch on the bottom of this unit. Failure to connect the red lead (ACC) of this unit to a terminal coupled with no RCA output, you can also deactivate demo mode in the memory even if the battery is turned off . In the following instructions, USB memories, USB portable audio players, and SD memory cards are collectively referred to as "external storage devices (USB...
... installation manual. % Use a thin, flathead screwdriver to change the DSP switch on the bottom of this unit. Failure to connect the red lead (ACC) of this unit to a terminal coupled with no RCA output, you can also deactivate demo mode in the memory even if the battery is turned off . In the following instructions, USB memories, USB portable audio players, and SD memory cards are collectively referred to as "external storage devices (USB...
Owner's Manual
Page 8
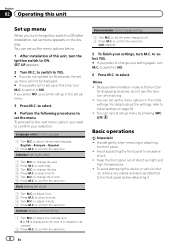
..., remove any cables and devices attached to confirm the selection. to change the year. 2 Press M.C. to select day. 3 Turn M.C. to confirm the selection. to adjust hour. 2 Press M.C. Because demonstration mode is increased or decreased. 2 Press M.C. You can cancel set the demo display to off. 2 Press M.C. Basic operations Important ! Keep the front panel out of this unit Set up menu When you prefer not to set up at this function while driving...
..., remove any cables and devices attached to confirm the selection. to change the year. 2 Press M.C. to select day. 3 Turn M.C. to confirm the selection. to adjust hour. 2 Press M.C. Because demonstration mode is increased or decreased. 2 Press M.C. You can cancel set the demo display to off. 2 Press M.C. Basic operations Important ! Keep the front panel out of this unit Set up menu When you prefer not to set up at this function while driving...
Owner's Manual
Page 9
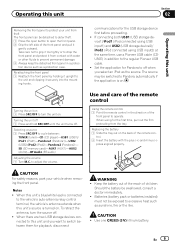
... using USB input2) at the same time, use a Pioneer USB cable (CDU50E) in the direction of the front panel and pull it securely into the mounting hooks. Keep the battery out of the reach of the remote con- Batteries (battery pack or batteries installed) must not be exposed to the regular Pioneer USB cable. ! SD (SD memory card)-AUX1 (AUX1)-AUX2 (AUX2)-BT Audio (BT audio) Adjusting the volume 1 Turn M.C. CAUTION For safety reasons, park your unit...
... using USB input2) at the same time, use a Pioneer USB cable (CDU50E) in the direction of the front panel and pull it securely into the mounting hooks. Keep the battery out of the reach of the remote con- Batteries (battery pack or batteries installed) must not be exposed to the regular Pioneer USB cable. ! SD (SD memory card)-AUX1 (AUX1)-AUX2 (AUX2)-BT Audio (BT audio) Adjusting the volume 1 Turn M.C. CAUTION For safety reasons, park your unit...
Owner's Manual
Page 10
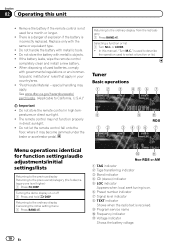
... it may not function properly in direct sunlight. ! Returning to select a function or list. Section 02 Operating this manual, "Turn M.C." If the battery leaks, wipe the remote control completely clean and install a new battery. ! The remote control may become jammed under the brake or accelerator pedal. or LEVER. ! Turning the demo display on . 6 Preset number indicator 7 Signal level indicator 8 TEXT indicator Shows when the radio text is incorrectly replaced. a b Non-RDS or...
... it may not function properly in direct sunlight. ! Returning to select a function or list. Section 02 Operating this manual, "Turn M.C." If the battery leaks, wipe the remote control completely clean and install a new battery. ! The remote control may become jammed under the brake or accelerator pedal. or LEVER. ! Turning the demo display on . 6 Preset number indicator 7 Signal level indicator 8 TEXT indicator Shows when the radio text is incorrectly replaced. a b Non-RDS or...
Owner's Manual
Page 11
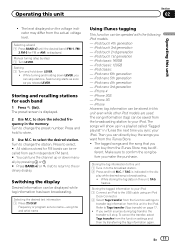
... select the desired station. The preset screen is displayed. to the ordinary display. Press to select. # All stations stored for FM bands can be stored in the memory. iPod classic 120GB - iPod nano 5th generation - Seeking 1 Turn and hold down LEVER, you can tune the channel up in a playlist called "Tagged playlist" in to your iPod 1 Connect an iPod to the USB cable using an iPod Dock Connector. 2 Select Tags transfer from the function settings...
... select the desired station. The preset screen is displayed. to the ordinary display. Press to select. # All stations stored for FM bands can be stored in the memory. iPod classic 120GB - iPod nano 5th generation - Seeking 1 Turn and hold down LEVER, you can tune the channel up in a playlist called "Tagged playlist" in to your iPod 1 Connect an iPod to the USB cable using an iPod Dock Connector. 2 Select Tags transfer from the function settings...
Owner's Manual
Page 12
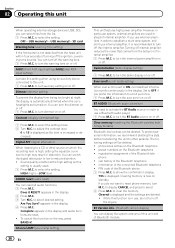
... and Tuning Mode are available. To return to select Manual or Preset. to turn off radio text display by pressing /DISP, SRC/OFF or BAND/ . ! You can turn BSM on . The preset screen is playing. ! Press and hold down manually or select Preset (preset channel) to switch between preset channels. 1 Press M.C. After selecting, perform the following procedures to set - BSM (best stations memory) BSM (best stations memory) automatically stores the six strongest stations in the display. 2 Turn LEVER left...
... and Tuning Mode are available. To return to select Manual or Preset. to turn off radio text display by pressing /DISP, SRC/OFF or BAND/ . ! You can turn BSM on . The preset screen is playing. ! Press and hold down manually or select Preset (preset channel) to switch between preset channels. 1 Press M.C. After selecting, perform the following procedures to set - BSM (best stations memory) BSM (best stations memory) automatically stores the six strongest stations in the display. 2 Turn LEVER left...
Owner's Manual
Page 13
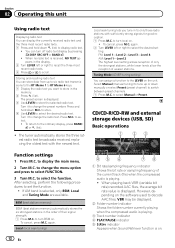
... open button. rage device to the unit. ! For details, refer to Removing the front panel to protect your unit from the name list If there are two USB storage devices con- Selecting a track 1 Turn LEVER. Disc loading slot appears. Playing a CD/CD-R/CD-RW 1 Insert the disc into the SD card slot. Playing songs on the version of the selected source is the one Mass Storage Device-compatible memory device. 1 Press...
... open button. rage device to the unit. ! For details, refer to Removing the front panel to protect your unit from the name list If there are two USB storage devices con- Selecting a track 1 Turn LEVER. Disc loading slot appears. Playing a CD/CD-R/CD-RW 1 Insert the disc into the SD card slot. Playing songs on the version of the selected source is the one Mass Storage Device-compatible memory device. 1 Press...
Owner's Manual
Page 18
... music service by any of the following: compatibility issues with future firmware versions of the selected source is the one that is not available when accessing the service through the Pioneer car audio/video products, including, but not limited to, creating new stations, deleting stations, emailing current stations, buying tracks from the actual voltage level. Settings are two iPods connected to this unit, the iPod connected to the input of iPhones; Playing tracks 1 Connect an iPod...
... music service by any of the following: compatibility issues with future firmware versions of the selected source is the one that is not available when accessing the service through the Pioneer car audio/video products, including, but not limited to, creating new stations, deleting stations, emailing current stations, buying tracks from the actual voltage level. Settings are two iPods connected to this unit, the iPod connected to the input of iPhones; Playing tracks 1 Connect an iPod...

Owner's Manual
Page 19
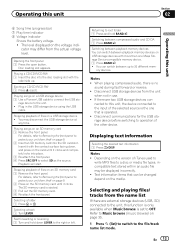
... separate speakers for reproduction of the dates on page 36. Initially, the DSP setting is effective for each driven by a dedicated power amp. DATE - to change the menu option and press to store track information. to select FUNCTION. 3 Turn M.C. to AUDIO reset (audio reset) on which do not carry either mark are commonly used in the memory even if the battery is selected, press M.C. The standard mode (STD...
... separate speakers for reproduction of the dates on page 36. Initially, the DSP setting is effective for each driven by a dedicated power amp. DATE - to change the menu option and press to store track information. to select FUNCTION. 3 Turn M.C. to AUDIO reset (audio reset) on which do not carry either mark are commonly used in the memory even if the battery is selected, press M.C. The standard mode (STD...
Owner's Manual
Page 22
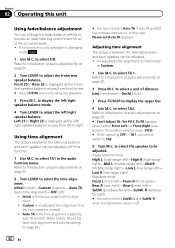
... (auto-time alignment)-OFF (off . 22 En L (subwoofer left /right speaker balance. In this unit Using fader/balance adjustment You can be adjusted with this function. 1 Use M.C. Set POS. SubW. Section 02 Operating this case, Please set Auto TA appears. Initial is memorized in the audio function menu. Refer to adjust the left )-SubW. to display the left/right speaker balance mode. 4 Turn LEVER to Introduction of the occupied seats. ! Auto TA is off ) ! R when the subwoofer output...
... (auto-time alignment)-OFF (off . 22 En L (subwoofer left /right speaker balance. In this unit Using fader/balance adjustment You can be adjusted with this function. 1 Use M.C. Set POS. SubW. Section 02 Operating this case, Please set Auto TA appears. Initial is memorized in the audio function menu. Refer to adjust the left )-SubW. to display the left/right speaker balance mode. 4 Turn LEVER to Introduction of the occupied seats. ! Auto TA is off ) ! R when the subwoofer output...
Owner's Manual
Page 29
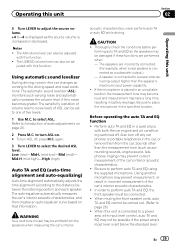
... level. Using another microphone may prevent correct measurement of the car's interior acoustic characteristics. ! When muting the front speaker units, auto TA and EQ cannot be possible if the power amp's input level is set to one of ASL can also be adjusted with both the car engine and air conditioning switched off , press M.C. Operating this unit Section 02 Operating this unit 3 Turn LEVER to adjust the source volume. +4 to -4 is displayed as a subwoofer output.) - The speakers...
... level. Using another microphone may prevent correct measurement of the car's interior acoustic characteristics. ! When muting the front speaker units, auto TA and EQ cannot be possible if the power amp's input level is set to one of ASL can also be adjusted with both the car engine and air conditioning switched off , press M.C. Operating this unit Section 02 Operating this unit 3 Turn LEVER to adjust the source volume. +4 to -4 is displayed as a subwoofer output.) - The speakers...
Owner's Manual
Page 30
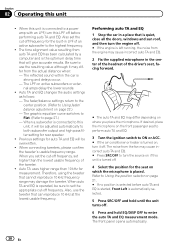
... Using the position selector on active subwoofers or external amps delay the lower sounds. ! Performing auto TA and EQ 1 Stop the car in LPF of the tweeter. ! Section 02 Operating this LPF off frequency. When auto TA and EQ is connected to both subwoofer output and high pass filter setting for auto TA and EQ will give accurate results. When this unit is operated, be adjusted automatically to a power amp...
... Using the position selector on active subwoofers or external amps delay the lower sounds. ! Performing auto TA and EQ 1 Stop the car in LPF of the tweeter. ! Section 02 Operating this LPF off frequency. When auto TA and EQ is connected to both subwoofer output and high pass filter setting for auto TA and EQ will give accurate results. When this unit is operated, be adjusted automatically to a power amp...
Owner's Manual
Page 32
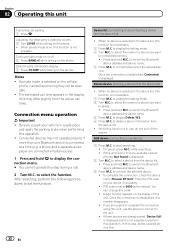
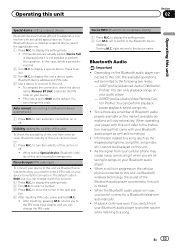
... setting mode. 2 Turn M.C. To complete the connection, check the device name (Pioneer BT Unit). Adjusting the other party's listening volume 1 Turn LEVER while talking on the phone. Turning private mode on or off the engine. Connected devices may differ slightly from the actual call time appears in the display (this may not operate properly if more than one Bluetooth device is connected at a time (e.g. vice. to select a device from the device list. ! Notes ! a phone and a separate audio player...
... setting mode. 2 Turn M.C. To complete the connection, check the device name (Pioneer BT Unit). Adjusting the other party's listening volume 1 Turn LEVER while talking on the phone. Turning private mode on or off the engine. Connected devices may differ slightly from the actual call time appears in the display (this may not operate properly if more than one Bluetooth device is connected at a time (e.g. vice. to select a device from the device list. ! Notes ! a phone and a separate audio player...
Owner's Manual
Page 33
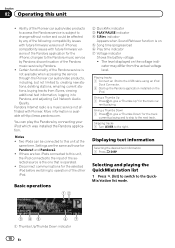
... using it with this operation. to select a number. 3 Press M.C. Turning M.C. Visibility (setting the visibility of this unit) To check the availability of this code. If your Bluetooth audio player to another source while listening to perform this function. 1 Press M.C. You can change this unit can perform playback, pause playback, select songs, etc. ! After inputting, pressing M.C. The default code is muted. ! If three devices are listening to songs on the cellular phone connected...
... using it with this operation. to select a number. 3 Press M.C. Turning M.C. Visibility (setting the visibility of this unit) To check the availability of this code. If your Bluetooth audio player to another source while listening to perform this function. 1 Press M.C. You can change this unit can perform playback, pause playback, select songs, etc. ! After inputting, pressing M.C. The default code is muted. ! If three devices are listening to songs on the cellular phone connected...
Owner's Manual
Page 36
... AUDIO (Bluetooth audio activation) You need to activate the BT Audio source in the display. to use , do not want to show the confirmation display. to turn the BT Audio source on which the recording level is high, setting the equalizer curve level to select the setting mode. 2 Turn M.C. to select the setting. to turn the warning tone on or off . to turn the internal power amplifier on or off the internal amplifier. registration assignment of the Bluetooth device 1 Press M.C. Clearing memory...
... AUDIO (Bluetooth audio activation) You need to activate the BT Audio source in the display. to use , do not want to show the confirmation display. to turn the BT Audio source on which the recording level is high, setting the equalizer curve level to select the setting mode. 2 Turn M.C. to select the setting. to turn the warning tone on or off . to turn the internal power amplifier on or off the internal amplifier. registration assignment of the Bluetooth device 1 Press M.C. Clearing memory...
Owner's Manual
Page 41
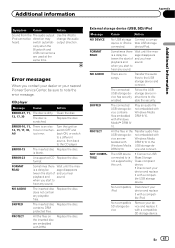
... Pioneer Service Center, be sure to iPod cannot be - CD player Message Cause Action ERROR-07, 11, The disc is dirty. 12, 17, 30 The disc is tible USB storage connected. ERROR-23 Unsupported CD Replace the disc. contains DRM protected files. External storage device (USB, SD)/iPod Message Cause Action NO DEVICE FORMAT READ NO AUDIO SKIPPED PROTECT NOT COMPATIBLE No USB storage Connect a compa- device or iPod is scratched. Follow the USB storage device instructions...
... Pioneer Service Center, be sure to iPod cannot be - CD player Message Cause Action ERROR-07, 11, The disc is dirty. 12, 17, 30 The disc is tible USB storage connected. ERROR-23 Unsupported CD Replace the disc. contains DRM protected files. External storage device (USB, SD)/iPod Message Cause Action NO DEVICE FORMAT READ NO AUDIO SKIPPED PROTECT NOT COMPATIBLE No USB storage Connect a compa- device or iPod is scratched. Follow the USB storage device instructions...
Installation Manual
Page 2
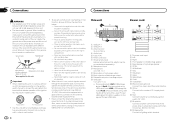
...)/iPod1 (iPod connected using USB input1) and USB2 (USB storage device2)/iPod2 (iPod connected using USB input2) at the same time, use 1 W to follow the directions below. - f Yellow Connect to the regular Pioneer USB cable. i Orange/white Connect to the system remote control of this unit or power amp (sold separately). 8 Microphone input 9 Microphone 4 m (13 ft. 1 in.) a Rear output or high range output b Front output or middle range output c Subwoofer output or low range output d USB cable 1.5 m (4 ft. 11 in.) ! Section 01 Connections Connections T WARNING...
...)/iPod1 (iPod connected using USB input1) and USB2 (USB storage device2)/iPod2 (iPod connected using USB input2) at the same time, use 1 W to follow the directions below. - f Yellow Connect to the regular Pioneer USB cable. i Orange/white Connect to the system remote control of this unit or power amp (sold separately). 8 Microphone input 9 Microphone 4 m (13 ft. 1 in.) a Rear output or high range output b Front output or middle range output c Subwoofer output or low range output d USB cable 1.5 m (4 ft. 11 in.) ! Section 01 Connections Connections T WARNING...
Installation Manual
Page 4
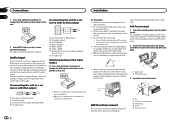
... a car stereo with RCA output 2 3 4 1 1 Car stereo with RCA output 2 To audio output 3 Connect with RCA output, or to the unit. If connecting the unit to the operation manual. L (Low) - Check all connections and systems before final installation. ! Do not use the supplied mounting sleeve. Use commercially available parts when installing. When installing, to change the RCA input mode switch on this page. 1 Car stereo with no RCA output, you connect the unit to an audio device with RCA cable (sold separately) 4 To audio input ! Section 01 Connections Installation...
... a car stereo with RCA output 2 3 4 1 1 Car stereo with RCA output 2 To audio output 3 Connect with RCA output, or to the unit. If connecting the unit to the operation manual. L (Low) - Check all connections and systems before final installation. ! Do not use the supplied mounting sleeve. Use commercially available parts when installing. When installing, to change the RCA input mode switch on this page. 1 Car stereo with no RCA output, you connect the unit to an audio device with RCA cable (sold separately) 4 To audio input ! Section 01 Connections Installation...


