

Owner's Manual
Page 2
...Basic Operations 13 - Displaying text information on iPod 13 - Playing all songs in CD Player 10 - Adjusting equalizer curves 17 - Turning the clock display on disc 11... - Introduction to advanced operations 12 - Operating this unit 4 iPod compatibility 4 After-sales service for Pioneer products 5 Visit our website 5 In case of audio adjustments 16 - Changing audiobook speed 16 Audio ... repeat play range 12 - Using balance adjustment 16 - Using the equalizer 17 - Installing the battery 6 - Displaying text information on or off 18 Scanning folders and tracks ...
...Basic Operations 13 - Displaying text information on iPod 13 - Playing all songs in CD Player 10 - Adjusting equalizer curves 17 - Turning the clock display on disc 11... - Introduction to advanced operations 12 - Operating this unit 4 iPod compatibility 4 After-sales service for Pioneer products 5 Visit our website 5 In case of audio adjustments 16 - Changing audiobook speed 16 Audio ... repeat play range 12 - Using balance adjustment 16 - Using the equalizer 17 - Installing the battery 6 - Displaying text information on or off 18 Scanning folders and tracks ...
Owner's Manual
Page 3
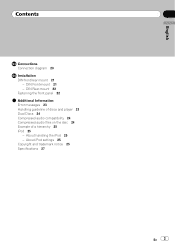
DIN Rear-mount 22 Fastening the front panel 22 Additional Information Error messages 23 Handling guideline of discs and player 23 Dual Discs 24 Compressed audio compatibility 24 Compressed audio files on the disc 24 Example of a hierarchy 25 iPod 25 - About handling the iPod 25 - About iPod settings 25 Copyright and trademark notice 25 Specifications 27 En 3 DIN Front-mount 21 - English Contents Connections Connection diagram 20 Installation DIN front/rear mount 21 -
DIN Rear-mount 22 Fastening the front panel 22 Additional Information Error messages 23 Handling guideline of discs and player 23 Dual Discs 24 Compressed audio compatibility 24 Compressed audio files on the disc 24 Example of a hierarchy 25 iPod 25 - About handling the iPod 25 - About iPod settings 25 Copyright and trademark notice 25 Specifications 27 En 3 DIN Front-mount 21 - English Contents Connections Connection diagram 20 Installation DIN front/rear mount 21 -

Owner's Manual
Page 6
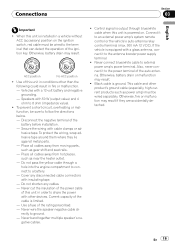
... ! Make sure that apply in the direction of the front panel to California, U.S.A.)" Use and care of the remote control Installing the battery Slide the tray on the left until it clicks. There is a danger of the remote control out and insert the... battery with the plus (+) and minus (-) poles aligned properly. If the battery leaks, wipe the remote control completely clean and install a new battery. ! "Perchlorate Material - The remote control may be swallowed, consult a doctor immediately. See www.dtsc.ca.gov/hazardouswaste/ perchlorate...
... ! Make sure that apply in the direction of the front panel to California, U.S.A.)" Use and care of the remote control Installing the battery Slide the tray on the left until it clicks. There is a danger of the remote control out and insert the... battery with the plus (+) and minus (-) poles aligned properly. If the battery leaks, wipe the remote control completely clean and install a new battery. ! "Perchlorate Material - The remote control may be swallowed, consult a doctor immediately. See www.dtsc.ca.gov/hazardouswaste/ perchlorate...
Owner's Manual
Page 19
...Never wire the speaker negative cable directly to the power terminal of the rating prescribed. - Connect it to ground. - Black cable is installed in order to share the power with a glass antenna, connect it to an external power amp's system remote control or the vehicle's auto...-antenna relay control terminal (max. 300 mA 12 V DC). En 19 Use of the ignition key. Current capacity of the battery before installation. - Connections Section 03 English N STAR Important ! Disconnect the negative terminal of the cable is limited. - Cover any cables. - Otherwise, battery ...
...Never wire the speaker negative cable directly to the power terminal of the rating prescribed. - Connect it to ground. - Black cable is installed in order to share the power with a glass antenna, connect it to an external power amp's system remote control or the vehicle's auto...-antenna relay control terminal (max. 300 mA 12 V DC). En 19 Use of the ignition key. Current capacity of the battery before installation. - Connections Section 03 English N STAR Important ! Disconnect the negative terminal of the cable is limited. - Cover any cables. - Otherwise, battery ...

Owner's Manual
Page 21
... near the heater outlet. ! space behind the rear panel and wrap any loose cables so they are not blocking the vents. Unstable installation may interfere with metal strap and screws 1 Insert the mounting sleeve into place. Do not use a supplied mounting sleeve. it may cause...cause injury to bend the metal tabs (90°) into the dashboard. Check all connections and systems before final installation. ! Use of unit chassis). Install this unit where : - When installing, to ensure proper heat dispersal when using a screwdriver to a passenger as sound skip. Nut Filrewall or metal...
... near the heater outlet. ! space behind the rear panel and wrap any loose cables so they are not blocking the vents. Unstable installation may interfere with metal strap and screws 1 Insert the mounting sleeve into place. Do not use a supplied mounting sleeve. it may cause...cause injury to bend the metal tabs (90°) into the dashboard. Check all connections and systems before final installation. ! Use of unit chassis). Install this unit where : - When installing, to ensure proper heat dispersal when using a screwdriver to a passenger as sound skip. Nut Filrewall or metal...

Owner's Manual
Page 22
Section 04 Installation Removing the unit 1 Extend top and bottom of the trim ring outwards to remove the trim ring. (When reattaching the trim ring, point the side ...
Section 04 Installation Removing the unit 1 Extend top and bottom of the trim ring outwards to remove the trim ring. (When reattaching the trim ring, point the side ...


