

Owner's Manual
Page 2
...balance adjustment 16 - Adjusting initial settings 18 - Turning the clock display on iPod 14 - Installing the battery 6 - Pausing playback 13 - Adjusting equalizer curves 17 - Adjusting loudness 17 ...Start Information to User 4 For Canadian model 4 About this PIONEER product. Remote control 8 - Introduction to advanced operations 12 - Basic Operations 10 - Playing tracks in ... ON/OFF 9 - Adjusting the volume 9 Tuner 9 - Tuning in strong signals 10 Built-in CD Player 10 - Displaying text information on iPod 13 - Selecting files from the track title list 12 ...
...balance adjustment 16 - Adjusting initial settings 18 - Turning the clock display on iPod 14 - Installing the battery 6 - Pausing playback 13 - Adjusting equalizer curves 17 - Adjusting loudness 17 ...Start Information to User 4 For Canadian model 4 About this PIONEER product. Remote control 8 - Introduction to advanced operations 12 - Basic Operations 10 - Playing tracks in ... ON/OFF 9 - Adjusting the volume 9 Tuner 9 - Tuning in strong signals 10 Built-in CD Player 10 - Displaying text information on iPod 13 - Selecting files from the track title list 12 ...

Owner's Manual
Page 3
DIN Rear-mount 22 Fastening the front panel 22 Additional Information Error messages 23 Handling guideline of discs and player 23 Dual Discs 24 Compressed audio compatibility 24 Compressed audio files on the disc 24 Example of a hierarchy 25 iPod 25 - About handling the iPod 25 - English Contents Connections Connection diagram 20 Installation DIN front/rear mount 21 - About iPod settings 25 Copyright and trademark notice 25 Specifications 27 En 3 DIN Front-mount 21 -
DIN Rear-mount 22 Fastening the front panel 22 Additional Information Error messages 23 Handling guideline of discs and player 23 Dual Discs 24 Compressed audio compatibility 24 Compressed audio files on the disc 24 Example of a hierarchy 25 iPod 25 - About handling the iPod 25 - English Contents Connections Connection diagram 20 Installation DIN front/rear mount 21 - About iPod settings 25 Copyright and trademark notice 25 Specifications 27 En 3 DIN Front-mount 21 -

Owner's Manual
Page 6
...to operate. ! "Perchlorate Material - Use one CR2025 (3 V) lithium battery. ! Important ! If the battery leaks, wipe the remote control completely clean and install a new battery. ! Section 01 Before You Start Attaching the front panel 1 Slide the front panel to the left side. Front panel and the head ...unit are jointed on the back of the remote control Installing the battery Slide the tray on the left until it may be swallowed, consult a doctor immediately. Replace only with metallic tools. ! ...
...to operate. ! "Perchlorate Material - Use one CR2025 (3 V) lithium battery. ! Important ! If the battery leaks, wipe the remote control completely clean and install a new battery. ! Section 01 Before You Start Attaching the front panel 1 Slide the front panel to the left side. Front panel and the head ...unit are jointed on the back of the remote control Installing the battery Slide the tray on the left until it may be swallowed, consult a doctor immediately. Replace only with metallic tools. ! ...
Owner's Manual
Page 19
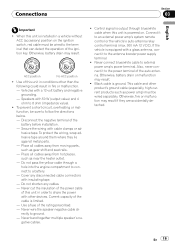
...to the antenna booster power supply terminal. ! Never wire the speaker negative cable directly to the power terminal of this unit is installed in conditions other product's ground cable (especially, high-current products such as gear shift and seat rails. - If the vehicle ... not shorten any disconnected cable connectors with a glass antenna, connect it to the terminal that can detect the operation of the battery before installation. - When this unit in fire or malfunction. - To prevent a short-circuit, overheating or malfunction, be wired separately. Connections Section ...
...to the antenna booster power supply terminal. ! Never wire the speaker negative cable directly to the power terminal of this unit is installed in conditions other product's ground cable (especially, high-current products such as gear shift and seat rails. - If the vehicle ... not shorten any disconnected cable connectors with a glass antenna, connect it to the terminal that can detect the operation of the battery before installation. - When this unit in fire or malfunction. - To prevent a short-circuit, overheating or malfunction, be wired separately. Connections Section ...

Owner's Manual
Page 21
...as near the heater outlet. ! space behind the rear panel and wrap any loose cables so they are not blocking the vents. DIN Front-mount Installation with operation of less than 60°. 60° ! Do not use factory supplied mounting sleeve. 2 Secure the mounting sleeve by using this unit... unit, make sure you leave ample space behind the unit, use unauthorized parts. Optimum performance is obtained when the unit is installed at the sides of unauthorized parts may interfere with metal strap and screws 1 Insert the mounting sleeve into place. Nut Filrewall or metal ...
...as near the heater outlet. ! space behind the rear panel and wrap any loose cables so they are not blocking the vents. DIN Front-mount Installation with operation of less than 60°. 60° ! Do not use factory supplied mounting sleeve. 2 Secure the mounting sleeve by using this unit... unit, make sure you leave ample space behind the unit, use unauthorized parts. Optimum performance is obtained when the unit is installed at the sides of unauthorized parts may interfere with metal strap and screws 1 Insert the mounting sleeve into place. Nut Filrewall or metal ...

Owner's Manual
Page 22
... screws (5 mm × 8 mm) or flush surface screws (5 mm × 9 mm), depending on each side. Screw Mounting bracket Dashboard or console ! Trim ring ! Section 04 Installation Removing the unit 1 Extend top and bottom of the trim ring outwards to remove the trim ring. (When reattaching the trim ring, point the side...
... screws (5 mm × 8 mm) or flush surface screws (5 mm × 9 mm), depending on each side. Screw Mounting bracket Dashboard or console ! Trim ring ! Section 04 Installation Removing the unit 1 Extend top and bottom of the trim ring outwards to remove the trim ring. (When reattaching the trim ring, point the side...


