Owner's Manual
Page 2
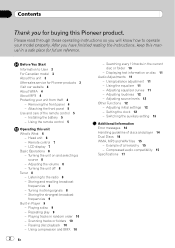
...website 4 About WMA 4 About MP3 4 Protecting your model properly. After you for buying this Pioneer product. Attaching the front panel 5 Use and care of a hierarchy 15 - Remote control 7 - Adjusting initial settings 12 - Example of the remote control 5 - Installing the battery 5 - Head unit 6... 14 WMA, MP3 and WAV files 15 - Removing the front panel 4 - Setting the clock 12 - Using balance adjustment 11 - Turning the unit on disc 11 Audio Adjustments 11 - Listening to the radio 8 - Repeating play 9 - Pausing disc playback 10 - Storing the strongest broadcast...
...website 4 About WMA 4 About MP3 4 Protecting your model properly. After you for buying this Pioneer product. Attaching the front panel 5 Use and care of a hierarchy 15 - Remote control 7 - Adjusting initial settings 12 - Example of the remote control 5 - Installing the battery 5 - Head unit 6... 14 WMA, MP3 and WAV files 15 - Removing the front panel 4 - Setting the clock 12 - Using balance adjustment 11 - Turning the unit on disc 11 Audio Adjustments 11 - Listening to the radio 8 - Repeating play 9 - Pausing disc playback 10 - Storing the strongest broadcast...
Owner's Manual
Page 6
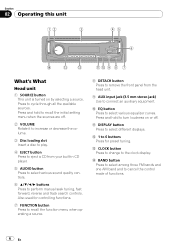
a EQ button Press to the clock display. d CLOCK button Press to change to select various equalizer curves. Press and hold to connect an auxiliary equipment. Press and hold to recall the initial setting menu when the sources are off . b DISPLAY button Press to cancel the control mode of... FUNCTION button Press to recall the function menu when operating a source. 8 DETACH button Press to remove the front panel from your built-in CD player. 5 AUDIO button Press to select various sound quality controls. 6 a/b/c/d buttons Press to cycle through all the available sources. e BAND ...
a EQ button Press to the clock display. d CLOCK button Press to change to select various equalizer curves. Press and hold to connect an auxiliary equipment. Press and hold to recall the initial setting menu when the sources are off . b DISPLAY button Press to cancel the control mode of... FUNCTION button Press to recall the function menu when operating a source. 8 DETACH button Press to remove the front panel from your built-in CD player. 5 AUDIO button Press to select various sound quality controls. 6 a/b/c/d buttons Press to cycle through all the available sources. e BAND ...
Owner's Manual
Page 12
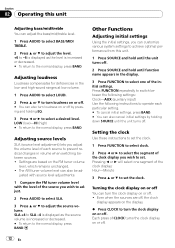
... select LOUD. 2 Press a or b to set . Turning the clock display on or off You can also turn the clock display on or off . ! LOW (low)-HI (high) # To return to set the clock. Settings are off, the clock display appears on the display. % Press CLOCK to select a desired level. The AM tuner ...volume level can also cancel initial settings by pressing and holding ...
... select LOUD. 2 Press a or b to set . Turning the clock display on or off You can also turn the clock display on or off . ! LOW (low)-HI (high) # To return to set the clock. Settings are off, the clock display appears on the display. % Press CLOCK to select a desired level. The AM tuner ...volume level can also cancel initial settings by pressing and holding ...
Owner's Manual
Page 13
Switching the auxiliary setting It is possible to use auxiliary equipment with this unit. 1 Press FUNCTION to select AUX. 2 Press a or b to this unit. Activate the auxiliary setting when using auxiliary equipment connected to turn the auxiliary setting on or off. Operating this unit # The clock display disappears temporarily when you perform other operations, but the clock display appears again after 25 seconds. English Section 02 En 13
Switching the auxiliary setting It is possible to use auxiliary equipment with this unit. 1 Press FUNCTION to select AUX. 2 Press a or b to this unit. Activate the auxiliary setting when using auxiliary equipment connected to turn the auxiliary setting on or off. Operating this unit # The clock display disappears temporarily when you perform other operations, but the clock display appears again after 25 seconds. English Section 02 En 13


