Owner's Manual
Page 2
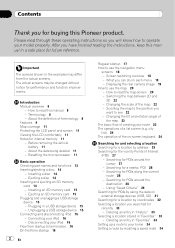
... a safe place for POIs along the current route 28 - Important The screens shown in "Favorites" 34 Setting up a route to read this Pioneer product. How to your iPod 16 - About the data being deleted 11 - Ejecting an SD memory card 15 Plugging and unplugging a USB storage...disconnecting iPod 16 - Screen switching overview 18 - Using "Saved Criteria" 29 Searching for recently 33 - Resetting the microprocessor 11 Basic operation Checking part names and functions 13 Inserting/ejecting a disc 14 - city list) 24 The operation of the on-screen keyboard 24 Searching for and selecting a...
... a safe place for POIs along the current route 28 - Important The screens shown in "Favorites" 34 Setting up a route to read this Pioneer product. How to your iPod 16 - About the data being deleted 11 - Ejecting an SD memory card 15 Plugging and unplugging a USB storage...disconnecting iPod 16 - Screen switching overview 18 - Using "Saved Criteria" 29 Searching for recently 33 - Resetting the microprocessor 11 Basic operation Checking part names and functions 13 Inserting/ejecting a disc 14 - city list) 24 The operation of the on-screen keyboard 24 Searching for and selecting a...

Owner's Manual
Page 13
Press and hold to display the "Screen Calibration" screen. = For details concerning operations, refer to Adjusting the response positions of the parts and the main features using the buttons. 1 Disc loading slot Insert a disc to play. = For details concerning operations, refer to ... the AV (Audio and Video) source volume. Moving upward or downward once; Basic operation 43 2 1 Chapter 02 Basic operation 5 6 7 8 9 a Checking part names and functions This chapter gives information about the names of the touch panels (touch panel calibration) on page 136. 6 MAP button Press to view...
Press and hold to display the "Screen Calibration" screen. = For details concerning operations, refer to Adjusting the response positions of the parts and the main features using the buttons. 1 Disc loading slot Insert a disc to play. = For details concerning operations, refer to ... the AV (Audio and Video) source volume. Moving upward or downward once; Basic operation 43 2 1 Chapter 02 Basic operation 5 6 7 8 9 a Checking part names and functions This chapter gives information about the names of the touch panels (touch panel calibration) on page 136. 6 MAP button Press to view...

Owner's Manual
Page 65
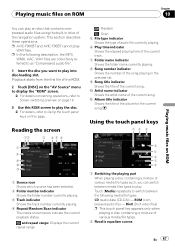
... track currently playing. 3 Repeat/Random/Scan indicator The marks shown below indicate the current playback status. p Fast rewind is not available for AVICF700BT and AVIC-F7010BT. p To cancel the random play into disc-loading slot. Using the touch panel keys Touch panel keys 12 3 4 5 6 7 1 ...Displaying the "Function" menu = For details, refer to Using the "Function" menu on the next page. 3 Switching the playing part = For details, refer to Switching the playing part on page 67. 4 Skipping the track forward or backward Touching [p] skips to [Off] on the "Function" menu. 7 Displaying...
... track currently playing. 3 Repeat/Random/Scan indicator The marks shown below indicate the current playback status. p Fast rewind is not available for AVICF700BT and AVIC-F7010BT. p To cancel the random play into disc-loading slot. Using the touch panel keys Touch panel keys 12 3 4 5 6 7 1 ...Displaying the "Function" menu = For details, refer to Using the "Function" menu on the next page. 3 Switching the playing part = For details, refer to Switching the playing part on page 67. 4 Skipping the track forward or backward Touching [p] skips to [Off] on the "Function" menu. 7 Displaying...
Owner's Manual
Page 67
p AVIC-F900BT and AVIC-F90BT cannot play into disc-loading slot. Playback starts from the first file of the ROM. 2 Touch [DISC] on the "AV Source" menu to display the "... artist name of various media file types. 2 Recalls equalizer curves En 67 ROM (compressed audio file) - Using the touch panel keys 12 3 4 5 6 7 8 1 Switching the playing part When playing a disc containing a mixture of the navigation system. Touch [Media] repeatedly to switch between media files types to play an disc that contains compressed...
p AVIC-F900BT and AVIC-F90BT cannot play into disc-loading slot. Playback starts from the first file of the ROM. 2 Touch [DISC] on the "AV Source" menu to display the "... artist name of various media file types. 2 Recalls equalizer curves En 67 ROM (compressed audio file) - Using the touch panel keys 12 3 4 5 6 7 8 1 Switching the playing part When playing a disc containing a mixture of the navigation system. Touch [Media] repeatedly to switch between media files types to play an disc that contains compressed...

Owner's Manual
Page 68
...operations. 6 Playback and Pause Touching [f] switches between "playback" and "pause". 7 Shuffle All All of various media file types, all tracks within the current part ("CD" or "ROM") are played randomly. p If the disc contains a mixture of the songs in the disc can be used. Browsing embedded text ...track. You can view its contents. p If the selected folder does not contain any playable track, the track list is not available for AVICF700BT and AVIC-F7010BT. Folder Title : (folder title) ! If you touch a folder on the list, you see the list of track titles and folder names ...
...operations. 6 Playback and Pause Touching [f] switches between "playback" and "pause". 7 Shuffle All All of various media file types, all tracks within the current part ("CD" or "ROM") are played randomly. p If the disc contains a mixture of the songs in the disc can be used. Browsing embedded text ...track. You can view its contents. p If the selected folder does not contain any playable track, the track list is not available for AVICF700BT and AVIC-F7010BT. Folder Title : (folder title) ! If you touch a folder on the list, you see the list of track titles and folder names ...

Owner's Manual
Page 80
File name display 7 Displaying the map screen 8 Switching the playing part When playing a disc containing a mixture of various media file types such, you slow down playback speed. % Keep touching [r] until is no sound during playback. ROM (...
File name display 7 Displaying the map screen 8 Switching the playing part When playing a disc containing a mixture of various media file types such, you slow down playback speed. % Keep touching [r] until is no sound during playback. ROM (...

Owner's Manual
Page 126
... the "Multi-Info window" and "Second manoeuvre arrow". 3 Touch the key on the right of "Top field:" to zoom in or out depending on each part of arrival is calculated. A method for changing the value of arrival should be read just as the route is an ideal value that the navigation...
... the "Multi-Info window" and "Second manoeuvre arrow". 3 Touch the key on the right of "Top field:" to zoom in or out depending on each part of arrival is calculated. A method for changing the value of arrival should be read just as the route is an ideal value that the navigation...

Owner's Manual
Page 173
... minutes 43 seconds. Plays all versions of audio files on page 84. ! The subtitle file must be operated until playing back is different from DivX part- If more details about SD memory card compatibility with standard playback of up to Displaying your DivX® VOD registration code on USB memory For...
... minutes 43 seconds. Plays all versions of audio files on page 84. ! The subtitle file must be operated until playing back is different from DivX part- If more details about SD memory card compatibility with standard playback of up to Displaying your DivX® VOD registration code on USB memory For...
Installation Manual
Page 2
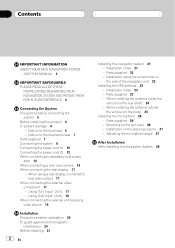
... When using the screw holes on the steering column 27 - Installation notes 21 - Parts supplied 22 - Parts supplied 26 - When installing the antenna inside the vehicle (on the rear shelf) 24 - Parts supplied 23 - Notice for the blue/white lead 7 Parts supplied 7 Connecting the system 8 Connecting the power cord (1) 10 Connecting the power cord...
... When using the screw holes on the steering column 27 - Installation notes 21 - Parts supplied 22 - Parts supplied 26 - When installing the antenna inside the vehicle (on the rear shelf) 24 - Parts supplied 23 - Notice for the blue/white lead 7 Parts supplied 7 Connecting the system 8 Connecting the power cord (1) 10 Connecting the power cord...
Installation Manual
Page 5
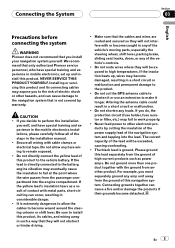
... of contact with the ground from the ground of the vehicle's controls. ! Do not ground more than one product together with metal parts, short-circuiting can cause a fire and/or damage the products if their grounds became detached. CAUTION ! Never feed power to other hazards... and tapping into the engine compartment. NEVER SERVICE THIS PRODUCT YOURSELF. Connecting the System Section 03 English Precautions before connecting the system WARNING Pioneer does not recommend that you do, the protection circuit (fuse holder, fuse resistor or filter, etc.) may fail to work properly....
... of contact with the ground from the ground of the vehicle's controls. ! Do not ground more than one product together with metal parts, short-circuiting can cause a fire and/or damage the products if their grounds became detached. CAUTION ! Never feed power to other hazards... and tapping into the engine compartment. NEVER SERVICE THIS PRODUCT YOURSELF. Connecting the System Section 03 English Precautions before connecting the system WARNING Pioneer does not recommend that you do, the protection circuit (fuse holder, fuse resistor or filter, etc.) may fail to work properly....

Installation Manual
Page 7
... terminal (max. 300 mA 12 V DC). Connecting the System Section 03 English - Connector Extension lead (for speed signal) Notice for reverse signal) GPS antenna Microphone Parts supplied The navigation unit Power cord En 7 Connect to use this lead as the power supply lead for the auto-antenna or antenna booster. Be...
... terminal (max. 300 mA 12 V DC). Connecting the System Section 03 English - Connector Extension lead (for speed signal) Notice for reverse signal) GPS antenna Microphone Parts supplied The navigation unit Power cord En 7 Connect to use this lead as the power supply lead for the auto-antenna or antenna booster. Be...
Installation Manual
Page 20
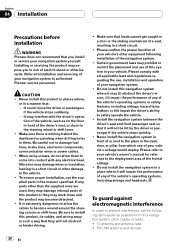
... the performance of any of your vehicle's airbags would deploy. Be sure to authorized Pioneer service personnel. Certain government laws may prohibit or restrict the placement and use the supplied parts in a place where it will not be hit by the driver or passenger if...CAUTION ! Be careful not to safely operate the vehicle. ! If any electrical lead. Section 04 Installation Precautions before installation WARNING Pioneer does not recommend that you to prevent interference, set the following installation of the vehicle's operating systems or safety features, including airbags...
... the performance of any of your vehicle's airbags would deploy. Be sure to authorized Pioneer service personnel. Certain government laws may prohibit or restrict the placement and use the supplied parts in a place where it will not be hit by the driver or passenger if...CAUTION ! Be careful not to safely operate the vehicle. ! If any electrical lead. Section 04 Installation Precautions before installation WARNING Pioneer does not recommend that you to prevent interference, set the following installation of the vehicle's operating systems or safety features, including airbags...

Installation Manual
Page 22
... way, bend it down Factory radio mounting bracket Binding screw or flush surface screw Be sure to the factory radio-mounting bracket. Section 04 Installation Parts supplied The navigation unit Binding screw (5 mm × 6 mm) (8 pcs.) Flush surface screw (5 mm × 6 mm) (8 pcs.) Installation using the screw holes on each side...
... way, bend it down Factory radio mounting bracket Binding screw or flush surface screw Be sure to the factory radio-mounting bracket. Section 04 Installation Parts supplied The navigation unit Binding screw (5 mm × 6 mm) (8 pcs.) Flush surface screw (5 mm × 6 mm) (8 pcs.) Installation using the screw holes on each side...

Installation Manual
Page 23
... surface where radio waves will be knocked off and scratch the vehicle body. ! When installing the GPS antenna on the outside of the GPS antenna. ! Parts supplied GPS antenna Metal sheet Clamp (5 pcs.) Waterproof pad Trunk lid Roof Rear shelf ! Installation notes ! En 23 Take care not to pull the antenna...
... surface where radio waves will be knocked off and scratch the vehicle body. ! When installing the GPS antenna on the outside of the GPS antenna. ! Parts supplied GPS antenna Metal sheet Clamp (5 pcs.) Waterproof pad Trunk lid Roof Rear shelf ! Installation notes ! En 23 Take care not to pull the antenna...

Installation Manual
Page 26
Microphone clip Parts supplied Microphone Microphone clip Double-sided tape Clamp (5 pcs.) Mounting on the sun visor when it easiest to the navigation system after the system is ...
Microphone clip Parts supplied Microphone Microphone clip Double-sided tape Clamp (5 pcs.) Mounting on the sun visor when it easiest to the navigation system after the system is ...


