Reference Manual - English
Page 7
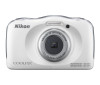
... personal use of personal image data. After resetting, erase all in the camera settings menu (A108). Disposing of Data Storage Devices Please note that deleting images or formatting data storage devices such as memory cards or built-in camera memory does not completely erase the original image data. Comply with Copyright Notices Under copyright law, photographs or recordings of copyrighted works made to ensure that the information in these manuals at any time and...
... personal use of personal image data. After resetting, erase all in the camera settings menu (A108). Disposing of Data Storage Devices Please note that deleting images or formatting data storage devices such as memory cards or built-in camera memory does not completely erase the original image data. Comply with Copyright Notices Under copyright law, photographs or recordings of copyrighted works made to ensure that the information in these manuals at any time and...

Reference Manual - English
Page 16
Getting Started...9 How to Attach the Camera Strap ...10 Inserting the Battery and Memory Card 11 Removing the Battery or Memory Card ...12 Memory Cards and Internal Memory...12 Charging the Battery ...13 Camera Setup...15 Setup from a Smartphone or Tablet ...15 Setup from the Camera Menus...19 What SnapBridge Can Do for You...21 Basic Shooting and Playback Operations 23 Shooting Images...24 Playing Back Images ...26 Deleting Images ...27 Selecting Which Images You Want to Delete 28 Restricting Image Deletion (Image Lock 29 xvi Table of Contents
Getting Started...9 How to Attach the Camera Strap ...10 Inserting the Battery and Memory Card 11 Removing the Battery or Memory Card ...12 Memory Cards and Internal Memory...12 Charging the Battery ...13 Camera Setup...15 Setup from a Smartphone or Tablet ...15 Setup from the Camera Menus...19 What SnapBridge Can Do for You...21 Basic Shooting and Playback Operations 23 Shooting Images...24 Playing Back Images ...26 Deleting Images ...27 Selecting Which Images You Want to Delete 28 Restricting Image Deletion (Image Lock 29 xvi Table of Contents

Reference Manual - English
Page 39
...; The language can be displayed. Use SnapBridge to send photos to set the camera clock. To skip this screen and set manually. 1 Turn the camera on (A15). • A language selection dialog will be displayed on -screen instructions to complete the setup process. • The procedure hereafter is displayed. • Select flexible button 3 (R Yes) when prompted to set the clock. 01 / 01 / 2016 00 : 00 • To turn daylight saving time off. 5 When...
...; The language can be displayed. Use SnapBridge to send photos to set the camera clock. To skip this screen and set manually. 1 Turn the camera on (A15). • A language selection dialog will be displayed on -screen instructions to complete the setup process. • The procedure hereafter is displayed. • Select flexible button 3 (R Yes) when prompted to set the clock. 01 / 01 / 2016 00 : 00 • To turn daylight saving time off. 5 When...

Reference Manual - English
Page 45
C The Auto Off Function • When no operations are being saved. C When Using a Tripod We recommend using digital zoom, the camera focuses in the center of the frame and the focus area is not displayed. • If the focus area or focus indicator flashes, the camera is unable to focus. Doing this could result in loss of exposures remaining or the indicator showing the remaining recording time flashes while images or movies are performed for about...
C The Auto Off Function • When no operations are being saved. C When Using a Tripod We recommend using digital zoom, the camera focuses in the center of the frame and the focus area is not displayed. • If the focus area or focus indicator flashes, the camera is unable to focus. Doing this could result in loss of exposures remaining or the indicator showing the remaining recording time flashes while images or movies are performed for about...

Reference Manual - English
Page 49
... lock image deletion (A27) and formatting (A117). 1 Press and hold down flexible buttons 1 and 4 at the same time while in shooting mode or playback mode. 15/11/2016 15:30 2 Press flexible button 3 (R Yes). • Image lock is set. 4 Enable image lock? • When image lock is set, C is the same as for removing image lock is displayed on the screen. Yes No 15/11/2016 15:30 4 Removing Image Lock The procedure for setting image lock. 29 Basic Shooting and Playback Operations Deleting Images...
... lock image deletion (A27) and formatting (A117). 1 Press and hold down flexible buttons 1 and 4 at the same time while in shooting mode or playback mode. 15/11/2016 15:30 2 Press flexible button 3 (R Yes). • Image lock is set. 4 Enable image lock? • When image lock is set, C is the same as for removing image lock is displayed on the screen. Yes No 15/11/2016 15:30 4 Removing Image Lock The procedure for setting image lock. 29 Basic Shooting and Playback Operations Deleting Images...

Reference Manual - English
Page 51
... shutter and button sounds. 45 l Settings Choose a size Allows you to set the smile timer. Z Flash mode/ self-timer Flash Self-timer Allows you to select a flash mode to match the shooting conditions. 33 The camera is selected, camera settings are automatically optimized for the selected 36 condition. When a style (shooting conditions and Choose a style effects) is equipped with the conditions. You can take pictures in Shooting Mode (Shooting Menu) Functions Available in the image, and change the other colors to black...
... shutter and button sounds. 45 l Settings Choose a size Allows you to set the smile timer. Z Flash mode/ self-timer Flash Self-timer Allows you to select a flash mode to match the shooting conditions. 33 The camera is selected, camera settings are automatically optimized for the selected 36 condition. When a style (shooting conditions and Choose a style effects) is equipped with the conditions. You can take pictures in Shooting Mode (Shooting Menu) Functions Available in the image, and change the other colors to black...

Reference Manual - English
Page 52
.... • When the digital zoom is 1 / 2 5 0 F 3.3 displayed in the following situations: - The camera recognizes the shooting conditions when you frame a picture, and you press the shutter- When the shot is at the edge of the frame. Using Target Finding AF The camera focuses in the manner described below when you can take pictures in the center of the screen - Focus areas 1 / 2 5 0 F 3.3 Focus area B Notes About Target...
.... • When the digital zoom is 1 / 2 5 0 F 3.3 displayed in the following situations: - The camera recognizes the shooting conditions when you frame a picture, and you press the shutter- When the shot is at the edge of the frame. Using Target Finding AF The camera focuses in the manner described below when you can take pictures in the center of the screen - Focus areas 1 / 2 5 0 F 3.3 Focus area B Notes About Target...

Reference Manual - English
Page 53
... recommend using some shooting modes or settings. • The setting applied in A Point and shoot is saved in dim lighting. Off: The flash does not fire when a picture is taken. • If the battery level is low, the screen turns off . 33 Shooting Features Flash Mode Flashing: The flash is charging. Enter shooting mode M flexible button 2 (Z) M flexible button 2 (x Flash) Available Flash Modes w Auto flash The flash fires when necessary, such as in the camera's memory even after the camera is taken. Use flexible button...
... recommend using some shooting modes or settings. • The setting applied in A Point and shoot is saved in dim lighting. Off: The flash does not fire when a picture is taken. • If the battery level is low, the screen turns off . 33 Shooting Features Flash Mode Flashing: The flash is charging. Enter shooting mode M flexible button 2 (Z) M flexible button 2 (x Flash) Available Flash Modes w Auto flash The flash fires when necessary, such as in the camera's memory even after the camera is taken. Use flexible button...

Reference Manual - English
Page 57
... shooting screen. • The flash setting is fixed at which it can focus. • The flash is set to the shooting screen. • The angle of images which are displayed. Tips and Notes D Shoot night scenes • When the shutter-release button is pressed all the way, hold the camera still until a still image is displayed. After taking a picture, do not turn the camera off before the screen switches to y Flash off (A33). • r Self-portrait timer...
... shooting screen. • The flash setting is fixed at which it can focus. • The flash is set to the shooting screen. • The angle of images which are displayed. Tips and Notes D Shoot night scenes • When the shutter-release button is pressed all the way, hold the camera still until a still image is displayed. After taking a picture, do not turn the camera off before the screen switches to y Flash off (A33). • r Self-portrait timer...

Reference Manual - English
Page 59
... photo size setting, the memory card used, or shooting condition. • Focus, exposure, and hue for continuous shooting may appear around dark subjects. • The flash setting is fixed at y Flash off (A33). • Y Smile timer is not available (A35). 39 Shooting Features Choose a Style (Shooting with the first image. • The flash setting is fixed at y Flash off (A33). • The self-timer is displayed. E Shoot backlit scenes • When taking a picture, do not turn the camera off before the screen switches...
... photo size setting, the memory card used, or shooting condition. • Focus, exposure, and hue for continuous shooting may appear around dark subjects. • The flash setting is fixed at y Flash off (A33). • Y Smile timer is not available (A35). 39 Shooting Features Choose a Style (Shooting with the first image. • The flash setting is fixed at y Flash off (A33). • The self-timer is displayed. E Shoot backlit scenes • When taking a picture, do not turn the camera off before the screen switches...

Reference Manual - English
Page 61
... the setting can be changed (A33). • Y Smile timer is displayed on the screen. Do not replace the memory card until shooting ends. • Use a sufficiently charged battery to prevent the camera from turning off during shooting. • Compose the shot so that the main subject is contained within the guide. • The flash is set to capture the first image. Focus, exposure, and hue are not recorded. • The movie frame size is fixed at...
... the setting can be changed (A33). • Y Smile timer is displayed on the screen. Do not replace the memory card until shooting ends. • Use a sufficiently charged battery to prevent the camera from turning off during shooting. • Compose the shot so that the main subject is contained within the guide. • The flash is set to capture the first image. Focus, exposure, and hue are not recorded. • The movie frame size is fixed at...

Reference Manual - English
Page 62
... flow of car lights or motion of still images is fixed at y Flash off (A33). • The self-timer is set to two seconds, but the setting can check the time remaining until shooting ends. • Use batteries with trails overlapped from turning off during the shooting interval. If you have obtained the desired trails, end shooting. The power-on lamp lights while the screen is off. •...
... flow of car lights or motion of still images is fixed at y Flash off (A33). • The self-timer is set to two seconds, but the setting can check the time remaining until shooting ends. • Use batteries with trails overlapped from turning off during the shooting interval. If you have obtained the desired trails, end shooting. The power-on lamp lights while the screen is off. •...

Reference Manual - English
Page 81
... messages have been recorded, they are both deleted. 10s Exchange messages Record Play recordings Erase recordings You'll need to favorites (A78), a confirmation message is added to remove the grade from favorites and displays the screen displayed in step 2. - S No: Returns to adjust playback volume. • If battery power runs out, playback stops automatically. Yes No Erase voice recordings? Yes No 61 Playback Features E Exchange Messages R Yes: Removes the grade or removes the image from this picture. Remove? If both a message...
... messages have been recorded, they are both deleted. 10s Exchange messages Record Play recordings Erase recordings You'll need to favorites (A78), a confirmation message is added to remove the grade from favorites and displays the screen displayed in step 2. - S No: Returns to adjust playback volume. • If battery power runs out, playback stops automatically. Yes No Erase voice recordings? Yes No 61 Playback Features E Exchange Messages R Yes: Removes the grade or removes the image from this picture. Remove? If both a message...

Reference Manual - English
Page 128
... format the memory card or the internal memory. 117 Language Allows you to change the background used on the menu screen. 120 Allows you to reset the camera's settings to a 121 computer. Reset all of the camera's functions. 113 Brightness Allows you to adjust the brightness of the menu options listed below can be captured. 119 Location data Allows you to set whether or not the battery in the Charge by computer camera...
... format the memory card or the internal memory. 117 Language Allows you to change the background used on the menu screen. 120 Allows you to reset the camera's settings to a 121 computer. Reset all of the camera's functions. 113 Brightness Allows you to adjust the brightness of the menu options listed below can be captured. 119 Location data Allows you to set whether or not the battery in the Charge by computer camera...

Reference Manual - English
Page 137
...Select Format card in the camera settings menu. Make sure to save important images to format a memory card or the internal memory. Formatting the Internal Memory • Remove the memory card from the camera. • Select Format memory in the camera settings menu. Format Card/Format Memory Enter shooting mode or playback mode M flexible button 4 (l) M flexible button 4 (l Camera settings) M press HI M N Format card/O Format memory Use this option to a computer before formatting. Remove image lock. 117 General Camera Setup l Camera Settings B Notes About Format card/Format memory You...
...Select Format card in the camera settings menu. Make sure to save important images to format a memory card or the internal memory. Formatting the Internal Memory • Remove the memory card from the camera. • Select Format memory in the camera settings menu. Format Card/Format Memory Enter shooting mode or playback mode M flexible button 4 (l) M flexible button 4 (l Camera settings) M press HI M N Format card/O Format memory Use this option to a computer before formatting. Remove image lock. 117 General Camera Setup l Camera Settings B Notes About Format card/Format memory You...

Reference Manual - English
Page 155
... resume printing.* - A time-out error occurred while saving the movie on . then on the memory card. • Remove the memory card to play back images in 12 the internal memory. • To copy the images saved in the camera's internal 88 memory to the memory card, select Copy in the camera's internal circuitry. Turn the camera off and If the error persists, contact your retailer or Nikon-authorized service representative. View the file using a computer or the device used to resume printing.* 135 Technical Notes Error Messages Printer error...
... resume printing.* - A time-out error occurred while saving the movie on . then on the memory card. • Remove the memory card to play back images in 12 the internal memory. • To copy the images saved in the camera's internal 88 memory to the memory card, select Copy in the camera's internal circuitry. Turn the camera off and If the error persists, contact your retailer or Nikon-authorized service representative. View the file using a computer or the device used to resume printing.* 135 Technical Notes Error Messages Printer error...

Reference Manual - English
Page 159
... connect the AC adapter (available separately) to retain certain settings. Remove image lock. Change the settings. close . Cannot select Format card or Format memory. Cause/Solution The clock battery is used to power the camera clock and to the camera, and the clock battery operates for setting time and date is displayed when the camera is turned on the Variety menu settings. all settings were restored to shooting mode. Depending on again. - 139 Technical Notes Troubleshooting Disconnect the HDMI cable or USB cable. 98 Cannot take pictures...
... connect the AC adapter (available separately) to retain certain settings. Remove image lock. Change the settings. close . Cannot select Format card or Format memory. Cause/Solution The clock battery is used to power the camera clock and to the camera, and the clock battery operates for setting time and date is displayed when the camera is turned on the Variety menu settings. all settings were restored to shooting mode. Depending on again. - 139 Technical Notes Troubleshooting Disconnect the HDMI cable or USB cable. 98 Cannot take pictures...
Reference Manual - English
Page 161
... able to zoom in on image. screen or images. the picture so that is in the frame, a ring- Saving images takes time. Cannot zoom in on images captured with another make or model of digital camera. - • This camera may not be able to play back images saved with another make or model of digital camera. • This camera cannot play back movies recorded with another make or model of the light source, or frame - Cause/Solution A • This camera may occur...
... able to zoom in on image. screen or images. the picture so that is in the frame, a ring- Saving images takes time. Cannot zoom in on images captured with another make or model of digital camera. - • This camera may not be able to play back images saved with another make or model of digital camera. • This camera cannot play back movies recorded with another make or model of the light source, or frame - Cause/Solution A • This camera may occur...

Reference Manual - English
Page 164
... on the screen of images are captured using Shoot at intervals, and the images are assigned file names as the image to which the message is created each time a series of the camera. • DSCN: Original still images, movies • DSCA: Message • DSCB: Message (reply) • SSCN: Small picture copies • RSCN: Cropped copies • FSCN: Images created by an image editing function other than crop and small picture, photo albums...
... on the screen of images are captured using Shoot at intervals, and the images are assigned file names as the image to which the message is created each time a series of the camera. • DSCN: Original still images, movies • DSCA: Message • DSCB: Message (reply) • SSCN: Small picture copies • RSCN: Cropped copies • FSCN: Images created by an image editing function other than crop and small picture, photo albums...

Reference Manual - English
Page 174
Playback mode 26 Playback zoom 26, 56 Power switch/power-on lamp....... 2, 15 Pressing halfway 50 Print 98, 101, 102 Printer 98, 100 R Rechargeable Li-ion battery .......... 11, 13 Remaining movie recording time 93, 94 Reset all 122 Restore default settings 110 Restricting image deletion 29 Retouch 88 Rotate pictures 90 S Saturation 44 Self-portrait timer 34 Self-timer 34 Self-timer lamp 2, 34 Send while shooting 110 Shoot a movie miniature j........ 36, 41 Shoot at intervals O 36, 38 Shoot backlit scenes...
Playback mode 26 Playback zoom 26, 56 Power switch/power-on lamp....... 2, 15 Pressing halfway 50 Print 98, 101, 102 Printer 98, 100 R Rechargeable Li-ion battery .......... 11, 13 Remaining movie recording time 93, 94 Reset all 122 Restore default settings 110 Restricting image deletion 29 Retouch 88 Rotate pictures 90 S Saturation 44 Self-portrait timer 34 Self-timer 34 Self-timer lamp 2, 34 Send while shooting 110 Shoot a movie miniature j........ 36, 41 Shoot at intervals O 36, 38 Shoot backlit scenes...

