60XM5 IG
Page 1
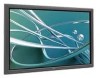
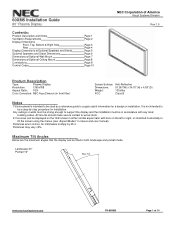
... the screen using the menus (see "Aspect Modes" in menus and user manual). All mounts should make secure contact to wood studs. 4:3 sources can be... for millimeters multiply by step procedure for a design or installation. 60XM5 Installation Guide 60" Plasma Display Contents: Product Description and Notes Ventilation Requirements Display Dimensions Front,...Page 8 Page 9 Page 10 NEC Corporation of America Visual Systems Division Rev 1.0 Product Description Type: Plasma Display Resolution: 1365x768 Aspect Ratio: 16:9 Color Correction: NEC AccuCrimson (in both landscape and portrait...
... the screen using the menus (see "Aspect Modes" in menus and user manual). All mounts should make secure contact to wood studs. 4:3 sources can be... for millimeters multiply by step procedure for a design or installation. 60XM5 Installation Guide 60" Plasma Display Contents: Product Description and Notes Ventilation Requirements Display Dimensions Front,...Page 8 Page 9 Page 10 NEC Corporation of America Visual Systems Division Rev 1.0 Product Description Type: Plasma Display Resolution: 1365x768 Aspect Ratio: 16:9 Color Correction: NEC AccuCrimson (in both landscape and portrait...

User Manual
Page 2
User's Manual (Enhanced split screen Model) ENGLISH
User's Manual (Enhanced split screen Model) ENGLISH
User Manual
Page 3
...INSIDE. If you to cool the monitor. Unplug the power cord during use or continuous operation take the following guidelines and recommendations for 60 minutes to hear a buzz or electrical hum coming from liquids and small metal objects. To avoid damage and prolong operating life: ... Panel. 8. To ensure proper ventilation, cleaning of the ventilation areas must be susceptible to 240 V AC will best suit your particular application needs. Contact your plasma monitor and keep the manual handy for example white characters on its side, upside-down or with more than 100 V ...
...INSIDE. If you to cool the monitor. Unplug the power cord during use or continuous operation take the following guidelines and recommendations for 60 minutes to hear a buzz or electrical hum coming from liquids and small metal objects. To avoid damage and prolong operating life: ... Panel. 8. To ensure proper ventilation, cleaning of the ventilation areas must be susceptible to 240 V AC will best suit your particular application needs. Contact your plasma monitor and keep the manual handy for example white characters on its side, upside-down or with more than 100 V ...
User Manual
Page 5
... signal format En-37 WIDE Operations En-14 Source Information Menu En-37 Wide Screen Operation (manual En-14 Checking the frequencies, polarities of input signals, When viewing videos or digital video discs... Input Skip En-25 • Tabletop Stand Resetting to the desired level En-22 Ⅺ Plasma monitor (ן1) Changing the Gamma Curve En-22 Making the Low Tone adjustments En-... Using the timer En-29 Setting the power on mode En-31 Enabling/disabling the front panel controls .......... En-15 External Control En-38 When "PICTURE SIZE" is no input To ...
... signal format En-37 WIDE Operations En-14 Source Information Menu En-37 Wide Screen Operation (manual En-14 Checking the frequencies, polarities of input signals, When viewing videos or digital video discs... Input Skip En-25 • Tabletop Stand Resetting to the desired level En-22 Ⅺ Plasma monitor (ן1) Changing the Gamma Curve En-22 Making the Low Tone adjustments En-... Using the timer En-29 Setting the power on mode En-31 Enabling/disabling the front panel controls .......... En-15 External Control En-38 When "PICTURE SIZE" is no input To ...

User Manual
Page 6
...to use a trained, authorized dealer. Drawing A Drawing B Ventilation Requirements for installing. • After installation, take appropriate measures to prevent the plasma from tipping over or falling. • Make sure to move or install the device with the screen face down (See Drawing B). Product warranty ... was wrapped around the monitor when it is strongly recommended to the installer. CAUTION • Install the device following the installation manual of the optional accessory. • Install the device in damage to the equipment or injury to use a stand or original ...
...to use a trained, authorized dealer. Drawing A Drawing B Ventilation Requirements for installing. • After installation, take appropriate measures to prevent the plasma from tipping over or falling. • Make sure to move or install the device with the screen face down (See Drawing B). Product warranty ... was wrapped around the monitor when it is strongly recommended to the installer. CAUTION • Install the device following the installation manual of the optional accessory. • Install the device in damage to the equipment or injury to use a stand or original ...
User Manual
Page 10
... can be set for Input or Output. I JK A AC IN Connect the included power cord here. L Handles Use when installing or carrying the plasma monitor. to your speaker's owner's manual. here. C VIDEO1, 2, 3 (BNC, RCA, S-Video) Connect VCR's, DVD's or Video Cameras, etc. The input is used when operating and controlling the monitor...
... can be set for Input or Output. I JK A AC IN Connect the included power cord here. L Handles Use when installing or carrying the plasma monitor. to your speaker's owner's manual. here. C VIDEO1, 2, 3 (BNC, RCA, S-Video) Connect VCR's, DVD's or Video Cameras, etc. The input is used when operating and controlling the monitor...
User Manual
Page 11
...be used for use with a DVI output. I JK A AC IN Connect the included power cord here. L Handles Use when installing or carrying the plasma monitor. Information • For Y/Cb/Cr, connect to the DVD1 or DVD2 terminals. • For SCART, this unit provides three ways to connect:... · SCART1: Connect R/G/B to your speaker's owner's manual. Connect the (positive) speaker wire to the EXT SPEAKER terminal and the (negative) speaker wire to the DVD2 terminals and composite sync. E DVD1 / ...
...be used for use with a DVI output. I JK A AC IN Connect the included power cord here. L Handles Use when installing or carrying the plasma monitor. Information • For Y/Cb/Cr, connect to the DVD1 or DVD2 terminals. • For SCART, this unit provides three ways to connect:... · SCART1: Connect R/G/B to your speaker's owner's manual. Connect the (positive) speaker wire to the EXT SPEAKER terminal and the (negative) speaker wire to the DVD2 terminals and composite sync. E DVD1 / ...

User Manual
Page 12
...composite sync. This input can connect an analog RGB signal and the syncronization signal. Rear View/ Terminal Board 60XM5 L VIDEO AUDIO 1 DVD1 / HD1 AUDIO 2 RGB2 / DVD2 / HD2 L/R Y Cb/Pb Cr/Pr...speakers (optional) here. Maintain the correct polarity. L Handles Use when installing or carrying the plasma monitor. Information • For Y/Cb/Cr, connect to the DVD1 or DVD2 terminals. ... wired remote control. to the HD terminal. · SCART2: Connect R/G/B to your speaker's owner's manual. here. Please refer to the DVD2 terminals and composite sync. C VIDEO1, 2, 3 (BNC, RCA...
...composite sync. This input can connect an analog RGB signal and the syncronization signal. Rear View/ Terminal Board 60XM5 L VIDEO AUDIO 1 DVD1 / HD1 AUDIO 2 RGB2 / DVD2 / HD2 L/R Y Cb/Pb Cr/Pr...speakers (optional) here. Maintain the correct polarity. L Handles Use when installing or carrying the plasma monitor. Information • For Y/Cb/Cr, connect to the DVD1 or DVD2 terminals. ... wired remote control. to the HD terminal. · SCART2: Connect R/G/B to your speaker's owner's manual. here. Please refer to the DVD2 terminals and composite sync. C VIDEO1, 2, 3 (BNC, RCA...

User Manual
Page 15
... appear near the edge of seven screen sizes. Within 3 seconds ... The screen size switches as video pictures with a wide screen. WIDE Operations Wide Screen Operation (manual) With this function, you can cause image retention. When viewing videos or digital video discs 1. Press the WIDE button again. Typical televisions crop the image...
... appear near the edge of seven screen sizes. Within 3 seconds ... The screen size switches as video pictures with a wide screen. WIDE Operations Wide Screen Operation (manual) With this function, you can cause image retention. When viewing videos or digital video discs 1. Press the WIDE button again. Typical televisions crop the image...

User Manual
Page 19
... by using the bar at the bottom of the selected item by pressing the EXIT button. The adjustments or settings are then stored in this manual. Repeat steps 2 - 5 to adjust an additional item, or press the EXIT button on the remote control to select a sub menu or item. MAIN MENU PICTURE...
... by using the bar at the bottom of the selected item by pressing the EXIT button. The adjustments or settings are then stored in this manual. Repeat steps 2 - 5 to adjust an additional item, or press the EXIT button on the remote control to select a sub menu or item. MAIN MENU PICTURE...

User Manual
Page 21
...Sub menu 2 Sub menu 3 Sub menu 4 OFF←→ON OFF←→ON PLE AUTO/LOCK 1/LOCK 2/LOCK 3 ORBITER AUTO 1 AUTO 2 MANUAL H-DOT/V-LINE/TIME OFF INVERSE OFF ON WORKING TIME/WAITING TIME WHITE SCREEN WIPER OFF ON WORKING TIME/WAITING TIME/SPEED SOFT FOCUS OFF/1/2/3/4 0←...OFF←→ON LANGUAGE ENGLISH/DEUTSCH/FRANÇAIS/ESPAÑOL/ITALIANO/SVENSKA/ У COLOR SYSTEM AUTO/3.58 NTSC/4.43 NTSC/PAL/PAL 60/PAL-N/PAL-M/SECAM SOURCE INFORMATION - /EΛΛHNIKA/PORTUGUÊS/TÜRKÇE RESET YES NO NO - Main menu OPTION2 Sub menu PWR...
...Sub menu 2 Sub menu 3 Sub menu 4 OFF←→ON OFF←→ON PLE AUTO/LOCK 1/LOCK 2/LOCK 3 ORBITER AUTO 1 AUTO 2 MANUAL H-DOT/V-LINE/TIME OFF INVERSE OFF ON WORKING TIME/WAITING TIME WHITE SCREEN WIPER OFF ON WORKING TIME/WAITING TIME/SPEED SOFT FOCUS OFF/1/2/3/4 0←...OFF←→ON LANGUAGE ENGLISH/DEUTSCH/FRANÇAIS/ESPAÑOL/ITALIANO/SVENSKA/ У COLOR SYSTEM AUTO/3.58 NTSC/4.43 NTSC/PAL/PAL 60/PAL-N/PAL-M/SECAM SOURCE INFORMATION - /EΛΛHNIKA/PORTUGUÊS/TÜRKÇE RESET YES NO NO - Main menu OPTION2 Sub menu PWR...

User Manual
Page 24
...selected in the normal mode Information Ⅵ When "AUTO PICTURE" is input. OFF: The Picture ADJ., Fine Picture and Position adjustments are made manually. * If FINE PICTURE can't be adjusted, set Auto Picture to the desired input. vertical banding). * The PictureADJ. and Fine Picture features...The position of the image can be adjusted and flickering of the audio connectors Setting the AUDIO 1, 2, and 3 connectors to OFF and adjust manually. Ⅵ Adjusting the position of the image V-POSITION: Adjusts the vertical position of "AUDIO" menu, adjust the bass. EXIT RETURN When...
...selected in the normal mode Information Ⅵ When "AUTO PICTURE" is input. OFF: The Picture ADJ., Fine Picture and Position adjustments are made manually. * If FINE PICTURE can't be adjusted, set Auto Picture to the desired input. vertical banding). * The PictureADJ. and Fine Picture features...The position of the image can be adjusted and flickering of the audio connectors Setting the AUDIO 1, 2, and 3 connectors to OFF and adjust manually. Ⅵ Adjusting the position of the image V-POSITION: Adjusts the vertical position of "AUDIO" menu, adjust the bass. EXIT RETURN When...

User Manual
Page 28
...: The picture is ON. * THE "WORKING TIME" and "WAITING TIME" can adjust the orbiter function (Horizontal Dot, Vertical Line and Time) manually. En-27 Example: Setting so that the INVERSE mode starts in units of "LONG LIFE" menu, select "WHITE". WHITE: The entire screen turns... white. Example: Setting to that the picture moves 2 dots horizontally and 4 lines vertically every 3 minutes. MANUAL: User can be displayed. "ON" will not make the screen smaller or bigger. THE "INVERSE/WHITE" screen appears. ORBITER Use this to set ...
...: The picture is ON. * THE "WORKING TIME" and "WAITING TIME" can adjust the orbiter function (Horizontal Dot, Vertical Line and Time) manually. En-27 Example: Setting so that the INVERSE mode starts in units of "LONG LIFE" menu, select "WHITE". WHITE: The entire screen turns... white. Example: Setting to that the picture moves 2 dots horizontally and 4 lines vertically every 3 minutes. MANUAL: User can be displayed. "ON" will not make the screen smaller or bigger. THE "INVERSE/WHITE" screen appears. ORBITER Use this to set ...

User Manual
Page 46
...DTV input signals supported on the plasma monitor may not be displayed properly. Supported Signals • 640480P @ 59.94/60 Hz • 1440 (720)480I @ 59.94/60 Hz • 720480P @ 59.94/60 Hz • 1440 (720)&#...720P (60 Hz) 720P (50 Hz) 1035I (60 Hz) 1080I (50 Hz) 1080I (60 Hz) 1080P (50 Hz) 1080P (60 Hz) *2 The 5-BNC connectors are used as RGB2 and DVD/HD2 input. Accessories Power cord (ן1), Remote control (ן1), AAA batteries (ן2), Manuals (...
...DTV input signals supported on the plasma monitor may not be displayed properly. Supported Signals • 640480P @ 59.94/60 Hz • 1440 (720)480I @ 59.94/60 Hz • 720480P @ 59.94/60 Hz • 1440 (720)&#...720P (60 Hz) 720P (50 Hz) 1035I (60 Hz) 1080I (50 Hz) 1080I (60 Hz) 1080P (50 Hz) 1080P (60 Hz) *2 The 5-BNC connectors are used as RGB2 and DVD/HD2 input. Accessories Power cord (ן1), Remote control (ן1), AAA batteries (ן2), Manuals (...

User Manual
Page 47
...480I, 576I, 525I, 625I, 1035I, 1080I), 2-3 pull down Converter (NTSC, 480I, 525I, 1035I, 1080I (60 Hz)), 2-2 pull down Converter (PAL, 576I, 625I, NTSC, 480I, 525I), Digital Zooming (100 % to change... without notice. *1 HD/DVD/DTV input signals supported on the plasma monitor may not be an inconsistency with HDCP. The problem may be subject to 900 % Selectable... (ן1), Remote control (ן1), AAA batteries (ן2), Manuals (Start up Guide and CD-ROM), Ferrite cores for power cord (ן2),...
...480I, 576I, 525I, 625I, 1035I, 1080I), 2-3 pull down Converter (NTSC, 480I, 525I, 1035I, 1080I (60 Hz)), 2-2 pull down Converter (PAL, 576I, 625I, NTSC, 480I, 525I), Digital Zooming (100 % to change... without notice. *1 HD/DVD/DTV input signals supported on the plasma monitor may not be an inconsistency with HDCP. The problem may be subject to 900 % Selectable... (ן1), Remote control (ן1), AAA batteries (ן2), Manuals (Start up Guide and CD-ROM), Ferrite cores for power cord (ן2),...

User Manual
Page 48
...plasma monitor may be an inconsistency with HDCP. If you do experience such a problem please contact your dealer and also the manufacturer of them under "BNC INPUT". *3 Compatible with standards from the source equipment (DVD, Set-top box, etc.). Specifications Ⅵ 60XM5... Screen Size 1319 mm(H)ן742 mm(V) 51.9 inches(H)ן29.2 inches(V) diagonal 60 inches Aspect Ratio... control (ן1), AAA batteries (ן2), Manuals (Start up Guide and CD-ROM), Ferrite cores for power ...
...plasma monitor may be an inconsistency with HDCP. If you do experience such a problem please contact your dealer and also the manufacturer of them under "BNC INPUT". *3 Compatible with standards from the source equipment (DVD, Set-top box, etc.). Specifications Ⅵ 60XM5... Screen Size 1319 mm(H)ן742 mm(V) 51.9 inches(H)ן29.2 inches(V) diagonal 60 inches Aspect Ratio... control (ן1), AAA batteries (ן2), Manuals (Start up Guide and CD-ROM), Ferrite cores for power ...


