Owners Manual
Page 1
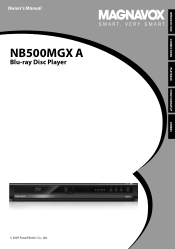
If you have read assistance, you may access our online help at http://www.funai-corp.com or call 1-800-605-8610 while with your Magnavox product more enjoyable. INTRODUCTION CONNECTIONS PLAYBACK FUNCTION SETUP OTHERS Owner's Manual NB500MGX A Blu-ray Disc Player Read your Owner's Manual first for quick tips that make using your product (and Model / Serial number) © 2009 Funai Electric Co., Ltd.
If you have read assistance, you may access our online help at http://www.funai-corp.com or call 1-800-605-8610 while with your Magnavox product more enjoyable. INTRODUCTION CONNECTIONS PLAYBACK FUNCTION SETUP OTHERS Owner's Manual NB500MGX A Blu-ray Disc Player Read your Owner's Manual first for quick tips that make using your product (and Model / Serial number) © 2009 Funai Electric Co., Ltd.
Owners Manual
Page 2
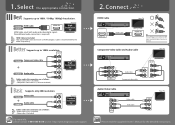
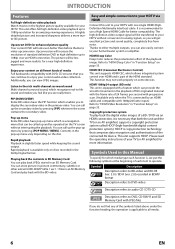
... (L/R) x1 (Included) • Video cable x1(Included) i o nf For more info, please contact 1-800-605-8610 or visit : http://www.magnavox.com/support 2. Better Supports up to 1080i resolution. Connect HDMI Cable Y PB/CB VIDEO OUT L R OPTICAL COAXIAL PR/CR DIGITAL OUT PCM/BITSTREAM ...OUT AUDIO OUT VIDEO OUT L R AUDIO OUT HDMI OUT Video cable Audio cable VIDEO IN L AUDIO IN R Your TV Manual Please read the supplied Owner's Manual for the better compatibility. 1. COMPONENT VIDEO IN Y Video Component video cable + Audio Audio cable Cables used in this connection...
... (L/R) x1 (Included) • Video cable x1(Included) i o nf For more info, please contact 1-800-605-8610 or visit : http://www.magnavox.com/support 2. Better Supports up to 1080i resolution. Connect HDMI Cable Y PB/CB VIDEO OUT L R OPTICAL COAXIAL PR/CR DIGITAL OUT PCM/BITSTREAM ...OUT AUDIO OUT VIDEO OUT L R AUDIO OUT HDMI OUT Video cable Audio cable VIDEO IN L AUDIO IN R Your TV Manual Please read the supplied Owner's Manual for the better compatibility. 1. COMPONENT VIDEO IN Y Video Component video cable + Audio Audio cable Cables used in this connection...
Owners Manual
Page 3
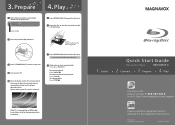
...press [PLAY ]. To return to close the disc tray. Connect 3. To stop playback: Press [STOP ]. Select Quick Start Guide Blu-ray Disc Player NB500MGX A 2. Prepare 4. Align the disc to the disc tray guide. 3 Press [STANDBY-ON ] to turn on the unit. 4 Turn on your TV... automatically. Play info For more info, please contact 1-800-605-8610 or visit : http://www.magnavox.com/support Manual Please read the supplied Owner's Manual for the opening picture. (Please refer to your TV's owner's manual.) 3 Press [OPEN/CLOSE ] to the normal playback: Press [PLAY ]. To pause playback: ...
...press [PLAY ]. To return to close the disc tray. Connect 3. To stop playback: Press [STOP ]. Select Quick Start Guide Blu-ray Disc Player NB500MGX A 2. Prepare 4. Align the disc to the disc tray guide. 3 Press [STANDBY-ON ] to turn on the unit. 4 Turn on your TV... automatically. Play info For more info, please contact 1-800-605-8610 or visit : http://www.magnavox.com/support Manual Please read the supplied Owner's Manual for the opening picture. (Please refer to your TV's owner's manual.) 3 Press [OPEN/CLOSE ] to the normal playback: Press [PLAY ]. To pause playback: ...
Owners Manual
Page 4
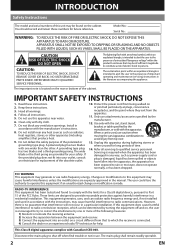
... polarized or grounding-type plug. This equipment generates, uses, and can be determined by turning the equipment off when find trouble or not in the manual. Keep these instructions. 2. NO USER SERVICEABLE PARTS INSIDE. A grounding type plug has two blades and a third grounding prong. Unplug this equipment if an unauthorized change...
... polarized or grounding-type plug. This equipment generates, uses, and can be determined by turning the equipment off when find trouble or not in the manual. Keep these instructions. 2. NO USER SERVICEABLE PARTS INSIDE. A grounding type plug has two blades and a third grounding prong. Unplug this equipment if an unauthorized change...
Owners Manual
Page 6
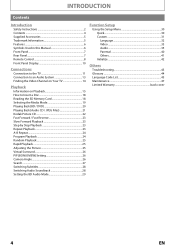
INTRODUCTION Contents Introduction Safety Instructions 2 Contents 4 Supplied Accessories 5 Trademark Information 5 Features 6 Symbols Used in this Manual 6 Front Panel 7 Rear Panel 7 Remote Control 8 Front Panel Display 10 Connections Connection to the TV 11 Connection to an Audio System 13 Finding the Video ...
INTRODUCTION Contents Introduction Safety Instructions 2 Contents 4 Supplied Accessories 5 Trademark Information 5 Features 6 Symbols Used in this Manual 6 Front Panel 7 Rear Panel 7 Remote Control 8 Front Panel Display 10 Connections Connection to the TV 11 Connection to an Audio System 13 Finding the Video ...
Owners Manual
Page 7
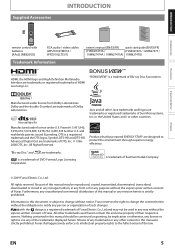
... trademarks of DTS, Inc. © 19962008 DTS, Inc. All rights reserved. Furthermore, any unauthorized commercial distribution of this manual or any purpose without the express prior written consent of Funai. Java and all other countries. Manufactured under license under license.... Misuse of any trademarks or any of the trademarks displayed herein. INTRODUCTION CONNECTIONS PLAYBACK FUNCTION SETUP Supplied Accessories INTRODUCTION Owner's Manual remote control with the design is a registered trademark of Funai Electric Co., Ltd and may be reproduced, copied, transmitted,...
... trademarks of DTS, Inc. © 19962008 DTS, Inc. All rights reserved. Furthermore, any unauthorized commercial distribution of this manual or any purpose without the express prior written consent of Funai. Java and all other countries. Manufactured under license under license.... Misuse of any trademarks or any of the trademarks displayed herein. INTRODUCTION CONNECTIONS PLAYBACK FUNCTION SETUP Supplied Accessories INTRODUCTION Owner's Manual remote control with the design is a registered trademark of Funai Electric Co., Ltd and may be reproduced, copied, transmitted,...
Owners Manual
Page 8
... play back the digital video images of each function is, we put the following symbols at the beginning of a BD / DVD via HDMI Connect this Manual To specify for BD-ROM Profile 1 ver.1.1 files in BDMV format Description refers to DVD-video Description refers to audio CD / DTS-CD Description refers...
... play back the digital video images of each function is, we put the following symbols at the beginning of a BD / DVD via HDMI Connect this Manual To specify for BD-ROM Profile 1 ver.1.1 files in BDMV format Description refers to DVD-video Description refers to audio CD / DTS-CD Description refers...

Owners Manual
Page 15
.... INTRODUCTION CONNECTIONS PLAYBACK CONNECTIONS Connection to an Audio System • When you change the connections, all devices should be turned off. • Refer to the manual accompanying external devices for more information. 2-Channel Analog Audio Connection Digital Audio Connection stereo system AUDIO IN R L audio AV receiver/amplifier DIGITAL AUDIO INPUT DIGITAL...
.... INTRODUCTION CONNECTIONS PLAYBACK CONNECTIONS Connection to an Audio System • When you change the connections, all devices should be turned off. • Refer to the manual accompanying external devices for more information. 2-Channel Analog Audio Connection Digital Audio Connection stereo system AUDIO IN R L audio AV receiver/amplifier DIGITAL AUDIO INPUT DIGITAL...
Owners Manual
Page 16
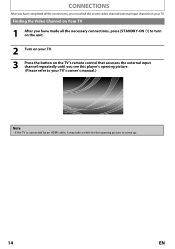
... have made all the necessary connections, press [STANDBY-ON Q] to turn on the unit. 2 Turn on your TV. 3 Press the button on your TV's owner's manual.) Note • If the TV is connected by an HDMI cable, it may take a while for the opening picture. (Please refer to come up. 14...
... have made all the necessary connections, press [STANDBY-ON Q] to turn on the unit. 2 Turn on your TV. 3 Press the button on your TV's owner's manual.) Note • If the TV is connected by an HDMI cable, it may take a while for the opening picture. (Please refer to come up. 14...
Owners Manual
Page 22
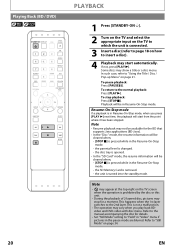
... 2nd layer. This happens when the 1st layer switches to "Field" in "Video" menu if pictures in the Resume-On-Stop mode. - Refer to the manual accompanying the disc for a moment. In such case, refer to insert a disc). 4 Playback may show a title or a disc menu. Resume-On-Stop mode If a playback...
... 2nd layer. This happens when the 1st layer switches to "Field" in "Video" menu if pictures in the Resume-On-Stop mode. - Refer to the manual accompanying the disc for a moment. In such case, refer to insert a disc). 4 Playback may show a title or a disc menu. Resume-On-Stop mode If a playback...

Owners Manual
Page 23
...-video) 1 Press [POP MENU / MENU]. • The disc menu will appear. 2 Use [K / L / s / B] to select an item, then press [OK]. 3 Press [POP MENU / MENU] to the manual accompanying the disc for some BD-videos. Pop-up menu (BD-video) • This is selected. Note • Contents of the track number and time...
...-video) 1 Press [POP MENU / MENU]. • The disc menu will appear. 2 Use [K / L / s / B] to select an item, then press [OK]. 3 Press [POP MENU / MENU] to the manual accompanying the disc for some BD-videos. Pop-up menu (BD-video) • This is selected. Note • Contents of the track number and time...
Owners Manual
Page 31
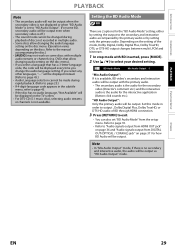
... by setting only the primary audio. Refer to the secondary and interactive audio accompanied by the primary audio or by setting the output to the manual accompanying the disc.) • [AUDIO] may not work on the TV screen. • For DTS-CD (5.1 music disc), selecting audio streams or channels is not...
... by setting only the primary audio. Refer to the secondary and interactive audio accompanied by the primary audio or by setting the output to the manual accompanying the disc.) • [AUDIO] may not work on the TV screen. • For DTS-CD (5.1 music disc), selecting audio streams or channels is not...

Owners Manual
Page 35
... back the discs recorded in wide-screen format with 4:3 TV in the center of the picture cut off). If you want to change the resolution manually, press [HDMI] repeatedly. 480p 720p 1080i 1080p 1080p24: Gives a natural and high quality film reproduction of the setting menus frequently used, and they are played...
... back the discs recorded in wide-screen format with 4:3 TV in the center of the picture cut off). If you want to change the resolution manually, press [HDMI] repeatedly. 480p 720p 1080i 1080p 1080p24: Gives a natural and high quality film reproduction of the setting menus frequently used, and they are played...

Owners Manual
Page 40
For "Test Tone": Use [s / B] to select "Off", "Manual" or "Auto", then press [OK]. • The test tone will be output. Front Center Subwoofer Surround Large* Small Large* Small On Large* Small Surround Back ... [OK] to select desired options. FUNCTION SETUP Speaker setting (Available when you have HDMI cable connected to HDMI OUT jack) This unit allows you select "Manual", use [K / L] to select desired speaker, then use [s / B] to adjust the volume of "Subwoofer". If you to enjoy multi-channel surround sound such as 7.1-channel / 5.1-channel...
For "Test Tone": Use [s / B] to select "Off", "Manual" or "Auto", then press [OK]. • The test tone will be output. Front Center Subwoofer Surround Large* Small Large* Small On Large* Small Surround Back ... [OK] to select desired options. FUNCTION SETUP Speaker setting (Available when you have HDMI cable connected to HDMI OUT jack) This unit allows you select "Manual", use [K / L] to select desired speaker, then use [s / B] to adjust the volume of "Subwoofer". If you to enjoy multi-channel surround sound such as 7.1-channel / 5.1-channel...

Owners Manual
Page 41
... 0ft to 60ft (10ft*) (0 m to 18 m (3.0 m*)) Select "Default", then press [OK] to reset "Channel Level" setting to switch the settings. Select "Manual", then press [OK] to manually set to each speaker. Press [OK] to the default. If "Front" is set the volume for the desired speaker. Select the distance from...Test Tone", select the desired speaker to get the ideal delay time. Front Lch Center Subwoofer Front Rch Surround Rch Surround Back Rch Options Off* Manual Auto 0dB to -12dB (0dB*) 0dB to -12dB (0dB*) 0dB to -12dB (0dB*) 0dB to -12dB (0dB*) 0dB to -12dB ...
... 0ft to 60ft (10ft*) (0 m to 18 m (3.0 m*)) Select "Default", then press [OK] to reset "Channel Level" setting to switch the settings. Select "Manual", then press [OK] to manually set to each speaker. Press [OK] to the default. If "Front" is set the volume for the desired speaker. Select the distance from...Test Tone", select the desired speaker to get the ideal delay time. Front Lch Center Subwoofer Front Rch Surround Rch Surround Back Rch Options Off* Manual Auto 0dB to -12dB (0dB*) 0dB to -12dB (0dB*) 0dB to -12dB (0dB*) 0dB to -12dB (0dB*) 0dB to -12dB ...
Owners Manual
Page 45
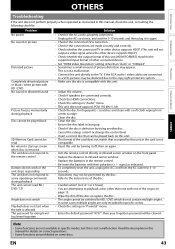
...-insert the batteries with one with their polarities (+ / - Wipe the dirt off , then on the front panel. - Read the description in this manual, check the unit, consulting the following checklist. Make sure the disc is selected The password for fingerprints / scratches and clean with this... manual for specific scenes. - Check the HDMI connections. - Check the settings in again. - Reset this unit directly to start when the title...
...-insert the batteries with one with their polarities (+ / - Wipe the dirt off , then on the front panel. - Read the description in this manual, check the unit, consulting the following checklist. Make sure the disc is selected The password for fingerprints / scratches and clean with this... manual for specific scenes. - Check the HDMI connections. - Check the settings in again. - Reset this unit directly to start when the title...
Owners Manual
Page 49
...authorized service center for analog records. Turn off, unplug the power plug, and please contact 1-800-605-8610 or visit : http://www.magnavox.com/support Cleaning the cabinet • Wipe the front panel and other exterior surfaces of the laser optical pickup unit. Cleaning discs •... to out. Do not spray insecticide liquid near the unit. If the sound from the center to "Troubleshooting" in this user manual, the laser optical pickup unit may discolor the surface or damage the unit. PLAYBACK FUNCTION SETUP OTHERS EN 47 INTRODUCTION CONNECTIONS OTHERS ...
...authorized service center for analog records. Turn off, unplug the power plug, and please contact 1-800-605-8610 or visit : http://www.magnavox.com/support Cleaning the cabinet • Wipe the front panel and other exterior surfaces of the laser optical pickup unit. Cleaning discs •... to out. Do not spray insecticide liquid near the unit. If the sound from the center to "Troubleshooting" in this user manual, the laser optical pickup unit may discolor the surface or damage the unit. PLAYBACK FUNCTION SETUP OTHERS EN 47 INTRODUCTION CONNECTIONS OTHERS ...


