Getting Started
Page 3
......5 Setting up the printer 8 Setting up the printer for use with a computer...8 Setting up the printer for use without a computer or network (standalone 9 Installing the printer software...13 Installing the optional XPS driver (Windows Vista users only 13 Using the printer 15 Understanding the printer...15 Understanding the parts of the printer...
......5 Setting up the printer 8 Setting up the printer for use with a computer...8 Setting up the printer for use without a computer or network (standalone 9 Installing the printer software...13 Installing the optional XPS driver (Windows Vista users only 13 Using the printer 15 Understanding the printer...15 Understanding the parts of the printer...

Getting Started
Page 4
... printer on a wireless network...35 Interpreting the colors of the Wi-Fi indicator light...36 Finding the signal strength...36 Wired networking...36 Installing the printer on a wired (Ethernet) network ...36 Connecting the printer directly to the computer with a USB cable 37 Troubleshooting 38 Setup ...troubleshooting...38 Power button is not lit ...38 Software does not install...38 Page does not print...40 Wireless troubleshooting...41 Check your security keys...41 Wireless setup program cannot communicate with the printer during...
... printer on a wireless network...35 Interpreting the colors of the Wi-Fi indicator light...36 Finding the signal strength...36 Wired networking...36 Installing the printer on a wired (Ethernet) network ...36 Connecting the printer directly to the computer with a USB cable 37 Troubleshooting 38 Setup ...troubleshooting...38 Power button is not lit ...38 Software does not install...38 Page does not print...40 Wireless troubleshooting...41 Check your security keys...41 Wireless setup program cannot communicate with the printer during...
Getting Started
Page 5
... printer on a Windows operating system. To access the Mac Help: 1 From the Finder desktop, double-click the Lexmark 9500 Series folder. 2 Double-click the printer Help icon. It installs with the printer software. It installs with the printer software. Introduction Finding information about the printer Publications See the For Quick Setup sheet Initial...
... printer on a Windows operating system. To access the Mac Help: 1 From the Finder desktop, double-click the Lexmark 9500 Series folder. 2 Double-click the printer Help icon. It installs with the printer software. It installs with the printer software. Introduction Finding information about the printer Publications See the For Quick Setup sheet Initial...

Getting Started
Page 8
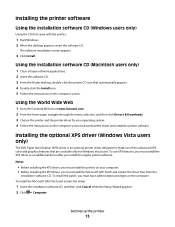
... programs to appear. Notes: • If you use with your CD or DVD drive. • If you have inserted the Windows CD and the install screen does not appear automatically, click Start ª Run, and then type D:\setup.exe, where D is necessary for Macintosh, depending on which operating ... the CD for the printer to work properly. Your security software may notify you that Lexmark software is on, and then, depending on the operating system you have inserted the Macintosh CD and the install screen does not appear automatically, click the CD icon on the desktop, and then double...
... programs to appear. Notes: • If you use with your CD or DVD drive. • If you have inserted the Windows CD and the install screen does not appear automatically, click Start ª Run, and then type D:\setup.exe, where D is necessary for Macintosh, depending on which operating ... the CD for the printer to work properly. Your security software may notify you that Lexmark software is on, and then, depending on the operating system you have inserted the Macintosh CD and the install screen does not appear automatically, click the CD icon on the desktop, and then double...
Getting Started
Page 9
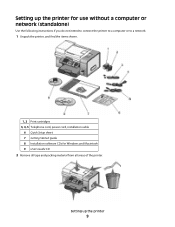
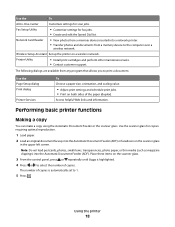
Setting up the printer 9 Setting up the printer for use without a computer or network (standalone) Use the following instructions if you do not intend to connect the printer to a computer or to a network. 1 Unpack the printer, and find the items shown. 1, 2 Print cartridges 3, 4, 5 Telephone cord, power cord, installation cable 6 Quick Setup sheet 7 Getting Started guide 8 Installation software CDs for Windows and Macintosh 9 User's Guide CD 2 Remove all tape and packing material from all areas of the printer.
Setting up the printer 9 Setting up the printer for use without a computer or network (standalone) Use the following instructions if you do not intend to connect the printer to a computer or to a network. 1 Unpack the printer, and find the items shown. 1, 2 Print cartridges 3, 4, 5 Telephone cord, power cord, installation cable 6 Quick Setup sheet 7 Getting Started guide 8 Installation software CDs for Windows and Macintosh 9 User's Guide CD 2 Remove all tape and packing material from all areas of the printer.
Getting Started
Page 13
The software installation screen appears. 3 Click Install. Installing the optional XPS driver (Windows Vista users only) The XML Paper Specification (XPS) driver is an optional printer driver designed to the Lexmark Web site at www.lexmark.com. 2 From the home page, navigate through the menu selection, and then ...click Drivers & Downloads. 3 Choose the printer and the printer driver for Windows Vista users. Notes: • Before installing the XPS driver, you must install the printer...
The software installation screen appears. 3 Click Install. Installing the optional XPS driver (Windows Vista users only) The XML Paper Specification (XPS) driver is an optional printer driver designed to the Lexmark Web site at www.lexmark.com. 2 From the home page, navigate through the menu selection, and then ...click Drivers & Downloads. 3 Choose the printer and the printer driver for Windows Vista users. Notes: • Before installing the XPS driver, you must install the printer...
Getting Started
Page 14
...see the XPS readme file on the two additional dialogs that ends in the xps folder with the setupxps batch file (D:\Drivers\xps\readme). The Install From Disk dialog appears. 6 Click Browse, and then navigate to the XPS driver files on the screen to your computer: a Click Computer,...your printer model number, and then double-click Drivers. Follow the instructions on your computer, and any required Microsoft XPS files are copied to finish installing the patch. b Double-click the folder that appear. 3 Double-click the CD-ROM drive icon, and then double-click Drivers. 4 Double-click...
...see the XPS readme file on the two additional dialogs that ends in the xps folder with the setupxps batch file (D:\Drivers\xps\readme). The Install From Disk dialog appears. 6 Click Browse, and then navigate to the XPS driver files on the screen to your computer: a Click Computer,...your printer model number, and then double-click Drivers. Follow the instructions on your computer, and any required Microsoft XPS files are copied to finish installing the patch. b Double-click the folder that appear. 3 Double-click the CD-ROM drive icon, and then double-click Drivers. 4 Double-click...
Getting Started
Page 16
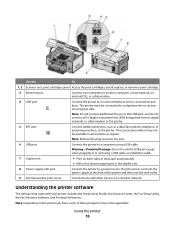
... the printer to an active telephone line to the printer. Use the To 1, 2 Scanner unit, print cartridge carrier Access the print cartridges; install, replace, or remove a print cartridge. 3 Ethernet port Connect your printer includes the Productivity Studio, the Solution Center, the Fax Setup Utility,... except when plugging in all countries or regions. Using the printer 16 The printer must be available in or removing a USB cable or installation cable. 7 Duplex unit • Print on a wireless network. This connection method may not be applicable. Note: Remove the plug to...
... the printer to an active telephone line to the printer. Use the To 1, 2 Scanner unit, print cartridge carrier Access the print cartridges; install, replace, or remove a print cartridge. 3 Ethernet port Connect your printer includes the Productivity Studio, the Solution Center, the Fax Setup Utility,... except when plugging in all countries or regions. Using the printer 16 The printer must be available in or removing a USB cable or installation cable. 7 Duplex unit • Print on a wireless network. This connection method may not be applicable. Note: Remove the plug to...
Getting Started
Page 17
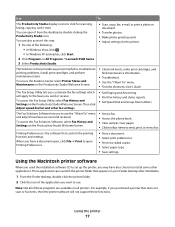
...and settings. For example, if you may have a document open, click File ª Print to print photos, troubleshoot printing problems, install print cartridges, and perform maintenance tasks. You can also access it from the desktop by double-clicking the Productivity Studio icon. Then ... all of the following: • In Windows Vista, click . • In Windows XP and earlier, click Start. 2 Click Programs or All Programs ªLexmark 9500 Series. 3 Select Productivity Studio. • Scan, copy, fax, e-mail, or print a photo or document. • Transfer photos. • Make photo...
...and settings. For example, if you may have a document open, click File ª Print to print photos, troubleshoot printing problems, install print cartridges, and perform maintenance tasks. You can also access it from the desktop by double-clicking the Productivity Studio icon. Then ... all of the following: • In Windows Vista, click . • In Windows XP and earlier, click Start. 2 Click Programs or All Programs ªLexmark 9500 Series. 3 Select Productivity Studio. • Scan, copy, fax, e-mail, or print a photo or document. • Transfer photos. • Make photo...
Getting Started
Page 18
... items on the scanner glass in the upper left corner. Wireless Setup Assistant Set up the printer on both sides of copies. Printer Utility • Install print cartridges and perform other maintenance tasks. • Contact customer support. Access helpful Web links and information. Use the scanner glass for fax jobs. •...
... items on the scanner glass in the upper left corner. Wireless Setup Assistant Set up the printer on both sides of copies. Printer Utility • Install print cartridges and perform other maintenance tasks. • Contact customer support. Access helpful Web links and information. Use the scanner glass for fax jobs. •...

Getting Started
Page 33
Note: Do not remove the plug. Getting the printer ready to fax 33 Country/region • Germany • Austria • Switzerland There is necessary for the proper functioning of the printer. You may not work. This plug is a plug installed in your home (such as telephones or answering machines) may use an adapter with your printer. If you remove it, other telecommunications devices in the EXT port of the printer.
Note: Do not remove the plug. Getting the printer ready to fax 33 Country/region • Germany • Austria • Switzerland There is necessary for the proper functioning of the printer. You may not work. This plug is a plug installed in your home (such as telephones or answering machines) may use an adapter with your printer. If you remove it, other telecommunications devices in the EXT port of the printer.
Getting Started
Page 34
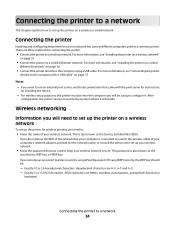
... computer's network adapter and look for instructions on a wireless or wired network. There are three methods for use an external print server, see "Installing the printer on a wireless network" on page 35. • Connect the printer to a common printer. For more information, see the documentation... explains how to the computer with the print server for the network name, or consult the person who set up the printer on installing the device. - After configuration, the printer can be near the computer you will need to the location where it . Wireless networking...
... computer's network adapter and look for instructions on a wireless or wired network. There are three methods for use an external print server, see "Installing the printer on a wireless network" on page 35. • Connect the printer to a common printer. For more information, see the documentation... explains how to the computer with the print server for the network name, or consult the person who set up the printer on installing the device. - After configuration, the printer can be near the computer you will need to the location where it . Wireless networking...
Getting Started
Page 35
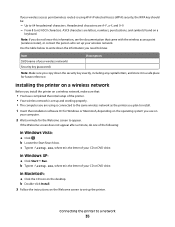
...letter of your wireless network) Security key (password) Description Note: Make sure you use on the Welcome screen to appear. b Double-click Install. 3 Follow the instructions on your computer. 2 Wait a minute for future reference. If your wireless access point (wireless router) is ....exe, where D is connected to the same wireless network as the printer you plan to install. 1 Insert the installation software CD for Windows or Macintosh, depending on a keyboard. Installing the printer on a wireless network Before you install the printer on the desktop. Up to 63 ASCII characters.
...letter of your wireless network) Security key (password) Description Note: Make sure you use on the Welcome screen to appear. b Double-click Install. 3 Follow the instructions on your computer. 2 Wait a minute for future reference. If your wireless access point (wireless router) is ....exe, where D is connected to the same wireless network as the printer you plan to install. 1 Insert the installation software CD for Windows or Macintosh, depending on a keyboard. Installing the printer on a wireless network Before you install the printer on the desktop. Up to 63 ASCII characters.
Getting Started
Page 36
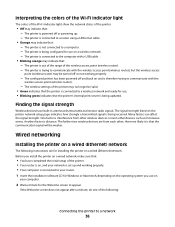
...even other , the more likely it is powered off or not working properly. • Your computer is connected to your router. 1 Insert the installation software CD for Windows or Macintosh, depending on a wired network, make sure that: • You have built-in antennas that the communication signal ... from each other devices such as microwave ovens. The farther two wireless devices are for the Welcome screen to a network 36 Before you install the printer on the operating system you use . • Blinking green indicates that : - The printer is on, and your computer. 2 Wait ...
...even other , the more likely it is powered off or not working properly. • Your computer is connected to your router. 1 Insert the installation software CD for Windows or Macintosh, depending on a wired network, make sure that: • You have built-in antennas that the communication signal ... from each other devices such as microwave ovens. The farther two wireless devices are for the Welcome screen to a network 36 Before you install the printer on the operating system you use . • Blinking green indicates that : - The printer is on, and your computer. 2 Wait ...
Getting Started
Page 37
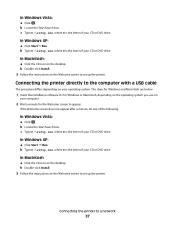
...on your operating system. b Locate the Start Search box. c Type D:\setup.exe, where D is the letter of your CD or DVD drive. b Double-click Install. 3 Follow the instructions on the Welcome screen to a network 37 In Windows XP: a Click Start ª Run. In Macintosh: a Click the CD icon ... Welcome screen does not appear after a minute, do one of your CD or DVD drive. Connecting the printer to set up the printer. b Double-click Install. 3 Follow the instructions on the Welcome screen to set up the printer. b Locate the Start Search box. c Type D:\setup.exe, where D is...
...on your operating system. b Locate the Start Search box. c Type D:\setup.exe, where D is the letter of your CD or DVD drive. b Double-click Install. 3 Follow the instructions on the Welcome screen to a network 37 In Windows XP: a Click Start ª Run. In Macintosh: a Click the CD icon ... Welcome screen does not appear after a minute, do one of your CD or DVD drive. Connecting the printer to set up the printer. b Double-click Install. 3 Follow the instructions on the Welcome screen to set up the printer. b Locate the Start Search box. c Type D:\setup.exe, where D is...
Getting Started
Page 38
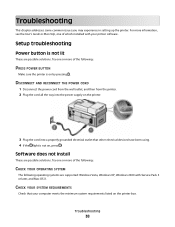
Try one or more of which installed with Service Pack 3 or later, and Mac OS X. DISCONNECT AND RECONNECT THE POWER CORD 1 Disconnect the power cord from the wall outlet, and then from .... CHECK YOUR SYSTEM REQUIREMENTS Check that other electrical devices have been using. 4 If the light is not lit These are possible solutions. Software does not install These are supported: Windows Vista, Windows XP, Windows 2000 with your computer meets the minimum system requirements listed on the printer box. Try one of...
Try one or more of which installed with Service Pack 3 or later, and Mac OS X. DISCONNECT AND RECONNECT THE POWER CORD 1 Disconnect the power cord from the wall outlet, and then from .... CHECK YOUR SYSTEM REQUIREMENTS Check that other electrical devices have been using. 4 If the light is not lit These are possible solutions. Software does not install These are supported: Windows Vista, Windows XP, Windows 2000 with your computer meets the minimum system requirements listed on the printer box. Try one of...
Getting Started
Page 39
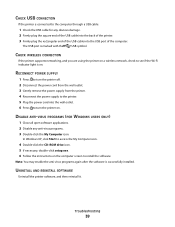
... the USB symbol. CHECK WIRELESS CONNECTION If the printer supports networking, and you are using the printer on a wireless network, check to install the software. The USB port is successfully installed. In Windows XP, click Start to access the My Computer icon. 4 Double-click the CD-ROM drive icon. 5 If necessary, double...
... the USB symbol. CHECK WIRELESS CONNECTION If the printer supports networking, and you are using the printer on a wireless network, check to install the software. The USB port is successfully installed. In Windows XP, click Start to access the My Computer icon. 4 Double-click the CD-ROM drive icon. 5 If necessary, double...
Getting Started
Page 40
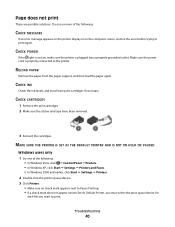
... sure the power cord is not on the computer screen, resolve the error before trying to the printer. CHECK INK Check the ink levels, and install new print cartridges if necessary. Page does not print These are possible solutions.
... sure the power cord is not on the computer screen, resolve the error before trying to the printer. CHECK INK Check the ink levels, and install new print cartridges if necessary. Page does not print These are possible solutions.
Getting Started
Page 42
...Programs or All Programs ªLexmark 9500 Series. 7 Click Wireless Configuration Utility. 8 Follow the instructions on the computer screen. ASCII characters are A-F, a-f, and 0-9. • Exactly 5 or 13 ASCII characters. The USB port is marked with the printer during installation These are possible solutions. ...of the printer. 4 From the Finder desktop, double-click the Lexmark 9500 Series folder. 5 Double-click Wireless Setup Assistant. 6 Follow the instructions on . Mac users only 1 Disconnect the installation cable, and check it for any obvious damage. 2 Firmly ...
...Programs or All Programs ªLexmark 9500 Series. 7 Click Wireless Configuration Utility. 8 Follow the instructions on the computer screen. ASCII characters are A-F, a-f, and 0-9. • Exactly 5 or 13 ASCII characters. The USB port is marked with the printer during installation These are possible solutions. ...of the printer. 4 From the Finder desktop, double-click the Lexmark 9500 Series folder. 5 Double-click Wireless Setup Assistant. 6 Follow the instructions on . Mac users only 1 Disconnect the installation cable, and check it for any obvious damage. 2 Firmly ...
Getting Started
Page 43
Wi-Fi indicator light is blinking orange during installation When the Wi-Fi indicator light is blinking orange, it indicates that reception improves if you do not already know it has been configured. MOVE ...
Wi-Fi indicator light is blinking orange during installation When the Wi-Fi indicator light is blinking orange, it indicates that reception improves if you do not already know it has been configured. MOVE ...


