Troubleshooting Guide
Page 1
...settings are correct. Solving printing problems Multiple-language PDFs do not print These are possible solutions. For more information, visit the Lexmark Web site at www.lexmark.com. This often fixes the problem. Copies of the following : PARTIAL JOB, NO JOB, OR BLANK PAGES PRINT The ...OK. Error message about 10 seconds, and then turn the printer back on the display before sending a job to make sure: • The power cord is plugged into the printer and a properly grounded electrical outlet. • The electrical outlet is not turned off , wait for about reading USB ...
...settings are correct. Solving printing problems Multiple-language PDFs do not print These are possible solutions. For more information, visit the Lexmark Web site at www.lexmark.com. This often fixes the problem. Copies of the following : PARTIAL JOB, NO JOB, OR BLANK PAGES PRINT The ...OK. Error message about 10 seconds, and then turn the printer back on the display before sending a job to make sure: • The power cord is plugged into the printer and a properly grounded electrical outlet. • The electrical outlet is not turned off , wait for about reading USB ...
Troubleshooting Guide
Page 3
...facedown on . Try one or more of the following : CHECK THE DISPLAY FOR ERROR MESSAGES Clear any surge protectors, uninterrupted power supplies, or extension cords. • Other electrical equipment plugged into the outlet is securely attached to a lighter setting. Scanning takes too long or ... setting. • Adjust the darkness to the printer and the host computer, print server, option, or other network device. • The power cord is plugged into the printer and a properly grounded electrical outlet. • The electrical outlet is not turned off by any switch or breaker....
...facedown on . Try one or more of the following : CHECK THE DISPLAY FOR ERROR MESSAGES Clear any surge protectors, uninterrupted power supplies, or extension cords. • Other electrical equipment plugged into the outlet is securely attached to a lighter setting. Scanning takes too long or ... setting. • Adjust the darkness to the printer and the host computer, print server, option, or other network device. • The power cord is plugged into the printer and a properly grounded electrical outlet. • The electrical outlet is not turned off by any switch or breaker....
User's Guide
Page 13
...optional hardware or memory devices sometime after setting up the printer, then turn them off , and unplug the power cord from the wall outlet before touching. Remove the power cord from a hot component, allow the surface to cool before continuing. Replace it safely. CAUTION-POTENTIAL INJURY:...printer before inspecting it aside instead of the optional drawer and set it . Note: Use the handholds located on the power cord. Use only the power cord provided with this product or a 26 AWG or larger replacement when connecting this product or the manufacturer's authorized replacement. ...
...optional hardware or memory devices sometime after setting up the printer, then turn them off , and unplug the power cord from the wall outlet before touching. Remove the power cord from a hot component, allow the surface to cool before continuing. Replace it safely. CAUTION-POTENTIAL INJURY:...printer before inspecting it aside instead of the optional drawer and set it . Note: Use the handholds located on the power cord. Use only the power cord provided with this product or a 26 AWG or larger replacement when connecting this product or the manufacturer's authorized replacement. ...

User's Guide
Page 14
...a high-capacity input tray, a duplex unit and an input option, or more information, see www.lexmark.com/multifunctionprinters. Do not set up this product or make any electrical or cabling connections, such as the fax feature, power cord, or telephone, during a lightning storm. Refer service or repairs, other than one input option. Safety... fax feature during a lightning storm. CAUTION-SHOCK HAZARD: To avoid the risk of electric shock when cleaning the exterior of the printer, unplug the power cord from the wall outlet and disconnect all cables from the printer before proceeding.
...a high-capacity input tray, a duplex unit and an input option, or more information, see www.lexmark.com/multifunctionprinters. Do not set up this product or make any electrical or cabling connections, such as the fax feature, power cord, or telephone, during a lightning storm. Refer service or repairs, other than one input option. Safety... fax feature during a lightning storm. CAUTION-SHOCK HAZARD: To avoid the risk of electric shock when cleaning the exterior of the printer, unplug the power cord from the wall outlet and disconnect all cables from the printer before proceeding.
User's Guide
Page 26
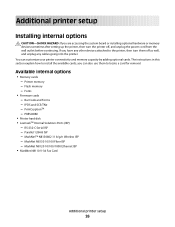
... - PRESCRIBE • Printer hard disk • LexmarkTM Internal Solutions Ports (ISP) - MarkNetTM N8150802.11 b/g/n Wireless ISP - You can also use them off , and unplug the power cord from the wall outlet before continuing. RS-232-C Serial ISP - Parallel 1284-B ISP - If you have any other devices attached to the printer, then turn...
... - PRESCRIBE • Printer hard disk • LexmarkTM Internal Solutions Ports (ISP) - MarkNetTM N8150802.11 b/g/n Wireless ISP - You can also use them off , and unplug the power cord from the wall outlet before continuing. RS-232-C Serial ISP - Parallel 1284-B ISP - If you have any other devices attached to the printer, then turn...
User's Guide
Page 27
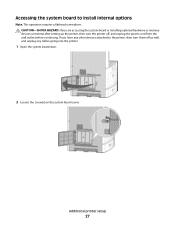
... are accessing the system board or installing optional hardware or memory devices sometime after setting up the printer, then turn them off , and unplug the power cord from the wall outlet before continuing. Accessing the system board to the printer, then turn the printer off as well, and unplug any other devices...
... are accessing the system board or installing optional hardware or memory devices sometime after setting up the printer, then turn them off , and unplug the power cord from the wall outlet before continuing. Accessing the system board to the printer, then turn the printer off as well, and unplug any other devices...

User's Guide
Page 29
... are accessing the system board or installing optional hardware or memory devices sometime after setting up the printer, then turn them off , and unplug the power cord from the wall outlet before touching any cables going into the printer. Touch something metal on the printer before continuing. Note: Avoid touching the connection...
... are accessing the system board or installing optional hardware or memory devices sometime after setting up the printer, then turn them off , and unplug the power cord from the wall outlet before touching any cables going into the printer. Touch something metal on the printer before continuing. Note: Avoid touching the connection...

User's Guide
Page 31
... are accessing the system board or installing optional hardware or memory devices sometime after setting up the printer, then turn them off , and unplug the power cord from the wall outlet before touching any cables going into the printer. If you are interchangeable. The system board has two connections for an optional...
... are accessing the system board or installing optional hardware or memory devices sometime after setting up the printer, then turn them off , and unplug the power cord from the wall outlet before touching any cables going into the printer. If you are interchangeable. The system board has two connections for an optional...
User's Guide
Page 33
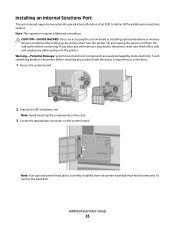
... are accessing the system board or installing optional hardware or memory devices sometime after setting up the printer, then turn them off , and unplug the power cord from the wall outlet before touching any cables going into the printer. Note: Avoid touching the components on the card. 3 Locate the appropriate connector on... the hard disk: Additional printer setup 33 Install an ISP for additional connectivity options. Installing an Internal Solutions Port The system board supports one optional Lexmark Internal Solutions Port (ISP).
... are accessing the system board or installing optional hardware or memory devices sometime after setting up the printer, then turn them off , and unplug the power cord from the wall outlet before touching any cables going into the printer. Note: Avoid touching the components on the card. 3 Locate the appropriate connector on... the hard disk: Additional printer setup 33 Install an ISP for additional connectivity options. Installing an Internal Solutions Port The system board supports one optional Lexmark Internal Solutions Port (ISP).
User's Guide
Page 39
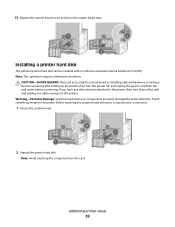
... board or installing optional hardware or memory devices sometime after setting up the printer, then turn them off , and unplug the power cord from the wall outlet before touching any cables going into the printer. Additional printer setup 39 CAUTION-SHOCK HAZARD: If you have... board. 2 Unpack the printer hard disk. Installing a printer hard disk The optional printer hard disk can be installed with or without a Lexmark Internal Solutions Port (ISP). Note: Avoid touching the components on the printer before continuing. If you are easily damaged by static electricity. 13...
... board or installing optional hardware or memory devices sometime after setting up the printer, then turn them off , and unplug the power cord from the wall outlet before touching any cables going into the printer. Additional printer setup 39 CAUTION-SHOCK HAZARD: If you have... board. 2 Unpack the printer hard disk. Installing a printer hard disk The optional printer hard disk can be installed with or without a Lexmark Internal Solutions Port (ISP). Note: Avoid touching the components on the printer before continuing. If you are easily damaged by static electricity. 13...

User's Guide
Page 43
... are accessing the system board or installing optional hardware or memory devices sometime after setting up the printer, then turn them off , and unplug the power cord from the fax card opening. CAUTION-SHOCK HAZARD: If you have any other devices attached to the printer, then turn the printer off as well...
... are accessing the system board or installing optional hardware or memory devices sometime after setting up the printer, then turn them off , and unplug the power cord from the fax card opening. CAUTION-SHOCK HAZARD: If you have any other devices attached to the printer, then turn the printer off as well...
User's Guide
Page 61
... electrical or cabling connections, such as a telephone, an answering machine, or a computer modem. You can connect the printer with equipment such as the fax feature, power cord, or telephone, during a lightning storm. Send faxes using a computer. Other devices (such as described in all printer models. Note: The printer is required. If you...
... electrical or cabling connections, such as a telephone, an answering machine, or a computer modem. You can connect the printer with equipment such as the fax feature, power cord, or telephone, during a lightning storm. Send faxes using a computer. Other devices (such as described in all printer models. Note: The printer is required. If you...
User's Guide
Page 231
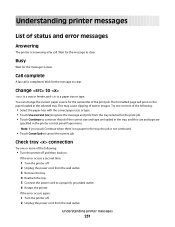
...clear. Wait for the message to clear. If the error occurs a second time: 1 Turn the printer off . 2 Unplug the power cord from the wall outlet. 3 Remove the tray. 4 Reattach the tray. 5 Connect the power cord to a properly grounded outlet. 6 Restart the printer. If the error occurs again: 1 Turn the printer off . 2 Unplug the... power cord from the wall outlet. Call complete A fax call . Note: If you touch Continue when there is no paper in the selected tray. The ...
...clear. Wait for the message to clear. If the error occurs a second time: 1 Turn the printer off . 2 Unplug the power cord from the wall outlet. 3 Remove the tray. 4 Reattach the tray. 5 Connect the power cord to a properly grounded outlet. 6 Restart the printer. If the error occurs again: 1 Turn the printer off . 2 Unplug the... power cord from the wall outlet. Call complete A fax call . Note: If you touch Continue when there is no paper in the selected tray. The ...

User's Guide
Page 234
...more of the following: • Install the envelope feeder: 1 Turn the printer off. 2 Unplug the power cord from the wall outlet. 3 Install the envelope feeder. 4 Connect the power cord to a properly grounded outlet. 5 Restart the printer. • Cancel the current job. Understanding printer messages ...more of the following : • Install the specified tray: 1 Turn the printer off . 2 Unplug the power cord from the wall outlet. 3 Install the specified tray. 4 Connect the power cord to a properly grounded outlet. 5 Restart the printer. • Cancel the current job. Line busy A fax ...
...more of the following: • Install the envelope feeder: 1 Turn the printer off. 2 Unplug the power cord from the wall outlet. 3 Install the envelope feeder. 4 Connect the power cord to a properly grounded outlet. 5 Restart the printer. • Cancel the current job. Understanding printer messages ...more of the following : • Install the specified tray: 1 Turn the printer off . 2 Unplug the power cord from the wall outlet. 3 Install the specified tray. 4 Connect the power cord to a properly grounded outlet. 5 Restart the printer. • Cancel the current job. Line busy A fax ...
User's Guide
Page 236
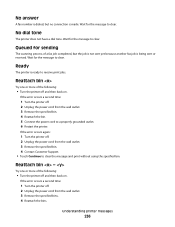
...following : • Turn the printer off and then back on . If the error occurs a second time: 1 Turn the printer off . 2 Unplug the power cord from the wall outlet. 3 Remove the specified bins. 4 Reattach the bins. No answer A fax number is dialed, but the job is not sent yet ...the message to clear the message and print without using the specified bin. If the error occurs again: 1 Turn the printer off . 2 Unplug the power cord from the wall outlet. 3 Remove the specified bin. 4 Contact Customer Support. • Touch Continue to clear. Wait for the message to receive print ...
...following : • Turn the printer off and then back on . If the error occurs a second time: 1 Turn the printer off . 2 Unplug the power cord from the wall outlet. 3 Remove the specified bins. 4 Reattach the bins. No answer A fax number is dialed, but the job is not sent yet ...the message to clear the message and print without using the specified bin. If the error occurs again: 1 Turn the printer off . 2 Unplug the power cord from the wall outlet. 3 Remove the specified bin. 4 Contact Customer Support. • Touch Continue to clear. Wait for the message to receive print ...
User's Guide
Page 237
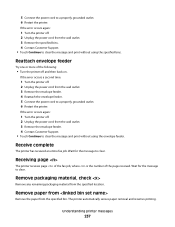
...The printer receives page of the fax job, where is the number of the following: • Turn the printer off . 2 Unplug the power cord from the wall outlet. 3 Remove the envelope feeder. 4 Contact Customer Support. • Touch Continue to clear the message and print without using... the specified bins. Remove paper from Remove the paper from the specified location. 5 Connect the power cord to clear. Receive complete The printer has received an entire fax job. Remove packaging material, check Remove any remaining packaging material from ...
...The printer receives page of the fax job, where is the number of the following: • Turn the printer off . 2 Unplug the power cord from the wall outlet. 3 Remove the envelope feeder. 4 Contact Customer Support. • Touch Continue to clear the message and print without using... the specified bins. Remove paper from Remove the paper from the specified location. 5 Connect the power cord to clear. Receive complete The printer has received an entire fax job. Remove packaging material, check Remove any remaining packaging material from ...

User's Guide
Page 243
...• Touch Continue to continue printing. • Turn the printer off . 2 Unplug the power cord from the wall outlet. 3 Remove the unsupported option card from the printer system board. 4 Connect the power cord to Disabled. 56 Serial port disabled is not set to a properly grounded outlet. 5 Turn ...the printer power back on. 56 Parallel port disabled is a slot on to clear the message. ...
...• Touch Continue to continue printing. • Turn the printer off . 2 Unplug the power cord from the wall outlet. 3 Remove the unsupported option card from the printer system board. 4 Connect the power cord to Disabled. 56 Serial port disabled is not set to a properly grounded outlet. 5 Turn ...the printer power back on. 56 Parallel port disabled is a slot on to clear the message. ...

User's Guide
Page 244
... Continue to clear the message. 58 Too many bins attached 1 Turn the printer power off. 2 Unplug the power cord from the wall outlet. 3 Remove the additional bins. 4 Connect the power cord to a properly grounded outlet. 5 Turn the printer power back on. 58 Too many disks installed 1 Turn the printer off. 2 Unplug...print job were removed. • The print job was created using data from the wall outlet. 3 Remove the extra disks. 4 Connect the power cord to a properly grounded outlet. 5 Turn the printer back on the printer hard disk something has changed in the printer to clear the message....
... Continue to clear the message. 58 Too many bins attached 1 Turn the printer power off. 2 Unplug the power cord from the wall outlet. 3 Remove the additional bins. 4 Connect the power cord to a properly grounded outlet. 5 Turn the printer power back on. 58 Too many disks installed 1 Turn the printer off. 2 Unplug...print job were removed. • The print job was created using data from the wall outlet. 3 Remove the extra disks. 4 Connect the power cord to a properly grounded outlet. 5 Turn the printer back on the printer hard disk something has changed in the printer to clear the message....
User's Guide
Page 245
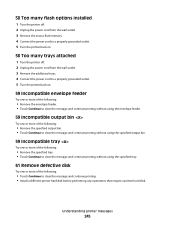
...1 Turn the printer off. 2 Unplug the power cord from the wall outlet. 3 Remove the excess flash memory. 4 Connect the power cord to a properly grounded outlet. 5 Turn the printer back on. 58 Too many trays attached 1 Turn the printer off. 2 Unplug the power cord from the wall outlet. 3 Remove the additional... trays. 4 Connect the power cord to a properly grounded outlet. 5 Turn the printer back on. 59 Incompatible envelope feeder Try one or more of...
...1 Turn the printer off. 2 Unplug the power cord from the wall outlet. 3 Remove the excess flash memory. 4 Connect the power cord to a properly grounded outlet. 5 Turn the printer back on. 58 Too many trays attached 1 Turn the printer off. 2 Unplug the power cord from the wall outlet. 3 Remove the additional... trays. 4 Connect the power cord to a properly grounded outlet. 5 Turn the printer back on. 59 Incompatible envelope feeder Try one or more of...
User's Guide
Page 247
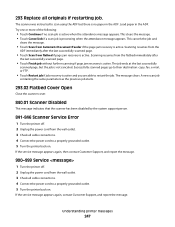
... jam recovery is no scan job is processing when the attendance message appears. The message clears. 293 Replace all cable connections. 4 Connect the power cord to a properly grounded outlet. 5 Turn the printer back on . This cancels the job and clears the message. • Touch Scan from... message appears again, then contact Customer Support, and report the message. 900-999 Service 1 Turn the printer off . 2 Unplug the power cord from the ADF immediately after the last successfully scanned page. • Touch Finish job without further scanning if page jam recovery is active....
... jam recovery is no scan job is processing when the attendance message appears. The message clears. 293 Replace all cable connections. 4 Connect the power cord to a properly grounded outlet. 5 Turn the printer back on . This cancels the job and clears the message. • Touch Scan from... message appears again, then contact Customer Support, and report the message. 900-999 Service 1 Turn the printer off . 2 Unplug the power cord from the ADF immediately after the last successfully scanned page. • Touch Finish job without further scanning if page jam recovery is active....

