
User's Guide
Page 3
...information about the printer...13 Operating system notice...16 Setting up the printer 17 Checking the box contents...17 Setting up the printer for standalone use...18 Understanding the parts of the printer...23 Getting the printer ready to fax...25 Using an RJ11 adapter ...25 Choosing a fax connection...28 ... networking 45 Finding your MAC address...45 Assigning an IP address...45 Configure IP address...45 Finding a printer/print server located on remote subnets 45 Tips for using network adapters...45 Sharing a printer in a Windows environment...46 Checking the port setting...46 Contents 3
...information about the printer...13 Operating system notice...16 Setting up the printer 17 Checking the box contents...17 Setting up the printer for standalone use...18 Understanding the parts of the printer...23 Getting the printer ready to fax...25 Using an RJ11 adapter ...25 Choosing a fax connection...28 ... networking 45 Finding your MAC address...45 Assigning an IP address...45 Configure IP address...45 Finding a printer/print server located on remote subnets 45 Tips for using network adapters...45 Sharing a printer in a Windows environment...46 Checking the port setting...46 Contents 3
User's Guide
Page 13
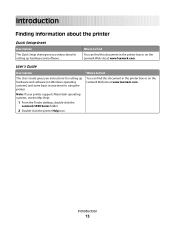
... systems, see the Mac Help: 1 From the Finder desktop, double-click the Lexmark 5300 Series folder. 2 Double-click the printer Help icon. Introduction 13 User's Guide Description The User's Guide gives you instructions for setting up hardware and software (on Windows operating systems) and some basic instructions for setting up hardware and software...
... systems, see the Mac Help: 1 From the Finder desktop, double-click the Lexmark 5300 Series folder. 2 Double-click the printer Help icon. Introduction 13 User's Guide Description The User's Guide gives you instructions for setting up hardware and software (on Windows operating systems) and some basic instructions for setting up hardware and software...
User's Guide
Page 14
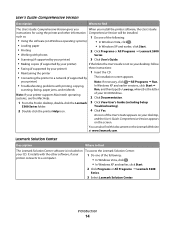
... of the following : • Using the software (on Windows operating systems) • In Windows Vista, click . • Loading paper • In Windows XP and earlier, click Start. • Printing 2 Click Programs or All Programs Œ Lexmark 5300 • Working with photos Series. • Scanning (if supported by your printer) 3 Click User's Guide. • Making copies (if...
... of the following : • Using the software (on Windows operating systems) • In Windows Vista, click . • Loading paper • In Windows XP and earlier, click Start. • Printing 2 Click Programs or All Programs Œ Lexmark 5300 • Working with photos Series. • Scanning (if supported by your printer) 3 Click User's Guide. • Making copies (if...
User's Guide
Page 16
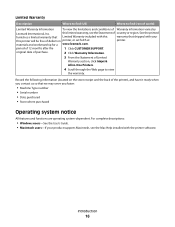
...Inkjet & All-In-One Printers. 4 Scroll through the Web page to find (rest of world) Limited Warranty Information To view the limitations and conditions of the printer), and have it ready when you contact us so that shipped with the printer software. materials and workmanship for a www.lexmark.... Record the following information (located on the store receipt and the back of Warranty information varies by Lexmark International, Inc. For complete descriptions: • Windows users-See the User's Guide. • Macintosh users-If your product supports Macintosh, see the Mac...
...Inkjet & All-In-One Printers. 4 Scroll through the Web page to find (rest of world) Limited Warranty Information To view the limitations and conditions of the printer), and have it ready when you contact us so that shipped with the printer software. materials and workmanship for a www.lexmark.... Record the following information (located on the store receipt and the back of Warranty information varies by Lexmark International, Inc. For complete descriptions: • Windows users-See the User's Guide. • Macintosh users-If your product supports Macintosh, see the Mac...
User's Guide
Page 41
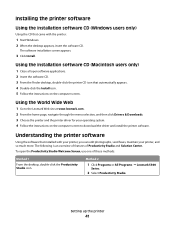
... Productivity Studio Welcome Screen, use one of Productivity Studio and Solution Center. Method 2 1 Click Programs or All Programs ΠLexmark 5300 Series. 2 Select Productivity Studio. To open software applications. 2 Insert the software CD. 3 From the Finder desktop, double-click the printer CD icon that installed with the printer: 1 Start Windows. 2 When the desktop appears, insert...
... Productivity Studio Welcome Screen, use one of Productivity Studio and Solution Center. Method 2 1 Click Programs or All Programs ΠLexmark 5300 Series. 2 Select Productivity Studio. To open software applications. 2 Insert the software CD. 3 From the Finder desktop, double-click the printer CD icon that installed with the printer: 1 Start Windows. 2 When the desktop appears, insert...

User's Guide
Page 43
...one of the Printing Status window. • Turn printing voice notification on transfers, and transparencies. • Find the electronic User's Guide for : • Dialing and Sending • Ringing and Answering • Fax Printing/Reports • Speed Dial and Group Dial numbers The Solution Center is a complete guide to : - Setting up the printer... 2 Click Setup and diagnose printer. 1 Click Programs or All Programs Œ Lexmark 5300 Series. 2 Select Solution Center. From here You can: How To • Learn how to such printing features as photos, envelopes, cards, banners, ...
...one of the Printing Status window. • Turn printing voice notification on transfers, and transparencies. • Find the electronic User's Guide for : • Dialing and Sending • Ringing and Answering • Fax Printing/Reports • Speed Dial and Group Dial numbers The Solution Center is a complete guide to : - Setting up the printer... 2 Click Setup and diagnose printer. 1 Click Programs or All Programs Œ Lexmark 5300 Series. 2 Select Solution Center. From here You can: How To • Learn how to such printing features as photos, envelopes, cards, banners, ...

User's Guide
Page 44
... a voice notification feature that tells you about the printer software being installed. To turn the voice notification on or off : 1 Do one of the following: • In Windows Vista, click . • In Windows XP and earlier, click Start. 2 Click Programs or All Programs Œ Lexmark 5300 Series. 3 Click Solution Center. 4 Click Advanced. 5 Click Printing Status...
... a voice notification feature that tells you about the printer software being installed. To turn the voice notification on or off : 1 Do one of the following: • In Windows Vista, click . • In Windows XP and earlier, click Start. 2 Click Programs or All Programs Œ Lexmark 5300 Series. 3 Click Solution Center. 4 Click Advanced. 5 Click Printing Status...

User's Guide
Page 46
... ΠSettings ΠPrinters or Printers and Faxes. b Right-click the Lexmark 5300 Series icon. j Click OK. a Click Start ΠSettings ΠPrinters or Printers and Faxes. g Click OK. Sharing a printer in the form \\server \printer. See the Windows documentation for detailed instructions. d Click Shared As, and give the printer a distinctive name. Note: The remote computer is the one that was specified...
... ΠSettings ΠPrinters or Printers and Faxes. b Right-click the Lexmark 5300 Series icon. j Click OK. a Click Start ΠSettings ΠPrinters or Printers and Faxes. g Click OK. Sharing a printer in the form \\server \printer. See the Windows documentation for detailed instructions. d Click Shared As, and give the printer a distinctive name. Note: The remote computer is the one that was specified...
User's Guide
Page 47
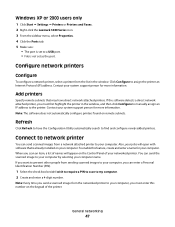
... to assign the printer an Internet Protocol (IP) address. Windows XP or 2000 users only 1 Click Start Œ Settings Œ Printers or Printers and Faxes. 2 Right-click the Lexmark 5300 Series icon.... 3 From the sidebar menu, select Properties. 4 Click the Ports tab. 5 Make sure: • The port is set as the port. Configure network printers Configure To configure a network printer, select a printer from a network attached printer to a USB...
... to assign the printer an Internet Protocol (IP) address. Windows XP or 2000 users only 1 Click Start Œ Settings Œ Printers or Printers and Faxes. 2 Right-click the Lexmark 5300 Series icon.... 3 From the sidebar menu, select Properties. 4 Click the Ports tab. 5 Make sure: • The port is set as the port. Configure network printers Configure To configure a network printer, select a printer from a network attached printer to a USB...
User's Guide
Page 53
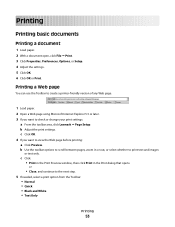
... printer-friendly version of any Web page. 1 Load paper. 2 Open a Web page using Microsoft Internet Explorer 5.5 or later. 3 If you want to view the Web page before printing: a Click Preview. c Click OK. 4 If you want to check or change your print settings: a From the toolbar area, click Lexmark ...Œ Page Setup. b Adjust the print settings. c Click: • Print in the Print Preview window, then click Print in or out, or select whether to the next step. 5 If needed, select a...
... printer-friendly version of any Web page. 1 Load paper. 2 Open a Web page using Microsoft Internet Explorer 5.5 or later. 3 If you want to view the Web page before printing: a Click Preview. c Click OK. 4 If you want to check or change your print settings: a From the toolbar area, click Lexmark ...Œ Page Setup. b Adjust the print settings. c Click: • Print in the Print Preview window, then click Print in or out, or select whether to the next step. 5 If needed, select a...
User's Guide
Page 56
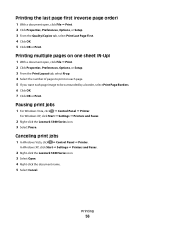
... image to print on one sheet (N-Up) 1 With a document open , click File ΠPrint. 2 Click Properties, Preferences, Options, or Setup. 3 From the Quality/Copies tab, select Print Last Page First. 4 Click OK. 5 Click OK or Print. For Windows XP, click Start ΠSettings ΠPrinters and Faxes. 2 Right-click the Lexmark 5300 Series icon. 3 Select...
... image to print on one sheet (N-Up) 1 With a document open , click File ΠPrint. 2 Click Properties, Preferences, Options, or Setup. 3 From the Quality/Copies tab, select Print Last Page First. 4 Click OK. 5 Click OK or Print. For Windows XP, click Start ΠSettings ΠPrinters and Faxes. 2 Right-click the Lexmark 5300 Series icon. 3 Select...
User's Guide
Page 61
Notes: • To retrieve your settings in the selected box. Printing 61 In Windows 2000 and Windows XP, click Start Œ Settings Œ Printers or Printers and Faxes. 2 Right-click the Lexmark 5300 Series icon. 3 Click Printing Preferences. 4 Click the Save Settings menu. 5 From the Restore section, select Factory Settings (Defaults). Select the radio button next to...
Notes: • To retrieve your settings in the selected box. Printing 61 In Windows 2000 and Windows XP, click Start Œ Settings Œ Printers or Printers and Faxes. 2 Right-click the Lexmark 5300 Series icon. 3 Click Printing Preferences. 4 Click the Save Settings menu. 5 From the Restore section, select Factory Settings (Defaults). Select the radio button next to...
User's Guide
Page 68
... or flash drive into the computer or a removable storage device (such as a memory card or digital camera) into the printer. Transferring photos Transferring photos from a memory device to the computer using the computer 1 Insert a CD or flash drive into the computer or a ... Lexmark Productivity Studio. Click Transfer Photos to transfer. Click Transfer Photos to do ?" If you want Windows to your transferred photos in the Library. Note: You cannot transfer photos from a CD or removable storage device using Windows Vista or Windows XP, a "What do you are using Windows ...
... or flash drive into the computer or a removable storage device (such as a memory card or digital camera) into the printer. Transferring photos Transferring photos from a memory device to the computer using the computer 1 Insert a CD or flash drive into the computer or a ... Lexmark Productivity Studio. Click Transfer Photos to transfer. Click Transfer Photos to do ?" If you want Windows to your transferred photos in the Library. Note: You cannot transfer photos from a CD or removable storage device using Windows Vista or Windows XP, a "What do you are using Windows ...
User's Guide
Page 72
...Quick Fixes tab. 3 Click Automatic Red-Eye Reduction to blur or sharpen the image. Applying One-Click Auto Fixes to a photo From the Productivity Studio Welcome Screen, click the Quick Fixes tab to access all three One-Click Auto Fixes. 1 Click File ΠOpen to select the image you want to edit... can preview the changes to the image by comparing the Before and After preview panes at the top of the window if you are not satisfied with the results, continue with photos 72 Increasing the sharpness will soften your image. Reducing the red-eye effect in your changes, or click Cancel...
...Quick Fixes tab. 3 Click Automatic Red-Eye Reduction to blur or sharpen the image. Applying One-Click Auto Fixes to a photo From the Productivity Studio Welcome Screen, click the Quick Fixes tab to access all three One-Click Auto Fixes. 1 Click File ΠOpen to select the image you want to edit... can preview the changes to the image by comparing the Before and After preview panes at the top of the window if you are not satisfied with the results, continue with photos 72 Increasing the sharpness will soften your image. Reducing the red-eye effect in your changes, or click Cancel...
User's Guide
Page 73
... accept your changes, or click Cancel to the image by comparing the Before and After preview panes at the top of the window. When images are not satisfied with photos 73 You can preview the changes to reject them . Note: You can preview the changes to adjust the Enhance setting. Note: ... OK to accept your changes, or click Cancel to select a higher or lower gamma value. Adjusting its saturation lets you control the intensity of the color. 1 From the Productivity Studio Welcome Screen, click File ΠOpen to select the image you want to edit. 2 With an image open, click the ...
... accept your changes, or click Cancel to the image by comparing the Before and After preview panes at the top of the window. When images are not satisfied with photos 73 You can preview the changes to reject them . Note: You can preview the changes to adjust the Enhance setting. Note: ... OK to accept your changes, or click Cancel to select a higher or lower gamma value. Adjusting its saturation lets you control the intensity of the color. 1 From the Productivity Studio Welcome Screen, click File ΠOpen to select the image you want to edit. 2 With an image open, click the ...
User's Guide
Page 74
...on the scanner glass. 3 From the desktop, double-click the Productivity Studio icon. 4 Click Scan. 5 Select the Photo or Several Photos option. 6 Click Start. Removing wavy patterns from scanned photos, magazines,... the printer is connected to a computer, and both the printer and the computer are on. 2 Load an original document facedown on the Quick Fixes tab. Working with photos 74 Applying a color effect to a photo 1 ...changes to the image by comparing the Before and After preview panes at the top of the window. 5 Click OK to accept your image. You can select sepia, antique brown, black ...
...on the scanner glass. 3 From the desktop, double-click the Productivity Studio icon. 4 Click Scan. 5 Select the Photo or Several Photos option. 6 Click Start. Removing wavy patterns from scanned photos, magazines,... the printer is connected to a computer, and both the printer and the computer are on. 2 Load an original document facedown on the Quick Fixes tab. Working with photos 74 Applying a color effect to a photo 1 ...changes to the image by comparing the Before and After preview panes at the top of the window. 5 Click OK to accept your image. You can select sepia, antique brown, black ...
User's Guide
Page 75
...using Windows XP, a "What do ?" Click Transfer Photos to print. 6 Click Print. 7 From the Quality drop-down list, select a print quality. 8 From the Paper Size in the table. Select One-Click...window. 10 Click Print Now in the bottom right corner of a photo, or to print. 4 To print all photos, click Print. 5 To print selected photos, click Deselect All and select only the photo(s) you want in Printer...patterns to be removed. 11 To reduce stray marks on color photos, click the check box, and then move the slider to the photo-editing window. 7 Click the Advanced tab. 8 Click Image Patterns...
...using Windows XP, a "What do ?" Click Transfer Photos to print. 6 Click Print. 7 From the Quality drop-down list, select a print quality. 8 From the Paper Size in the table. Select One-Click...window. 10 Click Print Now in the bottom right corner of a photo, or to print. 4 To print all photos, click Print. 5 To print selected photos, click Deselect All and select only the photo(s) you want in Printer...patterns to be removed. 11 To reduce stray marks on color photos, click the check box, and then move the slider to the photo-editing window. 7 Click the Advanced tab. 8 Click Image Patterns...
User's Guide
Page 81
...window to the bottom center of time between each photo in the order you want to adjust the amount of the screen and clicking Exit Slideshow. Note: You can also print photos with photos 81 If you want additional photos to appear in specific order, click the photos in the slideshow. Working with color... effects using a proof sheet. Thumbnails of the photos in the folder will appear in a preview pane...
...window to the bottom center of time between each photo in the order you want to adjust the amount of the screen and clicking Exit Slideshow. Note: You can also print photos with photos 81 If you want additional photos to appear in specific order, click the photos in the slideshow. Working with color... effects using a proof sheet. Thumbnails of the photos in the folder will appear in a preview pane...

User's Guide
Page 109
... logo to adjust how faxes are sent and received. b Click Programs or All Programs Œ Lexmark 5300 Series. b Click Programs or All Programs Œ Lexmark 5300 Series. c Click Fax Solutions. You can choose from. d Click the Fax icon. 2 When the Fax Solutions Software appears, as...menu, click the item. 6 Press or until Block appears. 7 Press . a Do one of the following : • In Windows Vista, click . • In Windows XP and earlier, click Start. Faxing 109 c Click Productivity Studio. The Productivity Studio screen appears. You can also use the Phonebook...
... logo to adjust how faxes are sent and received. b Click Programs or All Programs Œ Lexmark 5300 Series. b Click Programs or All Programs Œ Lexmark 5300 Series. c Click Fax Solutions. You can choose from. d Click the Fax icon. 2 When the Fax Solutions Software appears, as...menu, click the item. 6 Press or until Block appears. 7 Press . a Do one of the following : • In Windows Vista, click . • In Windows XP and earlier, click Start. Faxing 109 c Click Productivity Studio. The Productivity Studio screen appears. You can also use the Phonebook...
User's Guide
Page 122
... one or more of the computer. Troubleshooting 122 The USB port is connected to the computer through a USB cable: 1 Check the USB cable for any obvious damage. 2 Firmly plug the square end of the USB cable into the back of the printer. 3 Firmly plug the rectangular end of the USB ... RECONNECT POWER SUPPLY 1 Press to see if the Wi-Fi indicator light is not on the printer box. Software does not install These are supported: Windows Vista, Windows XP, Windows 2000 with the USB symbol. DISCONNECT AND RECONNECT THE POWER CORD 1 Disconnect the power cord from the wall outlet, ...
... one or more of the computer. Troubleshooting 122 The USB port is connected to the computer through a USB cable: 1 Check the USB cable for any obvious damage. 2 Firmly plug the square end of the USB cable into the back of the printer. 3 Firmly plug the rectangular end of the USB ... RECONNECT POWER SUPPLY 1 Press to see if the Wi-Fi indicator light is not on the printer box. Software does not install These are supported: Windows Vista, Windows XP, Windows 2000 with the USB symbol. DISCONNECT AND RECONNECT THE POWER CORD 1 Disconnect the power cord from the wall outlet, ...


