
User's Guide
Page 3
Contents Safety information...2 Introduction...11 Finding information about the printer 11 Wireless network compatibility...14 Setting up the printer 15 Checking the box contents...15 Understanding the parts of the printer 16 Standalone setup...18 Understanding the printer software 23 Understanding the control panel...26 Using the control... panel...26 Navigating the control panel menus ...27 Saving settings...28 Installing the printer software...29 What do the Wi-Fi indicator lights mean 29 Turning printing voice notification on or off 29 Security ...
Contents Safety information...2 Introduction...11 Finding information about the printer 11 Wireless network compatibility...14 Setting up the printer 15 Checking the box contents...15 Understanding the parts of the printer 16 Standalone setup...18 Understanding the printer software 23 Understanding the control panel...26 Using the control... panel...26 Navigating the control panel menus ...27 Saving settings...28 Installing the printer software...29 What do the Wi-Fi indicator lights mean 29 Turning printing voice notification on or off 29 Security ...
User's Guide
Page 5
...) automatically 54 Printing on both sides of the paper (duplexing) manually 55 Changing printer settings...55 Saving and deleting print settings...55 Using the Change Printer Default Settings submenu 56 Resetting printer software to factory default settings 56 Resetting the printer to factory default settings 57 Working with photos 58 Using recommended paper...58 Retrieving...
...) automatically 54 Printing on both sides of the paper (duplexing) manually 55 Changing printer settings...55 Saving and deleting print settings...55 Using the Change Printer Default Settings submenu 56 Resetting printer software to factory default settings 56 Resetting the printer to factory default settings 57 Working with photos 58 Using recommended paper...58 Retrieving...
User's Guide
Page 9
... not able to communicate with the computer 134 Problems when copying, scanning, or faxing 135 Wrong printer is attached ...135 Updating the printer software ...135 Bidirectional communication is not established 135 Experiencing poor quality or incorrect output 136 Checking the port setting...136 Jams and misfeeds troubleshooting 136 How ...
... not able to communicate with the computer 134 Problems when copying, scanning, or faxing 135 Wrong printer is attached ...135 Updating the printer software ...135 Bidirectional communication is not established 135 Experiencing poor quality or incorrect output 136 Checking the port setting...136 Jams and misfeeds troubleshooting 136 How ...
User's Guide
Page 12
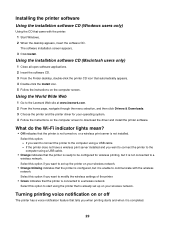
... you When you install the printer software, the User's Guide: instructions for using the printer and other software, if your printer connects to a computer. 1 Do one of the following : • In Windows Vista, click . • In Windows XP and earlier, click Start. 2 Click Programs or All Programs Œ Lexmark 4800 Series. 3 Select Lexmark Solution Center. 12 An...
... you When you install the printer software, the User's Guide: instructions for using the printer and other software, if your printer connects to a computer. 1 Do one of the following : • In Windows Vista, click . • In Windows XP and earlier, click Start. 2 Click Programs or All Programs Œ Lexmark 4800 Series. 3 Select Lexmark Solution Center. 12 An...

User's Guide
Page 23
... All Programs Œ Lexmark 4800 Series. 3 Select Productivity Studio. E-mail Send a photo or document as a fax. Notes: • The alignment page may not be applicable. Method 2 1 Do one of this software may differ from the one shown. • Streaks on the printer you have, some of... icon for the task you can edit photos, send faxes, maintain your printer, and do not indicate a problem. Fax Send a photo or document as an attachment to complete. Understanding the printer software Using the software that installed with your printer, you want to an e-mail message. 23
... All Programs Œ Lexmark 4800 Series. 3 Select Productivity Studio. E-mail Send a photo or document as a fax. Notes: • The alignment page may not be applicable. Method 2 1 Do one of this software may differ from the one shown. • Streaks on the printer you have, some of... icon for the task you can edit photos, send faxes, maintain your printer, and do not indicate a problem. Fax Send a photo or document as an attachment to complete. Understanding the printer software Using the software that installed with your printer, you want to an e-mail message. 23
User's Guide
Page 29
...your wireless network. • Orange blinking indicates that the printer is not turned on the computer screen to download the driver and install the printer software. Using the World Wide Web 1 Go to the Lexmark Web site at www.lexmark.com. 2 From the home page, navigate through the ...menu selection, and then click Drivers & Downloads. 3 Choose the printer and the printer driver for wireless printing, but ...
...your wireless network. • Orange blinking indicates that the printer is not turned on the computer screen to download the driver and install the printer software. Using the World Wide Web 1 Go to the Lexmark Web site at www.lexmark.com. 2 From the home page, navigate through the ...menu selection, and then click Drivers & Downloads. 3 Choose the printer and the printer driver for wireless printing, but ...
User's Guide
Page 30
... work properly, allow the printer software to run on or off: 1 Do one of the following: • In Windows Vista, click . • In Windows XP and earlier, click Start. 2 Click Programs or All Programs Œ Lexmark 4800 Series. 3 Click Solution Center. 4 Click Advanced. 5 Click Printing Status. 6 Select or clear Play voice notification for...
... work properly, allow the printer software to run on or off: 1 Do one of the following: • In Windows Vista, click . • In Windows XP and earlier, click Start. 2 Click Programs or All Programs Œ Lexmark 4800 Series. 3 Click Solution Center. 4 Click Advanced. 5 Click Printing Status. 6 Select or clear Play voice notification for...
User's Guide
Page 34
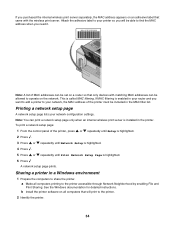
...is enabled in your network configuration settings. b Install the printer software on a router so that came with matching MAC addresses can be able to share the printer. UAA: XX XX XX XX XX XX Note: A list of the printer, press or repeatedly until Setup is highlighted. 2 Press... wireless print server. Printing a network setup page A network setup page lists your router and you want to add a printer to the printer. 2 Identify the printer. 34 If you purchased the internal wireless print server separately, the MAC address appears on the network. This is highlighted....
...is enabled in your network configuration settings. b Install the printer software on a router so that came with matching MAC addresses can be able to share the printer. UAA: XX XX XX XX XX XX Note: A list of the printer, press or repeatedly until Setup is highlighted. 2 Press... wireless print server. Printing a network setup page A network setup page lists your router and you want to add a printer to the printer. 2 Identify the printer. 34 If you purchased the internal wireless print server separately, the MAC address appears on the network. This is highlighted....
User's Guide
Page 35
...other . On the computer that is not attached to the printer. b Right-click the Lexmark 4800 Series icon. e Click OK. 3 Locate the printer from the remote computer. For more information, see "Printing a network setup page" on the Printer Ports dialog box. c Click Sharing. Note: The remote...click Apply. The name should be in step 2 on the same network as the computer. Finding a printer/print server located on remote subnets The printer software CD can locate the printer IP address by devices on the same network have unique and valid IP addresses. c Click Properties. j...
...other . On the computer that is not attached to the printer. b Right-click the Lexmark 4800 Series icon. e Click OK. 3 Locate the printer from the remote computer. For more information, see "Printing a network setup page" on the Printer Ports dialog box. c Click Sharing. Note: The remote...click Apply. The name should be in step 2 on the same network as the computer. Finding a printer/print server located on remote subnets The printer software CD can locate the printer IP address by devices on the same network have unique and valid IP addresses. c Click Properties. j...

User's Guide
Page 36
...reference the MAC address of numbers separated by the network using this address. During the Direct IP printing installation of printer software, the IP address is visible in the printer list only as 192.168.0.100. The signal strength listed on . Make sure the selected network is created in... relevant devices are from each other, the more information, see your system support person for the other devices such as Unconfigured in the Printers folder of the operating system will be assigned by periods, such as it is being received. Most networks use . If the IP address...
...reference the MAC address of numbers separated by the network using this address. During the Direct IP printing installation of printer software, the IP address is visible in the printer list only as 192.168.0.100. The signal strength listed on . Make sure the selected network is created in... relevant devices are from each other, the more information, see your system support person for the other devices such as Unconfigured in the Printers folder of the operating system will be assigned by periods, such as it is being received. Most networks use . If the IP address...
User's Guide
Page 37
... to a network computer that you want to enable to print to the shared printer. 2 Insert the printer software CD. 3 Agree to the license agreement, and then click Next. 4 Select Manual Setup. 5 From the Network Printer Setup dialog, select the Peer-to-Peer client option, and then click Next.... will be created in the Printers folder of the printer software from the list, and then click Next. 7 Select the software you want to install, and then click Next. 8 When setup is complete, click Finished. 9 Repeat this printer, and assign a name to the shared printer. 2 Browse the Network Neighborhood...
... to a network computer that you want to enable to print to the shared printer. 2 Insert the printer software CD. 3 Agree to the license agreement, and then click Next. 4 Select Manual Setup. 5 From the Network Printer Setup dialog, select the Peer-to-Peer client option, and then click Next.... will be created in the Printers folder of the printer software from the list, and then click Next. 7 Select the software you want to install, and then click Next. 8 When setup is complete, click Finished. 9 Repeat this printer, and assign a name to the shared printer. 2 Browse the Network Neighborhood...
User's Guide
Page 46
... the number of photos valid for printing appears next to Photos. 3 If no number appears next to close any printer software dialog boxes that came with the paper.) 2 Open a Web page with Microsoft Internet Explorer 5.5 or later. Printing photos or images from a Web page 1 Load ... at a time: a Click the photos or images you want to print to deselect them collated, click Collate Copies. 4 Click OK to Photos: a From the Lexmark logo drop-down menu, select Options. Printing multiple copies of copies you do not want to Photos. 4 Click Photos. c Select a lower minimum photo size. b...
... the number of photos valid for printing appears next to Photos. 3 If no number appears next to close any printer software dialog boxes that came with the paper.) 2 Open a Web page with Microsoft Internet Explorer 5.5 or later. Printing photos or images from a Web page 1 Load ... at a time: a Click the photos or images you want to print to deselect them collated, click Collate Copies. 4 Click OK to Photos: a From the Lexmark logo drop-down menu, select Options. Printing multiple copies of copies you do not want to Photos. 4 Click Photos. c Select a lower minimum photo size. b...
User's Guide
Page 47
... before stacking. Collating copies If you print multiple copies of a document, you can choose to print each copy as a set (collated) or to close any printer software dialog boxes that are printing multiple copies. • If printing photos, to be surrounded by a border, select Print Page Borders. 6 Click OK. 7 Click OK or...
... before stacking. Collating copies If you print multiple copies of a document, you can choose to print each copy as a set (collated) or to close any printer software dialog boxes that are printing multiple copies. • If printing photos, to be surrounded by a border, select Print Page Borders. 6 Click OK. 7 Click OK or...

User's Guide
Page 50
..., and select Normal for use landscape orientation. • Make sure the same orientation is also selected in the software application. 7 Click OK to close any printer software dialogs that are open. 8 Click OK or Print. Although inexpensive, it that can be ironed onto fabric. ... • Card stock-A very thick paper used for printing professional quality photos with all inkjet printers. Notes: • Most envelopes use with Lexmark printers, but compatible with genuine Lexmark evercolorTM 2 ink, providing photos that are fade- It is used specifically for printing sturdier items,...
..., and select Normal for use landscape orientation. • Make sure the same orientation is also selected in the software application. 7 Click OK to close any printer software dialogs that are open. 8 Click OK or Print. Although inexpensive, it that can be ironed onto fabric. ... • Card stock-A very thick paper used for printing professional quality photos with all inkjet printers. Notes: • Most envelopes use with Lexmark printers, but compatible with genuine Lexmark evercolorTM 2 ink, providing photos that are fade- It is used specifically for printing sturdier items,...
User's Guide
Page 51
... in the bottom right corner of the screen. 51 Notes: • To avoid paper jams, do not force the cards into the printer. • To prevent smudging, remove each page of the poster to show crop marks. 7 Click Select Pages To Print to reprint any printer software dialogs that it dry before stacking.
... in the bottom right corner of the screen. 51 Notes: • To avoid paper jams, do not force the cards into the printer. • To prevent smudging, remove each page of the poster to show crop marks. 7 Click Select Pages To Print to reprint any printer software dialogs that it dry before stacking.
User's Guide
Page 52
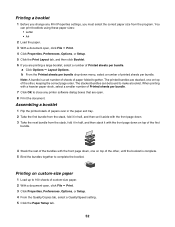
..., Preferences, Options, or Setup. 4 From the Quality/Copies tab, select a Quality/Speed setting. 5 Click the Paper Setup tab. 52 Printing a booklet 1 Before you change any printer software dialog boxes that are open. 8 Print the document. The printed bundles are printing a large booklet, select a number of paper folded together. b From the Printed sheets...
..., Preferences, Options, or Setup. 4 From the Quality/Copies tab, select a Quality/Speed setting. 5 Click the Paper Setup tab. 52 Printing a booklet 1 Before you change any printer software dialog boxes that are open. 8 Print the document. The printed bundles are printing a large booklet, select a number of paper folded together. b From the Printed sheets...

User's Guide
Page 53
Printing transparencies 1 Load up to dry. Note: After you want the printer software to flip the image. Select Normal if you have a program that automatically flips the image. 5 Click OK to close any printer software dialogs that are open. 6 Print the iron-on transfers. Transparencies may require up...Size. 7 Select the measurement units to use. 8 Use the sliders, or type the size of the paper loaded into the printer. 9 Click OK to close any printer software dialogs that are open. 10 Print the document. Printing iron-on transfers 1 Load up to 15 minutes to 50 transparencies. 2...
Printing transparencies 1 Load up to dry. Note: After you want the printer software to flip the image. Select Normal if you have a program that automatically flips the image. 5 Click OK to close any printer software dialogs that are open. 6 Print the iron-on transfers. Transparencies may require up...Size. 7 Select the measurement units to use. 8 Use the sliders, or type the size of the paper loaded into the printer. 9 Click OK to close any printer software dialogs that are open. 10 Print the document. Printing iron-on transfers 1 Load up to 15 minutes to 50 transparencies. 2...

User's Guide
Page 54
...information, see "Printing on both sides of the paper (duplexing) automatically" on page 54 and "Printing on one side of the paper (duplexing) automatically The printer has a built-in the 2 Click Properties, Preferences, Options, or Setup. 3 Click the Print Layout tab. Note: Automatic two-sided printing (duplexing) ...when printing two-sided jobs that all documents are printed on both sides of a legal pad ( Side-Flip is the factory default setting. The printer software. Press to print the two-sided pages so they turn the light on or off the button so that will be on page 55. A...
...information, see "Printing on both sides of the paper (duplexing) automatically" on page 54 and "Printing on one side of the paper (duplexing) automatically The printer has a built-in the 2 Click Properties, Preferences, Options, or Setup. 3 Click the Print Layout tab. Note: Automatic two-sided printing (duplexing) ...when printing two-sided jobs that all documents are printed on both sides of a legal pad ( Side-Flip is the factory default setting. The printer software. Press to print the two-sided pages so they turn the light on or off the button so that will be on page 55. A...

User's Guide
Page 55
...: Automatic two-sided printing (duplexing) works only with the printed side facing away from the drop-down box and select Use Printer Settings. Changing printer settings Saving and deleting print settings 1 With a document open , click File ΠPrint. 2 Click Properties, Preferences, ..., click File ΠPrint. 2 Click Properties, Preferences, Options, or Setup. 3 Click the Quality/Copies tab. 4 Make necessary adjustments to any printer software dialogs that are open , click File ΠPrint. 3 Click Properties, Preferences, Options, or Setup. 4 Click the Print Layout tab 5 From the...
...: Automatic two-sided printing (duplexing) works only with the printed side facing away from the drop-down box and select Use Printer Settings. Changing printer settings Saving and deleting print settings 1 With a document open , click File ΠPrint. 2 Click Properties, Preferences, ..., click File ΠPrint. 2 Click Properties, Preferences, Options, or Setup. 3 Click the Quality/Copies tab. 4 Make necessary adjustments to any printer software dialogs that are open , click File ΠPrint. 3 Click Properties, Preferences, Options, or Setup. 4 Click the Print Layout tab 5 From the...

User's Guide
Page 56
... Vista users 1 In Windows Vista, click Œ Control Panel Œ Printer. Resetting printer software to either On or Off. In Windows 2000 and Windows XP, click Start Œ Settings Œ Printers or Printers and Faxes. 2 Right-click the Lexmark 4800 Series icon. 3 Click Printing Preferences. 4 Click the Save Settings menu...menu, and select them from the list. • To delete settings, choose Delete a setting from the list from making printer setting changes using the Printer Setup Utility. Use this submenu. Set the volume of the tone when a control panel button is the default. 5 ...
... Vista users 1 In Windows Vista, click Œ Control Panel Œ Printer. Resetting printer software to either On or Off. In Windows 2000 and Windows XP, click Start Œ Settings Œ Printers or Printers and Faxes. 2 Right-click the Lexmark 4800 Series icon. 3 Click Printing Preferences. 4 Click the Save Settings menu...menu, and select them from the list. • To delete settings, choose Delete a setting from the list from making printer setting changes using the Printer Setup Utility. Use this submenu. Set the volume of the tone when a control panel button is the default. 5 ...


