
User's Guide
Page 7
..., crush, or place heavy objects on the power cord. Remove the power cord from the electrical outlet before inspecting it. Lexmark is misused, a risk of some parts may not always be obvious. Connect the power supply cord to abrasion or stress. Inspect the power cord regularly for the use of specific Lexmark components. The safety features of fire or electrical...
..., crush, or place heavy objects on the power cord. Remove the power cord from the electrical outlet before inspecting it. Lexmark is misused, a risk of some parts may not always be obvious. Connect the power supply cord to abrasion or stress. Inspect the power cord regularly for the use of specific Lexmark components. The safety features of fire or electrical...
User's Guide
Page 10
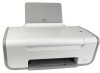
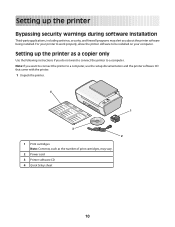
Setting up the printer as a copier only Use the following instructions if you do not want to connect the printer to a computer. Note: If you about the printer software being installed. Setting up the printer Bypassing security warnings during ...printer to a computer, use the setup documentation and the printer software CD that came with the printer. 1 Unpack the printer. 4 1 2 1 3 3 2 1 Print cartridges Note: Contents, such as the number of print cartridges, may vary. 2 Power cord 3 Printer software CD 4 Quick Setup sheet 10 For your printer to work properly, allow the printer...
Setting up the printer as a copier only Use the following instructions if you do not want to connect the printer to a computer. Note: If you about the printer software being installed. Setting up the printer Bypassing security warnings during ...printer to a computer, use the setup documentation and the printer software CD that came with the printer. 1 Unpack the printer. 4 1 2 1 3 3 2 1 Print cartridges Note: Contents, such as the number of print cartridges, may vary. 2 Power cord 3 Printer software CD 4 Quick Setup sheet 10 For your printer to work properly, allow the printer...
User's Guide
Page 11
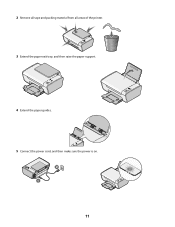
2 Remove all tape and packing material from all areas of the printer. 3 Extend the paper exit tray, and then raise the paper support. 2 1 4 Extend the paper guides. 5 Connect the power cord, and then make sure the power is on. 2 1 11
2 Remove all tape and packing material from all areas of the printer. 3 Extend the paper exit tray, and then raise the paper support. 2 1 4 Extend the paper guides. 5 Connect the power cord, and then make sure the power is on. 2 1 11
User's Guide
Page 48
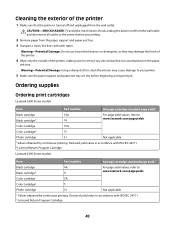
...refer to www.lexmark.com/pageyields. Declared yield value in accordance with ISO/IEC 24711 2 Licensed Return Program Cartridge 48 CAUTION-SHOCK HAZARD: To avoid the risk of electric shock, unplug the power cord from the wall outlet and disconnect all cables to the printer before beginning ...damage the finish of the printer. 4 Wipe only the outside of the printer, making sure to your printer. 5 Make sure the paper support and paper exit tray are dry before proceeding. 2 Remove paper from the wall outlet. Color cartridge 5A Color cartridge2 5 Photo cartridge 31 Not applicable 1...
...refer to www.lexmark.com/pageyields. Declared yield value in accordance with ISO/IEC 24711 2 Licensed Return Program Cartridge 48 CAUTION-SHOCK HAZARD: To avoid the risk of electric shock, unplug the power cord from the wall outlet and disconnect all cables to the printer before beginning ...damage the finish of the printer. 4 Wipe only the outside of the printer, making sure to your printer. 5 Make sure the paper support and paper exit tray are dry before proceeding. 2 Remove paper from the wall outlet. Color cartridge 5A Color cartridge2 5 Photo cartridge 31 Not applicable 1...
User's Guide
Page 50
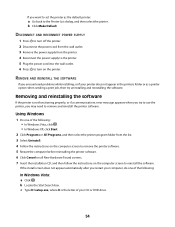
..., click Start ΠPrograms or All Programs, and then select the printer program folder from the list. 2 Select Lexmark Service Center. To open the Lexmark Service Center, use one of these methods: Method 1 Method 2 If it appears on the printer. 2 1 5 Plug the power cord into the power supply on an error message dialog, click the For additional assistance...
..., click Start ΠPrograms or All Programs, and then select the printer program folder from the list. 2 Select Lexmark Service Center. To open the Lexmark Service Center, use one of these methods: Method 1 Method 2 If it appears on the printer. 2 1 5 Plug the power cord into the power supply on an error message dialog, click the For additional assistance...

User's Guide
Page 51
... OS X versions 10.5, 10.4 and 10.3. The USB port is damaged, use a new one of the computer. RECONNECT THE POWER SUPPLY 1 Press to turn the printer off. 2 Disconnect the power cord from the wall outlet. 3 Gently remove the power supply from the printer. 4 Reconnect the power supply to the printer. 5 Plug the power cord into the wall outlet. 6 Press to turn the...
... OS X versions 10.5, 10.4 and 10.3. The USB port is damaged, use a new one of the computer. RECONNECT THE POWER SUPPLY 1 Press to turn the printer off. 2 Disconnect the power cord from the wall outlet. 3 Gently remove the power supply from the printer. 4 Reconnect the power supply to the printer. 5 Plug the power cord into the wall outlet. 6 Press to turn the...
User's Guide
Page 52
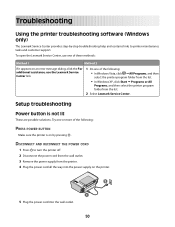
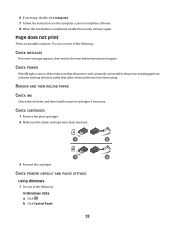
...2 Make sure the sticker and tape have been using. CHECK POWER If the light is not on the computer screen to print again. b Click Control Panel. 52 CHECK PRINTER DEFAULT AND PAUSE SETTINGS Using Windows 1 Do one or more of the following : CHECK MESSAGES If an error message...and then install new print cartridges if necessary. Try one of the following : In Windows Vista a Click . 6 If necessary, double-click setup.exe. 7 Follow the instructions on , then make sure that the power cord is properly connected to the printer and plugged into a known working electrical outlet that ...
...2 Make sure the sticker and tape have been using. CHECK POWER If the light is not on the computer screen to print again. b Click Control Panel. 52 CHECK PRINTER DEFAULT AND PAUSE SETTINGS Using Windows 1 Do one or more of the following : CHECK MESSAGES If an error message...and then install new print cartridges if necessary. Try one of the following : In Windows Vista a Click . 6 If necessary, double-click setup.exe. 7 Follow the instructions on , then make sure that the power cord is properly connected to the printer and plugged into a known working electrical outlet that ...
User's Guide
Page 54
... Start. 2 Click Programs or All Programs, and then select the printer program folder from the printer. 4 Reconnect the power supply to the printer. 5 Plug the power cord into the wall outlet. 6 Press to the Printer List dialog, and then select the printer. b Click Make Default. Using Windows 1 Do one of the following : In Windows Vista: a Click . c Type D:\setup.exe...
... Start. 2 Click Programs or All Programs, and then select the printer program folder from the printer. 4 Reconnect the power supply to the printer. 5 Plug the power cord into the wall outlet. 6 Press to the Printer List dialog, and then select the printer. b Click Make Default. Using Windows 1 Do one of the following : In Windows Vista: a Click . c Type D:\setup.exe...
User's Guide
Page 56
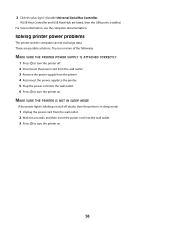
... one or more information, see the computer documentation. Solving printer power problems The printer and the computer cannot exchange data. These are listed, then the USB port is enabled. MAKE SURE THE PRINTER IS NOT IN SLEEP MODE If the power light is in sleep mode. 1 Unplug the power cord from the printer. 4 Reconnect the power supply to the printer. 5 Plug the power cord...
... one or more information, see the computer documentation. Solving printer power problems The printer and the computer cannot exchange data. These are listed, then the USB port is enabled. MAKE SURE THE PRINTER IS NOT IN SLEEP MODE If the power light is in sleep mode. 1 Unplug the power cord from the printer. 4 Reconnect the power supply to the printer. 5 Plug the power cord...

User's Guide
Page 63
...mode which still consumes a small amount of power, then to calculate the total product energy usage. See www.lexmark.com for a print job. 5.80 Power Saver The product is designed with an energy-saving mode called the Power Saver Timeout. Total energy usage It is ... product power consumption, disconnect the power supply cord from hard-copy original 13.79 documents. The power consumption levels listed in energy-saving mode. Factory default Power Saver Timeout for a specified period of the product. Since power consumption claims are subject to calculate energy usage. Power Saver...
...mode which still consumes a small amount of power, then to calculate the total product energy usage. See www.lexmark.com for a print job. 5.80 Power Saver The product is designed with an energy-saving mode called the Power Saver Timeout. Total energy usage It is ... product power consumption, disconnect the power supply cord from hard-copy original 13.79 documents. The power consumption levels listed in energy-saving mode. Factory default Power Saver Timeout for a specified period of the product. Since power consumption claims are subject to calculate energy usage. Power Saver...


