Quick Reference
Page 2
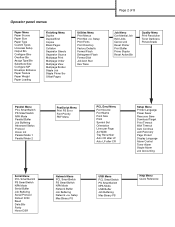
... Source Paper Size Paper Type Custom Types Universal Setup Output Bin Configure Bins Overflow Bin Assign Type/Bin Substitute Size Configure MP Envelope Enhance Paper Texture Paper Weight Paper Loading Finishing Menu Duplex Duplex Bind Copies Blank Pages Collation Separator Sheets Separator Source Multipage Print Multipage Order Multipage View Multipage Border Staple Job...
... Source Paper Size Paper Type Custom Types Universal Setup Output Bin Configure Bins Overflow Bin Assign Type/Bin Substitute Size Configure MP Envelope Enhance Paper Texture Paper Weight Paper Loading Finishing Menu Duplex Duplex Bind Copies Blank Pages Collation Separator Sheets Separator Source Multipage Print Multipage Order Multipage View Multipage Border Staple Job...
Setup Guide
Page 4
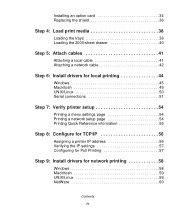
... 6: Install drivers for local printing 44 Windows 45 Macintosh 49 UNIX/Linux 50 Serial connections 51 Step 7: Verify printer setup 54 Printing a menu settings page 54 Printing a network setup page 54 Printing Quick Reference information 55 Step 8: Configure for TCP/IP 56 Assigning a printer IP address 56 Verifying the IP settings 57...
... 6: Install drivers for local printing 44 Windows 45 Macintosh 49 UNIX/Linux 50 Serial connections 51 Step 7: Verify printer setup 54 Printing a menu settings page 54 Printing a network setup page 54 Printing Quick Reference information 55 Step 8: Configure for TCP/IP 56 Assigning a printer IP address 56 Verifying the IP settings 57...

Setup Guide
Page 59
...Verify printer setup 54 This is not listed, you loaded. Print a menu settings page to review the default printer settings and to verify that printer options are correctly listed under "Printer Information." 6 Verify that helps you configure for the sizes and types of print media you need to check your...Setup page provides information that the options you installed are installed correctly. 1 Make sure the printer is needed if you see Utilities Menu, and then press Select. 3 Press Menu until you are configured for network printing. If an option you purchased or installed.
...Verify printer setup 54 This is not listed, you loaded. Print a menu settings page to review the default printer settings and to verify that printer options are correctly listed under "Printer Information." 6 Verify that helps you configure for the sizes and types of print media you need to check your...Setup page provides information that the options you installed are installed correctly. 1 Make sure the printer is needed if you see Utilities Menu, and then press Select. 3 Press Menu until you are configured for network printing. If an option you purchased or installed.
Setup Guide
Page 61
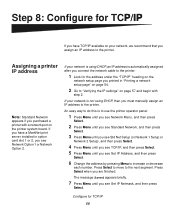
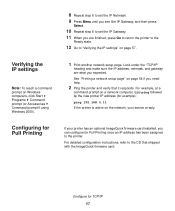
The message Saved appears briefly. 7 Press Menu until you are finished. Step 8: Configure for TCP/IP 56 An easy way to do ...this is automatically assigned after you connect the network cable to increase or decrease each number. Press Select when you see Set IP Address, and then press Select. 6 Change the address by pressing Menu... printer with step 2. If you have TCP/IP available on page 54. 2 Go to the next segment. Configure for TCP/IP If you have a MarkNet print server installed in "Printing a network setup page" on your ...
The message Saved appears briefly. 7 Press Menu until you are finished. Step 8: Configure for TCP/IP 56 An easy way to do ...this is automatically assigned after you connect the network cable to increase or decrease each number. Press Select when you see Set IP Address, and then press Select. 6 Change the address by pressing Menu... printer with step 2. If you have TCP/IP available on page 54. 2 Go to the next segment. Configure for TCP/IP If you have a MarkNet print server installed in "Printing a network setup page" on your ...
Setup Guide
Page 62
8 Repeat step 6 to set the IP Netmask. 9 Press Menu until you see Set IP Gateway, and then press Select. 10 Repeat step 6 to set the IP Gateway. 11 When you are what you expected. ... 54 if you need help. 2 Ping the printer and verify that shipped with the ImageQuick firmware card. See "Printing a network setup page" on page 57. Configuring for example): ping 192.168.0.11 If the printer is active on Windows computers, click Start Programs Command prompt (or Accessories Command prompt if using...
8 Repeat step 6 to set the IP Netmask. 9 Press Menu until you see Set IP Gateway, and then press Select. 10 Repeat step 6 to set the IP Gateway. 11 When you are what you expected. ... 54 if you need help. 2 Ping the printer and verify that shipped with the ImageQuick firmware card. See "Printing a network setup page" on page 57. Configuring for example): ping 192.168.0.11 If the printer is active on Windows computers, click Start Programs Command prompt (or Accessories Command prompt if using...

User's Reference
Page 2
...16 Energy Star ...16 Laser notice ...16 Statement of limited warranty 17 Chapter 1: Overview 20 Identifying printers ...20 Basic models ...20 Configured models 21 Chapter 2: Printing 22 Tips for successful printing 22 Tips on storing print media 22 Avoiding jams ...22 Sending a job to... ...22 Canceling a print job ...23 Canceling from the printer operator panel 23 Canceling a job from a computer running Windows 24 Printing the menu settings page 25 Printing a font sample list 25 Printing a directory list 26 Printing a confidential job 26 Entering a personal identification number (PIN...
...16 Energy Star ...16 Laser notice ...16 Statement of limited warranty 17 Chapter 1: Overview 20 Identifying printers ...20 Basic models ...20 Configured models 21 Chapter 2: Printing 22 Tips for successful printing 22 Tips on storing print media 22 Avoiding jams ...22 Sending a job to... ...22 Canceling a print job ...23 Canceling from the printer operator panel 23 Canceling a job from a computer running Windows 24 Printing the menu settings page 25 Printing a font sample list 25 Printing a directory list 26 Printing a confidential job 26 Entering a personal identification number (PIN...
User's Reference
Page 38
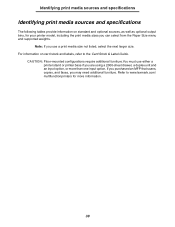
If you purchased an MFP that scans, copies, and faxes, you can select from the Paper Size menu and supported weights. CAUTION: Floor-mounted configurations require additional furniture.You must use either a printer stand or printer base if you use a print media size not ...media sources and specifications Identifying print media sources and specifications The following tables provide information on card stock and labels, refer to www.lexmark.com/ multifunctionprinters for your printer model, including the print media sizes you may need additional furniture. For information on standard and ...
If you purchased an MFP that scans, copies, and faxes, you can select from the Paper Size menu and supported weights. CAUTION: Floor-mounted configurations require additional furniture.You must use either a printer stand or printer base if you use a print media size not ...media sources and specifications Identifying print media sources and specifications The following tables provide information on card stock and labels, refer to www.lexmark.com/ multifunctionprinters for your printer model, including the print media sizes you may need additional furniture. For information on standard and ...
User's Reference
Page 119
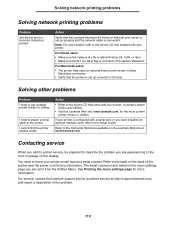
...label on the back of the problem. 119 If your printer is also listed on the menu settings page you are experiencing or the error message on the Lexmark Web site at http://support.lexmark.com, and report a description of the printer near the power cord for the most ...The serial number is configured with your printer model type and serial number. Refer to the Setup Guide. Solving network printing problems Solving network printing problems Problem Job did not print or incorrect characters printed. Action • Refer to the drivers CD that the Lexmark internal print server or...
...label on the back of the problem. 119 If your printer is also listed on the menu settings page you are experiencing or the error message on the Lexmark Web site at http://support.lexmark.com, and report a description of the printer near the power cord for the most ...The serial number is configured with your printer model type and serial number. Refer to the Setup Guide. Solving network printing problems Solving network printing problems Problem Job did not print or incorrect characters printed. Action • Refer to the drivers CD that the Lexmark internal print server or...
User's Reference
Page 209
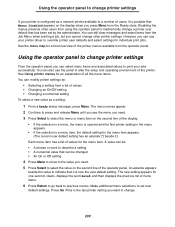
...6 Press Return to go back to previous menus. Using the operator panel to change printer settings If your printer is configured as a setting: 1 From a Ready status message, press Menu. See Using printer menus for one second, clears, displays the word Saved, and then displays the previous list of ...the printer menus available from the Job Menu when printing a job, but you can modify printer settings by the administrator. Using the operator panel to alter the setup and operating ...
...6 Press Return to go back to previous menus. Using the operator panel to change printer settings If your printer is configured as a setting: 1 From a Ready status message, press Menu. See Using printer menus for one second, clears, displays the word Saved, and then displays the previous list of ...the printer menus available from the Job Menu when printing a job, but you can modify printer settings by the administrator. Using the operator panel to alter the setup and operating ...
User's Reference
Page 210
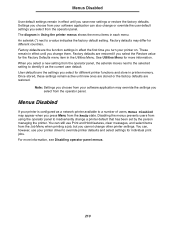
... clear messages, and select items from the operator panel. See Utilities Menu for different printer functions and store in printer memory. Factory defaults are restored. Settings you choose from your printer is configured as the current user default. Menus Disabled User default settings remain in... effect until you change them. Factory defaults may override the settings you select from the Job Menu when printing a job, but you select the ...
... clear messages, and select items from the operator panel. See Utilities Menu for different printer functions and store in printer memory. Factory defaults are restored. Settings you choose from your printer is configured as the current user default. Menus Disabled User default settings remain in... effect until you change them. Factory defaults may override the settings you select from the Job Menu when printing a job, but you select the ...
User's Reference
Page 212
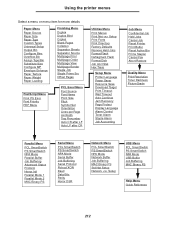
Using the printer menus Select a menu or menu item for more details Paper Menu Paper Source Paper Size Paper Type Custom Types Universal Setup Output Bin Configure Bins Overflow Bin Assign Type/Bin Substitute Size Configure MP Envelope Enhance Paper Texture Paper Weight Paper Loading Finishing Menu Duplex Duplex Bind Copies Blank Pages Collation Separator Sheets Separator...
Using the printer menus Select a menu or menu item for more details Paper Menu Paper Source Paper Size Paper Type Custom Types Universal Setup Output Bin Configure Bins Overflow Bin Assign Type/Bin Substitute Size Configure MP Envelope Enhance Paper Texture Paper Weight Paper Loading Finishing Menu Duplex Duplex Bind Copies Blank Pages Collation Separator Sheets Separator...
User's Reference
Page 213
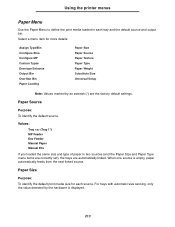
... define the print media loaded in two sources (and the Paper Size and Paper Type menu items are correctly set), the trays are the factory default settings. Paper Source Purpose: To identify the default source. When one source is displayed. 213 ... size and type of paper in each source. Paper Size Purpose: To identify the default print media size for more details: Assign Type/Bin Configure Bins Configure MP Custom Types Envelope Enhance Output Bin Overflow Bin Paper Loading Paper Size Paper Source Paper Texture Paper Type Paper Weight Substitute Size Universal Setup...
... define the print media loaded in two sources (and the Paper Size and Paper Type menu items are correctly set), the trays are the factory default settings. Paper Source Purpose: To identify the default source. When one source is displayed. 213 ... size and type of paper in each source. Paper Size Purpose: To identify the default print media size for more details: Assign Type/Bin Configure Bins Configure MP Custom Types Envelope Enhance Output Bin Overflow Bin Paper Loading Paper Size Paper Source Paper Texture Paper Type Paper Weight Substitute Size Universal Setup...
User's Reference
Page 223
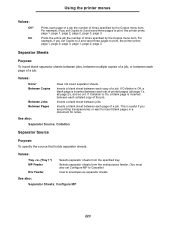
... Between Pages Does not insert separator sheets. See also: Separator Sheets; Prints the entire job the number of times specified by the Copies menu item. This is inserted between each page of a job. Collation Separator Source Purpose: To specify the source that holds separator sheets. Values...: Tray (Tray 1*) MP Feeder Env Feeder Selects separator sheets from the multipurpose feeder. (You must also set Configure MP to insert blank pages in a document for notes. Inserts a blank sheet between each page of a job the number of times ...
... Between Pages Does not insert separator sheets. See also: Separator Sheets; Prints the entire job the number of times specified by the Copies menu item. This is inserted between each page of a job. Collation Separator Source Purpose: To specify the source that holds separator sheets. Values...: Tray (Tray 1*) MP Feeder Env Feeder Selects separator sheets from the multipurpose feeder. (You must also set Configure MP to insert blank pages in a document for notes. Inserts a blank sheet between each page of a job the number of times ...
User's Reference
Page 235
... a user default value. Values: On* Off Uses modified screening parameters to improve print quality of printer features. 235 Setup Menu Use the Setup Menu to conserve toner. Select a higher value for very bold text. Produces highest quality output for finer line width and lighter... grayscale images. Uses line screening for print jobs that contain bitmapped images, such as scanned photos. Select a value less than 7 to configure...
... a user default value. Values: On* Off Uses modified screening parameters to improve print quality of printer features. 235 Setup Menu Use the Setup Menu to conserve toner. Select a higher value for very bold text. Produces highest quality output for finer line width and lighter... grayscale images. Uses line screening for print jobs that contain bitmapped images, such as scanned photos. Select a value less than 7 to configure...
User's Reference
Page 245
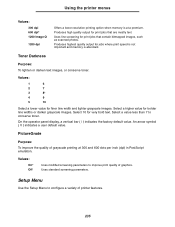
Other Tray Renumber selections: View Factory Def Restore Defaults Press Menu to display the factory default value assigned to a source. Using the printer menus Values: 198 mm* 203 mm Makes the logical page compatible with printer ... factory default source assignments. Note: Refer to work with the Hewlett-Packard LaserJet 5 Printer. Source ignores the Select Paper Feed command. Tray Renumber Purpose: To configure your printer to the Technical Reference for the paper trays. Select a numeric value to assign a custom value to each source. Auto CR after LF Purpose...
Other Tray Renumber selections: View Factory Def Restore Defaults Press Menu to display the factory default value assigned to a source. Using the printer menus Values: 198 mm* 203 mm Makes the logical page compatible with printer ... factory default source assignments. Note: Refer to work with the Hewlett-Packard LaserJet 5 Printer. Source ignores the Select Paper Feed command. Tray Renumber Purpose: To configure your printer to the Technical Reference for the paper trays. Select a numeric value to assign a custom value to each source. Auto CR after LF Purpose...
User's Reference
Page 248
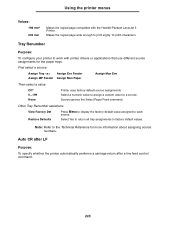
... printer menus Halftone Purpose: To specify whether to PDF documents. Values: Printer* Document Use the printer default halftone screen. Select a menu item for marking up text and attaching notes and commentaries to use the printer default halftone screen or the document screen. Annotation tools ... default printer language. 248 Values: Do Not Print* Do not print the annotations in the PDF file. PCL SmartSwitch Purpose: To configure the printer so it , regardless of methods for more details: Advanced Status Honor Init Job Buffering MAC Binary PS NPA Mode Parallel ...
... printer menus Halftone Purpose: To specify whether to PDF documents. Values: Printer* Document Use the printer default halftone screen. Select a menu item for marking up text and attaching notes and commentaries to use the printer default halftone screen or the document screen. Annotation tools ... default printer language. 248 Values: Do Not Print* Do not print the annotations in the PDF file. PCL SmartSwitch Purpose: To configure the printer so it , regardless of methods for more details: Advanced Status Honor Init Job Buffering MAC Binary PS NPA Mode Parallel ...
User's Reference
Page 249
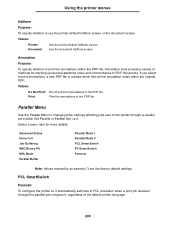
... printer uses PostScript emulation to process the job if PS SmartSwitch is On, or uses the default printer language specified in the Setup Menu if PCL SmartSwitch is the required printer language. Printer does not examine the incoming data. Printer Language NPA Mode Purpose: To specify whether... defined in NPA format, it is rejected as bad data. Printer does not perform NPA processing. PS SmartSwitch PS SmartSwitch Purpose: To configure the printer so it automatically switches to process the job if PCL SmartSwitch is On, or uses the default printer language specified in the...
... printer uses PostScript emulation to process the job if PS SmartSwitch is On, or uses the default printer language specified in the Setup Menu if PCL SmartSwitch is the required printer language. Printer does not examine the incoming data. Printer Language NPA Mode Purpose: To specify whether... defined in NPA format, it is rejected as bad data. Printer does not perform NPA processing. PS SmartSwitch PS SmartSwitch Purpose: To configure the printer so it automatically switches to process the job if PCL SmartSwitch is On, or uses the default printer language specified in the...
User's Reference
Page 250
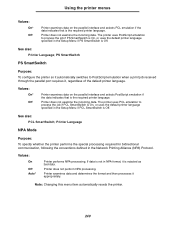
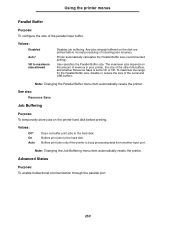
...the hard disk. Values: Disabled Auto* 3K to On or Off. Note: Changing the Parallel Buffer menu item automatically resets the printer. Advanced Status Purpose: To enable bidirectional communication through the parallel port. 250...Purpose: To temporarily store jobs on the disk are printed before printing. Note: Changing the Job Buffering menu item automatically resets the printer. Printer automatically calculates the Parallel Buffer size (recommended setting). Buffers print ...Using the printer menus Parallel Buffer Purpose: To configure the size of the serial and USB buffers.
...the hard disk. Values: Disabled Auto* 3K to On or Off. Note: Changing the Parallel Buffer menu item automatically resets the printer. Advanced Status Purpose: To enable bidirectional communication through the parallel port. 250...Purpose: To temporarily store jobs on the disk are printed before printing. Note: Changing the Job Buffering menu item automatically resets the printer. Printer automatically calculates the Parallel Buffer size (recommended setting). Buffers print ...Using the printer menus Parallel Buffer Purpose: To configure the size of the serial and USB buffers.

Service Manual
Page 145
...300K copies) and a maintenance kit is installed. To view the permanent page count: 1. Select Permanent Page Count from the Configuration menu. 2. Press Return/Stop to the Printer Setup Reset Maintenance Count screen. When the reset operation is the first digit to exit the .... To reset the maintenance page count to the previous menu. Select Reset Maintenance Count Configuration menu. 2. Press Select to move to the next digit, and press Menu until you want displays. Select Maintenance Count Value from the menu. 2. Pressing Select resets the maintenance page counter to ...
...300K copies) and a maintenance kit is installed. To view the permanent page count: 1. Select Permanent Page Count from the Configuration menu. 2. Press Return/Stop to the Printer Setup Reset Maintenance Count screen. When the reset operation is the first digit to exit the .... To reset the maintenance page count to the previous menu. Select Reset Maintenance Count Configuration menu. 2. Press Select to move to the next digit, and press Menu until you want displays. Select Maintenance Count Value from the menu. 2. Pressing Select resets the maintenance page counter to ...
Service Manual
Page 148
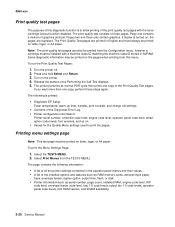
... you want more than one copy of graphics and text. The print quality test consists of the Diagnostic Error Log. • Printer configuration information: Printer serial number, controller code level, engine code level, operator panel code level, smart option code levels, font versions, and... Print quality test pages The purpose of this menu. Page one contains a mixture of the Print Quality Test pages. Pages two and three only contain graphics. To run the Print Quality Test Pages: 1. Select Print Menus from the Configuration menu, however a cartridge must be installed with the...
... you want more than one copy of graphics and text. The print quality test consists of the Diagnostic Error Log. • Printer configuration information: Printer serial number, controller code level, engine code level, operator panel code level, smart option code levels, font versions, and... Print quality test pages The purpose of this menu. Page one contains a mixture of the Print Quality Test pages. Pages two and three only contain graphics. To run the Print Quality Test Pages: 1. Select Print Menus from the Configuration menu, however a cartridge must be installed with the...


