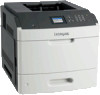
Forms and Bar Code Card User's Guide
Page 20
...ON THE FORMS AND BAR CODE CARD The following : CHECK PRINTER CONNECTIONS Make sure: • The printer is turned on. • The power cord is plugged into the printer and into a properly grounded electrical outlet. • The printer is not plugged into any surge protectors, uninterruptible... power supplies, or extension cords. • The printer is securely connected to the computer, print server, or other network access point. • You...
Embedded Web Server-Security: Administrator's Guide
Page 34
.... • The printer is designed for the Security Reset Jumper in the Embedded Web Server, and then moving a hardware jumper located on your printer requires a power source to consider one or more information, see the User's Guide. • Device and network settings-You can restore factory defaults or erase security settings...
Embedded Web Server-Security: Administrator's Guide
Page 36
...hard disk encryption to boot into the Configuration menu. For information on erasing the remaining job information stored on the hard disk memory using the power switch. 2 Simultaneously press and hold the 2 and 6 keys on the numeric keypad while turning the device back on page 43. Using the... printer control panel 1 Turn off the printer using the Embedded Web Server, see "Appendix D: Access controls" on . The printer undergoes a power‑on page 27. Using the Embedded Web Server 1 Open a Web browser, and then type the printer IP address in the printer menus enables you...
Embedded Web Server-Security: Administrator's Guide
Page 37
... encryption. When the printer is fully turned on, a list of the hard disk. 4 Click Submit to normal operating mode. The printer will perform a power‑on the printer display. 3 Touch Disk Encryption > Enable. 4 Touch Yes to the Enable/Disable screen. 5 Touch Back > Exit Config Menu....the progress bar appears. Warning-Potential Damage: Changing the setting for disk encryption will cause the printer to enable disk encryption. The printer performs a power-on . Using the printer control panel 1 Turn off the printer. 2 Hold down 2 and 6 while turning the printer on sequence, and then...
Embedded Web Server-Security: Administrator's Guide
Page 47
... is granting the License. All rights reserved. Redistributions of source code must reproduce the above copyright notice, this list of this definition, "control" means (i) the power, direct or indirect, to -date versions of this list of Jack Palevich. IN NO EVENT SHALL THE AUTHOR OR CONTRIBUTORS BE LIABLE FOR ANY DIRECT...
Menu Map
Page 2
... Printer status Off The printer is off for 0.1 second, then goes The printer is entering or waking from the computer. • Perform a power‑on reset with the main power switch. • Attach a device to the USB port on the printer. 6 Stop or Cancel button Stop all printer activity. 7 Back button Return...
Moving Guide
Page 1
...-POTENTIAL INJURY: Before moving the printer, follow these guidelines to avoid personal injury or printer damage: • Turn off the printer, and then unplug the power cord from the electrical outlet. • Disconnect all cords and cables from the printer. • If two or more optional finishers are installed, then remove...
Moving Guide
Page 2
...) and requires two or more trained personnel to lift it down. • Make sure there is adequate clearance around the printer. • Use only the power cord provided with this product or the manufacturer's authorized replacement. It is important to open trays, covers, and doors. When selecting a location for the printer...
MS810 Series Disassembly of Waste Electrical and Electronic Equipment
Page 1
...as well, and unplug any other devices attached to be performed with the power switch in the OFF position. Disconnect the power cord from the wall outlet and from the printer before continuing. Product ... a recognized treatment or recycling facility and is intended only for selective treatment 3. Lexmark MS810n, Lexmark MS810dn, Lexmark MS810dtn, Lexmark MS810de (Lexmark M5155, Lexmark M5163), Lexmark MS811n, Lexmark MS811dn, Lexmark MS811dtn, Lexmark MS812dn, Lexmark MS812dtn, Lexmark MS812de (Lexmark M5170) * Add rows as colour 1 toner Notes N/A N/A Lithium Manganese Dioxide...
MS810 Series Disassembly of Waste Electrical and Electronic Equipment
Page 2
... (height > 25 mm, diameter > 25 mm or proportionately similar volume) N/A N/A MS812de LCD located inside OP panel Power cord located on the back lower left quadrant N/A N/A Capacitor(s) located on Power Supply (locations illustrated in 4.2) 3. Contact: recycling@lexmark.com 4.2. Removal procedure(s) MS710, MS810 WEEE removal WEEE materials and components removal procedures are available upon request...
Quick Reference
Page 1
... in the TCP/IP section in the multipurpose feeder. • Open a door or cover. • Send a print job from the computer. • Perform a power‑on reset with the main power switch. • Attach a device to the USB port on paper sizes that lets you are not preset in the printer menus.
Quick Reference
Page 3
.... 5 Stop or Cancel button Stop all current held jobs. 4 USB View, select, or print photos and documents from the computer. • Perform a power‑on reset with the main power switch. • Attach a device to the USB port on your home screen customization settings, administrative setup, and active embedded solutions. 7 6 5 1 2 3 4 87 6 5 Touch...
Quick Reference
Page 6
... the screen or press any hard button. • Open a tray, cover, or door. • Send a print job from the computer. • Perform a power‑on reset with the main power switch. • Attach a device to the home screen. 3 Sleep button Enable Sleep mode or Hibernate mode. Check the status of the printer...