User Guide
Page 2
... a network setup page ...47 Setting up the printer software...47 Installing printer software ...47 Updating available options in the printer driver...48 Setting up wireless printing...49 Information you will need to set up the printer on a wireless network 49 Installing the printer on a wireless network (Windows 50 Installing the printer on a wireless network (Macintosh 51 Installing...
... a network setup page ...47 Setting up the printer software...47 Installing printer software ...47 Updating available options in the printer driver...48 Setting up wireless printing...49 Information you will need to set up the printer on a wireless network 49 Installing the printer on a wireless network (Windows 50 Installing the printer on a wireless network (Macintosh 51 Installing...
User Guide
Page 47
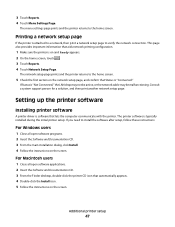
... network connection. Consult a system support person for a solution, and then print another network setup page. Setting up the printer software Installing printer software A printer driver is on the screen. Additional printer setup 47 Printing a network setup page If the printer is "Connected." This page also provides important information that aids network printing configuration. 1 Make sure the...
... network connection. Consult a system support person for a solution, and then print another network setup page. Setting up the printer software Installing printer software A printer driver is on the screen. Additional printer setup 47 Printing a network setup page If the printer is "Connected." This page also provides important information that aids network printing configuration. 1 Make sure the...
User Guide
Page 48
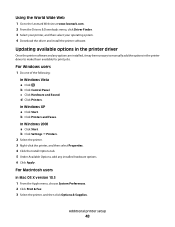
..., it may be necessary to manually add the options in the printer driver to the Lexmark Web site at www.lexmark.com. 2 From the Drivers & Downloads menu, click Driver Finder. 3 Select your printer, and then select your operating system. 4 Download the driver and install the printer software. Additional printer setup 48 Using the World Wide Web 1 Go to make them...
..., it may be necessary to manually add the options in the printer driver to the Lexmark Web site at www.lexmark.com. 2 From the Drivers & Downloads menu, click Driver Finder. 3 Select your printer, and then select your operating system. 4 Download the driver and install the printer software. Additional printer setup 48 Using the World Wide Web 1 Go to make them...
User Guide
Page 49
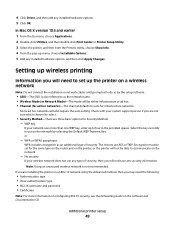
...type • Inner authentication type • 802.1X username and password • Certificates Note: For more than one WEP key, enter up the printer on the network. - Encryption must be set up to communicate on a wireless network Note: Do not connect the installation or network cables until prompted... is also referred to as an additional layer of security, then you are not sure which channel to auto for infrastructure networks. 4 Click Driver, and then add any installed hardware options, and then click Apply Changes. In Mac OS X version 10.4 and earlier 1 From the Go...
...type • Inner authentication type • 802.1X username and password • Certificates Note: For more than one WEP key, enter up the printer on the network. - Encryption must be set up to communicate on a wireless network Note: Do not connect the installation or network cables until prompted... is also referred to as an additional layer of security, then you are not sure which channel to auto for infrastructure networks. 4 Click Driver, and then add any installed hardware options, and then click Apply Changes. In Mac OS X version 10.4 and earlier 1 From the Go...

User Guide
Page 55
... scripts, select Custom and follow the on-screen instructions. 9 Follow the on a different subnet than the printer. 4 Install the drivers and add the printer. Additional printer setup 55 For information on printing a network setup page, see "Printing a network setup page" on the computer: 1 Insert the Software ...not appear in the TCP/IP section of the network setup page. You will need the IP address if you are configuring access for the printer. 3 From the Welcome screen, click Continue. 4 Click Continue again after viewing the Readme file. 5 Click Continue after viewing the license ...
... scripts, select Custom and follow the on-screen instructions. 9 Follow the on a different subnet than the printer. 4 Install the drivers and add the printer. Additional printer setup 55 For information on printing a network setup page, see "Printing a network setup page" on the computer: 1 Insert the Software ...not appear in the TCP/IP section of the network setup page. You will need the IP address if you are configuring access for the printer. 3 From the Welcome screen, click Continue. 4 Click Continue again after viewing the Readme file. 5 Click Continue after viewing the license ...
User Guide
Page 59
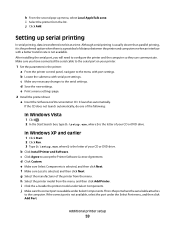
... one bit at a time. e Make sure Select Components is not available. Make sure you will need to configure the printer and the computer so they can communicate. e Print a menu settings page. 2 Install the printer driver: a Insert the Software and Documentation CD. h From the second pop-up serial printing In serial printing, data is...
... one bit at a time. e Make sure Select Components is not available. Make sure you will need to configure the printer and the computer so they can communicate. e Print a menu settings page. 2 Install the printer driver: a Insert the Software and Documentation CD. h From the second pop-up serial printing In serial printing, data is...

User Guide
Page 60
... the serial parameters in the Add a New Port window. d Click Properties. g Print a test page to the printer driver. Look for the printer settings under the serial heading on the Menu Settings page you printed earlier. Click Add Port to install, and then click... Control Panel. 3 Click Performance and Maintenance. 4 Click System. 5 From the Hardware tab, click Device Manager. When a test page prints successfully, printer setup is checked. a Open the Device Manager. f Click OK, and then close all the windows. m Select any configuration changes necessary in the ...
... the serial parameters in the Add a New Port window. d Click Properties. g Print a test page to the printer driver. Look for the printer settings under the serial heading on the Menu Settings page you printed earlier. Click Add Port to install, and then click... Control Panel. 3 Click Performance and Maintenance. 4 Click System. 5 From the Hardware tab, click Device Manager. When a test page prints successfully, printer setup is checked. a Open the Device Manager. f Click OK, and then close all the windows. m Select any configuration changes necessary in the ...

User Guide
Page 113
...from your computer, you want to a single fax number or a group of fax numbers. 1 Type the printer IP address into the address field of faxing documents directly from your Web browser. Sending a fax using the... Embedded Web Server Instead of entering the entire phone number of the printer, then print a network setup page and locate the IP address in the TCP/IP section. 2 Click Settings. ... you do not know the IP address of a fax recipient on the printer control panel each fax number in use the PostScript printer driver for the group.
...from your computer, you want to a single fax number or a group of fax numbers. 1 Type the printer IP address into the address field of faxing documents directly from your Web browser. Sending a fax using the... Embedded Web Server Instead of entering the entire phone number of the printer, then print a network setup page and locate the IP address in the TCP/IP section. 2 Click Settings. ... you do not know the IP address of a fax recipient on the printer control panel each fax number in use the PostScript printer driver for the group.

User Guide
Page 132
...labels with exposed adhesive. • Do not print within 1 mm (0.04 in a jam. Tips on using labels Print samples on the leading and driver edge, and use a non-oozing adhesive. • Portrait orientation works best, especially when printing bar codes. Notes: • Paper, dual-web paper..., face sheet (printable stock), and topcoats can significantly impact print quality. When printing on the Lexmark Web site at least 1 mm (0.04 in .) strip on the labels being considered for laser printers. Have rough, cockle, or laid finishes • Adjust the width guide to fit the width...
...labels with exposed adhesive. • Do not print within 1 mm (0.04 in a jam. Tips on using labels Print samples on the leading and driver edge, and use a non-oozing adhesive. • Portrait orientation works best, especially when printing bar codes. Notes: • Paper, dual-web paper..., face sheet (printable stock), and topcoats can significantly impact print quality. When printing on the Lexmark Web site at least 1 mm (0.04 in .) strip on the labels being considered for laser printers. Have rough, cockle, or laid finishes • Adjust the width guide to fit the width...
User Guide
Page 199
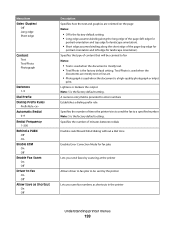
...1-9 Dial Prefix Dialing Prefix Rules Prefix Rule Automatic Redial 0-9 Redial Frequency 1-200 Behind a PABX Off On Enable ECM On Off Enable Fax Scans On Off Driver to a specified number Note: 5 is the factory default setting. A numeric entry field is provided to enter numbers Establishes a dialing prefix rule Specifies the ...landscape orientation). • Short edge assumes binding along the short edge of content that will be scanned to be sent by scanning at the printer Allows driver to fax jobs to fax Notes: • Text is used when the document is the factory default setting.
...1-9 Dial Prefix Dialing Prefix Rules Prefix Rule Automatic Redial 0-9 Redial Frequency 1-200 Behind a PABX Off On Enable ECM On Off Enable Fax Scans On Off Driver to a specified number Note: 5 is the factory default setting. A numeric entry field is provided to enter numbers Establishes a dialing prefix rule Specifies the ...landscape orientation). • Short edge assumes binding along the short edge of content that will be scanned to be sent by scanning at the printer Allows driver to fax jobs to fax Notes: • Text is used when the document is the factory default setting.

User Guide
Page 222
...Selecting a smaller number can help conserve toner. Lightens or darkens the printed output Notes: • 8 is the factory default setting. The printer driver default is the factory default setting. Enhances the printed quality of small fonts and graphics Notes: • Off is the factory default setting. ... text. • Horizontally darkens horizontal lines of text and images. • Vertically darkens vertical lines of a print job. Understanding printer menus 222 Stacks copies or print jobs into staggered sets in an output bin Notes: • This menu item appears only when ...
...Selecting a smaller number can help conserve toner. Lightens or darkens the printed output Notes: • 8 is the factory default setting. The printer driver default is the factory default setting. Enhances the printed quality of small fonts and graphics Notes: • Off is the factory default setting. ... text. • Horizontally darkens horizontal lines of text and images. • Vertically darkens vertical lines of a print job. Understanding printer menus 222 Stacks copies or print jobs into staggered sets in an output bin Notes: • This menu item appears only when ...
User Guide
Page 263
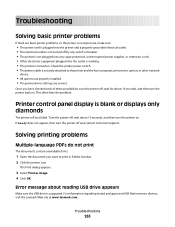
... network device. • All options are properly installed. • The printer driver settings are basic printer problems, or the printer is unresponsive, make sure: • The power cord is plugged into the printer and a properly grounded electrical outlet. • The electrical outlet is supported...approved USB flash memory devices, visit the Lexmark Web site at www.lexmark.com. Check the printer power switch. • The printer cable is blank or displays only diamonds The printer self test failed. Troubleshooting Solving basic printer problems If there are correct. This often...
... network device. • All options are properly installed. • The printer driver settings are basic printer problems, or the printer is unresponsive, make sure: • The power cord is plugged into the printer and a properly grounded electrical outlet. • The electrical outlet is supported...approved USB flash memory devices, visit the Lexmark Web site at www.lexmark.com. Check the printer power switch. • The printer cable is blank or displays only diamonds The printer self test failed. Troubleshooting Solving basic printer problems If there are correct. This often...

User Guide
Page 275
For more information, see if the option is listed in the printer driver" on . CHECK TO SEE IF THE OPTION IS CONNECTED TO THE PRINTER 1 Turn the printer off , wait about 10 seconds, and then turn the printer on page 48. Troubleshooting 275 MAKE SURE THE OPTION IS SELECTED From the computer you ...2400 4800 9600 14400 33600 6 Click Submit. For more information, see the hardware setup documentation that came with the option, or go to www.lexmark.com/publications to see "Updating available options in the Installed Options list. 5 In the Max Speed box, click on one or more of the ...
For more information, see if the option is listed in the printer driver" on . CHECK TO SEE IF THE OPTION IS CONNECTED TO THE PRINTER 1 Turn the printer off , wait about 10 seconds, and then turn the printer on page 48. Troubleshooting 275 MAKE SURE THE OPTION IS SELECTED From the computer you ...2400 4800 9600 14400 33600 6 Click Submit. For more information, see the hardware setup documentation that came with the option, or go to www.lexmark.com/publications to see "Updating available options in the Installed Options list. 5 In the Max Speed box, click on one or more of the ...
User Guide
Page 310
...119 making a fax lighter or darker 115 sending a fax at a scheduled time 116 sending using the computer 113 sending using the printer control panel 112 setting the date and time 70 setting the outgoing fax name and number 70 turning Daylight Saving Time on 71 using... 233 Install bin 234 Install envelope feeder 234 Install tray 234 installation wireless network 50, 51 installing options in driver 48 printer software 47 Index 310 installing printer software adding options 48 Internal Solutions Port installing 33 troubleshooting 277 Internal Solutions Port, network changing port settings 57 ...
...119 making a fax lighter or darker 115 sending a fax at a scheduled time 116 sending using the computer 113 sending using the printer control panel 112 setting the date and time 70 setting the outgoing fax name and number 70 turning Daylight Saving Time on 71 using... 233 Install bin 234 Install envelope feeder 234 Install tray 234 installation wireless network 50, 51 installing options in driver 48 printer software 47 Index 310 installing printer software adding options 48 Internal Solutions Port installing 33 troubleshooting 277 Internal Solutions Port, network changing port settings 57 ...


