
User's Guide
Page 2
...procedures other replacement parts. • Your product uses a laser. In the United Kingdom and Eire, send to compatibility are the user's responsibility. © 2005 Lexmark International, Inc. Details relating to Lexmark International Ltd., Marketing and Services Department, Westhorpe House, Westhorpe...up this agreement are the property of Adobe Systems Incorporated. The safety features of specific Lexmark components. Lexmark is intended to avoid the possibility of printer commands (language) and functions included in your point of the Hewlett-Packard Company. ...
...procedures other replacement parts. • Your product uses a laser. In the United Kingdom and Eire, send to compatibility are the user's responsibility. © 2005 Lexmark International, Inc. Details relating to Lexmark International Ltd., Marketing and Services Department, Westhorpe House, Westhorpe...up this agreement are the property of Adobe Systems Incorporated. The safety features of specific Lexmark components. Lexmark is intended to avoid the possibility of printer commands (language) and functions included in your point of the Hewlett-Packard Company. ...
User's Guide
Page 3
...Windows 95 and Windows 98 (first edition 11 Serial printing ...11 Macintosh ...13 Creating a queue in Print Center / Printer Setup Utility (Mac OS X 14 UNIX/Linux ...15 Chapter 3: Installing drivers for network printing 16 Printing a network setup page ...16 Assigning... a printer IP address ...16 Verifying the IP settings ...17 Windows ...17 Supported printer drivers ...17 Supported network printer ports ...17 Direct printing using Windows 98 SE, Me, Windows NT 4.0, Windows 2000, Windows XP...
...Windows 95 and Windows 98 (first edition 11 Serial printing ...11 Macintosh ...13 Creating a queue in Print Center / Printer Setup Utility (Mac OS X 14 UNIX/Linux ...15 Chapter 3: Installing drivers for network printing 16 Printing a network setup page ...16 Assigning... a printer IP address ...16 Verifying the IP settings ...17 Windows ...17 Supported printer drivers ...17 Supported network printer ports ...17 Direct printing using Windows 98 SE, Me, Windows NT 4.0, Windows 2000, Windows XP...
User's Guide
Page 4
... sample list ...28 Printing the Print Quality Test Pages ...29 Printing only black text and graphics ...29 Configuring the printer for black-only printing 29 Removing the color supplies ...30 Configuring the printer for color printing and replacing the supplies 33 Chapter 5: Media specifications 35 Media guidelines ...35 Paper ...35 Transparencies ...37...
... sample list ...28 Printing the Print Quality Test Pages ...29 Printing only black text and graphics ...29 Configuring the printer for black-only printing 29 Removing the color supplies ...30 Configuring the printer for color printing and replacing the supplies 33 Chapter 5: Media specifications 35 Media guidelines ...35 Paper ...35 Transparencies ...37...
User's Guide
Page 5
...Ordering a photoconductor unit ...80 Ordering a fuser ...80 Ordering a transfer belt ...80 Ordering a waste toner box ...80 Maintaining the printer for long-term storage 80 Storing supplies ...81 Storing media ...81 Storing the toner cartridges and photoconductor units 81 Replacing the toner cartridges ......81 Recycling Lexmark products ...83 Replacing the photoconductor units ...83 Replacing the fuser ...83 Replacing the waste toner box ...83 Replacing the ...
...Ordering a photoconductor unit ...80 Ordering a fuser ...80 Ordering a transfer belt ...80 Ordering a waste toner box ...80 Maintaining the printer for long-term storage 80 Storing supplies ...81 Storing media ...81 Storing the toner cartridges and photoconductor units 81 Replacing the toner cartridges ......81 Recycling Lexmark products ...83 Replacing the photoconductor units ...83 Replacing the fuser ...83 Replacing the waste toner box ...83 Replacing the ...

User's Guide
Page 6
Contents Disabling Power Saver ...108 Encrypting the disk ...108 Configuring printer alerts ...109 Adjusting operator panel contrast ...109 Memory requirements ...110 Using the Print and Hold function ...110 Selecting a user name ...110 Printing and deleting held ...
Contents Disabling Power Saver ...108 Encrypting the disk ...108 Configuring printer alerts ...109 Adjusting operator panel contrast ...109 Memory requirements ...110 Using the Print and Hold function ...110 Selecting a user name ...110 Printing and deleting held ...
User's Guide
Page 8
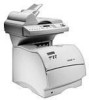
1 Overview Basic models The following illustration shows the Lexmark™ C520, C522, and C524 of the Lexmark family of the standard tray which can be seen once it is lowered using the handhold. C520 and C522 have an optional 500-sheet drawer ... for all models is available when it is pulled out using the latch. The C522 and C524 have a manual feed slot on the front of printers and their features. C524 has a multipurpose feeder located on the front of the standard tray.
1 Overview Basic models The following illustration shows the Lexmark™ C520, C522, and C524 of the Lexmark family of the standard tray which can be seen once it is lowered using the handhold. C520 and C522 have an optional 500-sheet drawer ... for all models is available when it is pulled out using the latch. The C522 and C524 have a manual feed slot on the front of printers and their features. C524 has a multipurpose feeder located on the front of the standard tray.
User's Guide
Page 10
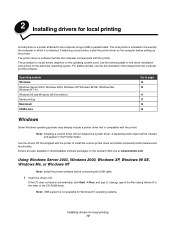
... will not replace the system driver. Note: USB support is attached. The local printer is intended to be created and appear in downloadable software packages on the Lexmark Web site at www.lexmark.com. Use the following table to install drivers depends on the computer before connecting the USB cable. 1 Insert the drivers...
... will not replace the system driver. Note: USB support is attached. The local printer is intended to be created and appear in downloadable software packages on the Lexmark Web site at www.lexmark.com. Use the following table to install drivers depends on the computer before connecting the USB cable. 1 Insert the drivers...

User's Guide
Page 11
...not available. Note: USB support is the default installation for Windows 95 and Windows 98 (first edition) operating systems. 4 When prompted, select Local printer. 5 Click Have Disk. The Suggested option is not available for local and network-attached setup. To install utilities, change settings, or customize device ... A serial interface card is transferred one bit at a time. Using Windows 95 and Windows 98 (first edition) 1 Turn on the printer. The path should be purchased separately. Note: Some Windows operating systems require that the user has administrative access to install...
...not available. Note: USB support is the default installation for Windows 95 and Windows 98 (first edition) operating systems. 4 When prompted, select Local printer. 5 Click Have Disk. The Suggested option is not available for local and network-attached setup. To install utilities, change settings, or customize device ... A serial interface card is transferred one bit at a time. Using Windows 95 and Windows 98 (first edition) 1 Turn on the printer. The path should be purchased separately. Note: Some Windows operating systems require that the user has administrative access to install...
User's Guide
Page 12
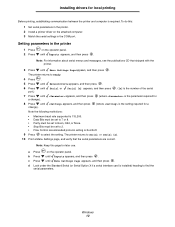
...is the parameter required for 8 Press until appears, and then press change). (where is required. Setting parameters in the COM port. The printer returns to find the serial parameters. a Press on the operator panel. 2 Press until Menu Settings Page appears, and then press . ... the serial parameters are correct. Note: Keep this : 1 Set serial parameters in the printer. 2 Install a printer driver on the attached computer. 3 Match the serial settings in the printer 1 Press on the operator panel. Installing drivers for local printing Before printing, establishing communication ...
...is the parameter required for 8 Press until appears, and then press change). (where is required. Setting parameters in the COM port. The printer returns to find the serial parameters. a Press on the operator panel. 2 Press until Menu Settings Page appears, and then press . ... the serial parameters are correct. Note: Keep this : 1 Set serial parameters in the printer. 2 Install a printer driver on the attached computer. 3 Match the serial settings in the printer 1 Press on the operator panel. Installing drivers for local printing Before printing, establishing communication ...
User's Guide
Page 13
... Custom, and click Next. 5 Select Components, and click Next. 6 Select Local, and click Next. 7 Select the printer from the list, and click Add Printer. 8 Expand the printer item listed below Selected Components. 9 Click PORT: , and select the communications port (COM1 or COM2) needed for use.... be installed on the Menu Settings page printed previously. 6 Click OK, and close all the windows. 7 Print a test page to verify printer installation. c Click File Æ Properties. Macintosh 13 Note: Windows 95 and Windows 98 (first edition) users should launch automatically. a Click Start...
... Custom, and click Next. 5 Select Components, and click Next. 6 Select Local, and click Next. 7 Select the printer from the list, and click Add Printer. 8 Expand the printer item listed below Selected Components. 9 Click PORT: , and select the communications port (COM1 or COM2) needed for use.... be installed on the Menu Settings page printed previously. 6 Click OK, and close all the windows. 7 Print a test page to verify printer installation. c Click File Æ Properties. Macintosh 13 Note: Windows 95 and Windows 98 (first edition) users should launch automatically. a Click Start...

User's Guide
Page 14
... Install screen, click Install. A queue has been created for the printer. • If the USB-attached printer does not appear in a downloadable software package on the Lexmark Web site at www.lexmark.com. 4 Do one of a printer to the Macintosh computer. All the necessary files are installed on the... computer. Macintosh 14 Note: A PPD for the printer is also available in the Printer List, make sure the USB cable is properly connected and the printer is turned on the Lexmark Web site at www.lexmark.com. 2 Do one of a printer to the Macintosh computer. Note: A PPD file...
... Install screen, click Install. A queue has been created for the printer. • If the USB-attached printer does not appear in a downloadable software package on the Lexmark Web site at www.lexmark.com. 4 Do one of a printer to the Macintosh computer. All the necessary files are installed on the... computer. Macintosh 14 Note: A PPD for the printer is also available in the Printer List, make sure the USB cable is properly connected and the printer is turned on the Lexmark Web site at www.lexmark.com. 2 Do one of a printer to the Macintosh computer. Note: A PPD file...
User's Guide
Page 15
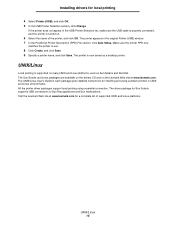
... detailed instructions for a complete list of the printer, and click OK. Make sure the printer PPD now matches the printer in the original Printer (USB) window. 7 In the PostScript Printer Description (PPD) File section, click Auto Setup. UNIX/Linux Local printing is turned on the Lexmark Web site at www.lexmark.com for installing and using a parallel...
... detailed instructions for a complete list of the printer, and click OK. Make sure the printer PPD now matches the printer in the original Printer (USB) window. 7 In the PostScript Printer Description (PPD) File section, click Auto Setup. UNIX/Linux Local printing is turned on the Lexmark Web site at www.lexmark.com for installing and using a parallel...
User's Guide
Page 16
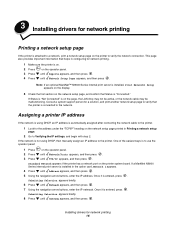
...then press . 4 Press until TCP/IP appears, and then press . 3 Installing drivers for network printing Printing a network setup page If the printer is "Connected." Note: If an optional MarkNet™ N8000 Series internal print server is installed, Print Network1 Setup appears on the display. 5 ... the network setup page printed in configuring for a solution, and print another network setup page to the network. Standard Network appears if the printer has a network port on the operator panel. 2 Press until Network/Ports appears, and then press . 3 Press until Network Setup Page appears...
...then press . 4 Press until TCP/IP appears, and then press . 3 Installing drivers for network printing Printing a network setup page If the printer is "Connected." Note: If an optional MarkNet™ N8000 Series internal print server is installed, Print Network1 Setup appears on the display. 5 ... the network setup page printed in configuring for a solution, and print another network setup page to the network. Standard Network appears if the printer has a network port on the operator panel. 2 Press until Network/Ports appears, and then press . 3 Press until Network Setup Page appears...
User's Guide
Page 17
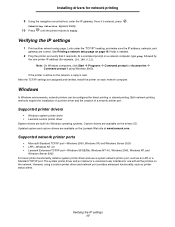
... and gateway are available on the drivers CD. Supported printer drivers • Windows system printer driver • Lexmark custom printer driver System drivers are built into Windows operating systems. Custom drivers are correct. Supported network printer ports • Microsoft Standard TCP/IP port-Windows 2000... Æ Command prompt if using a custom printer driver and network port provides enhanced functionality, such as an LPR or a Standard TCP/IP port. If the printer is active on the Lexmark Web site at www.lexmark.com. Updated system and custom drivers are assigned...
... and gateway are available on the drivers CD. Supported printer drivers • Windows system printer driver • Lexmark custom printer driver System drivers are built into Windows operating systems. Custom drivers are correct. Supported network printer ports • Microsoft Standard TCP/IP port-Windows 2000... Æ Command prompt if using a custom printer driver and network port provides enhanced functionality, such as an LPR or a Standard TCP/IP port. If the printer is active on the Lexmark Web site at www.lexmark.com. Updated system and custom drivers are assigned...
User's Guide
Page 18
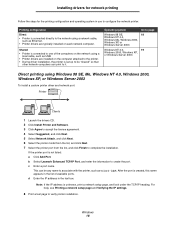
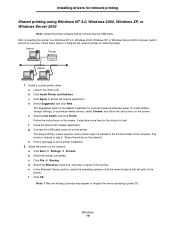
... 98 SE, Me, Windows NT 4.0, Windows 2000, Windows XP, or Windows Server 2003 To install a custom printer driver and network port: Printer Clients 1 Launch the drivers CD. 2 Click Install Printer and Software. 3 Click Agree to accept the license agreement. 4 Select Suggested, and click Next. 5 Select ...can print to one of available ports. b Select Lexmark Enhanced TCP/IP Port, and enter the information to verify printer installation. c Enter a port name. Shared • Printer is created, this name appears in the text box. If the printer port is unknown, print a network setup page, and...
... 98 SE, Me, Windows NT 4.0, Windows 2000, Windows XP, or Windows Server 2003 To install a custom printer driver and network port: Printer Clients 1 Launch the drivers CD. 2 Click Install Printer and Software. 3 Click Agree to accept the license agreement. 4 Select Suggested, and click Next. 5 Select ...can print to one of available ports. b Select Lexmark Enhanced TCP/IP Port, and enter the information to verify printer installation. c Enter a port name. Shared • Printer is created, this name appears in the text box. If the printer port is unknown, print a network setup page, and...
User's Guide
Page 19
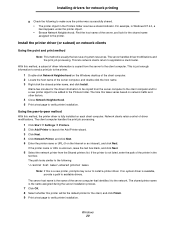
...drivers CD. To install utilities, change settings, or customize device drivers, select Custom, and follow these steps to configure the network printer for local and network-attached setup. Note: If files are missing, prompts may take some time for network printing Shared printing using ...Windows NT 4.0, Windows 2000, Windows XP, or Windows Server 2003 Note: Install the printer software before connnecting the USB cable. b Click Install Printer and Software. e In the Alternate Drivers section, select the operating systems of all the network clients ...
...drivers CD. To install utilities, change settings, or customize device drivers, select Custom, and follow these steps to configure the network printer for local and network-attached setup. Note: If files are missing, prompts may take some time for network printing Shared printing using ...Windows NT 4.0, Windows 2000, Windows XP, or Windows Server 2003 Note: Install the printer software before connnecting the USB cable. b Click Install Printer and Software. e In the Alternate Drivers section, select the operating systems of all the network clients ...
User's Guide
Page 20
..., and look for network printing g Check the following : \\\ Note: If this printer will be added to the Printers folder. The server handles driver modifications and the print job processing. If the printer is available, provide a path to applications much faster. If no system driver is ...assigned during the server installation process. 7 Click OK. 8 Select whether this is usually the best use of the printer in Windows NT 4.0, a hand appears under the printer object. • Browse Network Neighborhood. For example, in the text box. This lets network clients return to available ...
..., and look for network printing g Check the following : \\\ Note: If this printer will be added to the Printers folder. The server handles driver modifications and the print job processing. If the printer is available, provide a path to applications much faster. If no system driver is ...assigned during the server installation process. 7 Click OK. 8 Select whether this is usually the best use of the printer in Windows NT 4.0, a hand appears under the printer object. • Browse Network Neighborhood. For example, in the text box. This lets network clients return to available ...
User's Guide
Page 21
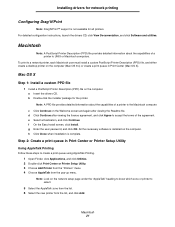
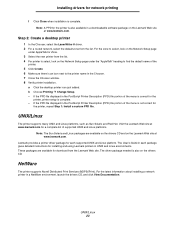
...is complete. Step 2: Create a print queue in Print Center (Mac OS X). Mac OS X Step 1: Install a custom PPD file 1 Install a PostScript Printer Description (PPD) file on the Welcome screen and again after viewing the license agreement, and click Agree to select. 5 Select the AppleTalk zone from the... list. 6 Select the new printer from the pop-up menu. f On the Easy Install screen, click Install. For detailed configuration instructions, launch the drivers CD, click View...
...is complete. Step 2: Create a print queue in Print Center (Mac OS X). Mac OS X Step 1: Install a custom PPD file 1 Install a PostScript Printer Description (PPD) file on the Welcome screen and again after viewing the license agreement, and click Agree to select. 5 Select the AppleTalk zone from the... list. 6 Select the new printer from the pop-up menu. f On the Easy Install screen, click Install. For detailed configuration instructions, launch the drivers CD, click View...
User's Guide
Page 22
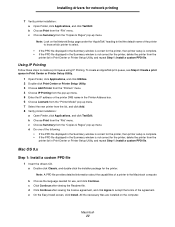
...; If the PPD file displayed in the Summary window is correct for the printer, then printer setup is complete. • If the PPD file displayed in the Printer Address box. 6 Choose Lexmark from the "Printer Model" pop-up menu. 7 Select the new printer from the "Copies & Pages" pop-up menu. c Click Continue after viewing the license...
...; If the PPD file displayed in the Summary window is correct for the printer, then printer setup is complete. • If the PPD file displayed in the Printer Address box. 6 Choose Lexmark from the "Printer Model" pop-up menu. 7 Select the new printer from the "Copies & Pages" pop-up menu. c Click Continue after viewing the license...
User's Guide
Page 23
... in UNIX and Linux environments. UNIX/Linux 23 Lexmark provides a printer driver package for each package gives detailed instructions for installing and using Lexmark printers in the PostScript Printer Description (PPD) file portion of the menu is not correct for the printer is complete. - Note: A PPD for the printer, repeat Step 1: Install a custom PPD file. For the...
... in UNIX and Linux environments. UNIX/Linux 23 Lexmark provides a printer driver package for each package gives detailed instructions for installing and using Lexmark printers in the PostScript Printer Description (PPD) file portion of the menu is not correct for the printer is complete. - Note: A PPD for the printer, repeat Step 1: Install a custom PPD file. For the...


