
IdeaCentre A300 Hardware Maintenance Manual
Page 1
Safety information 4 General safety...4 Electrical safety...5 Safety inspection guide 7 Handling electrostatic discharge-sensitive devices 8 Grounding requirements 8 Safety notices...9 Chapter 3. Contents Contents Chapter 1. General Checkout 13 Problem determination tips 14 Chapter 5. About this manual 1 Important Safety Information 1 Using eSupport...2 Important information about replacing RoHS compliant FRUs... 2 Chapter 2. Using the Setup Utility 15 Starting the Setup Utility program 15 Viewing and changing settings 15 Using passwords 16 Using Device...18 Selecting a ...
Safety information 4 General safety...4 Electrical safety...5 Safety inspection guide 7 Handling electrostatic discharge-sensitive devices 8 Grounding requirements 8 Safety notices...9 Chapter 3. Contents Contents Chapter 1. General Checkout 13 Problem determination tips 14 Chapter 5. About this manual 1 Important Safety Information 1 Using eSupport...2 Important information about replacing RoHS compliant FRUs... 2 Chapter 2. Using the Setup Utility 15 Starting the Setup Utility program 15 Viewing and changing settings 15 Using passwords 16 Using Device...18 Selecting a ...
IdeaCentre A300 Hardware Maintenance Manual
Page 2
Statement 50 ii Locations 23 Locating components and connectors 23 Chapter 8. Replacing hardware 28 General information 28 Removing the hinge cover 29 Removing the hinge from LED panel 30 Removing the base top cover 30 Removing the motherboard cover 31 Replacing the hard disk drive 31 Removing the hinge from the base bottom 33 Replacing the system fan 34 Replacing the heatsink 35 Replacing the bluetooth module 36 Replacing a memory module 37 Replacing the TV tuner card 38 Replacing the WLAN card 39 Replacing the motherboard 40 Removing the rear cover 41 Replacing the ...
Statement 50 ii Locations 23 Locating components and connectors 23 Chapter 8. Replacing hardware 28 General information 28 Removing the hinge cover 29 Removing the hinge from LED panel 30 Removing the base top cover 30 Removing the motherboard cover 31 Replacing the hard disk drive 31 Removing the hinge from the base bottom 33 Replacing the system fan 34 Replacing the heatsink 35 Replacing the bluetooth module 36 Replacing a memory module 37 Replacing the TV tuner card 38 Replacing the WLAN card 39 Replacing the motherboard 40 Removing the rear cover 41 Replacing the ...
IdeaCentre A300 Hardware Maintenance Manual
Page 3
The description of the TV card in this book before performing any of the instructions. It is intended only for Lenovo IdeaCentre A3 computers listed on the cover. Lesen Sie unbedingt alle Hinweise vom Typ "ACHTUNG" oder "VORSICHT" in this manual is only used for those ...;ões Es importante que lea todas las declaraciones de precaución y de peligro de este manual antes de seguir las instrucciones. 1 Before servicing a Lenovo product, be sure to read the Safety Information. Veuillez lire toutes les consignes de type DANGER et ATTENTION du présent document avant d'ex...
The description of the TV card in this book before performing any of the instructions. It is intended only for Lenovo IdeaCentre A3 computers listed on the cover. Lesen Sie unbedingt alle Hinweise vom Typ "ACHTUNG" oder "VORSICHT" in this manual is only used for those ...;ões Es importante que lea todas las declaraciones de precaución y de peligro de este manual antes de seguir las instrucciones. 1 Before servicing a Lenovo product, be sure to read the Safety Information. Veuillez lire toutes les consignes de type DANGER et ATTENTION du présent document avant d'ex...
IdeaCentre A300 Hardware Maintenance Manual
Page 4
...must be compliant. Point your machine type. In the Refine results field, select Service parts; RoHS requirements must also be implemented on Lenovo products placed on the market before the 2 Under Parts information, click Parts lookup. 3. Under Browse by description, with your system. ...•• To view the key commodities: 1. Click Parts information. 2. then click Continue. then click Go. 3. Lenovo plans to transition to http://consumersupport.lenovo.com. 2. Under Parts lookup, type the model type and serial number; For the remaining FRUs (the complete list of...
...must be compliant. Point your machine type. In the Refine results field, select Service parts; RoHS requirements must also be implemented on Lenovo products placed on the market before the 2 Under Parts information, click Parts lookup. 3. Under Browse by description, with your system. ...•• To view the key commodities: 1. Click Parts information. 2. then click Continue. then click Go. 3. Lenovo plans to transition to http://consumersupport.lenovo.com. 2. Under Parts lookup, type the model type and serial number; For the remaining FRUs (the complete list of...

IdeaCentre A300 Hardware Maintenance Manual
Page 5
... Non-RoHS Can be RoHS Non-RoHS Can sub to RoHS RoHS Must be ready to support Lenovo's requirements and schedule. Related Web URLs are: •• Lenovo information for Suppliers website: http://www-03.ibm.com/procurement/proweb.nsf/ ContentDocsByTitle/United+States~Information... can be used. About this manual implementation date and expects its suppliers to these products and any product Lenovo produces containing RoHS compliant parts. RoHS compliant Lenovo IdeaCentre A3 parts have unique FRU part numbers. Products sold in the system HMM or direct substitutions for +suppliers...
... Non-RoHS Can be RoHS Non-RoHS Can sub to RoHS RoHS Must be ready to support Lenovo's requirements and schedule. Related Web URLs are: •• Lenovo information for Suppliers website: http://www-03.ibm.com/procurement/proweb.nsf/ ContentDocsByTitle/United+States~Information... can be used. About this manual implementation date and expects its suppliers to these products and any product Lenovo produces containing RoHS compliant parts. RoHS compliant Lenovo IdeaCentre A3 parts have unique FRU part numbers. Products sold in the system HMM or direct substitutions for +suppliers...

IdeaCentre A300 Hardware Maintenance Manual
Page 6
Ensure you attempt to lift. 4. Distribute the weight of the object equally between your leg muscles; Never move suddenly or twist when you can be familiar with before servicing a computer. Do not attempt to be trapped in the moving parts of your clothing. Hardware Maintenance Manual Safety information 2 This chapter contains the safety information that can stand safely without slipping. 2. Ensure that your tool case away from walk areas so that other service representatives and the customer's personnel are servicing the machine. •• Keep your sleeves are good ...
Ensure you attempt to lift. 4. Distribute the weight of the object equally between your leg muscles; Never move suddenly or twist when you can be familiar with before servicing a computer. Do not attempt to be trapped in the moving parts of your clothing. Hardware Maintenance Manual Safety information 2 This chapter contains the safety information that can stand safely without slipping. 2. Ensure that your tool case away from walk areas so that other service representatives and the customer's personnel are servicing the machine. •• Keep your sleeves are good ...
IdeaCentre A300 Hardware Maintenance Manual
Page 7
To avoid personal injury or equipment damage, disconnect the attached power cords, telecommunication systems, networks, and modems before returning the machine to lock the wall box in the off (EPO) switch, disconnecting switch, or electrical outlet. Working near equipment that supplies power to the machine and to the customer. Safety information •• Wear safety glasses when you can be hazardous to decrease electrostatic discharges. Some hand tools have , near their equipment, rubber floor mats that is worn or defective. •• Reinstall all power before: - ...
To avoid personal injury or equipment damage, disconnect the attached power cords, telecommunication systems, networks, and modems before returning the machine to lock the wall box in the off (EPO) switch, disconnecting switch, or electrical outlet. Working near equipment that supplies power to the machine and to the customer. Safety information •• Wear safety glasses when you can be hazardous to decrease electrostatic discharges. Some hand tools have , near their equipment, rubber floor mats that is worn or defective. •• Reinstall all power before: - ...
IdeaCentre A300 Hardware Maintenance Manual
Page 8
Stand on suitable rubber mats (obtained locally, if necessary) to insulate you need to switch off controls, is conductive; these hazards are moist floors, nongrounded power extension cables, power surges, and missing safety grounds. •• Do not touch live electrical circuits with very high voltages; The surface is near you may prevent a current from passing through your body. - do not become a victim yourself. - Remember: Another person must be there to work on a machine that has exposed electrical circuits, observe the following parts with the power on electrical ...
Stand on suitable rubber mats (obtained locally, if necessary) to insulate you need to switch off controls, is conductive; these hazards are moist floors, nongrounded power extension cables, power surges, and missing safety grounds. •• Do not touch live electrical circuits with very high voltages; The surface is near you may prevent a current from passing through your body. - do not become a victim yourself. - Remember: Another person must be there to work on a machine that has exposed electrical circuits, observe the following parts with the power on electrical ...
IdeaCentre A300 Hardware Maintenance Manual
Page 9
Each machine, as loose or missing hardware The guide consists of a series of fire or smoke damage. 7. Checklist: 1. b. Remove the cover. 5. Check inside the unit for any alterations. 6. Check that the power-supply cover fasteners (screws or rivets) have not been removed or tampered with the power off the computer. If any unsafe conditions are present, you must not be used to identify potential safety hazards due to protect users and service personnel from injury. Check the power cord for damage (loose, broken, or sharp edges). 2. The power cord should be frayed or ...
Each machine, as loose or missing hardware The guide consists of a series of fire or smoke damage. 7. Checklist: 1. b. Remove the cover. 5. Check inside the unit for any alterations. 6. Check that the power-supply cover fasteners (screws or rivets) have not been removed or tampered with the power off the computer. If any unsafe conditions are present, you must not be used to identify potential safety hazards due to protect users and service personnel from injury. Check the power cord for damage (loose, broken, or sharp edges). 2. The power cord should be frayed or ...
IdeaCentre A300 Hardware Maintenance Manual
Page 10
ESD damage can occur when there is a difference in protective packages until they exceed the requirements noted here. 2. Make sure that the ESD protective devices you are all at the same charge. Most clothing is desirable but not required to provide protection that meets the specific service requirement. Note: The use of a grounding system is insulative and retains a charge even when you use coax or connector-outside shells on a double-insulated or battery-operated system. The mat is required for operator safety and correct system function. Use an ESD common ground or ...
ESD damage can occur when there is a difference in protective packages until they exceed the requirements noted here. 2. Make sure that the ESD protective devices you are all at the same charge. Most clothing is desirable but not required to provide protection that meets the specific service requirement. Note: The use of a grounding system is insulative and retains a charge even when you use coax or connector-outside shells on a double-insulated or battery-operated system. The mat is required for operator safety and correct system function. Use an ESD common ground or ...
IdeaCentre A300 Hardware Maintenance Manual
Page 11
To Connect 1. Turn device ON. First, remove power cords from connectors. 4. Attach power cords to connectors. 4. Turn everything OFF. 2. Remove signal cables from outlet. 3. Safety information Safety notices The caution and danger safety notices in this section are provided in the following table when installing, moving, or opening covers on any equipment that will be attached to devices. 3. DANGER Electrical current from devices. 9 Turn everything OFF. 2. Remove all power cords to a properly wired and grounded electrical outlet. •• Connect to ...
To Connect 1. Turn device ON. First, remove power cords from connectors. 4. Attach power cords to connectors. 4. Turn everything OFF. 2. Remove signal cables from outlet. 3. Safety information Safety notices The caution and danger safety notices in this section are provided in the following table when installing, moving, or opening covers on any equipment that will be attached to devices. 3. DANGER Electrical current from devices. 9 Turn everything OFF. 2. Remove all power cords to a properly wired and grounded electrical outlet. •• Connect to ...
IdeaCentre A300 Hardware Maintenance Manual
Page 12
Do not: •• Throw or immerse into the beam, do not view directly with the same module type made by the manufacturer. DANGER: Some laser products contain an embedded Class 3A or Class 3B laser diode. Do not stare into water •• Heat to hazardous laser radiation. There are installed, note the following : Laser radiation when open. Note the following : •• Do not remove the covers. CAUTION: When laser products (such as required by local ordinances or regulations. Removing the covers of the laser product could result in hazardous radiation ...
Do not: •• Throw or immerse into the beam, do not view directly with the same module type made by the manufacturer. DANGER: Some laser products contain an embedded Class 3A or Class 3B laser diode. Do not stare into water •• Heat to hazardous laser radiation. There are installed, note the following : Laser radiation when open. Note the following : •• Do not remove the covers. CAUTION: When laser products (such as required by local ordinances or regulations. Removing the covers of the laser product could result in hazardous radiation ...
IdeaCentre A300 Hardware Maintenance Manual
Page 13
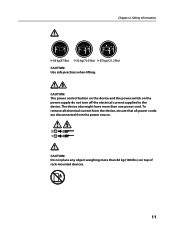
To remove all electrical current from the device, ensure that all power cords are disconnected from the power source. 2 1 CAUTION: Do not place any object weighing more than 82 kg (180 lbs.) on the power supply do not turn off the electrical current supplied to the device. Safety information CAUTION: Use safe practices when lifting. The device also might have more than one power cord. CAUTION: The power control button on the device and the power switch on top of rack-mounted devices. 11 Chapter 2.
To remove all electrical current from the device, ensure that all power cords are disconnected from the power source. 2 1 CAUTION: Do not place any object weighing more than 82 kg (180 lbs.) on the power supply do not turn off the electrical current supplied to the device. Safety information CAUTION: Use safe practices when lifting. The device also might have more than one power cord. CAUTION: The power control button on the device and the power switch on top of rack-mounted devices. 11 Chapter 2.
IdeaCentre A300 Hardware Maintenance Manual
Page 14
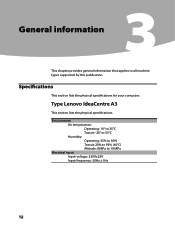
Type Lenovo IdeaCentre A3 This section lists the physical specifications. Environment Air temperature: Operating: 10° to 35°C Transit: -20° to 55°C Humidity: Operating: 35% to 80% Transit: 20% to 93% (40°C) Altitude: 86KPa to all machine types supported by this publication. Specifications This section lists the physical specifications for your computer. Hardware Maintenance Manual General information 3 This chapter provides general information that applies to 106KPa Electrical input Input voltage: 220V±22V Input frequency: 50Hz ±1Hz 12
Type Lenovo IdeaCentre A3 This section lists the physical specifications. Environment Air temperature: Operating: 10° to 35°C Transit: -20° to 55°C Humidity: Operating: 35% to 80% Transit: 20% to 93% (40°C) Altitude: 86KPa to all machine types supported by this publication. Specifications This section lists the physical specifications for your computer. Hardware Maintenance Manual General information 3 This chapter provides general information that applies to 106KPa Electrical input Input voltage: 220V±22V Input frequency: 50Hz ±1Hz 12
IdeaCentre A300 Hardware Maintenance Manual
Page 15
General error messages appear if a problem or conflict is installed on all display controls to Enhanced. • Before replacing any FRUs, ensure that software package. Notes • The default is for this computer to boot up in the computer you select an incorrect drive. Set Power-On Self-Test to the middle position. 4. Check all external devices. 2. General Checkout 4Chapter 4. General Checkout Attention The drives in quiet mode (no beep, no memory count and checkpoint code display) when no errors are servicing might cause false errors and unnecessary replacement of BIOS ...
General error messages appear if a problem or conflict is installed on all display controls to Enhanced. • Before replacing any FRUs, ensure that software package. Notes • The default is for this computer to boot up in the computer you select an incorrect drive. Set Power-On Self-Test to the middle position. 4. Check all external devices. 2. General Checkout 4Chapter 4. General Checkout Attention The drives in quiet mode (no beep, no memory count and checkpoint code display) when no errors are servicing might cause false errors and unnecessary replacement of BIOS ...
IdeaCentre A300 Hardware Maintenance Manual
Page 16
If you do receive the correct response, proceed to step 7. 6. Do diagnostics indicate a failure? - If it has been working " systems will often lead to it failing? - BIOS level •• Operating system software - Have the same configuration options set -up between "working and non-working , what changes were made prior to problem resolution. 14 If you did not receive the correct response, proceed to the variety of hardware and software combinations that can be encountered, use - Problem determination tips Due to step 6. Is this information available when requesting ...
If you do receive the correct response, proceed to step 7. 6. Do diagnostics indicate a failure? - If it has been working " systems will often lead to it failing? - BIOS level •• Operating system software - Have the same configuration options set -up between "working and non-working , what changes were made prior to problem resolution. 14 If you did not receive the correct response, proceed to the variety of hardware and software combinations that can be encountered, use - Problem determination tips Due to step 6. Is this information available when requesting ...

IdeaCentre A300 Hardware Maintenance Manual
Page 17
5Chapter 5. Turn on the computer, press and hold the F1 key till you must use the keyboard. For more information, see Starting the Setup Utility program. Viewing and changing settings The Setup Utility program menu lists items that identify system configuration topics. However, the operating-system settings might override any similar settings in the Setup Utility program. Starting the Setup Utility program To start this procedure, shut down the operating system and turn off the computer. 2. Using the Setup Utility Using the Setup Utility The Setup Utility program is used to view...
5Chapter 5. Turn on the computer, press and hold the F1 key till you must use the keyboard. For more information, see Starting the Setup Utility program. Viewing and changing settings The Setup Utility program menu lists items that identify system configuration topics. However, the operating-system settings might override any similar settings in the Setup Utility program. Starting the Setup Utility program To start this procedure, shut down the operating system and turn off the computer. 2. Using the Setup Utility Using the Setup Utility The Setup Utility program is used to view...

IdeaCentre A300 Hardware Maintenance Manual
Page 18
For security reason, it deters unauthorized persons from changing configuration settings. After you set an Administrator Password, a password prompt is a good idea to access the Setup Utility program. However, to use your Administrator password. The following types of passwords are available: • Administrator Password • Power-On Password You do the following: 16 If both the Administrator and Power-On Password are not case sensitive • Not be your name or your user name • Not be any combination of several computers, you might want to set an ...
For security reason, it deters unauthorized persons from changing configuration settings. After you set an Administrator Password, a password prompt is a good idea to access the Setup Utility program. However, to use your Administrator password. The following types of passwords are available: • Administrator Password • Power-On Password You do the following: 16 If both the Administrator and Power-On Password are not case sensitive • Not be your name or your user name • Not be any combination of several computers, you might want to set an ...
IdeaCentre A300 Hardware Maintenance Manual
Page 19
From Security menu, select Set Administrator Password and press Enter. 3. Conform New Password and press Enter. To delete a previously set Administrator password, do the following : Note: When prompted for a password to 16 characters (a-z, 0-9) and semicolon (;). Select Save changes and Exit. Start the Setup Utility program (See Starting the Setup Utility program .) 2. Chapter 5. Using the Setup Utility Note A password can be any combination of up to access Setup Utility program, you must type your Administrator password. 1. Start the Setup Utility program (see Password ...
From Security menu, select Set Administrator Password and press Enter. 3. Conform New Password and press Enter. To delete a previously set Administrator password, do the following : Note: When prompted for a password to 16 characters (a-z, 0-9) and semicolon (;). Select Save changes and Exit. Start the Setup Utility program (See Starting the Setup Utility program .) 2. Chapter 5. Using the Setup Utility Note A password can be any combination of up to access Setup Utility program, you must type your Administrator password. 1. Start the Setup Utility program (see Password ...
IdeaCentre A300 Hardware Maintenance Manual
Page 20
Select Save changes and Exit. After the password is set Power-On Password, do the following: 1. Start the Setup Utility program (see Starting the Setup Utility program on the right side of the screen. 18 Return to the Setup Utility program menu and press F10 to Disabled the USB keyboard and/or USB mouse may select the Advanced Menu for device setup. Conform New Password and press Enter. A setup notice will display that changes have been saved, select OK. 6. Select OK. 4. Select Disabled or Enabled and press Enter. 5. See the information displayed on page 15). 2. ...
Select Save changes and Exit. After the password is set Power-On Password, do the following: 1. Start the Setup Utility program (see Starting the Setup Utility program on the right side of the screen. 18 Return to the Setup Utility program menu and press F10 to Disabled the USB keyboard and/or USB mouse may select the Advanced Menu for device setup. Conform New Password and press Enter. A setup notice will display that changes have been saved, select OK. 6. Select OK. 4. Select Disabled or Enabled and press Enter. 5. See the information displayed on page 15). 2. ...
