User Guide
Page 3
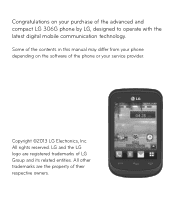
Copyright ©2013 LG Electronics, Inc. LG and the LG logo are the property of their respective owners. Congratulations on the software of the phone or your purchase of LG Group and its related entities. All other trademarks are registered trademarks of the advanced and compact LG 306G phone by LG, designed to operate with the latest digital mobile communication technology. All rights reserved. Some of the contents in this manual may differ from your phone depending on your service provider.
Copyright ©2013 LG Electronics, Inc. LG and the LG logo are the property of their respective owners. Congratulations on the software of the phone or your purchase of LG Group and its related entities. All other trademarks are registered trademarks of the advanced and compact LG 306G phone by LG, designed to operate with the latest digital mobile communication technology. All rights reserved. Some of the contents in this manual may differ from your phone depending on your service provider.
User Guide
Page 4
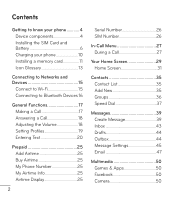
... components 4 Installing the SIM Card and Battery 6 Charging your phone 10 Installing a memory card 11 Icon Glossary 13 Connecting to Networks and Devices 15 Connect to Wi-Fi 15 Connecting to Bluetooth Devices.16 General ... Making a Call 17 Answering a Call 18 Adjusting the Volume 18 Setting Profiles 19 Entering Text 20 Prepaid 25 Add Airtime 25 Buy Airtime 25 My Phone Number 25 My Airtime Info 25 Airtime Display 25 2 Serial Number 26 SIM Number 26 In-Call Menu 27 During a Call 27 Your Home Screen...
... components 4 Installing the SIM Card and Battery 6 Charging your phone 10 Installing a memory card 11 Icon Glossary 13 Connecting to Networks and Devices 15 Connect to Wi-Fi 15 Connecting to Bluetooth Devices.16 General ... Making a Call 17 Answering a Call 18 Adjusting the Volume 18 Setting Profiles 19 Entering Text 20 Prepaid 25 Add Airtime 25 Buy Airtime 25 My Phone Number 25 My Airtime Info 25 Airtime Display 25 2 Serial Number 26 SIM Number 26 In-Call Menu 27 During a Call 27 Your Home Screen...
User Guide
Page 5
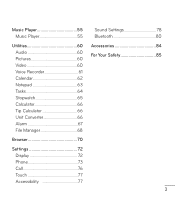
Music Player 55 Music Player 55 Utilities 60 Audio 60 Pictures 60 Video 60 Voice Recorder 61 Calendar 62 Notepad 63 Tasks 64 Stopwatch 65 Calculator 66 Tip Calculator 66 Unit Converter 66 Alarm 67 File Manager 68 Browser 70 Settings 72 Display 72 Phone 73 Call 76 Touch 77 Accessibility 77 Sound Settings 78 Bluetooth 80 Accessories 84 For Your Safety 85 3
Music Player 55 Music Player 55 Utilities 60 Audio 60 Pictures 60 Video 60 Voice Recorder 61 Calendar 62 Notepad 63 Tasks 64 Stopwatch 65 Calculator 66 Tip Calculator 66 Unit Converter 66 Alarm 67 File Manager 68 Browser 70 Settings 72 Display 72 Phone 73 Call 76 Touch 77 Accessibility 77 Sound Settings 78 Bluetooth 80 Accessories 84 For Your Safety 85 3
User Guide
Page 6
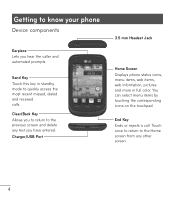
Charger/USB Port 3.5 mm Headset Jack Home Screen Displays phone status icons, menu items, web items, web information, pictures and more in standby mode to the Home screen from any text you hear the caller .... Touch once to return to quickly access the most recent missed, dialed and received calls. Clear/Back Key Allows you to return to know your phone Device components Earpiece Lets you have entered. Getting to the previous screen and delete any other screen. 4
Charger/USB Port 3.5 mm Headset Jack Home Screen Displays phone status icons, menu items, web items, web information, pictures and more in standby mode to the Home screen from any text you hear the caller .... Touch once to return to quickly access the most recent missed, dialed and received calls. Clear/Back Key Allows you to return to know your phone Device components Earpiece Lets you have entered. Getting to the previous screen and delete any other screen. 4
User Guide
Page 7
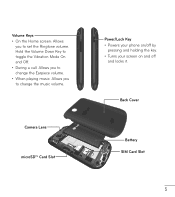
Hold the Volume Down Key to toggle the Vibration Mode On and Off. • During a call: Allows you to change the Earpiece volume. • When playing music: Allows you to change the music volume. Back Cover Battery SIM Card Slot 5 Camera Lens microSD™ Card Slot Power/Lock Key • Powers your phone on/off by pressing and holding the key. • Turns your screen on and off and locks it. Volume Keys • On the Home screen: Allows you to set the Ringtone volume.
Hold the Volume Down Key to toggle the Vibration Mode On and Off. • During a call: Allows you to change the Earpiece volume. • When playing music: Allows you to change the music volume. Back Cover Battery SIM Card Slot 5 Camera Lens microSD™ Card Slot Power/Lock Key • Powers your phone on/off by pressing and holding the key. • Turns your screen on and off and locks it. Volume Keys • On the Home screen: Allows you to set the Ringtone volume.

User Guide
Page 8
With the other hand, lift the back cover using the fingertip cutout located at the bottom. 6 Getting to know your phone Installing the SIM Card and Battery Remove the back cover Hold the phone on your hand firmly.
With the other hand, lift the back cover using the fingertip cutout located at the bottom. 6 Getting to know your phone Installing the SIM Card and Battery Remove the back cover Hold the phone on your hand firmly.
User Guide
Page 10
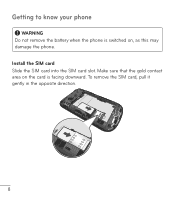
Getting to know your phone WARNING Do not remove the battery when the phone is switched on the card is facing downward. Make sure that the gold contact area on , as this may damage the phone. Install the SIM card Slide the SIM card into the SIM card slot. To remove the SIM card, pull it gently in the opposite direction. 8
Getting to know your phone WARNING Do not remove the battery when the phone is switched on the card is facing downward. Make sure that the gold contact area on , as this may damage the phone. Install the SIM card Slide the SIM card into the SIM card slot. To remove the SIM card, pull it gently in the opposite direction. 8

User Guide
Page 11
Install the back cover Align the back cover over the battery compartment and press it down until it clicks into place. 9 Ensure that the battery contacts align with the terminals on the phone. Install the battery Insert the top of the battery first into the top edge of the battery down until it clicks into place. Press the bottom of the battery compartment.
Install the back cover Align the back cover over the battery compartment and press it down until it clicks into place. 9 Ensure that the battery contacts align with the terminals on the phone. Install the battery Insert the top of the battery first into the top edge of the battery down until it clicks into place. Press the bottom of the battery compartment.
User Guide
Page 12
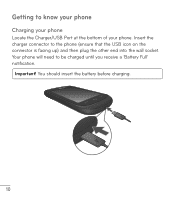
Getting to be charged until you receive a 'Battery Full' notification. Important! You should insert the battery before charging. 10 Your phone will need to know your phone Charging your phone Locate the Charger/USB Port at the bottom of your phone. Insert the charger connector to the phone (ensure that the USB icon on the connector is facing up) and then plug the other end into the wall socket.
Getting to be charged until you receive a 'Battery Full' notification. Important! You should insert the battery before charging. 10 Your phone will need to know your phone Charging your phone Locate the Charger/USB Port at the bottom of your phone. Insert the charger connector to the phone (ensure that the USB icon on the connector is facing up) and then plug the other end into the wall socket.
User Guide
Page 13
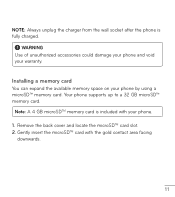
WARNING Use of unauthorized accessories could damage your phone and void your phone. 1. Gently insert the microSDTM card with your warranty. Note: A 4 GB microSDTM memory card is fully charged. Remove the back cover and locate the microSDTM card slot. 2. Installing a memory card You can expand the available memory space on your phone by using a microSD™ memory card. Your phone supports up to a 32 GB microSD™ memory card. NOTE: Always unplug the charger from the wall socket after the phone is included with the gold contact area facing downwards. 11
WARNING Use of unauthorized accessories could damage your phone and void your phone. 1. Gently insert the microSDTM card with your warranty. Note: A 4 GB microSDTM memory card is fully charged. Remove the back cover and locate the microSDTM card slot. 2. Installing a memory card You can expand the available memory space on your phone by using a microSD™ memory card. Your phone supports up to a 32 GB microSD™ memory card. NOTE: Always unplug the charger from the wall socket after the phone is included with the gold contact area facing downwards. 11
User Guide
Page 14
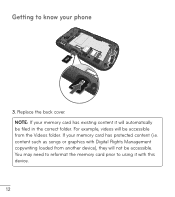
NOTE: If your memory card has existing content it with Digital Rights Management copywriting loaded from the Videos folder. content such as songs or graphics with this device. 12 If your phone 3. For example, videos will automatically be accessible. You may need to reformat the memory card prior to know your memory card has protected content (i.e. Getting to using it will be accessible from another device), they will not be filed in the correct folder. Replace the back cover.
NOTE: If your memory card has existing content it with Digital Rights Management copywriting loaded from the Videos folder. content such as songs or graphics with this device. 12 If your phone 3. For example, videos will automatically be accessible. You may need to reformat the memory card prior to know your memory card has protected content (i.e. Getting to using it will be accessible from another device), they will not be filed in the correct folder. Replace the back cover.
User Guide
Page 15
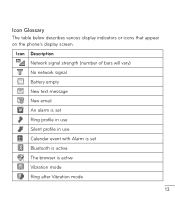
Icon Description Network signal strength (number of bars will vary) No network signal Battery empty New text message New email An alarm is set Ring profile in use Silent profile in use Calendar event with Alarm is set Bluetooth is active The browser is active Vibration mode Ring after Vibration mode 13 Icon Glossary The table below describes various display indicators or icons that appear on the phone's display screen.
Icon Description Network signal strength (number of bars will vary) No network signal Battery empty New text message New email An alarm is set Ring profile in use Silent profile in use Calendar event with Alarm is set Bluetooth is active The browser is active Vibration mode Ring after Vibration mode 13 Icon Glossary The table below describes various display indicators or icons that appear on the phone's display screen.

User Guide
Page 16
Getting to know your phone Icon Description Ring and Vibration mode Speakerphone Call in Progress Voicemail Battery Full Battery Charging Airplane Mode Wi-Fi is connected 14
Getting to know your phone Icon Description Ring and Vibration mode Speakerphone Call in Progress Voicemail Battery Full Battery Charging Airplane Mode Wi-Fi is connected 14
User Guide
Page 17
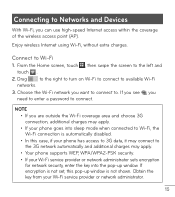
... Networks and Devices With Wi-Fi, you are outside the Wi-Fi coverage area and choose 3G connection, additional charges may apply. • If your phone goes into sleep mode when connected to Wi-Fi, the Wi-Fi connection is automatically disabled. • In this case, if your... access to 3G data, it may connect to the 3G network automatically and additional charges may apply. • Your phone supports WEP, WPA/WPA2-PSK security. • If your Wi-Fi service provider or network administrator. 15 NOTE • If you can use high-speed ...
... Networks and Devices With Wi-Fi, you are outside the Wi-Fi coverage area and choose 3G connection, additional charges may apply. • If your phone goes into sleep mode when connected to Wi-Fi, the Wi-Fi connection is automatically disabled. • In this case, if your... access to 3G data, it may connect to the 3G network automatically and additional charges may apply. • Your phone supports WEP, WPA/WPA2-PSK security. • If your Wi-Fi service provider or network administrator. 15 NOTE • If you can use high-speed ...

User Guide
Page 18
... . 2. Enter the desired name and touch Set. Drag to turn Bluetooth on or off 1. Making your phone's name 1. Touch My Bluetooth Info, then touch My Device Visibility. 3. Set the desired option. 16 Changing your phone visible to Bluetooth Devices To turn the function on or off . Access the Bluetooth menu and turn...
... . 2. Enter the desired name and touch Set. Drag to turn Bluetooth on or off 1. Making your phone's name 1. Touch My Bluetooth Info, then touch My Device Visibility. 3. Set the desired option. 16 Changing your phone visible to Bluetooth Devices To turn the function on or off . Access the Bluetooth menu and turn...

User Guide
Page 19
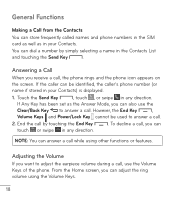
To edit a number, simply touch to erase the entire number. 3. Enter the country code, area code and the phone number. 3. Touch and enter a phone number using the dial pad, touch and hold to erase one digit at a time. ƬƬTouch and hold . 2. Select the desired number. ... Send Key to call the number. When using the dial pad. Or touch . Touch the Send Key and the most recent missed, dialed and received phone calls will be displayed. 2. General Functions Making a Call 1. Make sure your Recent Calls 1. Touch the Send Key or touch . Touch the Send ...
To edit a number, simply touch to erase the entire number. 3. Enter the country code, area code and the phone number. 3. Touch and enter a phone number using the dial pad, touch and hold to erase one digit at a time. ƬƬTouch and hold . 2. Select the desired number. ... Send Key to call the number. When using the dial pad. Or touch . Touch the Send Key and the most recent missed, dialed and received phone calls will be displayed. 2. General Functions Making a Call 1. Make sure your Recent Calls 1. Touch the Send Key or touch . Touch the Send ...
User Guide
Page 20
... , you can dial a number by touching the End Key . If Any Key has been set as in your Contacts) is displayed. 1. To decline a call , the phone rings and the phone icon appears on the screen. General Functions Making a Call from the Contacts You can store frequently called names and... the caller can be used to answer a call . 2. However, the End Key , Volume Keys and Power/Lock Key cannot be identified, the caller's phone number (or name if stored in any direction. Answering a Call When you want to adjust the earpiece volume during a call, use the Clear/Back Key ...
... , you can dial a number by touching the End Key . If Any Key has been set as in your Contacts) is displayed. 1. To decline a call , the phone rings and the phone icon appears on the screen. General Functions Making a Call from the Contacts You can store frequently called names and... the caller can be used to answer a call . 2. However, the End Key , Volume Keys and Power/Lock Key cannot be identified, the caller's phone number (or name if stored in any direction. Answering a Call When you want to adjust the earpiece volume during a call, use the Clear/Back Key ...
User Guide
Page 21
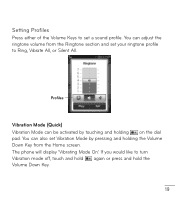
Setting Profiles Press either of the Volume Keys to turn Vibration mode off, touch and hold again or press and hold the Volume Down Key. 19 The phone will display 'Vibrating Mode On'. If you would like to set your ringtone profile to Ring, Vibrate All, or Silent All. You can also set Vibration Mode by touching and holding the Volume Down Key from the Ringtone section and set a sound profile. You can be activated by pressing and holding on the dial pad. Profiles Vibration Mode (Quick) Vibration Mode can adjust the ringtone volume from the Home screen.
Setting Profiles Press either of the Volume Keys to turn Vibration mode off, touch and hold again or press and hold the Volume Down Key. 19 The phone will display 'Vibrating Mode On'. If you would like to set your ringtone profile to Ring, Vibrate All, or Silent All. You can also set Vibration Mode by touching and holding the Volume Down Key from the Ringtone section and set a sound profile. You can be activated by pressing and holding on the dial pad. Profiles Vibration Mode (Quick) Vibration Mode can adjust the ringtone volume from the Home screen.

User Guide
Page 22
... of your input method settings. Symbols/Numbers Mode This mode allows you better reception. General Functions Signal Strength If you are available on your phone's display screen. Changing Between Letters and Symbols/Numbers Mode You can change the text input mode by touching and on your signal by the ...signal indicator on the phone. Letters Mode This mode allows you to enter letters by using the phone's touch pad. To change the input method, touch , then select Input Method and choose from Keyboard or ...
... of your input method settings. Symbols/Numbers Mode This mode allows you better reception. General Functions Signal Strength If you are available on your phone's display screen. Changing Between Letters and Symbols/Numbers Mode You can change the text input mode by touching and on your signal by the ...signal indicator on the phone. Letters Mode This mode allows you to enter letters by using the phone's touch pad. To change the input method, touch , then select Input Method and choose from Keyboard or ...
User Guide
Page 23
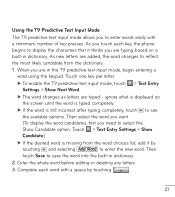
.... As you touch each word with a minimum number of key presses. Enter the whole word before editing or deleting any letters. 3. Complete each key, the phone begins to select the Show Candidate option. Then select the word you want. (To display the word candidates, first you need to display the characters...
.... As you touch each word with a minimum number of key presses. Enter the whole word before editing or deleting any letters. 3. Complete each key, the phone begins to select the Show Candidate option. Then select the word you want. (To display the word candidates, first you need to display the characters...


