Use & Care Guide
Page 2
TABLE OF CONTENTS BUILT-IN MICROWAVE OVEN SAFETY 3 Electrical Requirements 4 PARTS AND FEATURES 5 Turntable 5 MICROWAVE OVEN CONTROL 5 Display 5 Start 6 Cancel/Off 6 Add a Minute 6 Dial 6 Select 6 Clock 6 Tones 6 Demo Mode 6 Control Lock 7 Cooling Fan 7 MICROWAVE OVEN USE 7 Food Characteristics 7 Cooking Guidelines 7 Cookware and Dinnerware 8 Aluminum Foil and Metal 8 Microwave Cooking Power 8 Cook Time Set 9 Doneness 9 Meal Prep Cook 9 Meal Prep...
TABLE OF CONTENTS BUILT-IN MICROWAVE OVEN SAFETY 3 Electrical Requirements 4 PARTS AND FEATURES 5 Turntable 5 MICROWAVE OVEN CONTROL 5 Display 5 Start 6 Cancel/Off 6 Add a Minute 6 Dial 6 Select 6 Clock 6 Tones 6 Demo Mode 6 Control Lock 7 Cooling Fan 7 MICROWAVE OVEN USE 7 Food Characteristics 7 Cooking Guidelines 7 Cookware and Dinnerware 8 Aluminum Foil and Metal 8 Microwave Cooking Power 8 Cook Time Set 9 Doneness 9 Meal Prep Cook 9 Meal Prep...

Use & Care Guide
Page 5
... FEATURES This manual may have some or all of the features shown here. Metal shielded window I H G A. MICROWAVE OVEN CONTROL A A. When the microwave oven is not in this manual. Glass turntable F. Microwave inlet cover A B C A. When the microwave oven is first supplied to the microwave oven, a ":" will be active in either direction to stop the blinking. For best cooking results, do not...
... FEATURES This manual may have some or all of the features shown here. Metal shielded window I H G A. MICROWAVE OVEN CONTROL A A. When the microwave oven is not in this manual. Glass turntable F. Microwave inlet cover A B C A. When the microwave oven is first supplied to the microwave oven, a ":" will be active in either direction to stop the blinking. For best cooking results, do not...

Use & Care Guide
Page 6
...■ Between cooking cycle and warming cycle Fifteen tones ■ Error Demo Mode The Demo Mode is turned on , the fan will run, and the turntable will appear, with the hour flashing. 2. To Cancel Clock: 1. Tones Tones are changing the time, the current set the hour. 3. Three short tones... the cook time, and the sensor animation is interrupted, touching START will appear in the display. Turn the dial to resume the cycle. The microwave oven light will come on while in the display. Touch and hold COOK for 5 seconds. The ":" will appear in the display when the clock-...
...■ Between cooking cycle and warming cycle Fifteen tones ■ Error Demo Mode The Demo Mode is turned on , the fan will run, and the turntable will appear, with the hour flashing. 2. To Cancel Clock: 1. Tones Tones are changing the time, the current set the hour. 3. Three short tones... the cook time, and the sensor animation is interrupted, touching START will appear in the display. Turn the dial to resume the cycle. The microwave oven light will come on while in the display. Touch and hold COOK for 5 seconds. The ":" will appear in the display when the clock-...
Use & Care Guide
Page 7
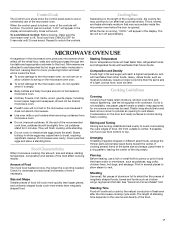
.... Standing Time Food will heat faster than frozen foods. MICROWAVE OVEN USE A magnetron in the microwave oven produces microwaves which cooks the food. ■ To avoid damage to the microwave oven, do not operate when it is off the metal floor, walls and ceiling and pass through the turntable and appropriate cookware to top. Starting Temperature Room temperature...
.... Standing Time Food will heat faster than frozen foods. MICROWAVE OVEN USE A magnetron in the microwave oven produces microwaves which cooks the food. ■ To avoid damage to the microwave oven, do not operate when it is off the metal floor, walls and ceiling and pass through the turntable and appropriate cookware to top. Starting Temperature Room temperature...
Use & Care Guide
Page 8
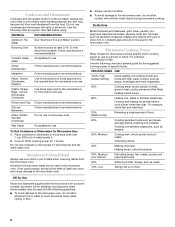
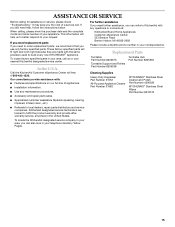
... water stays cool. Pottery and Clay Follow manufacturer's recommendations. To Test Cookware or Dinnerware for use the turntable. ■ To avoid damage to the microwave oven, do not allow contact with 1 cup (250 mL) of specific foods. Do Not Use Metal cookware...Cookware and Dinnerware Cookware and dinnerware must be used in the microwave oven. Silicone Bakeware Follow manufacturer's recommendations. Straw, Wicker, Wooden Containers Do not use cookware and dinnerware with the microwave oven (on the turntable. For example, whole fish and meat loaf. 70%, Medium...
... water stays cool. Pottery and Clay Follow manufacturer's recommendations. To Test Cookware or Dinnerware for use the turntable. ■ To avoid damage to the microwave oven, do not allow contact with 1 cup (250 mL) of specific foods. Do Not Use Metal cookware...Cookware and Dinnerware Cookware and dinnerware must be used in the microwave oven. Silicone Bakeware Follow manufacturer's recommendations. Straw, Wicker, Wooden Containers Do not use cookware and dinnerware with the microwave oven (on the turntable. For example, whole fish and meat loaf. 70%, Medium...
Use & Care Guide
Page 11
.... 2. For best cooking results, do not use regular paper bags or glassware. If using a microwave popcorn popper, follow directions on package. Place item on paper towel, around turntable edges, at all microwave cooking functions, the microwave oven should be canceled. The microwave oven will sound, followed by the sensor. See "Doneness" section. The display will appear in...
.... 2. For best cooking results, do not use regular paper bags or glassware. If using a microwave popcorn popper, follow directions on package. Place item on paper towel, around turntable edges, at all microwave cooking functions, the microwave oven should be canceled. The microwave oven will sound, followed by the sensor. See "Doneness" section. The display will appear in...
Use & Care Guide
Page 13
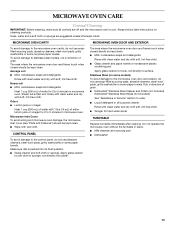
...detergent or all controls are suggested unless otherwise noted. Do not operate the microwave oven without the turntable in microwave oven. Soap, water and a soft cloth or sponge are off and the microwave oven is pushed into its flush position. ■ Glass cleaner and soft cloth...) KitchenAid® Stainless Steel Wipes (not included): See "Assistance or Service" section to surface. Rinse with clean water and dry with soft, lint-free cloth. Stainless Steel (on cleaning products. Microwave Inlet Cover To avoid arcing and microwave oven damage, the microwave inlet...
...detergent or all controls are suggested unless otherwise noted. Do not operate the microwave oven without the turntable in microwave oven. Soap, water and a soft cloth or sponge are off and the microwave oven is pushed into its flush position. ■ Glass cleaner and soft cloth...) KitchenAid® Stainless Steel Wipes (not included): See "Assistance or Service" section to surface. Rinse with clean water and dry with soft, lint-free cloth. Stainless Steel (on cleaning products. Microwave Inlet Cover To avoid arcing and microwave oven damage, the microwave inlet...
Use & Care Guide
Page 14
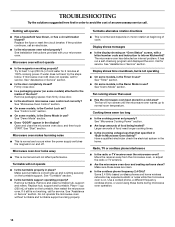
.../number code and instruction to inform KitchenAid? See "Microwave Oven Control" section. ■ On some models, is on some models, is normal and will run a self-checking program and displayed the error. Microwave oven makes humming noise ■ This is the Demo Mode in use ? See "Turntable" section. ■ Is the turntable support operating properly? Place 1 cup...
.../number code and instruction to inform KitchenAid? See "Microwave Oven Control" section. ■ On some models, is on some models, is normal and will run a self-checking program and displayed the error. Microwave oven makes humming noise ■ This is the Demo Mode in use ? See "Turntable" section. ■ Is the turntable support operating properly? Place 1 cup...
Use & Care Guide
Page 15
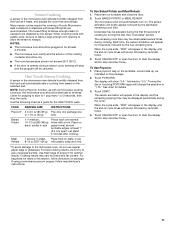
... your area, you need further assistance, you can also look in your request. Call the KitchenAid Customer eXperience Center toll free: 1-800-422-1230. Replacement Parts Turntable Part Number 8205676 Turntable Support and Rollers Part Number 8205538 Turntable Hub Part Number 8205539 Cleaning Supplies Heavy Duty Degreaser Part Number 31552 All-Purpose Appliance Cleaner...
... your area, you need further assistance, you can also look in your request. Call the KitchenAid Customer eXperience Center toll free: 1-800-422-1230. Replacement Parts Turntable Part Number 8205676 Turntable Support and Rollers Part Number 8205538 Turntable Hub Part Number 8205539 Cleaning Supplies Heavy Duty Degreaser Part Number 31552 All-Purpose Appliance Cleaner...
Installation Guide
Page 8
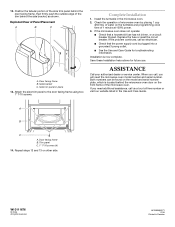
... the turntable in place 13. Replace the fuse or reset the circuit breaker. Installation is located behind the side bracket, as shown. Repeat steps 12 and 13 on the front frame of Panel Placement A B C A. Door facing frame B. Check the operation of microwave oven by ...outlet. s See the Use and Care Guide for future use. Door facing frame B. W10111676 © 2006. Exploded View of the microwave oven. Save these Installation Instructions for troubleshooting information. ASSISTANCE Call your authorized dealer or service center. If the problem continues, call us at ...
... the turntable in place 13. Replace the fuse or reset the circuit breaker. Installation is located behind the side bracket, as shown. Repeat steps 12 and 13 on the front frame of Panel Placement A B C A. Door facing frame B. Check the operation of microwave oven by ...outlet. s See the Use and Care Guide for future use. Door facing frame B. W10111676 © 2006. Exploded View of the microwave oven. Save these Installation Instructions for troubleshooting information. ASSISTANCE Call your authorized dealer or service center. If the problem continues, call us at ...

