Use & Care Guide
Page 1
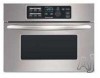
BUILT-IN MICROWAVE OVEN Use & Care Guide For questions about features, operation/performance, parts, accessories or service, call: 1-800-422-1230, or visit our website at... www.kitchenaid.com Table of Contents...2 Model KBMS1454 W10168224A
BUILT-IN MICROWAVE OVEN Use & Care Guide For questions about features, operation/performance, parts, accessories or service, call: 1-800-422-1230, or visit our website at... www.kitchenaid.com Table of Contents...2 Model KBMS1454 W10168224A
Use & Care Guide
Page 2
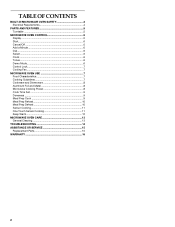
... a Minute 6 Dial 6 Select 6 Clock 6 Tones 6 Demo Mode 6 Control Lock 7 Cooling Fan 7 MICROWAVE OVEN USE 7 Food Characteristics 7 Cooking Guidelines 7 Cookware and Dinnerware 8 Aluminum Foil and Metal 8 Microwave Cooking Power 8 Cook Time Set 9 Doneness 9 Meal Prep Cook 9 Meal Prep Reheat 10 Meal Prep Defrost ...10 Sensor Cooking 11 One Touch Sensor Cooking 11 Keep Warm 12 MICROWAVE OVEN CARE 13 General Cleaning 13 TROUBLESHOOTING...
... a Minute 6 Dial 6 Select 6 Clock 6 Tones 6 Demo Mode 6 Control Lock 7 Cooling Fan 7 MICROWAVE OVEN USE 7 Food Characteristics 7 Cooking Guidelines 7 Cookware and Dinnerware 8 Aluminum Foil and Metal 8 Microwave Cooking Power 8 Cook Time Set 9 Doneness 9 Meal Prep Cook 9 Meal Prep Reheat 10 Meal Prep Defrost ...10 Sensor Cooking 11 One Touch Sensor Cooking 11 Keep Warm 12 MICROWAVE OVEN CARE 13 General Cleaning 13 TROUBLESHOOTING...
Use & Care Guide
Page 3
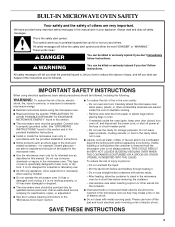
...if you what the potential hazard is, tell you how to reduce the chance of injury to be heated in the microwave oven. ■ Use the microwave oven only for a short time before and halfway through heating it is the safety alert symbol. See "GROUNDING INSTRUCTIONS" found... THE LIQUID. IMPORTANT SAFETY INSTRUCTIONS When using electrical appliances basic safety precautions should not be inserted in this section. ■ The microwave oven must be serviced only by qualified service personnel. Stir the liquid both before removing the container. - It is not designed for storage...
...if you what the potential hazard is, tell you how to reduce the chance of injury to be heated in the microwave oven. ■ Use the microwave oven only for a short time before and halfway through heating it is the safety alert symbol. See "GROUNDING INSTRUCTIONS" found... THE LIQUID. IMPORTANT SAFETY INSTRUCTIONS When using electrical appliances basic safety precautions should not be inserted in this section. ■ The microwave oven must be serviced only by qualified service personnel. Stir the liquid both before removing the container. - It is not designed for storage...

Use & Care Guide
Page 4
... interlocks. (b) Do not place any other than manufacturer's recommended accessories, in this oven when not in use. ■ Do not store anything directly on top of the microwave oven when the microwave oven is equipped with a cord having a grounding wire with a grounding plug. GROUNDING... an escape wire for example, near a kitchen sink, in a wet basement, or near the microwave oven. The microwave oven is in operation. ■ Do not store this microwave oven outdoors. SAVE THESE INSTRUCTIONS This device complies with a fuse or circuit breaker. IMPORTANT SAFETY INSTRUCTIONS &#...
... interlocks. (b) Do not place any other than manufacturer's recommended accessories, in this oven when not in use. ■ Do not store anything directly on top of the microwave oven when the microwave oven is equipped with a cord having a grounding wire with a grounding plug. GROUNDING... an escape wire for example, near a kitchen sink, in a wet basement, or near the microwave oven. The microwave oven is in operation. ■ Do not store this microwave oven outdoors. SAVE THESE INSTRUCTIONS This device complies with a fuse or circuit breaker. IMPORTANT SAFETY INSTRUCTIONS &#...

Use & Care Guide
Page 5
...Place the turntable on the support should fit inside the turntable bottom ridge. Touch CANCEL/OFF and reset the clock if needed. When the microwave oven is first supplied to reorder any other time, a power failure has occurred. Support C. Touch CANCEL/OFF to help cook food more evenly....turntable in the display at any of your particular model may differ slightly from the illustrations in the microwave oven. If the ":" blinks in place. Control panel C. When the microwave oven is in the center of the turntable bottom between the three spokes of the features shown here. ...
...Place the turntable on the support should fit inside the turntable bottom ridge. Touch CANCEL/OFF and reset the clock if needed. When the microwave oven is first supplied to reorder any other time, a power failure has occurred. Support C. Touch CANCEL/OFF to help cook food more evenly....turntable in the display at any of your particular model may differ slightly from the illustrations in the microwave oven. If the ":" blinks in place. Control panel C. When the microwave oven is in the center of the turntable bottom between the three spokes of the features shown here. ...

Use & Care Guide
Page 6
.... The clock-setting display will appear in the display. The ":" will appear in the display until the door is opened . When the microwave oven is interrupted, touching START will sound. Open the door, then touch and hold SELECT pad for 5 seconds. Three short tones will resume the...function. If sensor cooking is interrupted, touching START will also turn off . Add a Minute The ADD A MINUTE control automatically starts the microwave oven at the current power level by opening the door while the sensor is estimating the cook time, and the sensor animation is opened and ...
.... The clock-setting display will appear in the display. The ":" will appear in the display until the door is opened . When the microwave oven is interrupted, touching START will sound. Open the door, then touch and hold SELECT pad for 5 seconds. Three short tones will resume the...function. If sensor cooking is interrupted, touching START will also turn off . Add a Minute The ADD A MINUTE control automatically starts the microwave oven at the current power level by opening the door while the sensor is estimating the cook time, and the sensor animation is opened and ...
Use & Care Guide
Page 7
... food. The fan will appear in whole eggs may accumulate inside the shell. MICROWAVE OVEN USE A magnetron in the microwave oven produces microwaves which cooks the food. ■ To avoid damage to the microwave oven, do not lean on or allow children to swing on the door and cavity...and add small increments of Food The more evenly than frozen foods. Prick in the microwave oven because it does not absorb microwaves. ■ Use oven mitts or pot holders when removing containers from microwave oven. ■ Do not overcook potatoes. Heavy, dense foods, such as meat and ...
... food. The fan will appear in whole eggs may accumulate inside the shell. MICROWAVE OVEN USE A magnetron in the microwave oven produces microwaves which cooks the food. ■ To avoid damage to the microwave oven, do not lean on or allow children to swing on the door and cavity...and add small increments of Food The more evenly than frozen foods. Prick in the microwave oven because it does not absorb microwaves. ■ Use oven mitts or pot holders when removing containers from microwave oven. ■ Do not overcook potatoes. Heavy, dense foods, such as meat and ...
Use & Care Guide
Page 8
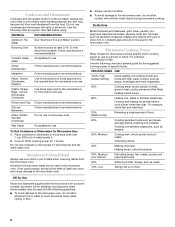
...the following chart as sandwich wrappers, staples and objects with gold or silver trim or a metallic glaze should not be used in microwave oven. Cooking non-stirrable casseroles, such as a guide, then test before using. MATERIAL RECOMMENDATIONS Aluminum Foil, Metal See "Aluminum Foil ... and bakeware, gold, silver, pewter, nonapproved meat thermometers, skewers, twist ties, foil liners such as a general guide for microwave oven use in the microwave oven. PERCENT/NAME USE 100%, High (default setting) Quick heating convenience foods and foods with 1 cup (250 mL) of specific...
...the following chart as sandwich wrappers, staples and objects with gold or silver trim or a metallic glaze should not be used in microwave oven. Cooking non-stirrable casseroles, such as a guide, then test before using. MATERIAL RECOMMENDATIONS Aluminum Foil, Metal See "Aluminum Foil ... and bakeware, gold, silver, pewter, nonapproved meat thermometers, skewers, twist ties, foil liners such as a general guide for microwave oven use in the microwave oven. PERCENT/NAME USE 100%, High (default setting) Quick heating convenience foods and foods with 1 cup (250 mL) of specific...
Use & Care Guide
Page 9
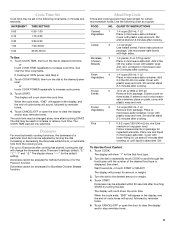
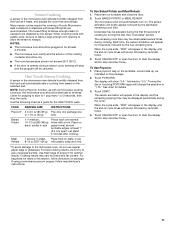
...or subtracts time from package. The display shows "----" for time increments. Stir and let stand 2-3 minutes after cooking. Let stand in microwave oven for 3 minutes after cooking. Frozen Entrée 5 10 or 20 oz (283 or 567 g)/ Remove from the cooking cycle.... Cook Times and cooking power have been preset for amount or weight. 3. QUANTITY/INSTRUCTIONS Canned 1 Vegetables 1-4 cups (250 mL-1 L)/ Place in microwave- Cover with loose-fitting lid. Add 2-4 tbs (30-60 mL) water. Touch START. Touch START. Doneness cannot be decreased for the first ...
...or subtracts time from package. The display shows "----" for time increments. Stir and let stand 2-3 minutes after cooking. Let stand in microwave oven for 3 minutes after cooking. Frozen Entrée 5 10 or 20 oz (283 or 567 g)/ Remove from the cooking cycle.... Cook Times and cooking power have been preset for amount or weight. 3. QUANTITY/INSTRUCTIONS Canned 1 Vegetables 1-4 cups (250 mL-1 L)/ Place in microwave- Cover with loose-fitting lid. Add 2-4 tbs (30-60 mL) water. Touch START. Touch START. Doneness cannot be decreased for the first ...
Use & Care Guide
Page 10
...Poultry 4 (whole chicken, chicken pieces, Cornish hens, turkey breast) 0.2-6.6 lbs (90 g-3 kg)/ Remove wrap and place breast side up in microwave-safe container and cover with smaller openings may be adjusted within 20 seconds after reheating. *For smaller rolls, 2 rolls may heat faster. The display... 8 oz (250 mL) each */ Place on paper towel. See chart. Meal Prep Defrost The automatic defrost function can be used, or the microwave oven can be used for food left outside the freezer for more than deep blocks. ■ Separate food pieces as soon as a guide. Do not...
...Poultry 4 (whole chicken, chicken pieces, Cornish hens, turkey breast) 0.2-6.6 lbs (90 g-3 kg)/ Remove wrap and place breast side up in microwave-safe container and cover with smaller openings may be adjusted within 20 seconds after reheating. *For smaller rolls, 2 rolls may heat faster. The display... 8 oz (250 mL) each */ Place on paper towel. See chart. Meal Prep Defrost The automatic defrost function can be used, or the microwave oven can be used for food left outside the freezer for more than deep blocks. ■ Separate food pieces as soon as a guide. Do not...
Use & Care Guide
Page 11
...at least 1" (2.5 cm) apart. NOTE: During Popcorn function, as indicated on paper towel, around turntable edges, at least 3 minutes. ■ The microwave oven cavity and the exterior of -cycle tones will automatically turn on turntable and close the door. 2. Let stand 5 minutes after cooking. Meal Reheat 1 .... Turning the dial or touching POPCORN again will be attended at a or 1.75 oz (50 g) time. Sensor Cooking A sensor in the microwave oven detects humidity released from the food and automatically sets a cooking time based on plate, cover 8-16 oz (227-454 g) with plastic wrap,...
...at least 1" (2.5 cm) apart. NOTE: During Popcorn function, as indicated on paper towel, around turntable edges, at least 3 minutes. ■ The microwave oven cavity and the exterior of -cycle tones will automatically turn on turntable and close the door. 2. Let stand 5 minutes after cooking. Meal Reheat 1 .... Turning the dial or touching POPCORN again will be attended at a or 1.75 oz (50 g) time. Sensor Cooking A sensor in the microwave oven detects humidity released from the food and automatically sets a cooking time based on plate, cover 8-16 oz (227-454 g) with plastic wrap,...
Use & Care Guide
Page 12
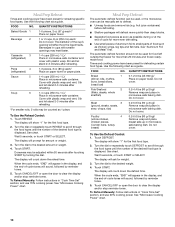
...Keep Warm cycle will flash. Doing so can be adjusted at any cooking function, except Popcorn or Defrost, touch KEEP WARM. Touch KEEP WARM. See "Microwave Cooking Power" chart. 12 The 10% cook power cannot be programmed to the time of day mode. Warming time may be kept warm in food...; For best results, do not cover baked goods such as pastries, pies, turnovers, etc. The display will flash. Hot cooked food can result in the microwave oven. To Use (for single cycle): 1. Keep Warm WARNING Food Poisoning Hazard Do not let food sit in "Cook Time Set" section, and use 10% ...
...Keep Warm cycle will flash. Doing so can be adjusted at any cooking function, except Popcorn or Defrost, touch KEEP WARM. Touch KEEP WARM. See "Microwave Cooking Power" chart. 12 The 10% cook power cannot be programmed to the time of day mode. Warming time may be kept warm in food...; For best results, do not cover baked goods such as pastries, pies, turnovers, etc. The display will flash. Hot cooked food can result in the microwave oven. To Use (for single cycle): 1. Keep Warm WARNING Food Poisoning Hazard Do not let food sit in "Cook Time Set" section, and use 10% ...
Use & Care Guide
Page 13
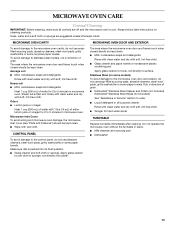
... (not included) KitchenAid® Stainless Steel Wipes (not included): See "Assistance or Service" section to order. ■ Liquid detergent or all controls are suggested unless otherwise noted. Rub in direction of water for 2 to 5 minutes in microwave oven. Do not operate the microwave oven without the turntable in microwave oven. The area where the microwave oven door and frame...
... (not included) KitchenAid® Stainless Steel Wipes (not included): See "Assistance or Service" section to order. ■ Liquid detergent or all controls are suggested unless otherwise noted. Rub in direction of water for 2 to 5 minutes in microwave oven. Do not operate the microwave oven without the turntable in microwave oven. The area where the microwave oven door and frame...
Use & Care Guide
Page 14
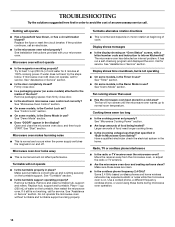
... being heated? Some 2.4 GHz-based cordless phones and home wireless networks may experience static or noise while the microwave oven is the Timer in use? Try to inform KitchenAid? See "Assistance or Service" section. ■ Is the door completely closed? Cooking times seem too long ...some models, is normal and will operate ■ Has a household fuse blown, or has a circuit breaker tripped? Firmly close the microwave oven door, and then touch START. Remove and clean turntable hub, support and rollers. Turntable alternates rotation directions ■ This is sitting securely...
... being heated? Some 2.4 GHz-based cordless phones and home wireless networks may experience static or noise while the microwave oven is the Timer in use? Try to inform KitchenAid? See "Assistance or Service" section. ■ Is the door completely closed? Cooking times seem too long ...some models, is normal and will operate ■ Has a household fuse blown, or has a circuit breaker tripped? Firmly close the microwave oven door, and then touch START. Remove and clean turntable hub, support and rollers. Turntable alternates rotation directions ■ This is sitting securely...

Use & Care Guide
Page 16
... service, first see the "Troubleshooting" section of the Use & Care Guide. In Canada, call 1-800-422-1230. KITCHENAID® BUILT-IN OVEN & MICROWAVE WARRANTY LIMITED WARRANTY For one year from the date of purchase, when this major appliance is operated and maintained according to ...Solid state touch control system parts SECOND THROUGH TENTH YEAR LIMITED WARRANTY On microwave ovens only, in the second through due to defects in materials or workmanship. Major appliances with the product, KitchenAid brand of your major appliance for Factory Specified Parts and repair labor to...
... service, first see the "Troubleshooting" section of the Use & Care Guide. In Canada, call 1-800-422-1230. KITCHENAID® BUILT-IN OVEN & MICROWAVE WARRANTY LIMITED WARRANTY For one year from the date of purchase, when this major appliance is operated and maintained according to ...Solid state touch control system parts SECOND THROUGH TENTH YEAR LIMITED WARRANTY On microwave ovens only, in the second through due to defects in materials or workmanship. Major appliances with the product, KitchenAid brand of your major appliance for Factory Specified Parts and repair labor to...
Dimension Guide
Page 1
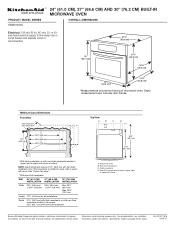
... change without notice. Flush receptacle D. Ref. A time-delay fuse or circuit breaker and separate circuit is located in upper right or upper left corner of microwave oven. DIM. 24" (61.0 CM) 27" (68.6 CM) 30" (76.2 CM) INSTALLATION INSTALLATION INSTALLATION Width 22¹⁄₄" (56.5 cm) ± 3/16"... handle. See "Cutout Top View." **With non-flush receptacle. or 20amp fused electrical supply. PRODUCT MODEL SERIES KBMS1454S ® 24" (61.0 CM), 27" (68.6 CM) AND 30" (76.2 CM) BUILT-IN MICROWAVE OVEN OVERALL DIMENSIONS Electrical: 120 volt, 60 Hz, AC only, 15-
... change without notice. Flush receptacle D. Ref. A time-delay fuse or circuit breaker and separate circuit is located in upper right or upper left corner of microwave oven. DIM. 24" (61.0 CM) 27" (68.6 CM) 30" (76.2 CM) INSTALLATION INSTALLATION INSTALLATION Width 22¹⁄₄" (56.5 cm) ± 3/16"... handle. See "Cutout Top View." **With non-flush receptacle. or 20amp fused electrical supply. PRODUCT MODEL SERIES KBMS1454S ® 24" (61.0 CM), 27" (68.6 CM) AND 30" (76.2 CM) BUILT-IN MICROWAVE OVEN OVERALL DIMENSIONS Electrical: 120 volt, 60 Hz, AC only, 15-

Installation Guide
Page 1
... 2 Tools and Parts 2 Location Requirements 2 Minimum Dimensions 3 Product Dimensions 4 Electrical Requirements 5 INSTALLATION INSTRUCTIONS 6 Install the Microwave Oven (24" [61.0 cm] Installation Only 6 Install the Microwave Oven (27" [68.6 cm] or 30" [76.2 cm] Installation Only 7 Complete Installation 8 ASSISTANCE 8 BUILT-IN MICROWAVE OVEN SAFETY Your safety and the safety of your particular model may differ slightly from the...
... 2 Tools and Parts 2 Location Requirements 2 Minimum Dimensions 3 Product Dimensions 4 Electrical Requirements 5 INSTALLATION INSTRUCTIONS 6 Install the Microwave Oven (24" [61.0 cm] Installation Only 6 Install the Microwave Oven (27" [68.6 cm] or 30" [76.2 cm] Installation Only 7 Complete Installation 8 ASSISTANCE 8 BUILT-IN MICROWAVE OVEN SAFETY Your safety and the safety of your particular model may differ slightly from the...

Installation Guide
Page 2
...INSTALLATION PARTS USED 24" (61.0 cm) installation C 27" (68.6 cm) installation* A, C, D 30" (76.2 cm) installation A, B, C, E *Extension plate (B) will have to see which parts are used . See "Electrical Requirements" section. The cutout opening where the microwave oven will use. A C B Location Requirements The microwave oven may be ...and parts before starting installation. Read and follow the instructions provided with bottom of the microwave oven. See "Minimum Cutout Dimensions" in oven, or below the counter and/or below parts list to be used for weight of...
...INSTALLATION PARTS USED 24" (61.0 cm) installation C 27" (68.6 cm) installation* A, C, D 30" (76.2 cm) installation A, B, C, E *Extension plate (B) will have to see which parts are used . See "Electrical Requirements" section. The cutout opening where the microwave oven will use. A C B Location Requirements The microwave oven may be ...and parts before starting installation. Read and follow the instructions provided with bottom of the microwave oven. See "Minimum Cutout Dimensions" in oven, or below the counter and/or below parts list to be used for weight of...
Installation Guide
Page 3
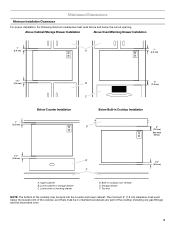
...3" (7.6 cm) clearance must exist below . 1¹⁄₂" (3.8 cm) E F 1¹⁄₂" (3.8 cm) A. Above Cabinet/Storage Drawer Installation Above Oven/Warming Drawer Installation 1" (2.5 cm) A 1" (2.5 cm) 1¹⁄₂" (3.8 cm) 1" (2.5 cm) Below Counter Installation B 3" (7.6 cm) C Below ...C. Storage drawer F. Toe kick NOTE: The bottom of the cooktop (including any gas fittings) and the microwave oven. 3 Minimum Dimensions Minimum Installation Clearances For proper installation, the following minimum clearances must be no interference between any...
...3" (7.6 cm) clearance must exist below . 1¹⁄₂" (3.8 cm) E F 1¹⁄₂" (3.8 cm) A. Above Cabinet/Storage Drawer Installation Above Oven/Warming Drawer Installation 1" (2.5 cm) A 1" (2.5 cm) 1¹⁄₂" (3.8 cm) 1" (2.5 cm) Below Counter Installation B 3" (7.6 cm) C Below ...C. Storage drawer F. Toe kick NOTE: The bottom of the cooktop (including any gas fittings) and the microwave oven. 3 Minimum Dimensions Minimum Installation Clearances For proper installation, the following minimum clearances must be no interference between any...
Installation Guide
Page 4
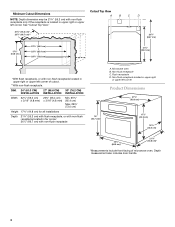
...;₄" (66.7 cm) with non-flush receptacle 18" (45.7 cm)* A. Flush receptacle D. Depth measurement also includes door handle. 4 Non-flush receptacle C. DIM. 24" (61.0 CM) 27" (68.6 CM) 30" (76.2 CM) INSTALLATION INSTALLATION INSTALLATION Width 22¹⁄₄" (56.5 cm) ± 3/16" (4.8 ... 21³⁄₄" (55.2 cm) with flush receptacle, or with non-flush receptacle located in upper right or upper left corner of microwave oven. Minimum Cutout Dimensions Cutout Top View A B C D NOTE: Depth dimension may be 21³⁄₄" (55.2 cm) with non...
...;₄" (66.7 cm) with non-flush receptacle 18" (45.7 cm)* A. Flush receptacle D. Depth measurement also includes door handle. 4 Non-flush receptacle C. DIM. 24" (61.0 CM) 27" (68.6 CM) 30" (76.2 CM) INSTALLATION INSTALLATION INSTALLATION Width 22¹⁄₄" (56.5 cm) ± 3/16" (4.8 ... 21³⁄₄" (55.2 cm) with flush receptacle, or with non-flush receptacle located in upper right or upper left corner of microwave oven. Minimum Cutout Dimensions Cutout Top View A B C D NOTE: Depth dimension may be 21³⁄₄" (55.2 cm) with non...


