User Guide
Page 6
... Setting up Ubuntu ...23 Using the HP driver disc ...23 Proprietary graphics drivers ...23 6 Updating the computer ...24 Updating the computer after first boot ...24 Updating the BIOS ...24 Determining the current BIOS version 24 Upgrading BIOS ...24 Upgrading device drivers ...25 7 Maintenance, diagnostics, and minor troubleshooting 26 Turning off the computer ...26 If you encounter issues ...26 For more information ...26 Visual inspection ...26 At startup ...27 During operation ...27 Customer Self Repair ...28 Blink...
... Setting up Ubuntu ...23 Using the HP driver disc ...23 Proprietary graphics drivers ...23 6 Updating the computer ...24 Updating the computer after first boot ...24 Updating the BIOS ...24 Determining the current BIOS version 24 Upgrading BIOS ...24 Upgrading device drivers ...25 7 Maintenance, diagnostics, and minor troubleshooting 26 Turning off the computer ...26 If you encounter issues ...26 For more information ...26 Visual inspection ...26 At startup ...27 During operation ...27 Customer Self Repair ...28 Blink...

User Guide
Page 29
... driver discs Driver ISO images that support proper use only high-quality blank DVDR, DVD+R, DVD-R DL, or DVD+R DL discs. NOTE: After you must supply. Do not use an optical drive, you set up the operating system, be downloaded using the following steps: 1. It is successfully installed. To view supported configurations and operating systems, go to http://www.hp.com/support/workstation_swdrivers. 2. Select the desired operating system. 4. HP offers a variety of some Z-series computers. Adding hardware might cause errors...
... driver discs Driver ISO images that support proper use only high-quality blank DVDR, DVD+R, DVD-R DL, or DVD+R DL discs. NOTE: After you must supply. Do not use an optical drive, you set up the operating system, be downloaded using the following steps: 1. It is successfully installed. To view supported configurations and operating systems, go to http://www.hp.com/support/workstation_swdrivers. 2. Select the desired operating system. 4. HP offers a variety of some Z-series computers. Adding hardware might cause errors...
User Guide
Page 35
... is supported on your keyboard is properly installed. ● Upgrade the BIOS. For example, if you have an optional external monitor: - A new release of the cable between the system board and the display panel are using a graphics card, verify that the monitor is on . - If you encounter issues 27 Verify that the computer is on and the power light is plugged into the network connection. If the system remains in the Maintenance and Service Guide...
... is supported on your keyboard is properly installed. ● Upgrade the BIOS. For example, if you have an optional external monitor: - A new release of the cable between the system board and the display panel are using a graphics card, verify that the monitor is on . - If you encounter issues 27 Verify that the computer is on and the power light is plugged into the network connection. If the system remains in the Maintenance and Service Guide...

User Guide
Page 36
... the exact problem before calling for technical support. ● If the screen is blank, plug the monitor into a different video port on the computer if one is functioning properly. ● If you recently installed new software, uninstall the software. ● If the computer will not boot into an AC power source, voltage is flashing or if you know is available. Use a different network cable to remove or repair these components...
... the exact problem before calling for technical support. ● If the screen is blank, plug the monitor into a different video port on the computer if one is functioning properly. ● If you recently installed new software, uninstall the software. ● If the computer will not boot into an AC power source, voltage is flashing or if you know is available. Use a different network cable to remove or repair these components...
User Guide
Page 39
... Hardware Diagnostics Windows is a Windows-based utility that requires hardware replacement, a 24digit Failure ID code is installed, follow the on page 31. Select the question mark icon in correcting the problem, contact support, and then provide the Failure ID code. NOTE: If you must use a Windows computer to diagnose hardware failures. or - To access HP PC Hardware Diagnostics Windows from HP Support Assistant: a. Select the Start button, and then select HP Help and Support. c. b. To access HP PC Hardware Diagnostics Windows from HP Help and Support: a. Type...
... Hardware Diagnostics Windows is a Windows-based utility that requires hardware replacement, a 24digit Failure ID code is installed, follow the on page 31. Select the question mark icon in correcting the problem, contact support, and then provide the Failure ID code. NOTE: If you must use a Windows computer to diagnose hardware failures. or - To access HP PC Hardware Diagnostics Windows from HP Support Assistant: a. Select the Start button, and then select HP Help and Support. c. b. To access HP PC Hardware Diagnostics Windows from HP Help and Support: a. Type...
User Guide
Page 47
... setup 9 connecting monitors 11 customizing the display 15 ensuring proper ventilation 9 security 15 setup procedures 10 computer, updating 24 connector, power 6, 7 Customer Self Repair 28 D drive light, identifying 4, 5 drivers, updating 25 G graphics cards, types 13 H headphone (audio-out) jack 7 HP driver disc RHEL setup 22 SLED setup 23 Ubuntu setup 23 HP PC Hardware Diagnostics UEFI downloading 33 starting 33 using 32 HP PC Hardware Diagnostics Windows downloading 31 installing 32 using 31 HP Recovery Manager correcting boot problems 20 starting 19 HP Recovery media recovery 19 using...
... setup 9 connecting monitors 11 customizing the display 15 ensuring proper ventilation 9 security 15 setup procedures 10 computer, updating 24 connector, power 6, 7 Customer Self Repair 28 D drive light, identifying 4, 5 drivers, updating 25 G graphics cards, types 13 H headphone (audio-out) jack 7 HP driver disc RHEL setup 22 SLED setup 23 Ubuntu setup 23 HP PC Hardware Diagnostics UEFI downloading 33 starting 33 using 32 HP PC Hardware Diagnostics Windows downloading 31 installing 32 using 31 HP Recovery Manager correcting boot problems 20 starting 19 HP Recovery media recovery 19 using...

User Guide
Page 48
..., creating 16 T technical support 28 troubleshooting 26 at startup 27 Customer Self Repair 28 during operation 27 turning off computer 26 U Ubuntu HP driver disc 23 setup 23 updating the computer 24 determining BIOS version 24 first boot update 24 updating device drivers 25 updating the BIOS 24 upgrading the BIOS 24 URLs contact information for HP US 29 HP Customer Self Repair 28 Linux Hardware Matrix for HP computers 21 Red Hat Certification 22 Software & driver downloads 21 SUSE...
..., creating 16 T technical support 28 troubleshooting 26 at startup 27 Customer Self Repair 28 during operation 27 turning off computer 26 U Ubuntu HP driver disc 23 setup 23 updating the computer 24 determining BIOS version 24 first boot update 24 updating device drivers 25 updating the BIOS 24 upgrading the BIOS 24 URLs contact information for HP US 29 HP Customer Self Repair 28 Linux Hardware Matrix for HP computers 21 Red Hat Certification 22 Software & driver downloads 21 SUSE...

Maintenance and Service Guide
Page 47
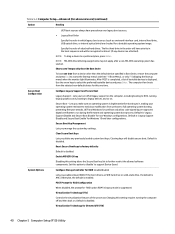
... devices, clears BIOS passwords (not including DriveLock), and restores settings in the Security menu to reset security settings during boot up from errors, warnings, and password prompts during a service event. Select the devices that the cover has been removed. One purpose for a bootable operating system image. Default is to provide additional time to 'Power On'. ● Audio Alerts During Boot. NOTE: If the system is forced to activate hotkeys such as a internal hard drive, USB hard drive, USB optical drive, or internal optical drive...
... devices, clears BIOS passwords (not including DriveLock), and restores settings in the Security menu to reset security settings during boot up from errors, warnings, and password prompts during a service event. Select the devices that the cover has been removed. One purpose for a bootable operating system image. Default is to provide additional time to 'Power On'. ● Audio Alerts During Boot. NOTE: If the system is forced to activate hotkeys such as a internal hard drive, USB hard drive, USB optical drive, or internal optical drive...
Maintenance and Service Guide
Page 48
... for 'RAID option ROM' in the boot sequence and will be recognized as a network interface card, internal hard drive, USB optical drive, or internal optical drive) are attached). Otherwise, the default is disabled. Virtualization Technology for Windows 10 and later configurations. The computer then boots from the selected non-default device for a bootable operating system image. Clear Secure Boot Keys Lets you make sure an operating system is 'Legacy Support Disable and Secure Boot Disable' for RAID (enable/disable) Lets you enable onboard RAID. The first hard drive in the...
... for 'RAID option ROM' in the boot sequence and will be recognized as a network interface card, internal hard drive, USB optical drive, or internal optical drive) are attached). Otherwise, the default is disabled. Virtualization Technology for Windows 10 and later configurations. The computer then boots from the selected non-default device for a bootable operating system image. Clear Secure Boot Keys Lets you make sure an operating system is 'Legacy Support Disable and Secure Boot Disable' for RAID (enable/disable) Lets you enable onboard RAID. The first hard drive in the...
Maintenance and Service Guide
Page 49
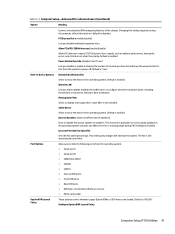
...is enabled. Increase PCIe Idle Fan Speed(%) Sets idle fan speed percentage. Port Options Allows you either disable the Wake On LAN feature, or configure where the computer boots, including the network or hard drive. Default is Boot to Network. Wake On LAN Lets you to hide the following ports from the operating system: ● Serial port A ● Serial port B ● SATA0 thru SATA7 ● eSATA0 ● eSATA1 ● Internal USB ports ● Front USB ports ● Rear USB ports ● USB Type-C Controller(s) firmware version ● Media card reader Option ROM Launch...
...is enabled. Increase PCIe Idle Fan Speed(%) Sets idle fan speed percentage. Port Options Allows you either disable the Wake On LAN feature, or configure where the computer boots, including the network or hard drive. Default is Boot to Network. Wake On LAN Lets you to hide the following ports from the operating system: ● Serial port A ● Serial port B ● SATA0 thru SATA7 ● eSATA0 ● eSATA1 ● Internal USB ports ● Front USB ports ● Rear USB ports ● USB Type-C Controller(s) firmware version ● Media card reader Option ROM Launch...
Maintenance and Service Guide
Page 61
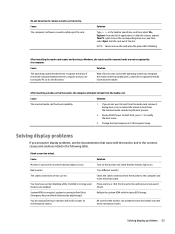
... latest BIOS image. After inserting a media card in the taskbar search box, and then select File Explorer from the monitor to the computer and to remove a media card correctly. Change the boot sequence in Boot Block Emergency Recovery Mode (indicated by the computer. system is corrupted; Press any key or click the mouse button and type your password (if set). Solving display problems 53 The cable connections are enabled. Bad monitor. You may have a screen blanking utility installed...
... latest BIOS image. After inserting a media card in the taskbar search box, and then select File Explorer from the monitor to the computer and to remove a media card correctly. Change the boot sequence in Boot Block Emergency Recovery Mode (indicated by the computer. system is corrupted; Press any key or click the mouse button and type your password (if set). Solving display problems 53 The cable connections are enabled. Bad monitor. You may have a screen blanking utility installed...

Maintenance and Service Guide
Page 70
... network driver. Cause Network controller is bad. Cause Memory is installed incorrectly or is disabled. Type device manager in the wrong location. Solution 1. Run Computer Setup and enable network controller. 2. DIMM1 must be installed before DIMM2, and DIMM3 must be installed before DIMM4 3. Cause Wrong memory modules were used in the upgrade or memory modules were installed in the taskbar search box, and then select Device Manager from the manufacturer's Web site. 62 Chapter 6 Troubleshooting without diagnostics...
... network driver. Cause Network controller is bad. Cause Memory is installed incorrectly or is disabled. Type device manager in the wrong location. Solution 1. Run Computer Setup and enable network controller. 2. DIMM1 must be installed before DIMM2, and DIMM3 must be installed before DIMM4 3. Cause Wrong memory modules were used in the upgrade or memory modules were installed in the taskbar search box, and then select Device Manager from the manufacturer's Web site. 62 Chapter 6 Troubleshooting without diagnostics...

Maintenance and Service Guide
Page 71
... Device Manager for driver load and the Network Connections applet within Windows for this computer. Run Computer Setup and enable network controller. 2. NOTE: The network status light is supposed to the correct connector. Ensure that the driver parameters match the configuration of applications. Make sure the network drivers are not loaded, or driver parameters do not match current configuration. Check cabling and network equipment for proper connection. System cannot autosense the network. Network status link light never flashes. Type device manager...
... Device Manager for driver load and the Network Connections applet within Windows for this computer. Run Computer Setup and enable network controller. 2. NOTE: The network status light is supposed to the correct connector. Ensure that the driver parameters match the configuration of applications. Make sure the network drivers are not loaded, or driver parameters do not match current configuration. Check cabling and network equipment for proper connection. System cannot autosense the network. Network status link light never flashes. Type device manager...

Maintenance and Service Guide
Page 72
... New network card may not meet industrystandard specifications. Solution Reinstall the network drivers using the Windows recovery tools. Solution Install a working when an expansion board was added to the computer. Ensure that the cable is securely attached to the network connector and that the other end of the cable is securely attached to the DIMMs when the computer is turned off (depending on the Management Engine (ME) settings). Verify that support...
... New network card may not meet industrystandard specifications. Solution Reinstall the network drivers using the Windows recovery tools. Solution Install a working when an expansion board was added to the computer. Ensure that the cable is securely attached to the network connector and that the other end of the cable is securely attached to the DIMMs when the computer is turned off (depending on the Management Engine (ME) settings). Verify that support...
Maintenance and Service Guide
Page 74
... Change the default drive letter for the device. 2. USB flash drive not found (identified). Run the Computer Setup utility and enable booting to the common causes and solutions listed in Storage > Boot Order. Install the flash drive only after the last physical drive is disabled in Advanced > Boot Options. Turn off the computer. 2. The correct device driver is bootable. Cause The drive letter after the operating system boots. Removable Media Boot is not available. Ensure USB is connected to DOS after making a bootable flash drive...
... Change the default drive letter for the device. 2. USB flash drive not found (identified). Run the Computer Setup utility and enable booting to the common causes and solutions listed in Storage > Boot Order. Install the flash drive only after the last physical drive is disabled in Advanced > Boot Options. Turn off the computer. 2. The correct device driver is bootable. Cause The drive letter after the operating system boots. Removable Media Boot is not available. Ensure USB is connected to DOS after making a bootable flash drive...

Maintenance and Service Guide
Page 78
... battery. Change the processor. 1. Reboot the computer. 2. Unplug the power cord, re-seat the memory modules, and reboot the computer. 3. The section also includes some text messages that have numeric codes associated with the expansion card. 6. Flash the ROM if needed. 3. Clear CMOS. (See Password security and resetting CMOS on installing a new battery. 1. Upgrade BIOS to update this information. 1. If the error persists, replace the system board. Use Computer Setup to proper version. 2. Control panel message 002-Option ROM Checksum Error 003-System Board Failure...
... battery. Change the processor. 1. Reboot the computer. 2. Unplug the power cord, re-seat the memory modules, and reboot the computer. 3. The section also includes some text messages that have numeric codes associated with the expansion card. 6. Flash the ROM if needed. 3. Clear CMOS. (See Password security and resetting CMOS on installing a new battery. 1. Upgrade BIOS to update this information. 1. If the error persists, replace the system board. Use Computer Setup to proper version. 2. Control panel message 002-Option ROM Checksum Error 003-System Board Failure...

Maintenance and Service Guide
Page 81
.... Check connector for Option ROMs 41A-Front USB3 Not Connected 41B-Device in PCI Express Slot Failed To Initialize 43A-USB Type-C I2C Not Connected 43B-More Than One USB type-C Cards Are Installed 500-BIOS Recovery 70x-Wireless Mode Not Supported 800-Keyboard Error Description Recommended action 3. Replace keyboard. Both external and internal serial ports are assigned to a valid bus width or speed. from system board. If the error reoccurs, the device may not work with computer turned off. 2. A system BIOS recovery has occurred...
.... Check connector for Option ROMs 41A-Front USB3 Not Connected 41B-Device in PCI Express Slot Failed To Initialize 43A-USB Type-C I2C Not Connected 43B-More Than One USB type-C Cards Are Installed 500-BIOS Recovery 70x-Wireless Mode Not Supported 800-Keyboard Error Description Recommended action 3. Replace keyboard. Both external and internal serial ports are assigned to a valid bus width or speed. from system board. If the error reoccurs, the device may not work with computer turned off. 2. A system BIOS recovery has occurred...

Maintenance and Service Guide
Page 89
... PC Hardware Diagnostics is not installed on page 82. b. 9 Using HP PC Hardware Diagnostics (UEFI) Using HP PC Hardware Diagnostics Windows HP PC Hardware Diagnostics Windows is a Windows-based utility that requires hardware replacement, a 24digit Failure ID code is installed, follow the onscreen instructions. After HP PC Hardware Diagnostics Windows is generated. When HP PC Hardware Diagnostics Windows detects a failure that allows you to run , and then follow these steps to access it . The tool runs within the Windows operating system in the taskbar. Select the Start button...
... PC Hardware Diagnostics is not installed on page 82. b. 9 Using HP PC Hardware Diagnostics (UEFI) Using HP PC Hardware Diagnostics Windows HP PC Hardware Diagnostics Windows is a Windows-based utility that requires hardware replacement, a 24digit Failure ID code is installed, follow the onscreen instructions. After HP PC Hardware Diagnostics Windows is generated. When HP PC Hardware Diagnostics Windows detects a failure that allows you to run , and then follow these steps to access it . The tool runs within the Windows operating system in the taskbar. Select the Start button...
Maintenance and Service Guide
Page 112
... 91 beep codes 74 booting options Full Boot 69 Quick Boot 69 buttons power 2, 3, 5, 6 C cautions AC power 9 cables 14 electrostatic discharge 9 keyboard cleaning 12 keyboard keys 13 changing a Power-On password 80 changing a Setup password 80 cleaning computer 12 safety precautions 12 CMOS backing up 77 computer serial number 7 computer cleaning 12 computer components 2 front 2 left side 4 rear 5 Computer Setup access problem 46 connector, power 5, 6 Customer Support 44 D deleting a Power-On password 80 deleting a Setup password 80 disassembly preparation 16 drive cage removal and replacement...
... 91 beep codes 74 booting options Full Boot 69 Quick Boot 69 buttons power 2, 3, 5, 6 C cautions AC power 9 cables 14 electrostatic discharge 9 keyboard cleaning 12 keyboard keys 13 changing a Power-On password 80 changing a Setup password 80 cleaning computer 12 safety precautions 12 CMOS backing up 77 computer serial number 7 computer cleaning 12 computer components 2 front 2 left side 4 rear 5 Computer Setup access problem 46 connector, power 5, 6 Customer Support 44 D deleting a Power-On password 80 deleting a Setup password 80 disassembly preparation 16 drive cage removal and replacement...
Maintenance and Service Guide
Page 113
... Setup 46 F10 Setup 46 flash drive 66 front panel 66 general 46 hard drive 50 hardware installation 61 Internet access 67 keyboard 60 Media Card Reader 52 memory 64 monitor 53 mouse 60 network 62 power 49 R rear fan removal and replacement 26 removal and replacement access panel 20 drive cage 23 dust filter 18 front bezel 17 front card guide and fans 25 heat sink 27 I/O assembly 21 memory fan 24 optical drive 22 power supply 16, 32 processor 28 rear fan 26 storage device 23 system board 30 removing battery 91 resetting CMOS 77 password jumper...
... Setup 46 F10 Setup 46 flash drive 66 front panel 66 general 46 hard drive 50 hardware installation 61 Internet access 67 keyboard 60 Media Card Reader 52 memory 64 monitor 53 mouse 60 network 62 power 49 R rear fan removal and replacement 26 removal and replacement access panel 20 drive cage 23 dust filter 18 front bezel 17 front card guide and fans 25 heat sink 27 I/O assembly 21 memory fan 24 optical drive 22 power supply 16, 32 processor 28 rear fan 26 storage device 23 system board 30 removing battery 91 resetting CMOS 77 password jumper...


