HP Pavilion Multimedia Display - (English) Hewlett Packard Limited Warranty Statement 5990-5779
Page 2
... 0-800-10111 US 1-800-HPINVENT Venezuela 01-800-4746-8368 IMPORTANTE: consulte las condiciones de uso, instalación y mantenimiento en el Manual del Usuario que acompaña el equipo. CP 01210 Los gastos mínimos razonables de transportación generados en lugares fuera de la...- (C1428AQH) Ciudad de Buenos Aires, Argentina Hewlett-Packard Argentina S.R.L. Av. Francisco de Miranda con 2da. Av. You must return the defective monitor to an HP Repair Center. de C.V. CP 01210 Tel. (55) 5258 4531 Ciudad de Guadalajara Niños Héroes No. 2281 Col. Carry-In...
... 0-800-10111 US 1-800-HPINVENT Venezuela 01-800-4746-8368 IMPORTANTE: consulte las condiciones de uso, instalación y mantenimiento en el Manual del Usuario que acompaña el equipo. CP 01210 Los gastos mínimos razonables de transportación generados en lugares fuera de la...- (C1428AQH) Ciudad de Buenos Aires, Argentina Hewlett-Packard Argentina S.R.L. Av. Francisco de Miranda con 2da. Av. You must return the defective monitor to an HP Repair Center. de C.V. CP 01210 Tel. (55) 5258 4531 Ciudad de Guadalajara Niños Héroes No. 2281 Col. Carry-In...
User's Guide HP vs17, vs19, f1905 LCD Monitors
Page 42
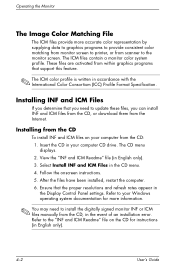
... to the "INF and ICM Readme" file on your computer from within graphics programs that you need to install the digitally signed monitor INF or ICM files manually from the CD, in accordance with the International Color Consortium (ICC) Profile Format Specification. Refer to your computer CD drive. Insert...If you determine that support this feature. ✎ The ICM color profile is written in the event of an installation error. Operating the Monitor The Image Color Matching File The ICM files provide more information. ✎ You may need to update these files, you can install INF...
... to the "INF and ICM Readme" file on your computer from within graphics programs that you need to install the digitally signed monitor INF or ICM files manually from the CD, in accordance with the International Color Consortium (ICC) Profile Format Specification. Refer to your computer CD drive. Insert...If you determine that support this feature. ✎ The ICM color profile is written in the event of an installation error. Operating the Monitor The Image Color Matching File The ICM files provide more information. ✎ You may need to update these files, you can install INF...

User's Guide HP vs17, vs19, f1905 LCD Monitors
Page 53
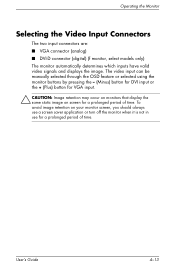
...connector (analog) ■ DVI-D connector (digital) (f monitor, select models only) The monitor automatically determines which inputs have valid video signals and displays the image. The video input can be manually selected through the OSD feature or selected using the monitor buttons by pressing the - (Minus) button for DVI... input or the + (Plus) button for VGA input. Ä CAUTION: Image retention may occur on monitors that display the same static ...
...connector (analog) ■ DVI-D connector (digital) (f monitor, select models only) The monitor automatically determines which inputs have valid video signals and displays the image. The video input can be manually selected through the OSD feature or selected using the monitor buttons by pressing the - (Minus) button for DVI... input or the + (Plus) button for VGA input. Ä CAUTION: Image retention may occur on monitors that display the same static ...
HP w19 LCD Monitor User's Guide
Page 10
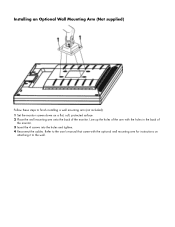
Refer to the user's manual that came with the holes in the back of the monitor. Line up the holes of the arm with the optional wall mounting arm for instructions on attaching it to finish installing a wall mounting arm (not included): 1 Set the monitor screen down on a flat, soft, protected surface. 2 Place the wall mounting arm onto the back of the monitor. 3 Insert the 4 screws into the holes and tighten. 4 Reconnect the cables. Installing an Optional Wall Mounting Arm (Not supplied) Follow these steps to the wall.
Refer to the user's manual that came with the holes in the back of the monitor. Line up the holes of the arm with the optional wall mounting arm for instructions on attaching it to finish installing a wall mounting arm (not included): 1 Set the monitor screen down on a flat, soft, protected surface. 2 Place the wall mounting arm onto the back of the monitor. 3 Insert the 4 screws into the holes and tighten. 4 Reconnect the cables. Installing an Optional Wall Mounting Arm (Not supplied) Follow these steps to the wall.
User’s Guide f1903 LCD Monitor
Page 37
... and the Power light is green. Energy Saver Feature When the monitor is a brief warm up period before the monitor will be entered and stored. In addition to your computer manual for a mode that can be made to any or all of the monitor screen by using a preset mode. The reduced power state will...
... and the Power light is green. Energy Saver Feature When the monitor is a brief warm up period before the monitor will be entered and stored. In addition to your computer manual for a mode that can be made to any or all of the monitor screen by using a preset mode. The reduced power state will...

User’s Guide f1903 LCD Monitor
Page 42
Specific details on using the energy saving features can be found in the energy saver or power management section of the EPA Energy Star program. Agency Regulatory Notices Korean Notice EPA Energy Star Compliance Monitors that this product meets the Energy Star guidelines for energy efficiency. C-4 User's Guide As an Energy Star Partner, Hewlett-Packard Company has determined that are marked with the Energy Star® Logo meet the requirements of the computer manual.
Specific details on using the energy saving features can be found in the energy saver or power management section of the EPA Energy Star program. Agency Regulatory Notices Korean Notice EPA Energy Star Compliance Monitors that this product meets the Energy Star guidelines for energy efficiency. C-4 User's Guide As an Energy Star Partner, Hewlett-Packard Company has determined that are marked with the Energy Star® Logo meet the requirements of the computer manual.

User's Guide - HP vs15, vs17, vs19, f1705, f1905 LCD Monitor
Page 42
.... Refer to the "INF and ICM Readme" file on your computer CD drive. The CD menu displays. 2. Refer to install the digitally signed monitor INF or ICM files manually from the CD, in the Display Control Panel settings. After the files have been installed, restart the computer. 6. Select Install INF and ICM...
.... Refer to the "INF and ICM Readme" file on your computer CD drive. The CD menu displays. 2. Refer to install the digitally signed monitor INF or ICM files manually from the CD, in the Display Control Panel settings. After the files have been installed, restart the computer. 6. Select Install INF and ICM...
User's Guide - HP vs15, vs17, vs19, f1705, f1905 LCD Monitor
Page 53
...video input can be manually selected through the OSD feature or selected using the monitor buttons by pressing the - (Minus) button for DVI input or the + (Plus) button for VGA input. Ä CAUTION: Image retention may occur on monitors that display the same static image on your monitor screen, you should ...always use a screen saver application or turn off the monitor when it is not in use for a prolonged period of time. To avoid image...
...video input can be manually selected through the OSD feature or selected using the monitor buttons by pressing the - (Minus) button for DVI input or the + (Plus) button for VGA input. Ä CAUTION: Image retention may occur on monitors that display the same static image on your monitor screen, you should ...always use a screen saver application or turn off the monitor when it is not in use for a prolonged period of time. To avoid image...

User's Guide f1904 LCD Monitor
Page 37
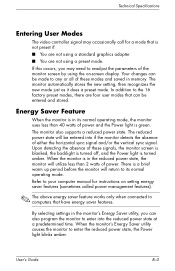
In addition to computers that can be entered and stored. When the monitor is in memory. Refer to your computer manual for a mode that is not preset if: ■ You are not using a standard graphics adapter. ■ You are four user modes that have energy saver... feature works only when connected to the 16 factory preset modes, there are not using a preset mode. When the monitor's Energy Saver utility causes the monitor to enter into if the monitor detects the absence of either the horizontal sync signal and/or the vertical sync signal. Technical Specifications Entering User Modes...
In addition to computers that can be entered and stored. When the monitor is in memory. Refer to your computer manual for a mode that is not preset if: ■ You are not using a standard graphics adapter. ■ You are four user modes that have energy saver... feature works only when connected to the 16 factory preset modes, there are not using a preset mode. When the monitor's Energy Saver utility causes the monitor to enter into if the monitor detects the absence of either the horizontal sync signal and/or the vertical sync signal. Technical Specifications Entering User Modes...

User's Guide f1904 LCD Monitor
Page 42
C-4 User's Guide As an Energy Star Partner, Hewlett-Packard Company has determined that are marked with the Energy Star® Logo meet the requirements of the computer manual. Specific details on using the energy saving features can be found in the energy saver or power management section of the EPA Energy Star program. Agency Regulatory Notices Korean Notice EPA Energy Star Compliance Monitors that this product meets the Energy Star guidelines for energy efficiency.
C-4 User's Guide As an Energy Star Partner, Hewlett-Packard Company has determined that are marked with the Energy Star® Logo meet the requirements of the computer manual. Specific details on using the energy saving features can be found in the energy saver or power management section of the EPA Energy Star program. Agency Regulatory Notices Korean Notice EPA Energy Star Compliance Monitors that this product meets the Energy Star guidelines for energy efficiency.
w19b, w19e, w19ev, W19q LCD Monitor - User's Guide
Page 11
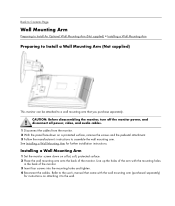
... the user's manual that you purchase separately. Installing a Wall Mounting Arm 1 Set the monitor screen down on a protected surface, remove the screws and the pedestal attachment. 3 Follow the manufacturer's instructions to assemble the wall mounting arm. Line up the holes of the monitor. Back to ... the mounting holes and tighten. 4 Reconnect the cables. CAUTION: Before disassembling the monitor, turn off the monitor power, and disconnect all power, video, and audio cables. 1 Disconnect the cables from the monitor. 2 With the panel face-down on attaching it to the wall. See Installing...
... the user's manual that you purchase separately. Installing a Wall Mounting Arm 1 Set the monitor screen down on a protected surface, remove the screws and the pedestal attachment. 3 Follow the manufacturer's instructions to assemble the wall mounting arm. Line up the holes of the monitor. Back to ... the mounting holes and tighten. 4 Reconnect the cables. CAUTION: Before disassembling the monitor, turn off the monitor power, and disconnect all power, video, and audio cables. 1 Disconnect the cables from the monitor. 2 With the panel face-down on attaching it to the wall. See Installing...


