HP W1907 Factory Reset - 19 LCD Monitor
HP W1907 Factory Reset
Related Manual Pages


Similar Questions


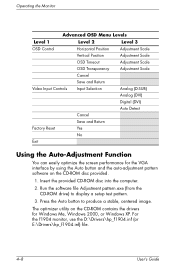
Monitor Reset
i need to reset my monitor because it is stuck on the auto adjustment
i need to reset my monitor because it is stuck on the auto adjustment
(Posted by mars91 12 years ago)

Bottom Of The Right Corner Is Becoming Dark And Is Getting Bigger Every Day
Bottom of the right corner of my HP L1925 started to get darker about 3 weeks ago and now it gets bi...
Bottom of the right corner of my HP L1925 started to get darker about 3 weeks ago and now it gets bi...
(Posted by dritonthunder 13 years ago)