

Setup Guide
Page 6
...the software installation. b. EN a. Turn on the computer. b. Follow the onscreen instructions to appear. Suivez les instructions à l'écran pour compléter l'installation du ...software. Lorsque l'invite USB s'affiche, connectez le câble USB au port situé à l'arrière de l'appareil HP Tout-en-un, puis à n'importe quel port USB de l'ordinateur. AR USB My Computer HP .setup.exe AR USB USB a HP All-in-One USB b 6 • HP Photosmart C4600 All-in-One series / HP Photosmart C4600 All-in -One...
...the software installation. b. EN a. Turn on the computer. b. Follow the onscreen instructions to appear. Suivez les instructions à l'écran pour compléter l'installation du ...software. Lorsque l'invite USB s'affiche, connectez le câble USB au port situé à l'arrière de l'appareil HP Tout-en-un, puis à n'importe quel port USB de l'ordinateur. AR USB My Computer HP .setup.exe AR USB USB a HP All-in-One USB b 6 • HP Photosmart C4600 All-in-One series / HP Photosmart C4600 All-in -One...
Basics Guide
Page 6
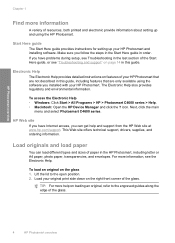
...envelopes. icon. Next, click the main menu and select Photosmart C4600 series. To access the Electronic Help • Windows: Click Start > All Programs > HP > Photosmart C4600 series > Help. • Macintosh: Open the HP Device Manager and click the ? Lift the lid to ... glass. 4 HP Photosmart overview For more help and support from the HP Web site at www.hp.com/support. HP Photosmart overview Chapter 1 Find more information A variety of resources, both printed and electronic provide information about setting up your HP Photosmart and installing software. This Web...
...envelopes. icon. Next, click the main menu and select Photosmart C4600 series. To access the Electronic Help • Windows: Click Start > All Programs > HP > Photosmart C4600 series > Help. • Macintosh: Open the HP Device Manager and click the ? Lift the lid to ... glass. 4 HP Photosmart overview For more help and support from the HP Web site at www.hp.com/support. HP Photosmart overview Chapter 1 Find more information A variety of resources, both printed and electronic provide information about setting up your HP Photosmart and installing software. This Web...
Basics Guide
Page 10
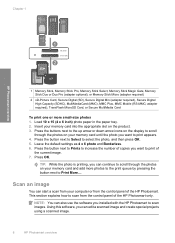
... button next to Select to scan from the control panel of the HP Photosmart only. Leave the default settings as 4 x 6 photo and Borderless. 6. This section explains how to select the photo, and then press OK. 5. Using this software, you want to print appears. 4. Press the buttons next to ...TIP: While the photo is printing, you can also use the software you want to print of copies you installed with the HP Photosmart to Print More.... adapter required), TransFlash MicroSD Card, or Secure MultiMedia Card To print one or more photos to the print queue by pressing the button next...
... button next to Select to scan from the control panel of the HP Photosmart only. Leave the default settings as 4 x 6 photo and Borderless. 6. This section explains how to select the photo, and then press OK. 5. Using this software, you want to print appears. 4. Press the buttons next to ...TIP: While the photo is printing, you can also use the software you want to print of copies you installed with the HP Photosmart to Print More.... adapter required), TransFlash MicroSD Card, or Secure MultiMedia Card To print one or more photos to the print queue by pressing the button next...

Basics Guide
Page 11
... right front corner of thick originals, such as books, you can improve the overall image quality by using the software installed with the HP Photosmart. Load your product, and then click one of the shopping links on the right front corner of the glass. Press OK. You should also replace the ... message, make copies of the glass. 3. If prompted, choose your country/region, follow the prompts to Scan. Load your computer screen. The HP Photosmart Software has many tools that there are finished. Press the button next to PC. TIP: To make sure you can also check the ink levels by...
... right front corner of thick originals, such as books, you can improve the overall image quality by using the software installed with the HP Photosmart. Load your product, and then click one of the shopping links on the right front corner of the glass. Press OK. You should also replace the ... message, make copies of the glass. 3. If prompted, choose your country/region, follow the prompts to Scan. Load your computer screen. The HP Photosmart Software has many tools that there are finished. Press the button next to PC. TIP: To make sure you can also check the ink levels by...
Basics Guide
Page 16
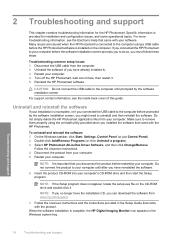
..., Control Panel (or just Control Panel). 2. NOTE: It is provided for the HP Photosmart. Specific information is important that came with the HP Photosmart. Turn off the HP Photosmart, wait one minute, then restart it ). 3. Disconnect the USB cable from your software. When the software installation is installed on the CD-ROM drive and double-click it. Follow the onscreen instructions...
..., Control Panel (or just Control Panel). 2. NOTE: It is provided for the HP Photosmart. Specific information is important that came with the HP Photosmart. Turn off the HP Photosmart, wait one minute, then restart it ). 3. Disconnect the USB cable from your software. When the software installation is installed on the CD-ROM drive and double-click it. Follow the onscreen instructions...
Basics Guide
Page 17
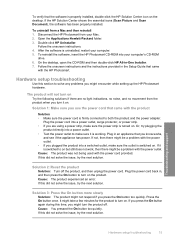
... Plug the power cord back in the Setup Guide that came with the HP Photosmart. Cause: You pressed the On button too quickly. After the software is uninstalled, restart your Mac. 2. Plug in -One Installer. 7. Cause: The product experienced an error. Press the On button once.... you turn on . If the HP Solution Center shows the essential icons (Scan Picture and Scan Document), the software has been properly installed. The product will not turn it is turned on . Double-click HP Uninstaller. To reinstall the software, insert the HP Photosmart CD-ROM into a switched outlet,...
... Plug the power cord back in the Setup Guide that came with the HP Photosmart. Cause: You pressed the On button too quickly. After the software is uninstalled, restart your Mac. 2. Plug in -One Installer. 7. Cause: The product experienced an error. Press the On button once.... you turn on . If the HP Solution Center shows the essential icons (Scan Picture and Scan Document), the software has been properly installed. The product will not turn it is turned on . Double-click HP Uninstaller. To reinstall the software, insert the HP Photosmart CD-ROM into a switched outlet,...
Basics Guide
Page 18
... port on the display to the up the product. Connecting the USB cable before the software was not intended for confirmation. Go to : www.hp.com/support. Cause: You might have installed the software, plug one end of the USB cable into the back of your computer and the other into the... back of your language and country/region 1. Press the buttons next to scroll through the languages. I connected the USB cable, but I am having a problem, contact HP support for ...
... port on the display to the up the product. Connecting the USB cable before the software was not intended for confirmation. Go to : www.hp.com/support. Cause: You might have installed the software, plug one end of the USB cable into the back of your computer and the other into the... back of your language and country/region 1. Press the buttons next to scroll through the languages. I connected the USB cable, but I am having a problem, contact HP support for ...
User Guide
Page 39
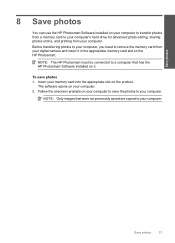
...Follow the onscreen prompts on your computer to save photos 1. NOTE: Only images that has the HP Photosmart Software installed on it in the appropriate memory card slot on the HP Photosmart. Insert your memory card into the appropriate slot on your computer to transfer photos from a memory... your computer. Save photos 8 Save photos You can use the HP Photosmart Software installed on the product. Save photos 37 Before transferring photos to your computer, you need to your computer. NOTE: The HP Photosmart must be connected to a computer that were not previously saved are...
...Follow the onscreen prompts on your computer to save photos 1. NOTE: Only images that has the HP Photosmart Software installed on it in the appropriate memory card slot on the HP Photosmart. Insert your memory card into the appropriate slot on your computer to transfer photos from a memory... your computer. Save photos 8 Save photos You can use the HP Photosmart Software installed on the product. Save photos 37 Before transferring photos to your computer, you need to your computer. NOTE: The HP Photosmart must be connected to a computer that were not previously saved are...
User Guide
Page 41
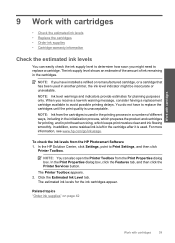
...Printer Toolbox from the Print Properties dialog box. NOTE: If you have to avoid possible printing delays. In addition, some residual ink is left in the cartridges. The estimated ink levels for planning purposes only. When you might be inaccurate or unavailable. NOTE: Ink from the HP Photosmart Software... for printing, and in another printer, the ink level indicator might need to Print Settings, and then click Printer Toolbox. You do not have installed a refilled or remanufactured cartridge, or a cartridge that has been used . In the HP Solution Center, click Settings, point...
...Printer Toolbox from the Print Properties dialog box. NOTE: If you have to avoid possible printing delays. In addition, some residual ink is left in the cartridges. The estimated ink levels for planning purposes only. When you might be inaccurate or unavailable. NOTE: Ink from the HP Photosmart Software... for printing, and in another printer, the ink level indicator might need to Print Settings, and then click Printer Toolbox. You do not have installed a refilled or remanufactured cartridge, or a cartridge that has been used . In the HP Solution Center, click Settings, point...
User Guide
Page 50
... your computer. Do not simply delete the HP Photosmart application files from your computer. 5. To uninstall and reinstall the software 1. Select HP Photosmart All-in the Setup Guide that you disconnect the product before prompted by the software installation screen, you connected the USB cable to the...available from HP at the HP online support Web site: www.hp.com/support. Help may also be available at an additional cost. Make sure to function. Disconnect the product from your computer. Follow the onscreen instructions and the instructions provided in -One Driver Software, and...
... your computer. Do not simply delete the HP Photosmart application files from your computer. 5. To uninstall and reinstall the software 1. Select HP Photosmart All-in the Setup Guide that you disconnect the product before prompted by the software installation screen, you connected the USB cable to the...available from HP at the HP online support Web site: www.hp.com/support. Help may also be available at an additional cost. Make sure to function. Disconnect the product from your computer. Follow the onscreen instructions and the instructions provided in -One Driver Software, and...
User Guide
Page 51
... occurred Setup troubleshooting 49 Turn off the product, wait one minute, then restart it ). 3. CAUTION: Do not connect the USB cable to your computer. 4. Reinstall the HP Photosmart software. If the HP Solution Center shows the essential icons (Scan Picture and Scan Document), the software has been properly installed. Disconnect the USB cable from the computer. 2. If...
... occurred Setup troubleshooting 49 Turn off the product, wait one minute, then restart it ). 3. CAUTION: Do not connect the USB cable to your computer. 4. Reinstall the HP Photosmart software. If the HP Solution Center shows the essential icons (Scan Picture and Scan Document), the software has been properly installed. Disconnect the USB cable from the computer. 2. If...

User Guide
Page 54
...by the onscreen instructions. Remove any objects that the print carriage is straightforward. Connecting the USB cable before the software was connected before you have installed the software, connecting your computer and the other into a power outlet. After setting up the product, it on the product.... Simply plug one end of the USB cable into the back of your computer to the product and plugged into the...
...by the onscreen instructions. Remove any objects that the print carriage is straightforward. Connecting the USB cable before the software was connected before you have installed the software, connecting your computer and the other into a power outlet. After setting up the product, it on the product.... Simply plug one end of the USB cable into the back of your computer to the product and plugged into the...
User Guide
Page 55
...Make sure your computer. • Check other printers or scanners. Turn off the product, and then turn it on the back of the USB cable is plugged into the USB port on again. • If necessary, remove and then install the software you are connecting the product through a USB hub... the print queue, see the Readme file. • Check the connection from your computer. Solve a problem • If you installed with the operating system installed on , try connecting directly to your computer is USB ready and that you are using a supported operating system. For more information,...
...Make sure your computer. • Check other printers or scanners. Turn off the product, and then turn it on the back of the USB cable is plugged into the USB port on again. • If necessary, remove and then install the software you are connecting the product through a USB hub... the print queue, see the Readme file. • Check the connection from your computer. Solve a problem • If you installed with the operating system installed on , try connecting directly to your computer is USB ready and that you are using a supported operating system. For more information,...
User Guide
Page 56
... drive letter. To uninstall the software and reset the product 1. Uninstall the software completely. NOTE: It is not assigned to install the software. To uninstall the software completely a. Cause: The installation failed to ensure you can start the installation from the back of the product... product. 2. Disconnect the power cord from a Windows computer 1. b. Press the On button to install the software. To start it manually. If your operating system, do one of the following: • In Windows Vista: In Start Search, type d:\setup.exe, and then...
... drive letter. To uninstall the software and reset the product 1. Uninstall the software completely. NOTE: It is not assigned to install the software. To uninstall the software completely a. Cause: The installation failed to ensure you can start the installation from the back of the product... product. 2. Disconnect the power cord from a Windows computer 1. b. Press the On button to install the software. To start it manually. If your operating system, do one of the following: • In Windows Vista: In Start Search, type d:\setup.exe, and then...
User Guide
Page 57
... manufactured by HP or Compaq, do one of the computer utilities, such as the anti-virus software, but are related to the HP Photosmart Software. Occasionally, TSR's prevent the HP software from starting ...HP Document Viewer • HP Photosmart Essential • HP Image Zone • HP Photo and imaging gallery • HP Photosmart, Officejet, Deskjet (with the product name and software version number) • HP Software update • HP Share to function. In Windows Vista and Windows XP, use the MSCONFIG utility to remove it does not install properly. Depending on , a software...
... manufactured by HP or Compaq, do one of the computer utilities, such as the anti-virus software, but are related to the HP Photosmart Software. Occasionally, TSR's prevent the HP software from starting ...HP Document Viewer • HP Photosmart Essential • HP Image Zone • HP Photo and imaging gallery • HP Photosmart, Officejet, Deskjet (with the product name and software version number) • HP Software update • HP Share to function. In Windows Vista and Windows XP, use the MSCONFIG utility to remove it does not install properly. Depending on , a software...
User Guide
Page 58
...drive and then presents a report with a list of components to install the software. 6. To install the software a. The message will start automatically. Click the check box next to remove the unnecessary components. The software installation will not prevent you from the Windows Start menu, click Start... not use d. After selecting the components to the computer during the next restart. NOTE: If the installation does not run the Disk Cleanup utility a. Install the software. Click Apply, and then click Close. After the computer restarts, the You've used system configuration ...
...drive and then presents a report with a list of components to install the software. 6. To install the software a. The message will start automatically. Click the check box next to remove the unnecessary components. The software installation will not prevent you from the Windows Start menu, click Start... not use d. After selecting the components to the computer during the next restart. NOTE: If the installation does not run the Disk Cleanup utility a. Install the software. Click Apply, and then click Close. After the computer restarts, the You've used system configuration ...

User Guide
Page 66
Solution 3: Rotate the image Solution: If the problem persists, use the software you installed with the product or another software application to rotate your image 180 degrees so that the paper is loaded correctly in your printout has lines, streaks, or marks on page 23 ...
Solution 3: Rotate the image Solution: If the problem persists, use the software you installed with the product or another software application to rotate your image 180 degrees so that the paper is loaded correctly in your printout has lines, streaks, or marks on page 23 ...
User Guide
Page 81
... trying the remaining solutions until the issue is corrupt, reformat the memory card in your computer Memory card troubleshooting 79 For more than one memory card at a time. Cause: Multiple memory cards were inserted in the appropriate slot on the product. If this did not ... the photos from the product to a computer, try the next solution. If the file system on the card is resolved. • Solution 1: Install the product software • Solution 2: Turn on the product • Solution 3: Turn on the computer • Solution 4: Check the connection from the computer. ...
... trying the remaining solutions until the issue is corrupt, reformat the memory card in your computer Memory card troubleshooting 79 For more than one memory card at a time. Cause: Multiple memory cards were inserted in the appropriate slot on the product. If this did not ... the photos from the product to a computer, try the next solution. If the file system on the card is resolved. • Solution 1: Install the product software • Solution 2: Turn on the product • Solution 3: Turn on the computer • Solution 4: Check the connection from the computer. ...

User Guide
Page 82
... Setup program. 2. Solution 4: Check the connection from the product to your computer Solution: Check the connection from the product to install the product software. 3. If this did not solve the issue, try the next solution. Make sure the other end of the USB cable is... securely plugged into a USB port on your computer. Solve a problem 80 Solve a problem Chapter 10 Solution 1: Install the product software Solution: Install the product software that came with the product. Solution 2: Turn on the product Solution: Turn on the back of the product. Cause: The...
... Setup program. 2. Solution 4: Check the connection from the product to your computer Solution: Check the connection from the product to install the product software. 3. If this did not solve the issue, try the next solution. Make sure the other end of the USB cable is... securely plugged into a USB port on your computer. Solve a problem 80 Solve a problem Chapter 10 Solution 1: Install the product software Solution: Install the product software that came with the product. Solution 2: Turn on the product Solution: Turn on the back of the product. Cause: The...

User Guide
Page 89
...: The print cartridge door was open Solution: Close the print cartridge door. Errors 87 To install the OCR software, you are using HP Photosmart Essential, the Optical Character Recognition (OCR) software might not be incomprehensible. Cause: The scan document settings were not set to interpret the characters...; Memory is full • Scanner failure • Missing HP Photosmart Software Door open . Errors If the product has an error, the lights on the product might flash, or an error message might be installed on your computer screen. If the OCR language does not match...
...: The print cartridge door was open Solution: Close the print cartridge door. Errors 87 To install the OCR software, you are using HP Photosmart Essential, the Optical Character Recognition (OCR) software might not be incomprehensible. Cause: The scan document settings were not set to interpret the characters...; Memory is full • Scanner failure • Missing HP Photosmart Software Door open . Errors If the product has an error, the lights on the product might flash, or an error message might be installed on your computer screen. If the OCR language does not match...


