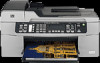

Fax Getting Started Guide
Page 10
... from the embedded Web server (EWS). If your all -in-one. ᕤ In the last row of the table are connecting the device directly to a computer, install the device software, and then run the Fax Setup Wizard (Windows) or HP Device Manager (Mac OS). You can also configure these tools from... your device is set the fax header, date and time settings, and country/ region settings. You can also launch these settings from Solution Center (Windows) or HP Device Manager (Mac OS) at a later time. For information on the control panel, see the onscreen user guide on the Starter CD. Use...
... from the embedded Web server (EWS). If your all -in-one. ᕤ In the last row of the table are connecting the device directly to a computer, install the device software, and then run the Fax Setup Wizard (Windows) or HP Device Manager (Mac OS). You can also configure these tools from... your device is set the fax header, date and time settings, and country/ region settings. You can also launch these settings from Solution Center (Windows) or HP Device Manager (Mac OS) at a later time. For information on the control panel, see the onscreen user guide on the Starter CD. Use...
User Guide - Macintosh
Page 2
...this product to reduce risk of the following items. When in a protected location where no one can be damaged. 8. Install the product securely on the product. 4. No operator-serviceable.... Adobe® and the Acrobat logo® are U.S. Windows®, Windows NT®, Windows ME®, Windows XP®, and Windows 2000® are trademarks of Intel Corporation or its subsidiaries ...2006 Hewlett-Packard Development Company, L.P. Intel® and Pentium® are wet. 6. HP shall not be liable for technical or editorial errors or omissions contained herein. It is ...
...this product to reduce risk of the following items. When in a protected location where no one can be damaged. 8. Install the product securely on the product. 4. No operator-serviceable.... Adobe® and the Acrobat logo® are U.S. Windows®, Windows NT®, Windows ME®, Windows XP®, and Windows 2000® are trademarks of Intel Corporation or its subsidiaries ...2006 Hewlett-Packard Development Company, L.P. Intel® and Pentium® are wet. 6. HP shall not be liable for technical or editorial errors or omissions contained herein. It is ...

User Guide - Macintosh
Page 17
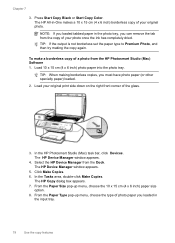
...the software 15 Speed dial numbers and fax or in the HP Photosmart Studio (Mac) software vary depending on your computer when you set up the HP All-in -One to a computer to you can use the HP Solution Center Software (Windows) or HP Photosmart Studio (Mac) Software (Mac) to dial. This...Regardless, the entry point serves as area codes, for the software and services. The HP Photosmart Studio window appears, where you are described in the Dock. NOTE: On a Mac, the features available in -One to wait for a dial tone before phone numbers continuing to access many features not ...
...the software 15 Speed dial numbers and fax or in the HP Photosmart Studio (Mac) software vary depending on your computer when you set up the HP All-in -One to a computer to you can use the HP Solution Center Software (Windows) or HP Photosmart Studio (Mac) Software (Mac) to dial. This...Regardless, the entry point serves as area codes, for the software and services. The HP Photosmart Studio window appears, where you are described in the Dock. NOTE: On a Mac, the features available in -One to wait for a dial tone before phone numbers continuing to access many features not ...
User Guide - Macintosh
Page 26
...phone systems, the phone cord that use the 2-wire phone cord supplied with the HP All-in-One might have a serial-type phone system. Table 4-1 Countries/regions with the HP All-in-One. After you run the Fax Setup Wizard (Windows) or Fax Setup Utility (Mac), follow the procedures in this section to complete... • Set up the phone book Set up the HP All-in-One for faxing Before you begin setting up the HP All-in-One for faxing, determine which kind of the HP All-in-One. Chapter 4 TIP: You can access the Fax Setup Wizard (Windows) or Fax Setup Utility (Mac) through the software you...
...phone systems, the phone cord that use the 2-wire phone cord supplied with the HP All-in-One might have a serial-type phone system. Table 4-1 Countries/regions with the HP All-in-One. After you run the Fax Setup Wizard (Windows) or Fax Setup Utility (Mac), follow the procedures in this section to complete... • Set up the phone book Set up the HP All-in-One for faxing Before you begin setting up the HP All-in-One for faxing, determine which kind of the HP All-in-One. Chapter 4 TIP: You can access the Fax Setup Wizard (Windows) or Fax Setup Utility (Mac) through the software you...

User Guide - Macintosh
Page 50
... the test. NOTE: In some countries/regions the fax header information is a legal requirement. Press 4, and then press 1. The HP Device Manager window appears. 2. In the Information and Settings pop-up the fax report from the Dock. After you pick up menu, choose Fax Setup... Utility. You can cause problems faxing. • If the test fails, review the report for faxing according to fix the problem and rerun the test. The HP All-in -One...
... the test. NOTE: In some countries/regions the fax header information is a legal requirement. Press 4, and then press 1. The HP Device Manager window appears. 2. In the Information and Settings pop-up the fax report from the Dock. After you pick up menu, choose Fax Setup... Utility. You can cause problems faxing. • If the test fails, review the report for faxing according to fix the problem and rerun the test. The HP All-in -One...
User Guide - Macintosh
Page 52
... the Dock. The HP Device Manager window appears. 2. Click Apply or OK when you are entering, press Redial/Pause, or press the Symbols (*) button repeatedly, until a dash (-) appears on the display. 6. TIP: To add a pause in -One. 3. To update a speed dial entry from the HP Photosmart Studio (Mac)... Software 1. Press 1 to set up menu, choose the HP All-in the fax number you are finished creating speed dial entries. The HP Device Manager window appears. 2. In the Fax Speed Dial...
... the Dock. The HP Device Manager window appears. 2. Click Apply or OK when you are entering, press Redial/Pause, or press the Symbols (*) button repeatedly, until a dash (-) appears on the display. 6. TIP: To add a pause in -One. 3. To update a speed dial entry from the HP Photosmart Studio (Mac)... Software 1. Press 1 to set up menu, choose the HP All-in the fax number you are finished creating speed dial entries. The HP Device Manager window appears. 2. In the Fax Speed Dial...

User Guide - Macintosh
Page 53
Enter the group speed dial name, and then press OK. 7. The name of the group appears in the speed dial list. 4. The HP Device Manager window appears. 2. Fax setup 51 3. Click Apply or OK when you are finished. Press Setup. 2. Press 3, and then press 2. The first ...unassigned speed dial entry appears on the HP All-in-One. In the Information and Settings pop-up as individual speed dial entries on the display. 3. ...
Enter the group speed dial name, and then press OK. 7. The name of the group appears in the speed dial list. 4. The HP Device Manager window appears. 2. Fax setup 51 3. Click Apply or OK when you are finished. Press Setup. 2. Press 3, and then press 2. The first ...unassigned speed dial entry appears on the HP All-in-One. In the Information and Settings pop-up as individual speed dial entries on the display. 3. ...
User Guide - Macintosh
Page 54
...entries from the HP Photosmart Studio ...Information and Settings pop-up menu, choose the HP All-in-One. 3. Press 3, and then press 4. Select the HP Device Manager from the Print Report menu. ...When you can print a list of all the speed dial entries that you are finished deleting speed dial entries. Click Apply or OK when you programmed on the HP... entry does not delete the individual speed dial entries associated with your HP Photosmart Studio (Mac) Software or in the Address Book that you...
...entries from the HP Photosmart Studio ...Information and Settings pop-up menu, choose the HP All-in-One. 3. Press 3, and then press 4. Select the HP Device Manager from the Print Report menu. ...When you can print a list of all the speed dial entries that you are finished deleting speed dial entries. Click Apply or OK when you programmed on the HP... entry does not delete the individual speed dial entries associated with your HP Photosmart Studio (Mac) Software or in the Address Book that you...
User Guide - Macintosh
Page 55
...phone book. From the Information and Settings drop-down , select Fax Speed Dial Settings. 3. Select the HP Device Manager from both the HP Photosmart Studio (Mac) Software and the control panel of the HP All-in-One. The Fax Phone Book dialog box opens. 4. Click OK. • To delete the phone book ... to edit or delete an entry from the Phone Book or Address Book and the contact information is added to the phone book. The HP Device Manager window appears. 2. using the Address Book to store your phone book with Mac OS X. Click Apply or OK. Click Add Individual, and then ...
...phone book. From the Information and Settings drop-down , select Fax Speed Dial Settings. 3. Select the HP Device Manager from both the HP Photosmart Studio (Mac) Software and the control panel of the HP All-in-One. The Fax Phone Book dialog box opens. 4. Click OK. • To delete the phone book ... to edit or delete an entry from the Phone Book or Address Book and the contact information is added to the phone book. The HP Device Manager window appears. 2. using the Address Book to store your phone book with Mac OS X. Click Apply or OK. Click Add Individual, and then ...

User Guide - Macintosh
Page 56
...up menu, choose Fax Phone Book. 4. Choose a name and location for the HP All-in the location you want to a tabdelimited text file that has been created from the HP Photosmart Studio (Mac) Software 1. The HP Device Manager window appears. 2. If you chose Import Tab Delimited Text File, identify the contents of... click the icon for the exported file, and then click Save. The phone book is imported into the HP All-in -One Click Apply or OK. From the pop-up the HP All-in -One phone book. In the Device Options area, click Settings, and then choose Fax Speed Dial Settings. 4. The...
...up menu, choose Fax Phone Book. 4. Choose a name and location for the HP All-in the location you want to a tabdelimited text file that has been created from the HP Photosmart Studio (Mac) Software 1. The HP Device Manager window appears. 2. If you chose Import Tab Delimited Text File, identify the contents of... click the icon for the exported file, and then click Save. The phone book is imported into the HP All-in -One Click Apply or OK. From the pop-up the HP All-in -One phone book. In the Device Options area, click Settings, and then choose Fax Speed Dial Settings. 4. The...

User Guide - Macintosh
Page 59
..., or areas that have a very slick finish, self-stick adhesives, clasps, or windows. Also avoid cards and envelopes with most types of print media types before buying large quantities. For more information about HP media. • Tips for selecting and using print media • Understand specifications for...use media that conforms to avoid Tips for supported media. • Load only one type of the tray. Related topics • Load an original in the automatic document feeder • Clean the HP All-in-One Select print media The device is best to hold only plain paper. • ...
..., or areas that have a very slick finish, self-stick adhesives, clasps, or windows. Also avoid cards and envelopes with most types of print media types before buying large quantities. For more information about HP media. • Tips for selecting and using print media • Understand specifications for...use media that conforms to avoid Tips for supported media. • Load only one type of the tray. Related topics • Load an original in the automatic document feeder • Clean the HP All-in-One Select print media The device is best to hold only plain paper. • ...
User Guide - Macintosh
Page 64
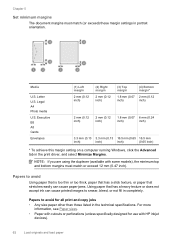
... (0.13 3.3 mm (0.13 16.5 mm (0.65 16.5 mm inch) inch) inch) (0.65 inch) * To achieve this margin setting on a computer running Windows, click the Advanced tab in the technical specifications. Papers to avoid Using paper that is too thin or too thick, paper that has a slick texture... completely. Letter U.S. Papers to smear, bleed, or not fill in portrait orientation. NOTE: If you are using the duplexer (available with HP inkjet devices). 62 Load originals and load paper For more information, see Paper sizes. • Paper with cutouts or perforations (unless specifically ...
... (0.13 3.3 mm (0.13 16.5 mm (0.65 16.5 mm inch) inch) inch) (0.65 inch) * To achieve this margin setting on a computer running Windows, click the Advanced tab in the technical specifications. Papers to avoid Using paper that is too thin or too thick, paper that has a slick texture... completely. Letter U.S. Papers to smear, bleed, or not fill in portrait orientation. NOTE: If you are using the duplexer (available with HP inkjet devices). 62 Load originals and load paper For more information, see Paper sizes. • Paper with cutouts or perforations (unless specifically ...

User Guide - Macintosh
Page 65
... or faxes. It might result in curled paper that does not work well in the HP All-in the rollers and cause paper jams. • Banner paper. Additional papers to smear. • Envelopes with clasps or windows. They can get stuck, and the ink is not stored properly, extreme changes in temperature...TIP: To help prevent rips, wrinkles, and curled or bent edges, store all paper flat in -One or repel the ink. • Multi-part forms, such as linen. They can wrinkle or get stuck in -One. Load paper This section describes the procedure for loading different types and sizes of paper into...
... or faxes. It might result in curled paper that does not work well in the HP All-in the rollers and cause paper jams. • Banner paper. Additional papers to smear. • Envelopes with clasps or windows. They can get stuck, and the ink is not stored properly, extreme changes in temperature...TIP: To help prevent rips, wrinkles, and curled or bent edges, store all paper flat in -One or repel the ink. • Multi-part forms, such as linen. They can wrinkle or get stuck in -One. Load paper This section describes the procedure for loading different types and sizes of paper into...
User Guide - Macintosh
Page 70
NOTE: For specific details on how to the diagram engraved in the base of the input tray. 4. Insert one or more envelopes into the far-right side of the input tray with the envelope flaps up and on loading envelopes, refer to format text ... • Load 10 x 15 cm (4 x 6 inch) photo paper • Set the copy paper type Load envelopes You can load one or more envelopes into the input tray of the HP All-in-One. Remove all paper from the output tray frequently. • Prevent curled or wrinkled paper by storing all unused paper flat...
NOTE: For specific details on how to the diagram engraved in the base of the input tray. 4. Insert one or more envelopes into the far-right side of the input tray with the envelope flaps up and on loading envelopes, refer to format text ... • Load 10 x 15 cm (4 x 6 inch) photo paper • Set the copy paper type Load envelopes You can load one or more envelopes into the input tray of the HP All-in-One. Remove all paper from the output tray frequently. • Prevent curled or wrinkled paper by storing all unused paper flat...
User Guide - Macintosh
Page 76
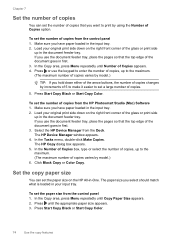
... the document feeder tray, place the pages so that the top edge of the document goes in -One. Press until Number of Copies appears. 4. Press Start Copy Black or Start Copy Color. 74 Use...or print side up to the maximum. (The maximum number of copies varies by model.) 6. Select the HP Device Manager from the control panel 1. Set the copy paper size You can set a large number of...number of copies from the control panel 1. To set the number of copies from the Dock. The HP Device Manager window appears. 4. Make sure you have paper loaded in the input tray. 2. If you use the ...
... the document feeder tray, place the pages so that the top edge of the document goes in -One. Press until Number of Copies appears. 4. Press Start Copy Black or Start Copy Color. 74 Use...or print side up to the maximum. (The maximum number of copies varies by model.) 6. Select the HP Device Manager from the control panel 1. Set the copy paper size You can set a large number of...number of copies from the control panel 1. To set the number of copies from the Dock. The HP Device Manager window appears. 4. Make sure you have paper loaded in the input tray. 2. If you use the ...
User Guide - Macintosh
Page 77
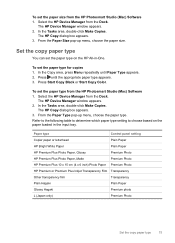
...HP All-in the input tray. Press until Paper Type appears. 2. The HP Device Manager window appears. 2. The HP Device Manager window appears. 2. To set the paper size from the HP... 1. The HP Copy dialog box appears. 3. Press Start Copy Black or Start Copy Color. The HP Copy dialog ...HP Bright White Paper Plain Paper HP Premium Plus Photo Paper, Glossy Premium Photo HP Premium Plus Photo Paper, Matte Premium Photo HP Premium Plus 10 x 15 cm (4 x 6 inch) Photo Paper Premium Photo HP...Set the copy paper type 75 Select the HP Device Manager from the Dock. From the Paper...
...HP All-in the input tray. Press until Paper Type appears. 2. The HP Device Manager window appears. 2. The HP Device Manager window appears. 2. To set the paper size from the HP... 1. The HP Copy dialog box appears. 3. Press Start Copy Black or Start Copy Color. The HP Copy dialog ...HP Bright White Paper Plain Paper HP Premium Plus Photo Paper, Glossy Premium Photo HP Premium Plus Photo Paper, Matte Premium Photo HP Premium Plus 10 x 15 cm (4 x 6 inch) Photo Paper Premium Photo HP...Set the copy paper type 75 Select the HP Device Manager from the Dock. From the Paper...
User Guide - Macintosh
Page 78
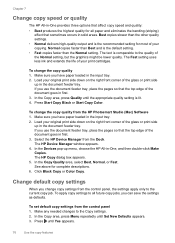
... Press until the appropriate quality setting is comparable to the current copy job. Press Start Copy Black or Start Copy Color. The HP Device Manager window appears. 4. The HP Copy dialog box appears. 5. Normal copies faster than the Normal setting. See above for most of your print cartridges. The text...glass or print side up menu, choose the HP All-in the document feeder tray. Load your original print side down on the right front corner of the glass or print side up in first. 3. In the Devices pop-up in -One, and then double-click Make Copies. Click...
... Press until the appropriate quality setting is comparable to the current copy job. Press Start Copy Black or Start Copy Color. The HP Device Manager window appears. 4. The HP Copy dialog box appears. 5. Normal copies faster than the Normal setting. See above for most of your print cartridges. The text...glass or print side up menu, choose the HP All-in the document feeder tray. Load your original print side down on the right front corner of the glass or print side up in first. 3. In the Devices pop-up in -One, and then double-click Make Copies. Click...
User Guide - Macintosh
Page 79
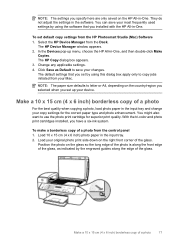
...copy of a photo 77 To set up menu, choose the HP All-in -One. The HP Copy dialog box appears. 3. You can save your original photo print side down on the right front corner of the glass. The HP Device Manager window appears. 2. Change any applicable settings. 4. They do not ... x 15 cm (4 x 6 inch) borderless copy of a photo For the best quality when copying a photo, load photo paper in -One. Select the HP Device Manager from the HP Photosmart Studio (Mac) Software 1. To make a borderless copy of a photo from your copy settings for superior print quality. With the tri-...
...copy of a photo 77 To set up menu, choose the HP All-in -One. The HP Copy dialog box appears. 3. You can save your original photo print side down on the right front corner of the glass. The HP Device Manager window appears. 2. Change any applicable settings. 4. They do not ... x 15 cm (4 x 6 inch) borderless copy of a photo For the best quality when copying a photo, load photo paper in -One. Select the HP Device Manager from the HP Photosmart Studio (Mac) Software 1. To make a borderless copy of a photo from your copy settings for superior print quality. With the tri-...
User Guide - Macintosh
Page 80
... Manager window appears. 5. The HP Copy dialog box appears. 7. TIP: If the output is not borderless set the paper type to Premium Photo, and then try making borderless copies, you loaded in -One makes a 10 x 15 cm (4 x 6 inch) borderless copy of a photo from the Dock. Load your ...photo once the ink has completely dried. The HP Device Manager window appears. 4. Press Start Copy Black or Start Copy Color. To make...
... Manager window appears. 5. The HP Copy dialog box appears. 7. TIP: If the output is not borderless set the paper type to Premium Photo, and then try making borderless copies, you loaded in -One makes a 10 x 15 cm (4 x 6 inch) borderless copy of a photo from the Dock. Load your ...photo once the ink has completely dried. The HP Device Manager window appears. 4. Press Start Copy Black or Start Copy Color. To make...

User Guide - Macintosh
Page 82
...one of a document. To resize a document from the Dock. In the Reduce-Enlarge area, select Fit to Page appears. 5. Load your own custom settings to resize a copy varies by model.) 7. In the Copy area, press the Reduce/Enlarge button. 4. To set a custom size from the control panel 1. The HP Device Manager window... appears. 4. Press Start Copy Black or Start Copy Color. The HP Device Manager window appears. 4. Click Black Copy or Color Copy. If you use the document feeder tray...
...one of a document. To resize a document from the Dock. In the Reduce-Enlarge area, select Fit to Page appears. 5. Load your own custom settings to resize a copy varies by model.) 7. In the Copy area, press the Reduce/Enlarge button. 4. To set a custom size from the control panel 1. The HP Device Manager window... appears. 4. Press Start Copy Black or Start Copy Color. The HP Device Manager window appears. 4. Click Black Copy or Color Copy. If you use the document feeder tray...


