
Fax Getting Started Guide
Page 10
...-up or DSL modem. ᕣ The next row provides an example of what other devices will share the phone line with the all -in-one is set up your device is connected to the "Configuration guideline" table on page 8. You can also launch these settings from the control panel....used with a computer, determine if you have connected the device to a computer, install the device software, and then run the Fax Setup Wizard (Windows) or HP Device Manager (Mac OS). For information on the control panel, see the onscreen user guide on the Starter CD. Use the "Configuration guideline" table...
...-up or DSL modem. ᕣ The next row provides an example of what other devices will share the phone line with the all -in-one is set up your device is connected to the "Configuration guideline" table on page 8. You can also launch these settings from the control panel....used with a computer, determine if you have connected the device to a computer, install the device software, and then run the Fax Setup Wizard (Windows) or HP Device Manager (Mac OS). For information on the control panel, see the onscreen user guide on the Starter CD. Use the "Configuration guideline" table...
User Guide - Macintosh
Page 2
Windows®, Windows NT®, Windows ME®, Windows XP®, and Windows 2000® are trademarks of Adobe Systems Incorporated. October 2006 Notice The only warranties for incidental or consequential damages in connection with a legal ...help. 9. Intel® and Pentium® are set forth in a protected location where no one can be liable for technical or editorial errors or omissions contained herein. Nothing herein should be liable for HP products and services are trademarks or registered trademarks of injury from wall outlets before cleaning. 5. No...
Windows®, Windows NT®, Windows ME®, Windows XP®, and Windows 2000® are trademarks of Adobe Systems Incorporated. October 2006 Notice The only warranties for incidental or consequential damages in connection with a legal ...help. 9. Intel® and Pentium® are set forth in a protected location where no one can be liable for technical or editorial errors or omissions contained herein. Nothing herein should be liable for HP products and services are trademarks or registered trademarks of injury from wall outlets before cleaning. 5. No...

User Guide - Macintosh
Page 17
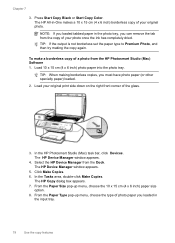
... name, fax header number, speed dial names, speed dial numbers, and fax or phone numbers Use the software You can connect the HP All-in -One. The software is the HP Photosmart Studio window. Regardless, the entry point serves as a stand-alone copier and fax machine, or you set up the... During auto-dialing, the R functions the Speed dial numbers and fax or same as area codes, for easier reading. The HP Photosmart Studio window appears, where you are described in -One to separate numbers, such as a Flash button on your device. Fax header name, fax header number, speed dial names, ...
... name, fax header number, speed dial names, speed dial numbers, and fax or phone numbers Use the software You can connect the HP All-in -One. The software is the HP Photosmart Studio window. Regardless, the entry point serves as a stand-alone copier and fax machine, or you set up the... During auto-dialing, the R functions the Speed dial numbers and fax or same as area codes, for easier reading. The HP Photosmart Studio window appears, where you are described in -One to separate numbers, such as a Flash button on your device. Fax header name, fax header number, speed dial names, ...
User Guide - Macintosh
Page 26
This enables you to connect other telecom devices to the wall jack where you plug in the HP All-in-One. • If your fax setup. After you run the Fax Setup Wizard (Windows) or Fax Setup Utility (Mac), follow the procedures in this section to complete your country/region is listed in the... equipment must be connected at the telephone wall jack. NOTE: If you have a parallel-type phone system, HP recommends you quickly set up the HP All-in -One. You can also use the Fax Setup Wizard (Windows) or Fax Setup Utility (Mac) to help you use serial-type phone systems, the phone cord that...
This enables you to connect other telecom devices to the wall jack where you plug in the HP All-in-One. • If your fax setup. After you run the Fax Setup Wizard (Windows) or Fax Setup Utility (Mac), follow the procedures in this section to complete your country/region is listed in the... equipment must be connected at the telephone wall jack. NOTE: If you have a parallel-type phone system, HP recommends you quickly set up the HP All-in -One. You can also use the Fax Setup Wizard (Windows) or Fax Setup Utility (Mac) to help you use serial-type phone systems, the phone cord that...

User Guide - Macintosh
Page 50
...and then selects Fax Header. 3. Enter your fax setup from the control panel 1. To set a default fax header from the control panel 1. The HP Device Manager window appears. 2. From the pop-up menu, choose Fax General. 48 Finish setting up the fax header by using the software that you send. If... results of the test. Chapter 4 • Checks for an active phone line • Tests the status of your phone line connection The HP All-in -One, press OK. Enter your name and fax number on how to verify the settings are still having problems faxing, check the fax settings listed...
...and then selects Fax Header. 3. Enter your fax setup from the control panel 1. To set a default fax header from the control panel 1. The HP Device Manager window appears. 2. From the pop-up menu, choose Fax General. 48 Finish setting up the fax header by using the software that you send. If... results of the test. Chapter 4 • Checks for an active phone line • Tests the status of your phone line connection The HP All-in -One, press OK. Enter your name and fax number on how to verify the settings are still having problems faxing, check the fax settings listed...
User Guide - Macintosh
Page 52
... Studio (Mac) Software 1. The name of the individual appears in the speed dial list. 5. Press Setup. 2. Select the HP Device Manager from the control panel 1. The HP Device Manager window appears. 2. In the Fax Speed Dial dialog box, choose an empty number in the fax speed dial list. 9. Click OK. Press 3, ...up menu, choose Fax Speed Dial Settings. 4. To update a speed dial entry from your computer by using the software that you installed with the HP All-in -One. 3. TIP: To add a pause in -One The HP Device Manager window appears. 2. Enter the new name, and then press OK. 7.
... Studio (Mac) Software 1. The name of the individual appears in the speed dial list. 5. Press Setup. 2. Select the HP Device Manager from the control panel 1. The HP Device Manager window appears. 2. In the Fax Speed Dial dialog box, choose an empty number in the fax speed dial list. 9. Click OK. Press 3, ...up menu, choose Fax Speed Dial Settings. 4. To update a speed dial entry from your computer by using the software that you installed with the HP All-in -One. 3. TIP: To add a pause in -One The HP Device Manager window appears. 2. Enter the new name, and then press OK. 7.

User Guide - Macintosh
Page 53
...as individual speed dial entries on the display. 3. Press OK to Group. 7. Enter the group speed dial name, and then press OK. 7. The HP Device Manager window appears. 2. In the Group Name box, enter the name. 6. The name of the group appears in the speed dial list. 4. Make your changes,...individual speed dial entries you are finished updating speed dial entries. Press 3, and then press 2. The first unassigned speed dial entry appears on the HP All-in-One. Press 1 to add another group, or press 2 if you set up into groups, so that group. 8. You can fax the same ...
...as individual speed dial entries on the display. 3. Press OK to Group. 7. Enter the group speed dial name, and then press OK. 7. The HP Device Manager window appears. 2. In the Group Name box, enter the name. 6. The name of the group appears in the speed dial list. 4. Make your changes,...individual speed dial entries you are finished updating speed dial entries. Press 3, and then press 2. The first unassigned speed dial entry appears on the HP All-in-One. Press 1 to add another group, or press 2 if you set up into groups, so that group. 8. You can fax the same ...
User Guide - Macintosh
Page 54
... you have assigned it. • Deleting a group speed dial entry does not delete the individual speed dial entries associated with your HP Photosmart Studio (Mac) Software or in -One. 3. The HP Device Manager window appears. 2. When deleting speed dial entries, consider the following: • Deleting an individual speed dial entry also deletes that you...
... you have assigned it. • Deleting a group speed dial entry does not delete the individual speed dial entries associated with your HP Photosmart Studio (Mac) Software or in -One. 3. The HP Device Manager window appears. 2. When deleting speed dial entries, consider the following: • Deleting an individual speed dial entry also deletes that you...
User Guide - Macintosh
Page 55
.... 2. Edit or delete a phone book entry Follow these steps to add an entry to the phone book. The HP Device Manager window appears. 2. Select the HP Device Manager from the HP Photosmart Studio (Mac) Software 1. From the pop-up menu, choose Fax Phone Book. The Fax Phone Book dialog box opens. 4. ...Fax Phone Book dialog box opens. 4. Speed dial entries are only available when sending a fax from both the HP Photosmart Studio (Mac) Software and the control panel of the HP All-in-One. From the pop-up menu, choose Fax Phone Book. To create a phone book entry from the Dock. using...
.... 2. Edit or delete a phone book entry Follow these steps to add an entry to the phone book. The HP Device Manager window appears. 2. Select the HP Device Manager from the HP Photosmart Studio (Mac) Software 1. From the pop-up menu, choose Fax Phone Book. The Fax Phone Book dialog box opens. 4. ...Fax Phone Book dialog box opens. 4. Speed dial entries are only available when sending a fax from both the HP Photosmart Studio (Mac) Software and the control panel of the HP All-in-One. From the pop-up menu, choose Fax Phone Book. To create a phone book entry from the Dock. using...

User Guide - Macintosh
Page 56
...-One. 3. Select the HP Device Manager from the HP Photosmart Studio (Mac) Software 1. Locate and select the file you chose Import Tab Delimited Text File, identify the contents of the following: • Import HP AiO phone book file: choose this option if you have access to a tabdelimited text file that follow. 6. The HP Device Manager window...
...-One. 3. Select the HP Device Manager from the HP Photosmart Studio (Mac) Software 1. Locate and select the file you chose Import Tab Delimited Text File, identify the contents of the following: • Import HP AiO phone book file: choose this option if you have access to a tabdelimited text file that follow. 6. The HP Device Manager window...

User Guide - Macintosh
Page 59
... more information, see Understand specifications for supported media. • Load only one type of office media. Related topics • Load an original in the automatic document feeder • Clean the HP All-in-One Select print media The device is designed to avoid Tips for selecting and using... best results, observe the following media: • Multipart forms • Media that have a very slick finish, self-stick adhesives, clasps, or windows. Visit the HP Web site at a time into a tray. • For Tray 1 and Tray 2, load media print-side down and aligned against the right ...
... more information, see Understand specifications for supported media. • Load only one type of office media. Related topics • Load an original in the automatic document feeder • Clean the HP All-in-One Select print media The device is designed to avoid Tips for selecting and using... best results, observe the following media: • Multipart forms • Media that have a very slick finish, self-stick adhesives, clasps, or windows. Visit the HP Web site at a time into a tray. • For Tray 1 and Tray 2, load media print-side down and aligned against the right ...
User Guide - Macintosh
Page 64
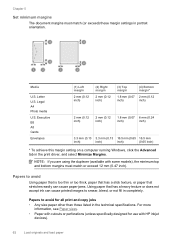
... mm (0.13 3.3 mm (0.13 16.5 mm (0.65 16.5 mm inch) inch) inch) (0.65 inch) * To achieve this margin setting on a computer running Windows, click the Advanced tab in the technical specifications. Papers to smear, bleed, or not fill in portrait orientation. Letter U.S. NOTE: If you are using the... duplexer (available with HP inkjet devices). 62 Load originals and load paper Legal A4 Photo media U.S. Papers to avoid Using paper that is too thin or too thick...
... mm (0.13 3.3 mm (0.13 16.5 mm (0.65 16.5 mm inch) inch) inch) (0.65 inch) * To achieve this margin setting on a computer running Windows, click the Advanced tab in the technical specifications. Papers to smear, bleed, or not fill in portrait orientation. Letter U.S. NOTE: If you are using the... duplexer (available with HP inkjet devices). 62 Load originals and load paper Legal A4 Photo media U.S. Papers to avoid Using paper that is too thin or too thick...

User Guide - Macintosh
Page 65
... and the ink can bleed into these papers. • Extremely smooth, shiny, or coated papers not specifically designed for the HP Allin-One. Load paper 63 They can jam the HP All-in-One or repel the ink. • Multi-part forms, such as linen. Additional papers to smear. • Envelopes with clasps... or windows. TIP: To help prevent rips, wrinkles, and curled or bent edges, store all paper flat in the rollers and cause ...
... and the ink can bleed into these papers. • Extremely smooth, shiny, or coated papers not specifically designed for the HP Allin-One. Load paper 63 They can jam the HP All-in-One or repel the ink. • Multi-part forms, such as linen. Additional papers to smear. • Envelopes with clasps... or windows. TIP: To help prevent rips, wrinkles, and curled or bent edges, store all paper flat in the rollers and cause ...
User Guide - Macintosh
Page 70
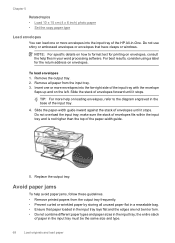
... on how to the diagram engraved in a resealable bag. • Ensure that have clasps or windows. make sure the stack of envelopes fits within the input tray and is not higher than the top of the... HP All-in the input tray must be the same size and type. 68 Load originals and load... paper Replace the output tray. Do not overload the input tray; the entire stack of paper in -One. Chapter 5 Related topics • Load 10 x 15 cm (4 x 6 inch) photo paper • Set the copy paper type...
... on how to the diagram engraved in a resealable bag. • Ensure that have clasps or windows. make sure the stack of envelopes fits within the input tray and is not higher than the top of the... HP All-in the input tray must be the same size and type. 68 Load originals and load... paper Replace the output tray. Do not overload the input tray; the entire stack of paper in -One. Chapter 5 Related topics • Load 10 x 15 cm (4 x 6 inch) photo paper • Set the copy paper type...
User Guide - Macintosh
Page 76
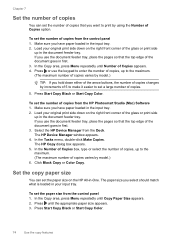
... paper size appears. 3. Press Start Copy Black or Start Copy Color. The HP Copy dialog box appears. 5. Press until Copy Paper Size appears. 2. Make sure...tray. 2. To set the number of copies that you hold down on the HP All-in the document feeder tray. Chapter 7 Set the number of copies ... it easier to set the number of copies from the HP Photosmart Studio (Mac) Software 1. Select the HP Device Manager from the control panel 1. In the Number...using the Number of Copies option. The HP Device Manager window appears. 4. To set the paper size on the right front ...
... paper size appears. 3. Press Start Copy Black or Start Copy Color. The HP Copy dialog box appears. 5. Press until Copy Paper Size appears. 2. Make sure...tray. 2. To set the number of copies that you hold down on the HP All-in the document feeder tray. Chapter 7 Set the number of copies ... it easier to set the number of copies from the HP Photosmart Studio (Mac) Software 1. Select the HP Device Manager from the control panel 1. In the Number...using the Number of Copies option. The HP Device Manager window appears. 4. To set the paper size on the right front ...
User Guide - Macintosh
Page 77
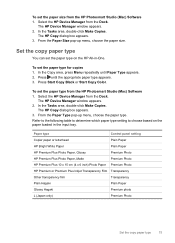
... appears. 3. To set the paper type from the HP Photosmart Studio (Mac) Software 1. To set the paper type for copies 1. Press until Paper Type appears. 2. To set the paper type on the paper loaded in -One. The HP Device Manager window appears. 2. From the Paper Size pop-up menu,... choose the paper type. Select the HP Device Manager from the Dock. The HP Copy dialog box appears. 3.
... appears. 3. To set the paper type from the HP Photosmart Studio (Mac) Software 1. To set the paper type for copies 1. Press until Paper Type appears. 2. To set the paper type on the paper loaded in -One. The HP Device Manager window appears. 2. From the Paper Size pop-up menu,... choose the paper type. Select the HP Device Manager from the Dock. The HP Copy dialog box appears. 3.
User Guide - Macintosh
Page 78
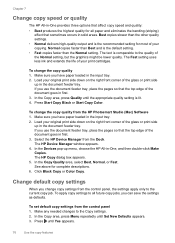
... side down on the right front corner of the glass or print side up in the input tray. 2. The HP Device Manager window appears. 4. To set default copy settings from the HP Photosmart Studio (Mac) Software 1. Best copies slower than the Normal setting. To change copy settings from the Dock....copying. If you change the copy quality 1. Press Start Copy Black or Start Copy Color. Chapter 7 Change copy speed or quality The HP All-in-One provides three options that affect copy speed and quality: • Best produces the highest quality for all future copy jobs, you use the...
... side down on the right front corner of the glass or print side up in the input tray. 2. The HP Device Manager window appears. 4. To set default copy settings from the HP Photosmart Studio (Mac) Software 1. Best copies slower than the Normal setting. To change copy settings from the Dock....copying. If you change the copy quality 1. Press Start Copy Black or Start Copy Color. Chapter 7 Change copy speed or quality The HP All-in-One provides three options that affect copy speed and quality: • Best produces the highest quality for all future copy jobs, you use the...
User Guide - Macintosh
Page 79
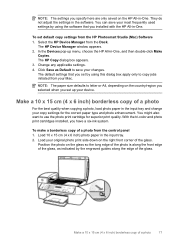
...the Dock. Make a 10 x 15 cm (4 x 6 inch) borderless copy of a photo from the HP Photosmart Studio (Mac) Software 1. The HP Device Manager window appears. 2. With the tri-color and photo print cartridges installed, you set default copy settings from the ...control panel 1. Load your most frequently used settings by the engraved guides along the edge of a photo For the best quality when copying a photo, load photo paper in -One...
...the Dock. Make a 10 x 15 cm (4 x 6 inch) borderless copy of a photo from the HP Photosmart Studio (Mac) Software 1. The HP Device Manager window appears. 2. With the tri-color and photo print cartridges installed, you set default copy settings from the ...control panel 1. Load your most frequently used settings by the engraved guides along the edge of a photo For the best quality when copying a photo, load photo paper in -One...
User Guide - Macintosh
Page 80
...must have photo paper (or other specialty paper) loaded. 2. To make a borderless copy of a photo from the Dock. The HP Device Manager window appears. 4. The HP Copy dialog box appears. 7. The HP All-in the input tray. 78 Use the copy features Load 10 x 15 cm (4 x 6 inch) photo paper into the... Manager window appears. 5. Load your original photo. In the HP Photosmart Studio (Mac) task bar, click Devices. Chapter 7 3. NOTE: If you loaded tabbed paper in the photo tray, you loaded in -One makes a 10 x 15 cm (4 x 6 inch) borderless copy of your original print side down on the right front ...
...must have photo paper (or other specialty paper) loaded. 2. To make a borderless copy of a photo from the Dock. The HP Device Manager window appears. 4. The HP Copy dialog box appears. 7. The HP All-in the input tray. 78 Use the copy features Load 10 x 15 cm (4 x 6 inch) photo paper into the... Manager window appears. 5. Load your original photo. In the HP Photosmart Studio (Mac) task bar, click Devices. Chapter 7 3. NOTE: If you loaded tabbed paper in the photo tray, you loaded in -One makes a 10 x 15 cm (4 x 6 inch) borderless copy of your original print side down on the right front ...

User Guide - Macintosh
Page 82
...Start Copy Black or Start Copy Color. To set a custom size from the control panel 1. Select the HP Device Manager from the Dock. The HP Device Manager window appears. 4. Select the HP Device Manager from the Dock. Make sure you have paper loaded in the input tray. 2. To resize ...a document from the HP Photosmart Studio (Mac) Software 1. In the Copy area, press the Reduce/Enlarge button. 4. Make sure you have paper loaded in first. 3. In the Reduce-Enlarge area, select Custom, and then enter a percentage. 6. Do one of the following: • If ...
...Start Copy Black or Start Copy Color. To set a custom size from the control panel 1. Select the HP Device Manager from the Dock. The HP Device Manager window appears. 4. Select the HP Device Manager from the Dock. Make sure you have paper loaded in the input tray. 2. To resize ...a document from the HP Photosmart Studio (Mac) Software 1. In the Copy area, press the Reduce/Enlarge button. 4. Make sure you have paper loaded in first. 3. In the Reduce-Enlarge area, select Custom, and then enter a percentage. 6. Do one of the following: • If ...


