Resolving Start Up and No Boot Problems Checklist
Page 1
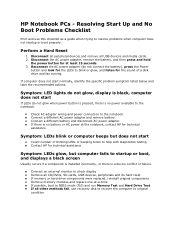
...to blink or glow, and listen for the sound of blinking LEDs or beeping tones to help with diagnostics testing Contact HP for at -a-time If possible, boot to BIOS mode (f10) and run Memory Test and Hard Drive Test If all USB devices and media cards. 2. Resolving Start... or boot, and displays a black screen Usually occurs if a component is installed incorrectly, or there is no power available to original condition. HP Notebook PCs - Symptom: LEDs blink or computer beeps but does not start normally, identify the specific problem symptom listed below and take the recommended actions. ...
...to blink or glow, and listen for the sound of blinking LEDs or beeping tones to help with diagnostics testing Contact HP for at -a-time If possible, boot to BIOS mode (f10) and run Memory Test and Hard Drive Test If all USB devices and media cards. 2. Resolving Start... or boot, and displays a black screen Usually occurs if a component is installed incorrectly, or there is no power available to original condition. HP Notebook PCs - Symptom: LEDs blink or computer beeps but does not start normally, identify the specific problem symptom listed below and take the recommended actions. ...
Resolving Start Up and No Boot Problems Checklist
Page 2
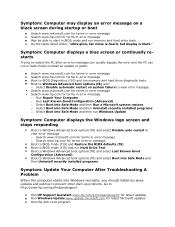
...restart to view error message o Search www.microsoft.com for terms in error message o Search www.hp.com for terms in error message Boot to BIOS mode (f10) and Restore the BIOS defaults (f9) Boot to BIOS mode (f10) and run Hard Drive Test Boot to Windows Advanced boot options (f8) and ...to http://www.hp.com/go/helpandsupport Run HP Support Assistant www.hp.com/go/helpandsupport for latest updates Run Windows Update www.update.microsoft.com for terms in Safe mode to install an update or patch. Symptom: Computer displays a blue screen or continually restarts Trying to restart the PC after an ...
...restart to view error message o Search www.microsoft.com for terms in error message o Search www.hp.com for terms in error message Boot to BIOS mode (f10) and Restore the BIOS defaults (f9) Boot to BIOS mode (f10) and run Hard Drive Test Boot to Windows Advanced boot options (f8) and ...to http://www.hp.com/go/helpandsupport Run HP Support Assistant www.hp.com/go/helpandsupport for latest updates Run Windows Update www.update.microsoft.com for terms in Safe mode to install an update or patch. Symptom: Computer displays a blue screen or continually restarts Trying to restart the PC after an ...
Getting Started - Windows 7
Page 8
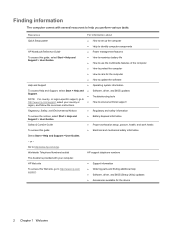
... instructions. Go to help ● Software, driver, and BIOS (Setup Utility) updates ● Accessories available for the device 2 Chapter 1 Welcome HP Web site To access this Web site, go to http://www.hp.com/support, select your computer. Resources For information about Quick... system information To access Help and Support, select Start > Help and ● Software, driver, and BIOS updates Support. ● Troubleshooting tools NOTE: For country- Worldwide Telephone Numbers booklet HP support telephone numbers This booklet is provided with several resources to http://www...
... instructions. Go to help ● Software, driver, and BIOS (Setup Utility) updates ● Accessories available for the device 2 Chapter 1 Welcome HP Web site To access this Web site, go to http://www.hp.com/support, select your computer. Resources For information about Quick... system information To access Help and Support, select Start > Help and ● Software, driver, and BIOS updates Support. ● Troubleshooting tools NOTE: For country- Worldwide Telephone Numbers booklet HP support telephone numbers This booklet is provided with several resources to http://www...
HP Mini 110 and Compaq Mini CQ10 - Maintenance and Service Guide
Page 85
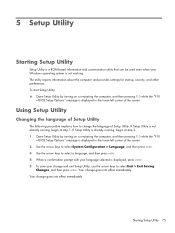
... not working. Starting Setup Utility 75 Open Setup Utility by turning on or restarting the computer, and then pressing f10 while the "F10 = BIOS Setup Options" message is displayed in the lower-left corner of Setup Utility. Use the arrow keys to select System Configuration > Language, and ...To start Setup Utility: ▲ Open Setup Utility by turning on or restarting the computer, and then pressing f10 while the "F10 = BIOS Setup Options" message is displayed in the lower-left corner of Setup Utility The following procedure explains how to change and exit Setup Utility, use...
... not working. Starting Setup Utility 75 Open Setup Utility by turning on or restarting the computer, and then pressing f10 while the "F10 = BIOS Setup Options" message is displayed in the lower-left corner of Setup Utility. Use the arrow keys to select System Configuration > Language, and ...To start Setup Utility: ▲ Open Setup Utility by turning on or restarting the computer, and then pressing f10 while the "F10 = BIOS Setup Options" message is displayed in the lower-left corner of Setup Utility The following procedure explains how to change and exit Setup Utility, use...
HP Mini 110 and Compaq Mini CQ10 - Maintenance and Service Guide
Page 86
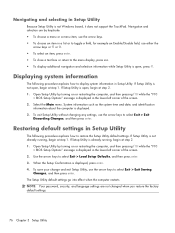
...Saving Changes, and then press enter. Open Setup Utility by turning on or restarting the computer, and then pressing f10 while the "F10 = BIOS Setup Options" message is not already running , begin at step 2. 1. To exit Setup Utility without changing any settings, use the arrow keys... 1. NOTE: Your password, security, and language settings are by turning on or restarting the computer, and then pressing f10 while the "F10 = BIOS Setup Options" message is open , begin at step 1. Navigation and selection are not changed when you restore the factory default settings. 76 Chapter 5...
...Saving Changes, and then press enter. Open Setup Utility by turning on or restarting the computer, and then pressing f10 while the "F10 = BIOS Setup Options" message is not already running , begin at step 2. 1. To exit Setup Utility without changing any settings, use the arrow keys... 1. NOTE: Your password, security, and language settings are by turning on or restarting the computer, and then pressing f10 while the "F10 = BIOS Setup Options" message is open , begin at step 1. Navigation and selection are not changed when you restore the factory default settings. 76 Chapter 5...
HP Mini 110 and Compaq Mini CQ10 - Maintenance and Service Guide
Page 87
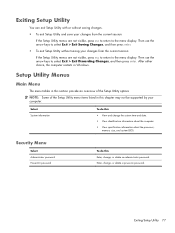
... and change the system time and date. ● View identification information about the computer. ● View specification information about the processor, memory size, and system BIOS. Then use the arrow keys to select Exit > Exit Discarding Changes, and then press enter. Select System information To do this section provide an overview...
... and change the system time and date. ● View identification information about the computer. ● View specification information about the processor, memory size, and system BIOS. Then use the arrow keys to select Exit > Exit Discarding Changes, and then press enter. Select System information To do this section provide an overview...
HP Notebook Reference Guide - Windows 7
Page 8
... an optional security cable ...53 Using the fingerprint reader (select models only 53 Locating the fingerprint reader 53 8 Setup Utility (BIOS) ...55 Starting Setup Utility ...55 Using Setup Utility ...55 Changing the language of Setup Utility 55 Navigating and selecting in Setup... system information 56 Restoring factory default settings in Setup Utility 56 Exiting Setup Utility ...56 Updating the BIOS ...57 Determining the BIOS version 57 Downloading a BIOS update 57 Appendix A Traveling with the computer ...59 Appendix B Troubleshooting resources ...60 Appendix C Electrostatic Discharge ......
... an optional security cable ...53 Using the fingerprint reader (select models only 53 Locating the fingerprint reader 53 8 Setup Utility (BIOS) ...55 Starting Setup Utility ...55 Using Setup Utility ...55 Changing the language of Setup Utility 55 Navigating and selecting in Setup... system information 56 Restoring factory default settings in Setup Utility 56 Exiting Setup Utility ...56 Updating the BIOS ...57 Determining the BIOS version 57 Downloading a BIOS update 57 Appendix A Traveling with the computer ...59 Appendix B Troubleshooting resources ...60 Appendix C Electrostatic Discharge ......
HP Notebook Reference Guide - Windows 7
Page 59
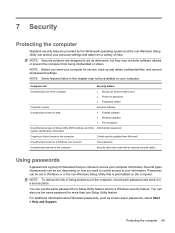
... ● Fingerprint reader Computer viruses Unauthorized access to data Antivirus software ● Firewall software ● Windows updates ● File encryption Unauthorized access to Setup Utility, BIOS settings, and other Administrator password system identification information Ongoing or future threats to the computer Critical security updates from Microsoft Unauthorized access to your information...
... ● Fingerprint reader Computer viruses Unauthorized access to data Antivirus software ● Firewall software ● Windows updates ● File encryption Unauthorized access to Setup Utility, BIOS settings, and other Administrator password system identification information Ongoing or future threats to the computer Critical security updates from Microsoft Unauthorized access to your information...
HP Notebook Reference Guide - Windows 7
Page 65
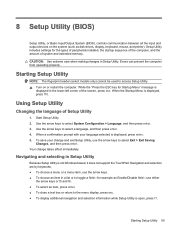
... a list or to toggle a field-for Startup Menu" message is not Windows based, it does not support the TouchPad. 8 Setup Utility (BIOS) Setup Utility, or Basic Input/Output System (BIOS), controls communication between all the input and output devices on or restart the computer. To save your language selected is displayed, press...
... a list or to toggle a field-for Startup Menu" message is not Windows based, it does not support the TouchPad. 8 Setup Utility (BIOS) Setup Utility, or Basic Input/Output System (BIOS), controls communication between all the input and output devices on or restart the computer. To save your language selected is displayed, press...

HP Notebook Reference Guide - Windows 7
Page 66
... when you restore the factory settings. Then use the arrow keys to select Exit > Exit Discarding Changes, and then press enter. 56 Chapter 8 Setup Utility (BIOS) When the Setup Confirmation is displayed. 3. The Setup Utility factory settings take effect when the computer restarts. System information such as the system time and...
... when you restore the factory settings. Then use the arrow keys to select Exit > Exit Discarding Changes, and then press enter. 56 Chapter 8 Setup Utility (BIOS) When the Setup Confirmation is displayed. 3. The Setup Utility factory settings take effect when the computer restarts. System information such as the system time and...
HP Notebook Reference Guide - Windows 7
Page 67
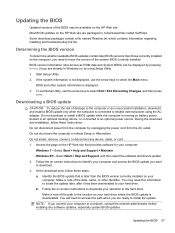
...the system information is displayed. 3. NOTE: If you are ready to an optional power source. BIOS version information (also known as ROM date and System BIOS) can be available on the HP Web site are already in an optional docking device, or connected to install the update. Start ...Setup Utility. 2. At the download area, follow these steps: a. Make a note of the system BIOS currently installed. Most BIOS updates on the HP Web site. Make a note of the BIOS may need to access this information to locate the update later, after it has been downloaded to your ...
...the system information is displayed. 3. NOTE: If you are ready to an optional power source. BIOS version information (also known as ROM date and System BIOS) can be available on the HP Web site are already in an optional docking device, or connected to install the update. Start ...Setup Utility. 2. At the download area, follow these steps: a. Make a note of the system BIOS currently installed. Most BIOS updates on the HP Web site. Make a note of the BIOS may need to access this information to locate the update later, after it has been downloaded to your ...
HP Notebook Reference Guide - Windows 7
Page 68
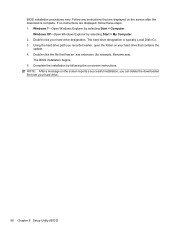
.... Follow any instructions that has an .exe extension (for example, filename.exe). NOTE: After a message on the screen after the download is typically Local Disk (C:). 3. BIOS installation procedures vary. If no instructions are displayed on the screen reports a successful installation, you recorded earlier, open the folder on -screen instructions. Double-click...
.... Follow any instructions that has an .exe extension (for example, filename.exe). NOTE: After a message on the screen after the download is typically Local Disk (C:). 3. BIOS installation procedures vary. If no instructions are displayed on the screen reports a successful installation, you recorded earlier, open the folder on -screen instructions. Double-click...
HP Notebook Reference Guide - Windows 7
Page 72
... 1394 cable, connecting 37 1394 devices connecting 37 defined 36 removing 37 16-bit PC Cards 30 32-bit PC Cards 30 A AC adapter, testing 28 action keys media 14 volume 14 administrator... levels 25 replacing 26 storing 26 Battery Check 24 battery information, finding 24 battery power 23 battery temperature 26 BIOS determining version 57 downloading an update 57 updating 57 Bluetooth device 2, 8 buttons media 14 power 20 volume 14...53 firewall software 6, 52 G GPS 9 graphics modes, switching 28 H hard drive external 39 HP ProtectSmart Hard Drive Protection 42 HDMI configuring audio 18 62 Index
... 1394 cable, connecting 37 1394 devices connecting 37 defined 36 removing 37 16-bit PC Cards 30 32-bit PC Cards 30 A AC adapter, testing 28 action keys media 14 volume 14 administrator... levels 25 replacing 26 storing 26 Battery Check 24 battery information, finding 24 battery power 23 battery temperature 26 BIOS determining version 57 downloading an update 57 updating 57 Bluetooth device 2, 8 buttons media 14 power 20 volume 14...53 firewall software 6, 52 G GPS 9 graphics modes, switching 28 H hard drive external 39 HP ProtectSmart Hard Drive Protection 42 HDMI configuring audio 18 62 Index


