Resolving Start Up and No Boot Problems Checklist
Page 1
... number of a disk drive and fan turning. If computer does not start If LEDs do hard reset If memory or hard drive components were replaced, reinstall original components Remove memory modules and replace one-at least 15 seconds. 3. Connect a different AC power adapter and remove battery. Connect an external monitor to blink or glow, and listen for technical assistance. Perform a Hard Reset 1. Reconnect the AC power adapter (do not connect the battery), press the Power button and look for the LEDs to check display Remove all USB devices and media cards...
... number of a disk drive and fan turning. If computer does not start If LEDs do hard reset If memory or hard drive components were replaced, reinstall original components Remove memory modules and replace one-at least 15 seconds. 3. Connect a different AC power adapter and remove battery. Connect an external monitor to blink or glow, and listen for technical assistance. Perform a Hard Reset 1. Reconnect the AC power adapter (do not connect the battery), press the Power button and look for the LEDs to check display Remove all USB devices and media cards...
Resolving Start Up and No Boot Problems Checklist
Page 2
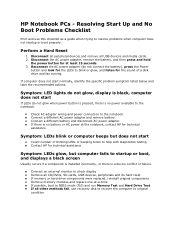
... BIOS mode and run Hard Drive Test Boot to Windows Advanced boot options (f8) and select Last Known Good Configuration (Advanced) Boot to Windows Advanced boot options (f8) and select Boot into Safe Mode and then Uninstall recently installed programs Symptom: Update Your Computer After Troubleshooting A Problem When the computer starts into Safe Mode and then run Windows Update Symptom: Computer displays the Windows logo screen and stops responding Boot to Windows Advanced boot options (f8) and select Disable auto-restart to view error...
... BIOS mode and run Hard Drive Test Boot to Windows Advanced boot options (f8) and select Last Known Good Configuration (Advanced) Boot to Windows Advanced boot options (f8) and select Boot into Safe Mode and then Uninstall recently installed programs Symptom: Update Your Computer After Troubleshooting A Problem When the computer starts into Safe Mode and then run Windows Update Symptom: Computer displays the Windows logo screen and stops responding Boot to Windows Advanced boot options (f8) and select Disable auto-restart to view error...

Limited warranty and technical support - (1 Year)
Page 10
... product drivers, latest updates and software fixes, warranty information, and product documentation. „ Find updated service and support information. „ Open an online service event with an HP support specialist for assistance with your product. A variety of services are unable to your problem using HP online services, you call HP: „ Product number, serial number, model name, and model number „ Applicable error messages „ Add-on accessories „ Operating system „ Third-party hardware or software...
... product drivers, latest updates and software fixes, warranty information, and product documentation. „ Find updated service and support information. „ Open an online service event with an HP support specialist for assistance with your product. A variety of services are unable to your problem using HP online services, you call HP: „ Product number, serial number, model name, and model number „ Applicable error messages „ Add-on accessories „ Operating system „ Third-party hardware or software...
Getting Started - Windows 7
Page 25
... Support. The following wireless devices: ● Wireless local area network (WLAN) device ● HP Mobile Broadband Module (a wireless wide area network (WWAN) device) ● Bluetooth device For more of the following features will help set up a new Internet account or configure the computer to use an existing account: ● Internet Services & Offers (available in some locations)-These icons may be displayed either individually on -screen instructions. ● Windows Connect to the Internet Wizard-You can connect to the Internet...
... Support. The following wireless devices: ● Wireless local area network (WLAN) device ● HP Mobile Broadband Module (a wireless wide area network (WWAN) device) ● Bluetooth device For more of the following features will help set up a new Internet account or configure the computer to use an existing account: ● Internet Services & Offers (available in some locations)-These icons may be displayed either individually on -screen instructions. ● Windows Connect to the Internet Wizard-You can connect to the Internet...
Getting Started - Windows 7
Page 31
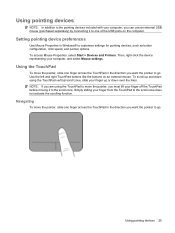
... to the pointing devices included with your computer, you can use an external USB mouse (purchased separately) by connecting it to the scroll zone. Simply sliding your finger up and down using the TouchPad to move the pointer, slide one finger across the TouchPad in Windows® to customize settings for pointing devices, such as button configuration, click speed, and pointer options. Using the TouchPad To move the...
... to the pointing devices included with your computer, you can use an external USB mouse (purchased separately) by connecting it to the scroll zone. Simply sliding your finger up and down using the TouchPad to move the pointer, slide one finger across the TouchPad in Windows® to customize settings for pointing devices, such as button configuration, click speed, and pointer options. Using the TouchPad To move the...
Getting Started - Windows 7
Page 50
...settings 39 personal files 39 battery bay 11 battery release latches 11 battery, replacing 27 buttons left TouchPad 4 right TouchPad 4 C caps lock light, identifying 5 components bottom 11 display 10 front 7 left-side 9 right-side 8 top 4 connector, power 9 D Digital Media Slot, identifying 8 drive light 9 E esc key, identifying 6 external monitor port 9 F f11 38 fn key, identifying 6 full system recovery 37 H hard drive installing 30 removing 29 headphone (audio-out) jack 9 I input power 43 integrated webcam light, identifying 10 internal microphones, identifying 10 Internet connection setup...
...settings 39 personal files 39 battery bay 11 battery release latches 11 battery, replacing 27 buttons left TouchPad 4 right TouchPad 4 C caps lock light, identifying 5 components bottom 11 display 10 front 7 left-side 9 right-side 8 top 4 connector, power 9 D Digital Media Slot, identifying 8 drive light 9 E esc key, identifying 6 external monitor port 9 F f11 38 fn key, identifying 6 full system recovery 37 H hard drive installing 30 removing 29 headphone (audio-out) jack 9 I input power 43 integrated webcam light, identifying 10 internal microphones, identifying 10 Internet connection setup...
HP Mini 110 and Compaq Mini CQ10 - Maintenance and Service Guide
Page 13
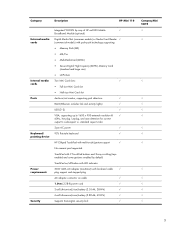
... Mini Card slot Audio-in/out combo, supporting jack detection √ RJ-45 (Ethernet, includes link and activity lights) √ USB (2-3) √ VGA, supporting up to 1600 x 900 external resolution @ √ 60Hz, hot plug /unplug, and auto detection for correct output to wide-aspect vs. TouchPad with 2 TouchPad buttons and 2-way scrolling (taps enabled and some gestures enabled by way of HP un2400 Mobile √ Broadband Module (optional) Digital Media Slot (consumer models) or Media Card Reader...
... Mini Card slot Audio-in/out combo, supporting jack detection √ RJ-45 (Ethernet, includes link and activity lights) √ USB (2-3) √ VGA, supporting up to 1600 x 900 external resolution @ √ 60Hz, hot plug /unplug, and auto detection for correct output to wide-aspect vs. TouchPad with 2 TouchPad buttons and 2-way scrolling (taps enabled and some gestures enabled by way of HP un2400 Mobile √ Broadband Module (optional) Digital Media Slot (consumer models) or Media Card Reader...
HP Mini 110 and Compaq Mini CQ10 - Maintenance and Service Guide
Page 46
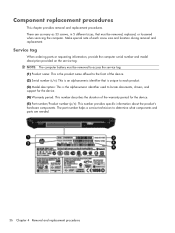
The part number helps a service technician to locate documents, drivers, and support for the device. (4) Warranty period: This number describes the duration of the warranty period for the device. (5) Part number/Product number (p/n): This number provides specific information about the product's hardware components. Service tag When ordering parts or requesting information, provide the computer serial number and model description provided on the service tag: NOTE: The computer battery must be removed to access the service tag. (1) Product...
The part number helps a service technician to locate documents, drivers, and support for the device. (4) Warranty period: This number describes the duration of the warranty period for the device. (5) Part number/Product number (p/n): This number provides specific information about the product's hardware components. Service tag When ordering parts or requesting information, provide the computer serial number and model description provided on the service tag: NOTE: The computer battery must be removed to access the service tag. (1) Product...
HP Mini 110 and Compaq Mini CQ10 - Maintenance and Service Guide
Page 86
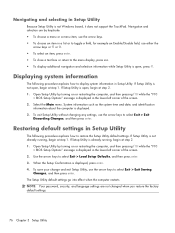
... information while Setup Utility is not Windows based, it does not support the TouchPad. The Setup Utility default settings go into effect when the computer restarts. Navigating and selecting in Setup Utility The following procedure explains how to display system information in a list or to toggle a field, for example an Enable/Disable field, use the arrow keys to select Exit > Exit Discarding Changes, and then press enter. Open Setup Utility by turning on...
... information while Setup Utility is not Windows based, it does not support the TouchPad. The Setup Utility default settings go into effect when the computer restarts. Navigating and selecting in Setup Utility The following procedure explains how to display system information in a list or to toggle a field, for example an Enable/Disable field, use the arrow keys to select Exit > Exit Discarding Changes, and then press enter. Open Setup Utility by turning on...
HP Mini 110 and Compaq Mini CQ10 - Maintenance and Service Guide
Page 92
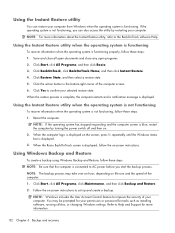
... Support for tasks such as installing software, running utilities, or changing Windows settings. Using the Instant Restore utility when the operating system is not functioning To recover information when the operating system is displayed. 3. Using Windows Backup and Restore To create a backup using Windows Backup and Restore, follow these steps: NOTE: Be sure that the computer is connected to improve the security of the computer screen. 6. Follow the on-screen instructions to the BackOnTrack software Help. NOTE: Windows includes the User Account Control...
... Support for tasks such as installing software, running utilities, or changing Windows settings. Using the Instant Restore utility when the operating system is not functioning To recover information when the operating system is displayed. 3. Using Windows Backup and Restore To create a backup using Windows Backup and Restore, follow these steps: NOTE: Be sure that the computer is connected to improve the security of the computer screen. 6. Follow the on-screen instructions to the BackOnTrack software Help. NOTE: Windows includes the User Account Control...

HP Mini 110 and Compaq Mini CQ10 - Maintenance and Service Guide
Page 113
... K keyboard product description 3 removal 54 spare part numbers 16, 27, 28, 54 keys action 8 fn 8 Windows applications 8 Windows logo 8 L language support 78 lights AC adaptor 11 caps lock 7 drive 11 mute 7 power 10 webcam 12 wireless 7 M Main Menu, Setup Utility 77 memory module product description 2 removal 51 spare part numbers 18, 28, 51 memory test 78 microphone 12 microphone jack connector pinout 91 location 11 model name 1 modem, product description 2 monitor port connector pinout 92 location 11 mute light 7 N navigating in Setup Utility 76 network jack...
... K keyboard product description 3 removal 54 spare part numbers 16, 27, 28, 54 keys action 8 fn 8 Windows applications 8 Windows logo 8 L language support 78 lights AC adaptor 11 caps lock 7 drive 11 mute 7 power 10 webcam 12 wireless 7 M Main Menu, Setup Utility 77 memory module product description 2 removal 51 spare part numbers 18, 28, 51 memory test 78 microphone 12 microphone jack connector pinout 91 location 11 model name 1 modem, product description 2 monitor port connector pinout 92 location 11 mute light 7 N navigating in Setup Utility 76 network jack...

HP Mini 110 and Compaq Mini CQ10 - Maintenance and Service Guide
Page 114
... Configuration Menu 78 using 75 Setup Utility menus 77 SIM, removal 39 speakers location 9 removal 60 spare part number 17, 28, 60 starting Setup Utility 75 static-shielding materials 35 system board removal 68 spare part numbers 17, 26, 68 System Configuration Menu, Setup Utility 78 system information 76, 77 U Universal Serial Bus (USB) port connector pinout 93 location 10, 11 using Setup Utility 75 V vent 11 vents location 9 video, product description 2 W webcam 12 webcam light 12 webcam/microphone module, spare part number 22, 27 Windows applications key 8 Windows logo key 8 wireless light...
... Configuration Menu 78 using 75 Setup Utility menus 77 SIM, removal 39 speakers location 9 removal 60 spare part number 17, 28, 60 starting Setup Utility 75 static-shielding materials 35 system board removal 68 spare part numbers 17, 26, 68 System Configuration Menu, Setup Utility 78 system information 76, 77 U Universal Serial Bus (USB) port connector pinout 93 location 10, 11 using Setup Utility 75 V vent 11 vents location 9 video, product description 2 W webcam 12 webcam light 12 webcam/microphone module, spare part number 22, 27 Windows applications key 8 Windows logo key 8 wireless light...
HP Notebook Reference Guide - Windows 7
Page 30
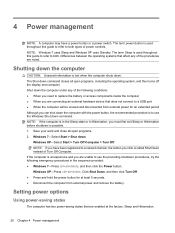
... a network domain, the button you click is called Shut Down instead of power controls. Save your work and close all open programs. 2. If the computer is unresponsive and you are enabled at least 5 seconds. ● Disconnect the computer from external power and remove the battery. Setting power options Using power-saving states The computer has two power-saving states that affect any of the procedures are connecting an external hardware device...
... a network domain, the button you click is called Shut Down instead of power controls. Save your work and close all open programs. 2. If the computer is unresponsive and you are enabled at least 5 seconds. ● Disconnect the computer from external power and remove the battery. Setting power options Using power-saving states The computer has two power-saving states that affect any of the procedures are connecting an external hardware device...
HP Notebook Reference Guide - Windows 7
Page 34
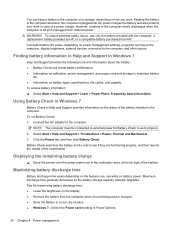
... depending on the computer, display brightness, external devices connected to the computer. Connect the AC adapter to the computer, and other factors. To run Battery Check: 1. Click the Power tab, and then click Battery Check. Select Start > Help and Support > Troubleshoot > Power, Thermal and Mechanical. 3. Computer battery life varies, depending on power management settings, programs running on the features you work in Power Options. 24 Chapter 4 Power management Finding battery information in Help and...
... depending on the computer, display brightness, external devices connected to the computer. Connect the AC adapter to the computer, and other factors. To run Battery Check: 1. Click the Power tab, and then click Battery Check. Select Start > Help and Support > Troubleshoot > Power, Thermal and Mechanical. 3. Computer battery life varies, depending on power management settings, programs running on the features you work in Power Options. 24 Chapter 4 Power management Finding battery information in Help and...
HP Notebook Reference Guide - Windows 7
Page 38
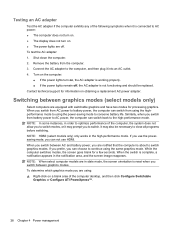
... switch between graphics modes. NOTE: HDMI (select models only) only works in the notification area, and the screen image reappears. If you use HDMI. When the switch is reset when you can switch from battery power to AC power, the computer can not use the powersaving mode, you to switch. Contact technical support for information on , the AC adapter is working properly. ● If the power lights remain off . When you switch from using...
... switch between graphics modes. NOTE: HDMI (select models only) only works in the notification area, and the screen image reappears. If you use HDMI. When the switch is reset when you can switch from battery power to AC power, the computer can not use the powersaving mode, you to switch. Contact technical support for information on , the AC adapter is working properly. ● If the power lights remain off . When you switch from using...
HP Notebook Reference Guide - Windows 7
Page 49
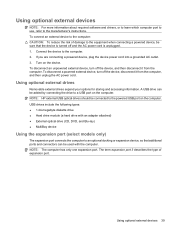
... computer port to use, refer to the computer. 2. Using optional external drives Removable external drives expand your options for storing and accessing information. NOTE: HP external USB optical drives should be added by connecting the drive to the computer: CAUTION: To reduce the risk of expansion port. To connect an external device to a USB port on the device. USB drives include the following types: ● 1.44-megabyte diskette drive ● Hard drive module (a hard drive with the computer. To disconnect a powered external device, turn off the device, disconnect...
... computer port to use, refer to the computer. 2. Using optional external drives Removable external drives expand your options for storing and accessing information. NOTE: HP external USB optical drives should be added by connecting the drive to the computer: CAUTION: To reduce the risk of expansion port. To connect an external device to a USB port on the device. USB drives include the following types: ● 1.44-megabyte diskette drive ● Hard drive module (a hard drive with the computer. To disconnect a powered external device, turn off the device, disconnect...
HP Notebook Reference Guide - Windows 7
Page 52
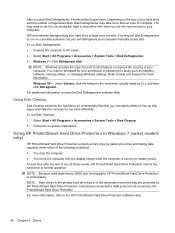
... to free up disk space and help the computer to run during the night or at least once a month. For additional information, access the Disk Defragmenter software Help. Using Disk Cleanup Disk Cleanup searches the hard drive for more efficiently. Select Start > All Programs > Accessories > System Tools > Disk Cleanup. 2. NOTE: Because solid-state drives (SSD) lack moving parts, HP ProtectSmart Hard Drive Protection is running utilities, or changing Windows settings. Hard drives connected to USB ports...
... to free up disk space and help the computer to run during the night or at least once a month. For additional information, access the Disk Defragmenter software Help. Using Disk Cleanup Disk Cleanup searches the hard drive for more efficiently. Select Start > All Programs > Accessories > System Tools > Disk Cleanup. 2. NOTE: Because solid-state drives (SSD) lack moving parts, HP ProtectSmart Hard Drive Protection is running utilities, or changing Windows settings. Hard drives connected to USB ports...
HP Notebook Reference Guide - Windows 7
Page 67
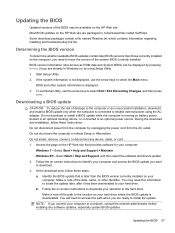
... optional docking device, or connected to reliable external power using Setup Utility. 1. Make a note of the path to a network, consult the network administrator before installing any device, cable, or cord. 1. If the system information is not displayed, use the arrow keys to download. 3. Access the page on the HP Web site that is later than those currently installed on battery power, docked in compressed files called SoftPaqs. You will need to access this information to locate...
... optional docking device, or connected to reliable external power using Setup Utility. 1. Make a note of the path to a network, consult the network administrator before installing any device, cable, or cord. 1. If the system information is not displayed, use the arrow keys to download. 3. Access the page on the HP Web site that is later than those currently installed on battery power, docked in compressed files called SoftPaqs. You will need to access this information to locate...
HP Notebook Reference Guide - Windows 7
Page 72
... drive light 43 drive media 21 drivers 30 drives external 39 handling 41 hard 39 optical 39 using 41 E electrostatic discharge 61 entering a power-on password 51 entering an administrator password 51 eSATA cable, connecting 38 eSATA devices connecting 37 defined 37 removing 38 existing wireless network, connecting to 5 expansion port 39 ExpressCard configuring 32 defined 32 inserting 33 removing 34 removing insert 33 external AC power, using 27 external devices 39 external drive 39 external monitor port 16 F factory settings, restoring 56 finding more information 1 fingerprint reader locating...
... drive light 43 drive media 21 drivers 30 drives external 39 handling 41 hard 39 optical 39 using 41 E electrostatic discharge 61 entering a power-on password 51 entering an administrator password 51 eSATA cable, connecting 38 eSATA devices connecting 37 defined 37 removing 38 existing wireless network, connecting to 5 expansion port 39 ExpressCard configuring 32 defined 32 inserting 33 removing 34 removing insert 33 external AC power, using 27 external devices 39 external drive 39 external monitor port 16 F factory settings, restoring 56 finding more information 1 fingerprint reader locating...

HP Notebook Reference Guide - Windows 7
Page 73
... current 22 power switch 20 power-on password creating 51 entering 51 managing 51 power-saving states 20 protecting the computer 49 protecting your wireless network 6 N network cable, connecting 12 network icon 2 O operating system controls 5 optical disc inserting 45 removing 46 optical drive 39 optional external devices, using 39 P passwords set in Setup Utility 50 set in Windows 50 PC Cards configuring 30 description 30 inserting 30 removing 32 removing insert 31 software and drivers 30 supported types 30 ports DisplayPort 17 expansion 39 external monitor 16 HDMI 17 VGA 16 power battery 23...
... current 22 power switch 20 power-on password creating 51 entering 51 managing 51 power-saving states 20 protecting the computer 49 protecting your wireless network 6 N network cable, connecting 12 network icon 2 O operating system controls 5 optical disc inserting 45 removing 46 optical drive 39 optional external devices, using 39 P passwords set in Setup Utility 50 set in Windows 50 PC Cards configuring 30 description 30 inserting 30 removing 32 removing insert 31 software and drivers 30 supported types 30 ports DisplayPort 17 expansion 39 external monitor 16 HDMI 17 VGA 16 power battery 23...


