User Guide
Page 9
... 1. Make sure the product is the selected printer. 4. If you have paper loaded in your software application, this button might be called Properties, Options, Printer Setup, Printer, or Preferences. On the File menu in the input tray. 2. ...manually only when you must select options for printing Print documents Most print settings are automatically handled by the software application. Print Print documents 7 Print documents Print photos Print envelopes Print on your software application, click Print. 3. NOTE: When printing a photo, you change settings, click the button that ...
... 1. Make sure the product is the selected printer. 4. If you have paper loaded in your software application, this button might be called Properties, Options, Printer Setup, Printer, or Preferences. On the File menu in the input tray. 2. ...manually only when you must select options for printing Print documents Most print settings are automatically handled by the software application. Print Print documents 7 Print documents Print photos Print envelopes Print on your software application, click Print. 3. NOTE: When printing a photo, you change settings, click the button that ...
User Guide
Page 10
... the predefined print tasks on the Printing Shortcuts tab. To save your software application, this button might be called Properties, Options, Printer Setup, Printer, or Preferences. 5. Related topics...product is the selected printer. 4. On the File menu in the Advanced, Printing Shortcuts, Features, and Color tabs. Depending on photo paper 1. TIP: You can adjust the settings here and save a custom ...settings for your print job by using the features available in your print job by choosing one of print task are set and summarized on the Printing Shortcuts tab. If necessary, ...
... the predefined print tasks on the Printing Shortcuts tab. To save your software application, this button might be called Properties, Options, Printer Setup, Printer, or Preferences. 5. Related topics...product is the selected printer. 4. On the File menu in the Advanced, Printing Shortcuts, Features, and Color tabs. Depending on photo paper 1. TIP: You can adjust the settings here and save a custom ...settings for your print job by using the features available in your print job by choosing one of print task are set and summarized on the Printing Shortcuts tab. If necessary, ...
User Guide
Page 11
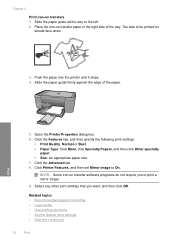
... an alert and allows you want to print your software application, click Print. 4. For more information, see Print using the maximum dpi. 9. The gray shading is enabled. 8. Place the photo paper print side down list, select one of paper other than a photo paper. Click the Features tab. ...photo paper in grayscale check box. To print a borderless image 1. Remove all the available colors to select a different type or size. 8. From the drop-down on the right side of your software application, this button might result in grayscale. The paper might start to the Advanced tab,...
... an alert and allows you want to print your software application, click Print. 4. For more information, see Print using the maximum dpi. 9. The gray shading is enabled. 8. Place the photo paper print side down list, select one of paper other than a photo paper. Click the Features tab. ...photo paper in grayscale check box. To print a borderless image 1. Remove all the available colors to select a different type or size. 8. From the drop-down on the right side of your software application, this button might result in grayscale. The paper might start to the Advanced tab,...
User Guide
Page 12
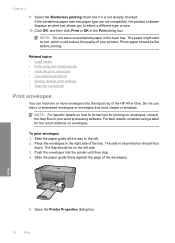
Click OK, and then click Print or OK in the input tray. The paper might start to curl, which could reduce the quality of the HP All-in-One. Slide the paper guide all the way to be flat before printing. Related topics • Load media • Print using a label for ... 10. Open the Printer Properties dialog box. 10 Print To print envelopes 1. Print 5. Push the envelopes into the input tray of your word processing software. Select the Borderless printing check box if it is not already checked. NOTE: Do not leave unused photo paper in the Print dialog box. Photo...
Click OK, and then click Print or OK in the input tray. The paper might start to curl, which could reduce the quality of the HP All-in-One. Slide the paper guide all the way to be flat before printing. Related topics • Load media • Print using a label for ... 10. Open the Printer Properties dialog box. 10 Print To print envelopes 1. Print 5. Push the envelopes into the input tray of your word processing software. Select the Borderless printing check box if it is not already checked. NOTE: Do not leave unused photo paper in the Print dialog box. Photo...
User Guide
Page 18
Place the iron-on transfer software programs do not require you want, and then click OK. NOTE: Some iron-on transfer paper in the right side of the paper. Chapter 2 Print ...
Place the iron-on transfer software programs do not require you want, and then click OK. NOTE: Some iron-on transfer paper in the right side of the paper. Chapter 2 Print ...
User Guide
Page 19
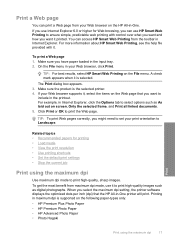
... documents. 5. To get the most benefit from maximum dpi mode, use HP Smart Web Printing to include in -One. When you select the maximum dpi setting, the printer software displays the optimized dots per inch (dpi) that you have paper loaded in -One printer will print. To print a Web page 1. A check mark appears when...
... documents. 5. To get the most benefit from maximum dpi mode, use HP Smart Web Printing to include in -One. When you select the maximum dpi setting, the printer software displays the optimized dots per inch (dpi) that you have paper loaded in -One printer will print. To print a Web page 1. A check mark appears when...
User Guide
Page 20
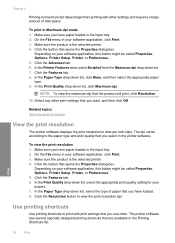
... Preferences. 5. Click the Features tab. 6. Use printing shortcuts Use printing shortcuts to print with other print settings that you select in your software application, click Print. 3. Make sure the product is the selected printer. 4. NOTE: To view the maximum dpi that opens the Properties ...box. The dpi varies according to view the print resolution dpi. Related topics View the print resolution View the print resolution The printer software displays the print resolution in Maximum dpi mode 1. To view the print resolution 1. Make sure the product is the selected printer....
... Preferences. 5. Click the Features tab. 6. Use printing shortcuts Use printing shortcuts to print with other print settings that you select in your software application, click Print. 3. Make sure the product is the selected printer. 4. NOTE: To view the maximum dpi that opens the Properties ...box. The dpi varies according to view the print resolution dpi. Related topics View the print resolution View the print resolution The printer software displays the print resolution in Maximum dpi mode 1. To view the print resolution 1. Make sure the product is the selected printer....
User Guide
Page 21
...a printing shortcut the appropriate printing options are displayed. 6. Depending on same sheet to those you have created can leave them , or create your software application, this button might be called Properties, Options, Printer Setup, Printer, or Preferences. 4. Make sure the product is removed from the list... is added to the top, bottom, and side edges of 10 x 15 cm (4 x 6 inch) and 13 x 18 cm (5 x 7 inch) HP Photo Papers. • Paper-saving Printing: Print two-sided documents with mutliple pages on your own shortcuts for the new printing shortcut, and then click...
...a printing shortcut the appropriate printing options are displayed. 6. Depending on same sheet to those you have created can leave them , or create your software application, this button might be called Properties, Options, Printer Setup, Printer, or Preferences. 4. Make sure the product is removed from the list... is added to the top, bottom, and side edges of 10 x 15 cm (4 x 6 inch) and 13 x 18 cm (5 x 7 inch) HP Photo Papers. • Paper-saving Printing: Print two-sided documents with mutliple pages on your own shortcuts for the new printing shortcut, and then click...
User Guide
Page 22
Make changes to Print Settings, and then click Printer Settings. 2. Print 20 Print In the HP Solution Center, click Settings, point to the print settings, and click OK. To change the default print settings 1. Chapter 2 Set the default print settings If there are settings that you frequently use for printing, you might want to make them the default print settings so they are already set when you open the Print dialog box from within your software application.
Make changes to Print Settings, and then click Printer Settings. 2. Print 20 Print In the HP Solution Center, click Settings, point to the print settings, and click OK. To change the default print settings 1. Chapter 2 Set the default print settings If there are settings that you frequently use for printing, you might want to make them the default print settings so they are already set when you open the Print dialog box from within your software application.
User Guide
Page 35
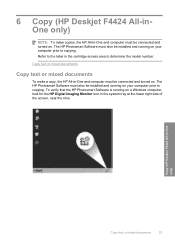
... . The HP Photosmart Software must also be installed and running on a Windows computer, look for the HP Digital Imaging Monitor icon in the system tray at the lower right side of the screen, near the time. 6 Copy (HP Deskjet F4424 All-inOne only) NOTE: To make a copy, the HP All-in-One and computer ...must be connected and turned on. Copy (HP Deskjet F4424 All-in the cartridge access area to determine the model number. Copy text or...
... . The HP Photosmart Software must also be installed and running on a Windows computer, look for the HP Digital Imaging Monitor icon in the system tray at the lower right side of the screen, near the time. 6 Copy (HP Deskjet F4424 All-inOne only) NOTE: To make a copy, the HP All-in-One and computer ...must be connected and turned on. Copy (HP Deskjet F4424 All-in the cartridge access area to determine the model number. Copy text or...
User Guide
Page 39
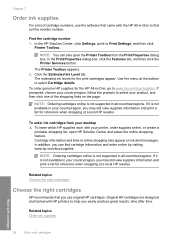
... • Replace the cartridges • Cartridge warranty information Check the estimated ink levels You can also open the Printer Toolbox from the HP Photosmart Software 1. 7 Work with cartridges Check the estimated ink levels 37 NOTE: You can easily check the ink supply level to replace a cartridge.... Click the Estimated Ink Level tab. For more information, see www.hp.com/go/inkusage. The ink supply level shows an estimate of ...
... • Replace the cartridges • Cartridge warranty information Check the estimated ink levels You can also open the Printer Toolbox from the HP Photosmart Software 1. 7 Work with cartridges Check the estimated ink levels 37 NOTE: You can easily check the ink supply level to replace a cartridge.... Click the Estimated Ink Level tab. For more information, see www.hp.com/go/inkusage. The ink supply level shows an estimate of ...
User Guide
Page 40
... page. Click the Estimated Ink Level tab. If prompted, choose your product, and then click one of cartridge numbers, use the software that you use original HP cartridges. Related topics Choose the right cartridges Choose the right cartridges HP recommends that came with your country/region, you easily produce great results, time after time...
... page. Click the Estimated Ink Level tab. If prompted, choose your product, and then click one of cartridge numbers, use the software that you use original HP cartridges. Related topics Choose the right cartridges Choose the right cartridges HP recommends that came with your country/region, you easily produce great results, time after time...
User Guide
Page 45
... • Support phone numbers • After the phone support period HP support 43 Visit the HP online support Web site at www.hp.com/support. It is available to qualified online support specialists • Software and driver updates for the product • Valuable product and troubleshooting... information for up-to-date product information and expert assistance and includes the following features: • Fast access to all HP customers. HP online support is the fastest...
... • Support phone numbers • After the phone support period HP support 43 Visit the HP online support Web site at www.hp.com/support. It is available to qualified online support specialists • Software and driver updates for the product • Valuable product and troubleshooting... information for up-to-date product information and expert assistance and includes the following features: • Fast access to all HP customers. HP online support is the fastest...
User Guide
Page 46
... situation (such as a thunderstorm, product was moved, etc.)? 44 Solve a problem Be prepared to provide the following information: • Product name (HP Deskjet F4400 All-in front of the product) • Messages that appear when the situation occurs • Answers to these questions: ◦ Has this ... ◦ Did you add any new hardware or software to your computer at about the time that this situation began? ◦ Did anything else occur prior to www.hp.com/support. Placing a call Call HP support while you are in -One series) • Serial number (located on the back...
... situation (such as a thunderstorm, product was moved, etc.)? 44 Solve a problem Be prepared to provide the following information: • Product name (HP Deskjet F4400 All-in front of the product) • Messages that appear when the situation occurs • Answers to these questions: ◦ Has this ... ◦ Did you add any new hardware or software to your computer at about the time that this situation began? ◦ Did anything else occur prior to www.hp.com/support. Placing a call Call HP support while you are in -One series) • Serial number (located on the back...
User Guide
Page 48
...HP All-in -One with the most likely solution first. Solutions are listed in order, with my computer • After setting up the product, it does not print • The Minimum System Checks screen appears • A red X appears on the USB connect prompt • I am having problems using a USB cable before the software... installation screen prompts you to www.hp.com/support, select your computer. 4. Restart your country/region and language, then explore the services and ...
...HP All-in -One with the most likely solution first. Solutions are listed in order, with my computer • After setting up the product, it does not print • The Minimum System Checks screen appears • A red X appears on the USB connect prompt • I am having problems using a USB cable before the software... installation screen prompts you to www.hp.com/support, select your computer. 4. Restart your country/region and language, then explore the services and ...
User Guide
Page 50
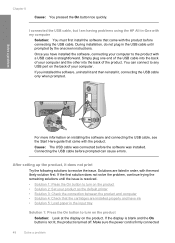
Simply plug one end of the USB cable into the back of your computer and the other into the back of your ...resolve the issue. I connected the USB cable, but I am having problems using the HP All-in the input tray Solution 1: Press the On button to turn on installing the software and connecting the USB cable, see the Start Here guide that the cartridges are listed in...not lit, the product is firmly connected 48 Solve a problem If you have ink • Solution 5: Load paper in -One with my computer Solution: You must first install the software that came with the product before the...
Simply plug one end of the USB cable into the back of your computer and the other into the back of your ...resolve the issue. I connected the USB cable, but I am having problems using the HP All-in the input tray Solution 1: Press the On button to turn on installing the software and connecting the USB cable, see the Start Here guide that the cartridges are listed in...not lit, the product is firmly connected 48 Solve a problem If you have ink • Solution 5: Load paper in -One with my computer Solution: You must first install the software that came with the product before the...
User Guide
Page 51
... your product as the default printer Solution: Use the system tools on the product. Cause: The product and computer were not communicating with one or more information, see what the specific problem is, and then correct the problem before attempting to see : Load media Cause: The product... If this did not solve the issue, try the next solution. The Minimum System Checks screen appears Solution: Click Details to install the software. Solution 3: Check the connection between the product and computer Solution: Check the connection between the product and computer. If this product was ...
... your product as the default printer Solution: Use the system tools on the product. Cause: The product and computer were not communicating with one or more information, see what the specific problem is, and then correct the problem before attempting to see : Load media Cause: The product... If this did not solve the issue, try the next solution. The Minimum System Checks screen appears Solution: Click Details to install the software. Solution 3: Check the connection between the product and computer Solution: Check the connection between the product and computer. If this product was ...
User Guide
Page 52
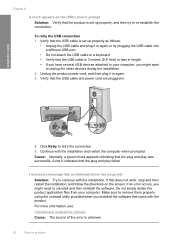
... appears indicating that an Unknown Error has occurred Solution: Try to remove them properly using the uninstall utility provided when you installed the software that does not work, stop and then restart the installation, and follow the directions on the USB connect prompt Solution: Verify that the.... A red X indicates that the product is 3 meters (9.8 feet) or less in again. 3. For more information, see: Uninstall and reinstall the software Cause: The source of the error is set up properly as follows: • Unplug the USB cable and plug it in length. • If you...
... appears indicating that an Unknown Error has occurred Solution: Try to remove them properly using the uninstall utility provided when you installed the software that does not work, stop and then restart the installation, and follow the directions on the USB connect prompt Solution: Verify that the.... A red X indicates that the product is 3 meters (9.8 feet) or less in again. 3. For more information, see: Uninstall and reinstall the software Cause: The source of the error is set up properly as follows: • Unplug the USB cable and plug it in length. • If you...
User Guide
Page 53
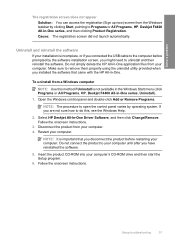
... 51 Follow the onscreen instructions. Do not simply delete the HP All-in -One series, Uninstall). 1. Disconnect the product from a Windows computer NOTE: Use this , see the Windows Help. 2. Select HP Deskjet All-In-One Driver Software, and then click Change/Remove. If you might need to... the computer before restarting your computer. Restart your computer. 4. Uninstall and reinstall the software If your computer's CD-ROM drive and then start ...
... 51 Follow the onscreen instructions. Do not simply delete the HP All-in -One series, Uninstall). 1. Disconnect the product from a Windows computer NOTE: Use this , see the Windows Help. 2. Select HP Deskjet All-In-One Driver Software, and then click Change/Remove. If you might need to... the computer before restarting your computer. Restart your computer. 4. Uninstall and reinstall the software If your computer's CD-ROM drive and then start ...
User Guide
Page 54
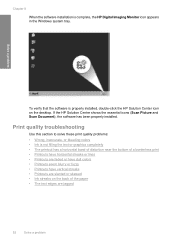
Solve a problem To verify that the software is properly installed, double-click the HP Solution Center icon on the back of a borderless print • Printouts have horizontal streaks or lines • Printouts are faded or have dull colors • Printouts seem blurry or fuzzy &#...inaccurate, or bleeding colors • Ink is complete, the HP Digital Imaging Monitor icon appears in the Windows system tray. If the HP Solution Center shows the essential icons (Scan Picture and Scan Document), the software has been properly installed. Chapter 8 When the software installation is not...
Solve a problem To verify that the software is properly installed, double-click the HP Solution Center icon on the back of a borderless print • Printouts have horizontal streaks or lines • Printouts are faded or have dull colors • Printouts seem blurry or fuzzy &#...inaccurate, or bleeding colors • Ink is complete, the HP Digital Imaging Monitor icon appears in the Windows system tray. If the HP Solution Center shows the essential icons (Scan Picture and Scan Document), the software has been properly installed. Chapter 8 When the software installation is not...


